

You are using an out of date browser. It may not display this or other websites correctly.
You should upgrade or use an alternative browser.
You should upgrade or use an alternative browser.
1970 Rover 3500 - EMF
- Thread starter testrider
- Start date
testrider
Active Member
stina said:Looking good Paul , looks like you've really been enjoying it . You chose a good part of the country for your holiday
Yes, despite the weather we've done a fair few miles this 'summer'.

The impeller that goes inside the Trico windscreen washer motor.
Nice one Paul
Ron.
Nice one Paul
Ron.
testrider
Active Member
SydneyRoverP6B said:The impeller that goes inside the Trico windscreen washer motor.
Nice one Paul
Ron.
That's it Ron, full marks, top of the class.
It's actually a new old stock Rolls Royce and Bentley part :shock: and it was fairly expensive for what it is, but still less than an aftermartket washer pump.

The bottom seal isn't correct for our pumps but the impellor is the same.
Here's the offending item in the bottom of the washer bottle cap.

You can see how it has worn and lost it flexibilty so it doesn't seal against the inside of the housing.
New and old side by side.

This is the new one in situ - much better.

A worthwhile repair, although it took longer researching it on the internet than to actually fit it, and I wish I'd looked into it years ago now. :roll:
jamesdean2112
Active Member
Excellent read Paul
Brian-Northampton
Administrator
That's brilliant Paul, good bit of detective work there. I'm going to put that part number in my parts X-Ref sheet! (and probably order one to be ready!)
and a nice shiny kitchen sink too!
Bri.
and a nice shiny kitchen sink too!
Bri.
arthuy
Well-Known Member
Very lucky find. I bought the last one i know of from scotts about 9 years ago.
I have made enquiries with trico and companies to make them but no lucky.
Best you can do is buy a trico 24v motor from landrovers and MOD trucks and swap the parts around.
There was a guy on ebay doing them for around £10 but i can't see them.
But the link below is the item.
Trico 24 volt screenwash pump 60183WA-E | Other | John Richards Surplus | John Richards Surplus - A Name You Can Trust! - http://www.johnrichardssurplus.co.uk/pr ... -60183wa-e
testrider
Active Member
Brian-Northampton said:That's brilliant Paul, good bit of detective work there.
arthuy said:Very lucky find
I reckon that took about 5 hours detective work in total before I found it.
Brian, I did the repair just before I moved house so everything was shiny - chrome cleaner brought the sink and the taps up lovely 8)
testrider
Active Member
That washer bottle pump repair got me through the MOT last week with no advisories, so obviously the first thing to do when I got home was put it back in the garage, jack it up and start taking it to pieces! It's not like I haven't got anything else to do
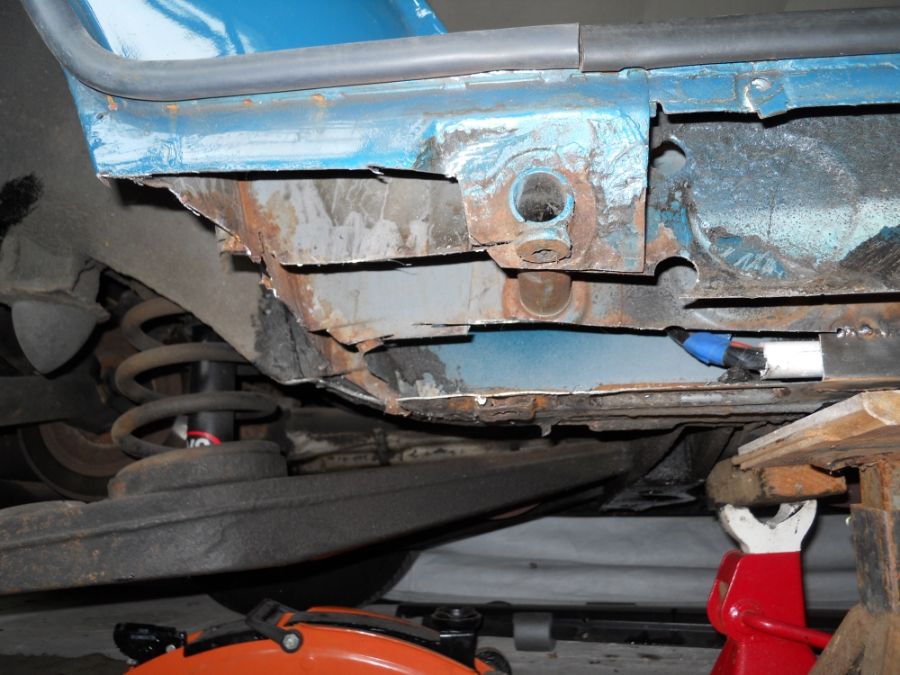
I'd had a hunch the sills were past their best for a while and driving HOT in comparison I could feel the base unit is definitely not a stiff. Front wing and sill cover off - this doesn't look too bad from the outside.
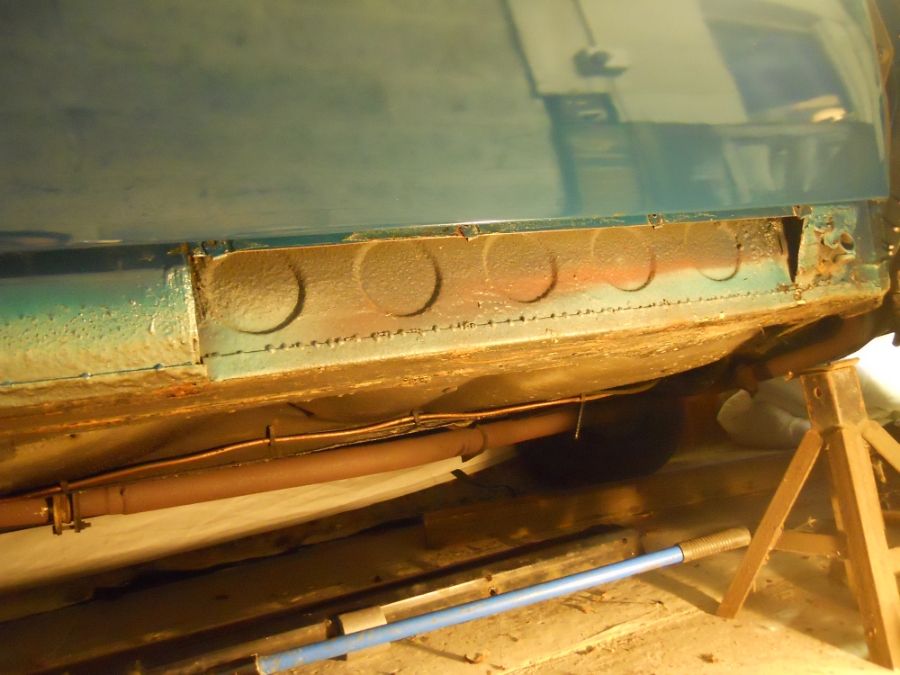
Rather than just slicing it off I decided to unpick the tack welds to see what was left of the original sill - well, actually most of it, just the bottom bit had been cut out.
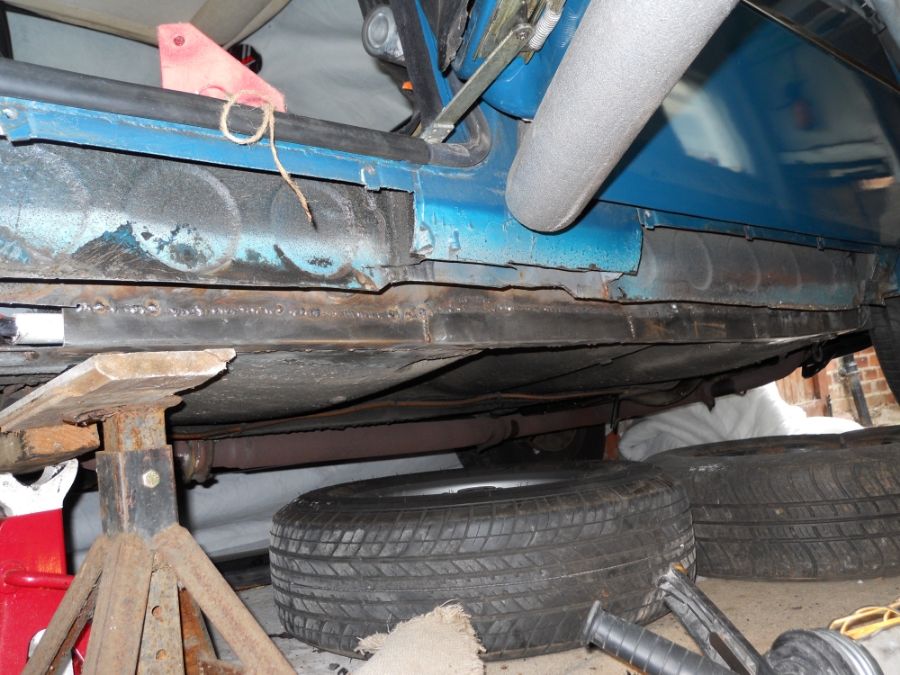
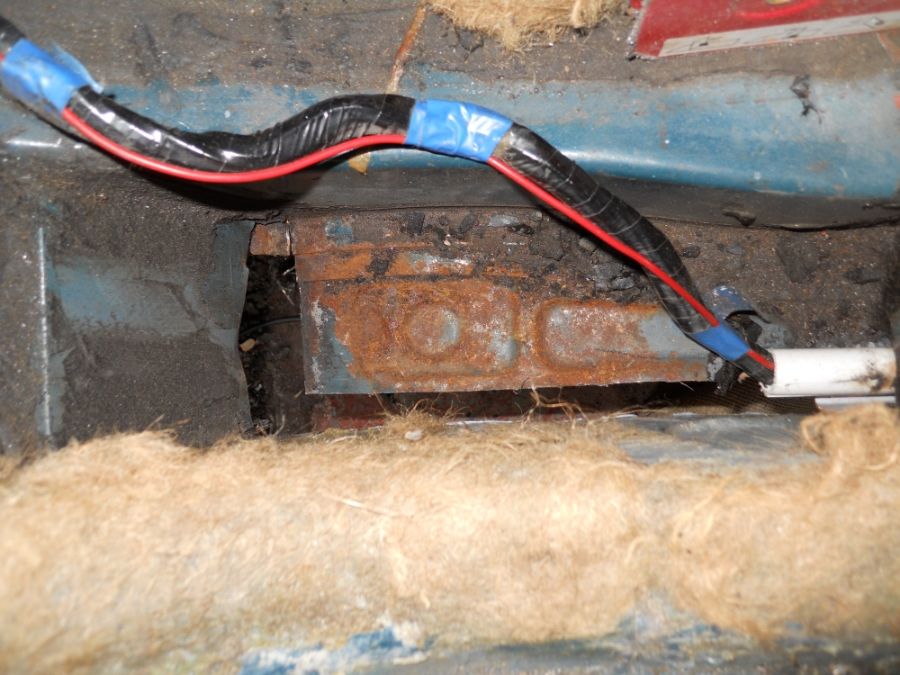
Note the pipelagging on the bottom of each door. If I get through this project without scratching it I'll be amazed.
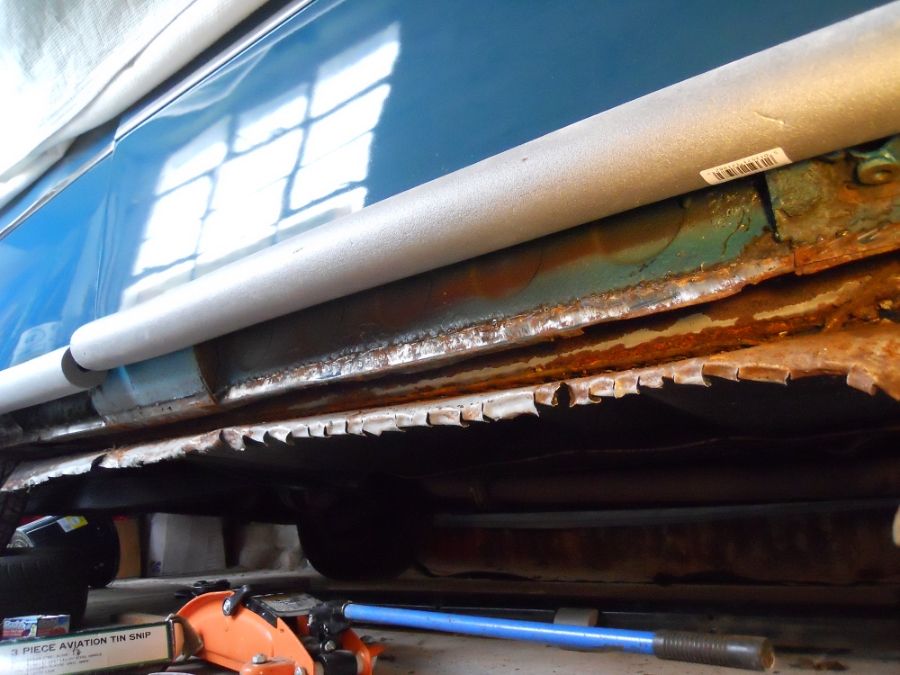
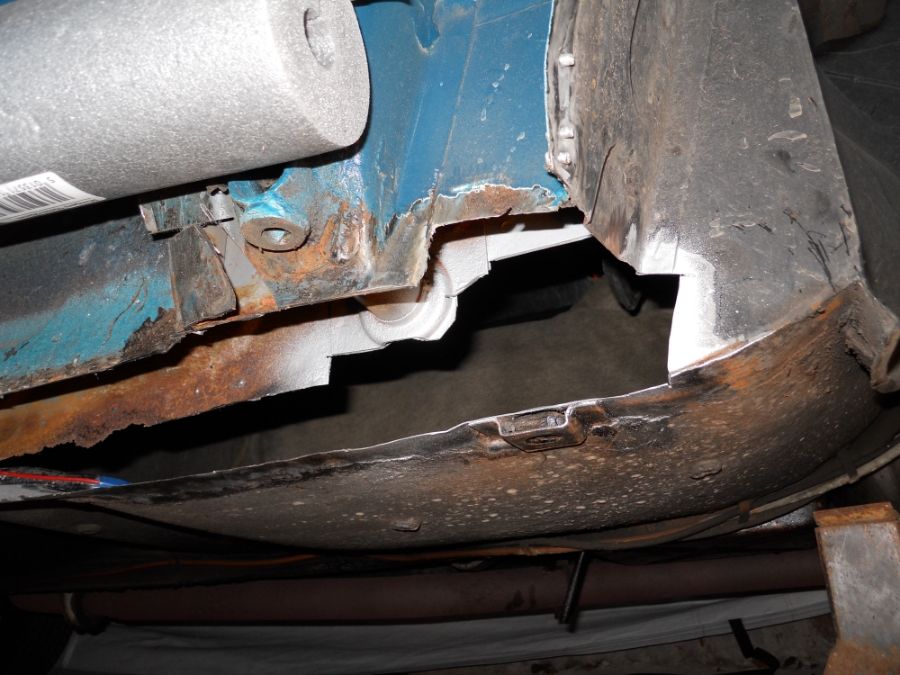
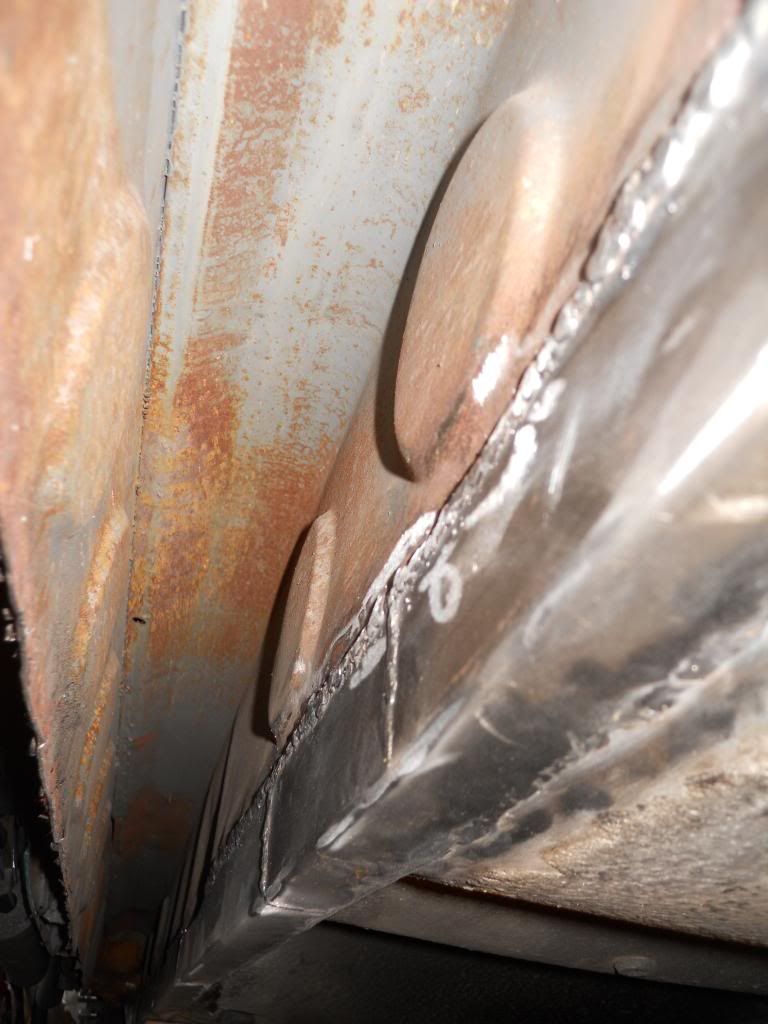
There's plenty of rust on the inner sill where they meet the floor inside the car though. The light coloured bit is an old patch on the inside.
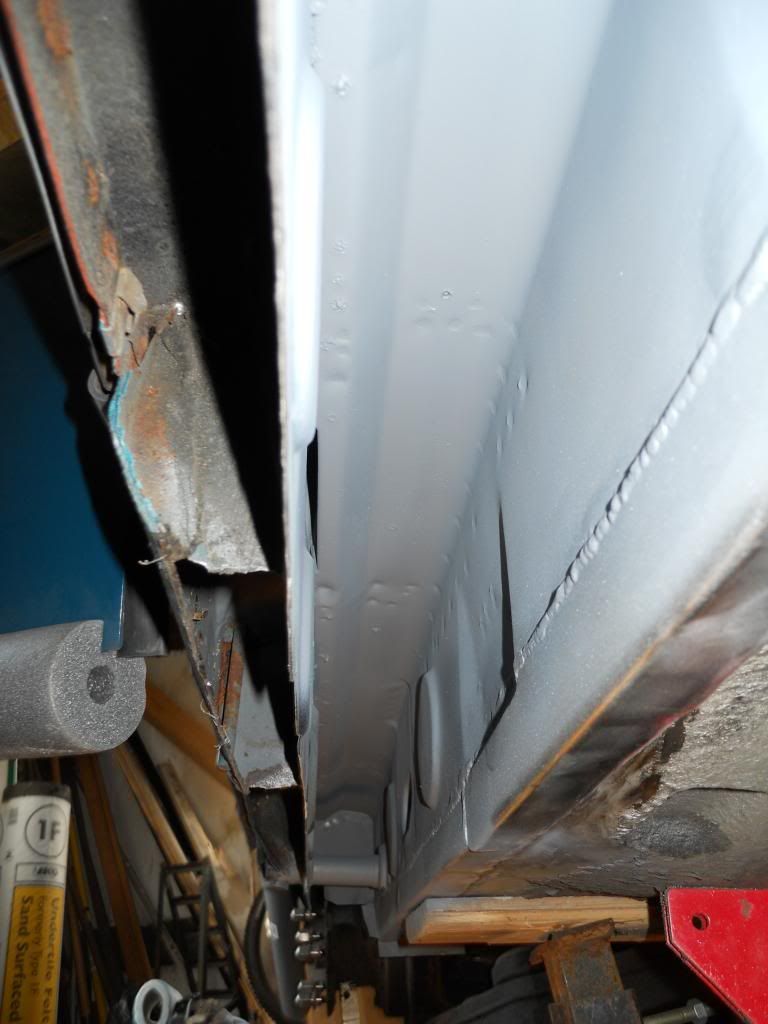
If you've ever wondered what the factory jacking point/D post looks like before the bottom rusts out here it is.
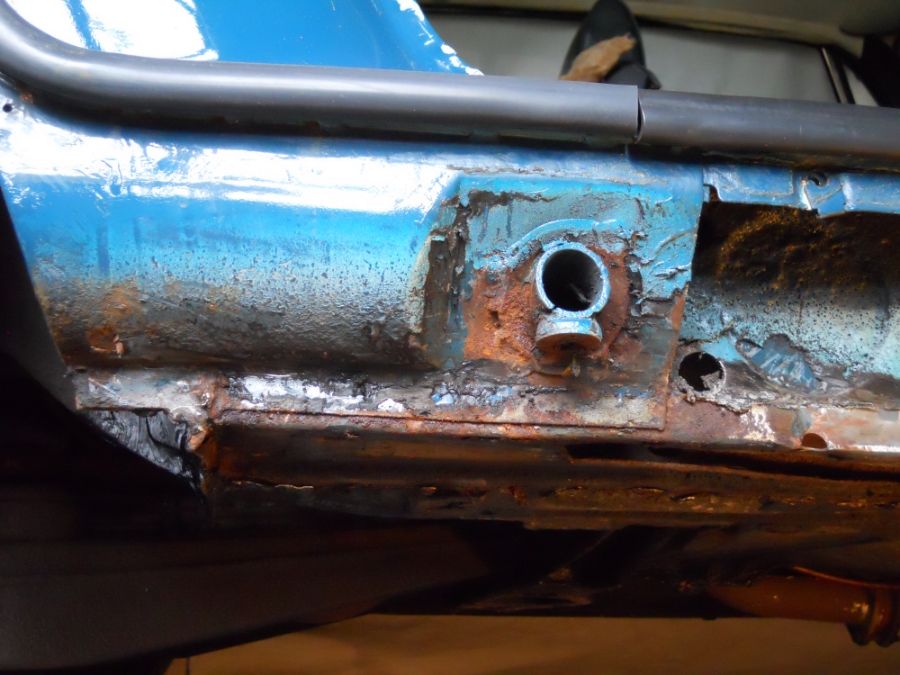
Unfortunately it's got to go so that I have access to the inside to weld the sill on.

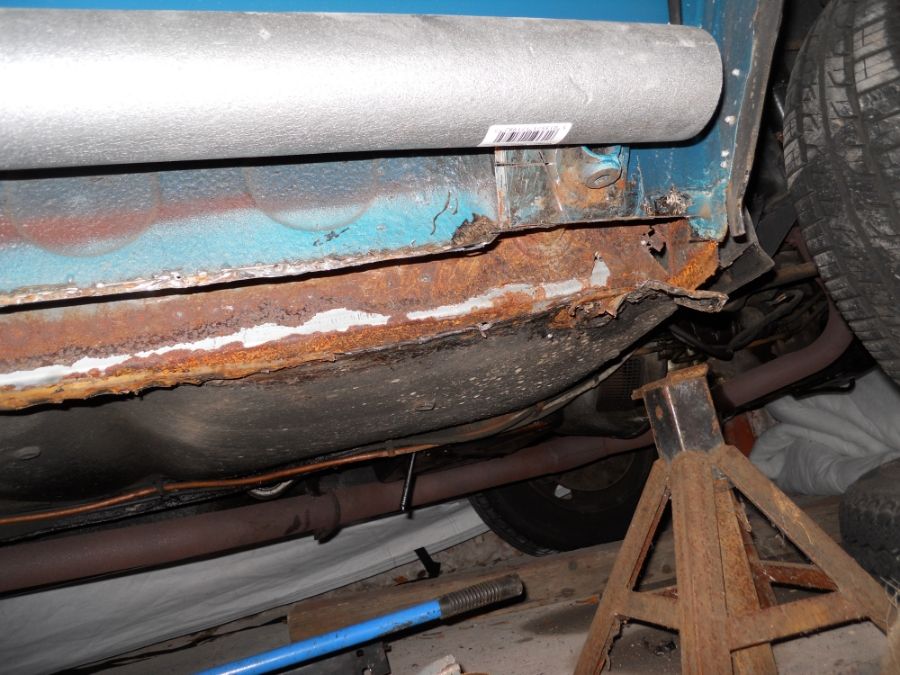
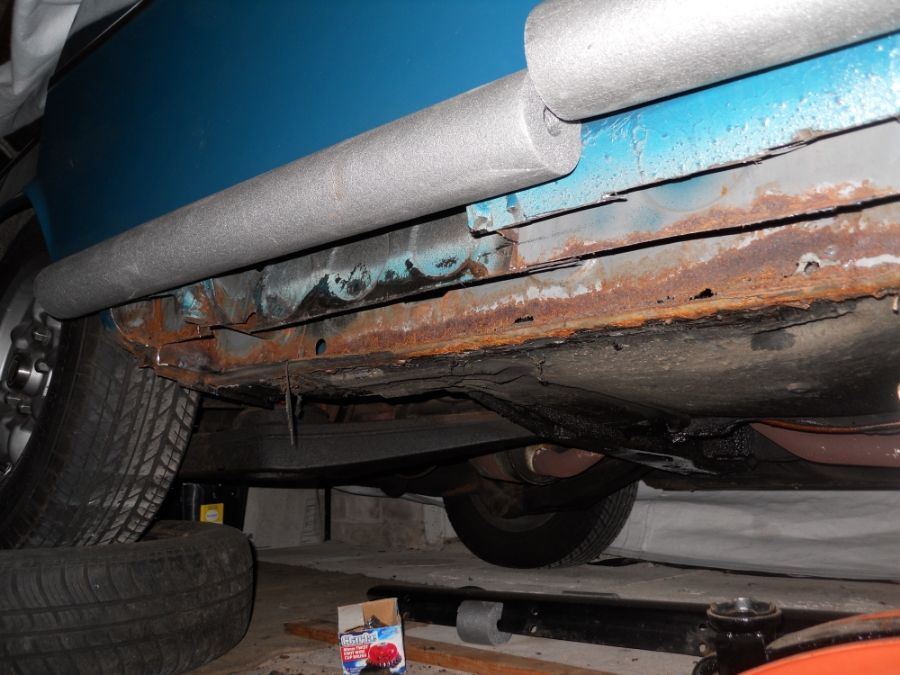
Lots more trimming back to be done before I can start welding though.
I'd had a hunch the sills were past their best for a while and driving HOT in comparison I could feel the base unit is definitely not a stiff. Front wing and sill cover off - this doesn't look too bad from the outside.

Rather than just slicing it off I decided to unpick the tack welds to see what was left of the original sill - well, actually most of it, just the bottom bit had been cut out.

Note the pipelagging on the bottom of each door. If I get through this project without scratching it I'll be amazed.
There's plenty of rust on the inner sill where they meet the floor inside the car though. The light coloured bit is an old patch on the inside.


If you've ever wondered what the factory jacking point/D post looks like before the bottom rusts out here it is.

Unfortunately it's got to go so that I have access to the inside to weld the sill on.

Lots more trimming back to be done before I can start welding though.
Hi Paul,
Looks like a lot of work there. How long do you envisage it will take you to correct?
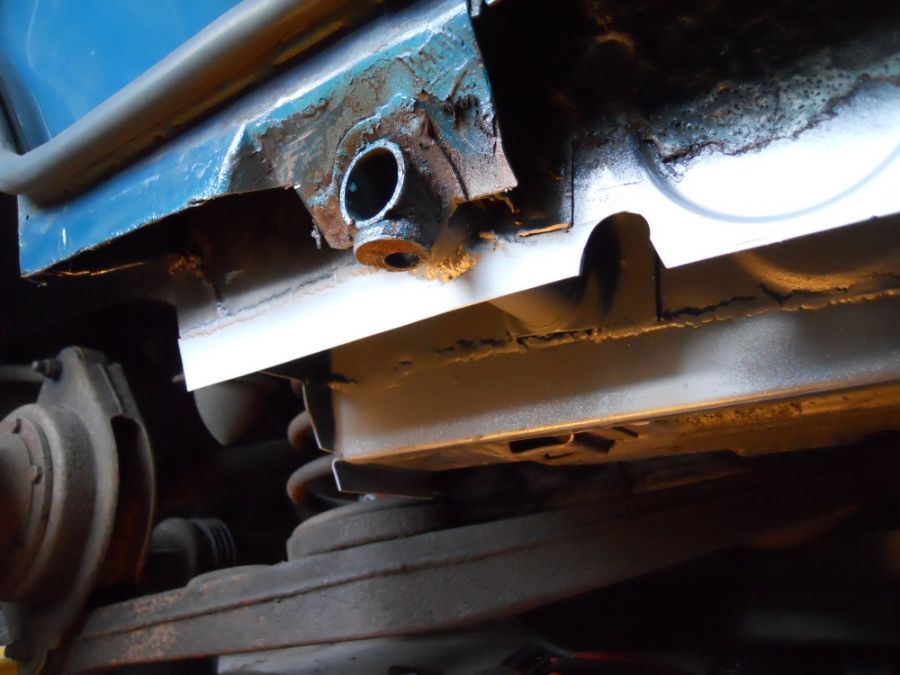
I can see that your BW35 transmission bellhousing includes vents (I am assuming that is what they are) on the sides. Apart from in a drawing, I have not seen those before.
Sorry to say, but It looks like your pinion oil seal is leaking too.
Ron.
Looks like a lot of work there. How long do you envisage it will take you to correct?
I can see that your BW35 transmission bellhousing includes vents (I am assuming that is what they are) on the sides. Apart from in a drawing, I have not seen those before.
Sorry to say, but It looks like your pinion oil seal is leaking too.
Ron.
testrider
Active Member
I'm setting myself up for a fall here Ron, but I'd like to get at least this side done in the next couple of weeks so that we can go away for the weekend in it at the end of May.
The pinion seal's been leaking for a while and over winter the axle seals behind the discs have wept a little too. To be honest, apart from basic maintenance I've neglected stuff like this since I bought the TC as I didn't really want to end up with two cars in pieces at the same time but that's what's happened.
There are a couple of plastic vents in the bell housing, but I assumed they all had them, is that not the case? It's a very early series 2 so lots of little things are different to the bulk of the cars out there.
testrider said:There are a couple of plastic vents in the bell housing, but I assumed they all had them, is that not the case?
All except the 303 boxes had the vents. The vents allowed air to be drawn in and out of the cooling shroud on the early converters.
testrider
Active Member
So, a couple of weeks on from that last post I thought I'd update on the progress.
I decided to start replacing the floor to sill section at the front and trimming back to sound metal at the front left it looking like this.
Unusually for me it seems I didn't take any photos along the way, but I worked towards the back of the car replacing a 300mm section at a time.
As you can see in the photo there's a slight upward curve at the front which I didn't notice at the time, but it seems the the floor was bent upwards by someone using the production line brackets as a jacking point. This was also the case at the rear, but the inner sill was creased so it was obvious the the floor needed pushing back down.
Here it is trimmed away.
I wanted the keep the factory pressings so I cut round them and straightened it ready for the new steel. I put a plastic tube over the main wire loom where is passes through the crossmember so that I could lift it out of the way of heat from underneath without bending.
More floor and bottom edge of inner wheel arch added.

Before closing the bottom of the sill with the repair section I cleaned out the top part.
And coated it with etch primer.
With the floor now supported properly I could get on to making the sill panel itself. I got a local fabrication company to cut and fold some strips of 1.5mm thick sheet steel for me - 90mm wide with a 30mm upright. I could have stuck it straight on, but I decided I wanted to try to replicate the stepped edge that the factory and repair panels have. So I made this.
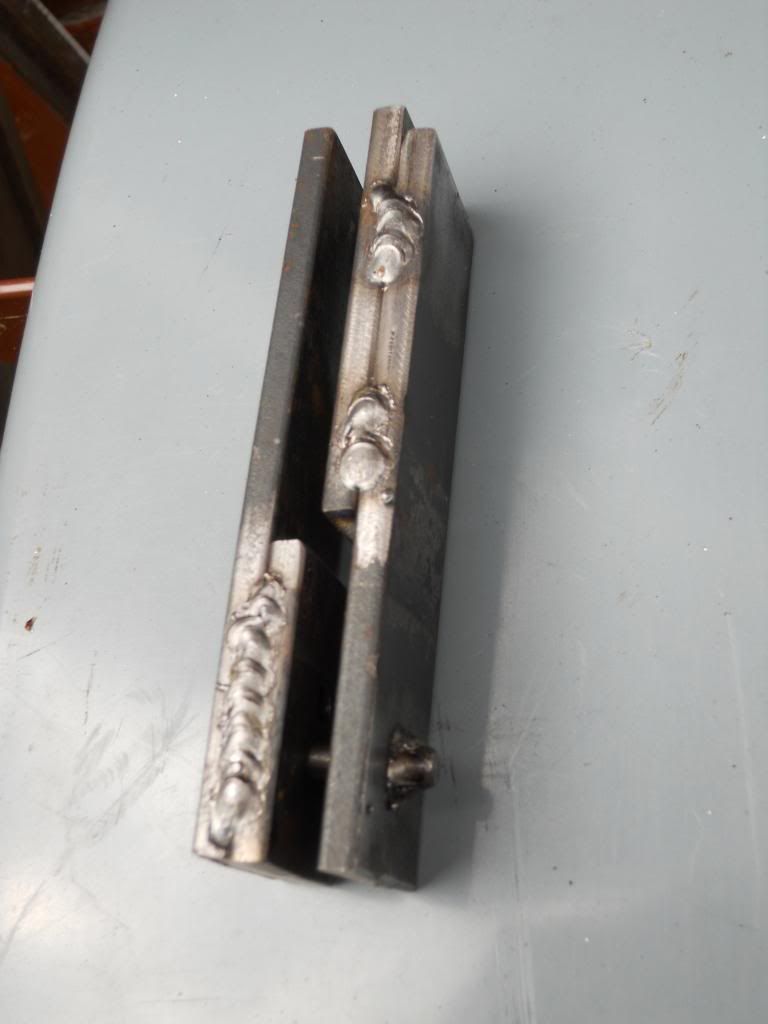
To do this.
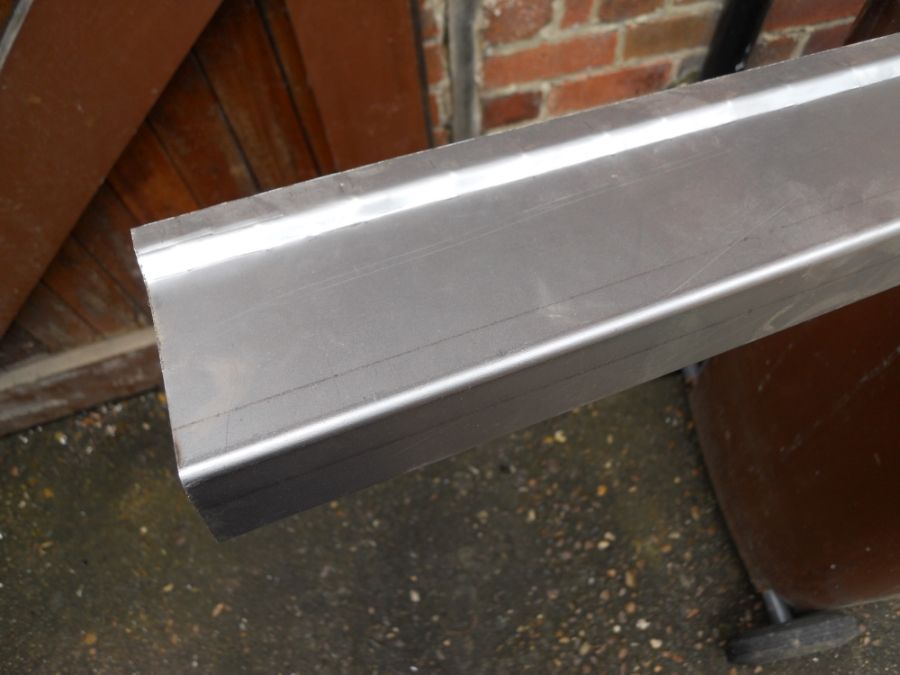
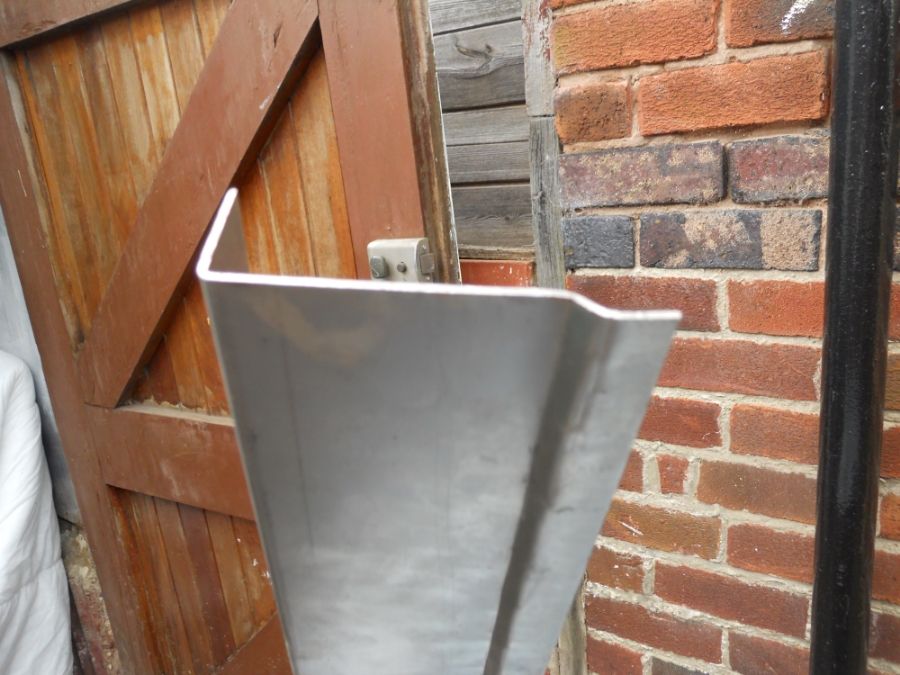
I'll admit it took a while and pretty early on in this process I broke my vice, so I did what I'm sure most people would do and took it to my Dad's place to use his! I think it was worth the effort though.
I decided to start replacing the floor to sill section at the front and trimming back to sound metal at the front left it looking like this.

Unusually for me it seems I didn't take any photos along the way, but I worked towards the back of the car replacing a 300mm section at a time.

As you can see in the photo there's a slight upward curve at the front which I didn't notice at the time, but it seems the the floor was bent upwards by someone using the production line brackets as a jacking point. This was also the case at the rear, but the inner sill was creased so it was obvious the the floor needed pushing back down.
Here it is trimmed away.


I wanted the keep the factory pressings so I cut round them and straightened it ready for the new steel. I put a plastic tube over the main wire loom where is passes through the crossmember so that I could lift it out of the way of heat from underneath without bending.
More floor and bottom edge of inner wheel arch added.


Before closing the bottom of the sill with the repair section I cleaned out the top part.

And coated it with etch primer.

With the floor now supported properly I could get on to making the sill panel itself. I got a local fabrication company to cut and fold some strips of 1.5mm thick sheet steel for me - 90mm wide with a 30mm upright. I could have stuck it straight on, but I decided I wanted to try to replicate the stepped edge that the factory and repair panels have. So I made this.

To do this.


I'll admit it took a while and pretty early on in this process I broke my vice, so I did what I'm sure most people would do and took it to my Dad's place to use his! I think it was worth the effort though.