Heater Unit Refurbishment

rp61973

Member
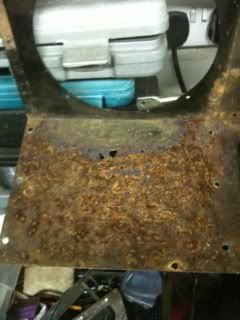
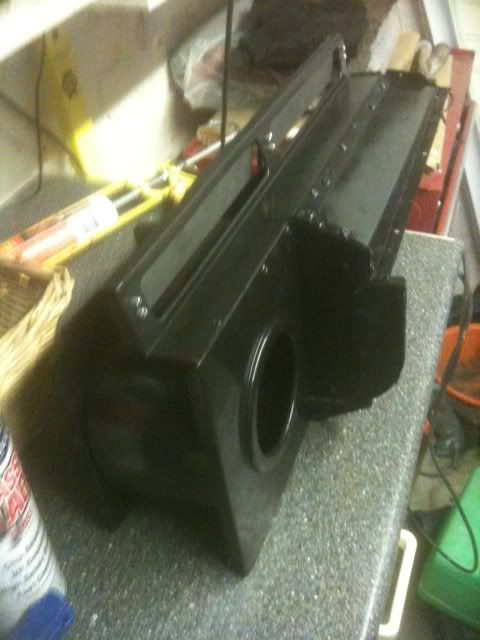
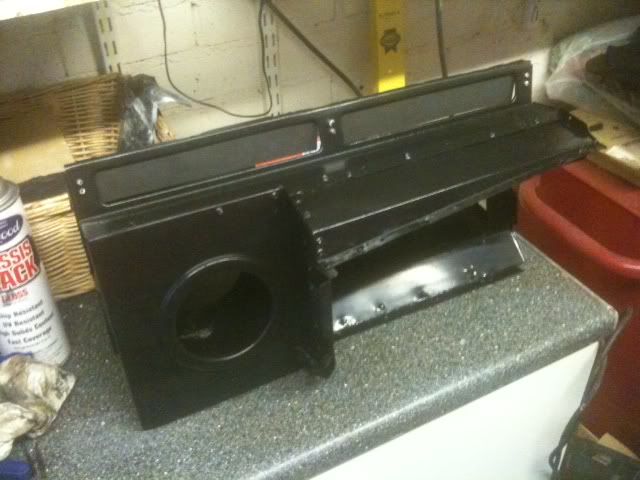
Hoping to get my P6 MOT'd and back on the road for Easter so it can enjoy an autobox rebuild, I have a few things left to do. One of these is the rebuild of the heater box. I plan to renew the foam sealing strips, get the matrix rebuilt and take apart the fan motor, clean, re-grease bearing, clean commutator and change brushes if required. I am getting thoroughly cheesed off with being frozen in winter by a lukewarm dribble of air and then roasted alive in summer when warmish air bleeds through into the interior. :evil:

I have removed all 4 bolts holding the unit to the bulkhead, removed the heater hoses and disconnected the air blending/temperature control forks. I have yet to disconnect the fan speed/flap open&shut switch - looking beneath the dash the switch appears to be bolted through a link which runs parallel to the bulkhead. If I disconnect the switch by the bolt, how does the parallel link clear the bulkhead when you lift the unit free?

The workshop manual doesn't explain this in any detail - could anyone here please advise?

Many thanks.
 
Re: Heater Unit Removal

Undo and remove the bolt that holds the operating lever to the cross rod that goes into the heater, and as you move the heater out there is a hinge in the rod that allows it to fold straight and come out. As you lift the heater, hold the bottom flap upwards on the lever on the side of the heater, otherwise the flap will stop the heater moving forward enough to get it out.
 
Harvey, excellent stuff and many thanks.

I am just hoping I don't find a crusty heater box and bulkhead when I lift it out. :?
 
Right, I managed to lift the unit out of the car last night. I firstly inspected the outer box (which is heavily surface rusted on the matrix inspection hatch section), but there doesn't appear to be any rot there, thank goodness. I will have much derusting and repainting of the unit to do. Base unit ledge has some light surface rust, but is OK and will tidy up.

With a fight (even after taking all the end panel screws out), I extracted the matrix, which has a lovely coating of limescale in the inlet/outlet pipes and appears to have leaked at some time. The matrix itself seems a little too long as (a) I had to bend the holder slightly to extract it and (b) the body of the matrix has been touching the side of the outer box and produced a heavy surface rust patch on the outer box. I am sending the matrix to a local rad firm to get it rebuilt at the weekend - I will ask them to make it around 5mm shorter in length.

The foam seals on the lower 3 flaps are shot - they remain sponge-like in appearance until you touch the sponge and it turns into a sticky-toffee like substance. I suspect oil fumes from the engine bay have degraded the foam over the years.

Does anyone have any suggestions for replacing the 2 shot fibreglass insulation pads on the outside or do I need to keep the originals?

Any useful hints/tips experiences for moving forward as I rebuild the unit will be gratefully received.
 
Well I have now bought anti rust primer and near gloss chassis black from Frost. I have also purchased an offcut length of self-adhesive neoprene strip from Fastgaskets (a roll measuring 75mm wide x 3mm thick x 5m long) to refurb the flap seals (should be enough to do about 4 boxes).

Quite excited now. I have gone to Demister Man (www.demisterman.co.uk) for a brand new matrix (seemed reasonably priced). All I need now is a good rust removal pad for the drill, some more heavy duty abrasive paper, a new drain hose (side ones are recent but bottom one is original and has fossilised) and away I go with the arduous task of cleaning old paint and rust from the outside of the heater box and the inside of the matrix compartment!

I am looking forward to a refurbed heater which will keep the car warm in winter but will close off all heat in summer.
 
rp61973 said:
I am looking forward to a refurbed heater which will keep the car warm in winter but will close off all heat in summer.

Chasing the unobtainable Rover P6 dream!! :LOL:

Graeme
 
ghce said:
rp61973 said:
I am looking forward to a refurbed heater which will keep the car warm in winter but will close off all heat in summer.

Chasing the unobtainable Rover P6 dream!! :LOL:

Graeme

Most probably; my expectations can be a little unattainable sometimes. I will post some pics throughout the rebuild stage for those who may be thinking of tackling the job themselves!

One thing I have just thought of. I won't rely on the self adhesive of the neoprene for the new flap seals. I will fit these with strong contact adhesive. The thought of the self adhesive coating drying out and giving up in a stream of lovely warm air is just too depressing to contemplate!
 
Hi Colin,

Many thanks - an interesting and helpful link. Internally my heater box is pretty OK (some tidying in the compartment where the matrix sits and re-foaming the flaps), so I won't go as far as Simon did in dismantling the rivetted sections of the box. The man does come across as being a glutton for punishment! :mrgreen:
 
Well it is not good news. After starting to strip the surface rust/paint from the bottom face of the unit I have found a patch of rust holes, confined to an area about 2" x 2" below the heater unit.

I have begun to drill out the rivets and spotwelds as Simon did. I have a local body repair man (who I am on good terms with) who has confirmed he will be able to look at this with a view to cutting out the rusty section and letting some new metal in.

God knows why Smiths used a comination of spot welds, rivets and screws to hold the unit together. Why could they not just use rivets?

I think this is going to turn into an 'all or nothing' job, the all being along the lines of what Simon had to do.

Ho hum.
 
Well, I am beginning to dismantle the heater unit. Stubborn spot welds and rivets have now mostly been removed. This was the sight that greeted me when I removed the bottom and side section. This is going off to the bodywork man tomorrow for the rust to be chopped out and some new metal to be let in.

heater.jpg
 
Oh the fun of dismantling the p6 heater :roll: :LOL:

I think the most difficult part of rebuilding the heater assembly was working out the sequence for reassembly while sealing it all up. Mine looked worse than it actually was in the pictures, the pitting was very light and mostly disappeared once I put a few coats of paint over it. It was definately an all or nothing job, luckily for me I've had practice and success doing it my way before so it wasn't too much bother.

Since then I've rebuilt a small heater for another project, and had the casing bead blasted which showed up a section about 5"x3" of rot in the base. The metal being stupidly thin on these Smith's heaters was a real pain to weld up neatly but once done I was left with a 100% rust free heater to be proud of. With a decent coating of paint, not that water soluble rubbish that was originally on them, and fresh sealing foam on the flaps, they should last a long time without needing any further attention.
 
After a 2 month period of derusting and de-painting heater parts (level of tedium increasing proportionally with time) I think I am getting there.

All but 2 of the separated components are now in a lovely glossy Eastwood Chassis Black finish with no rust.

Pictures to follow shortly.

Then I need to get some rivets and start re-assembly. :mrgreen:
 
One snag - the two 90 degree rubber drain pipes that run from the top plate to the two side drain pipes are in a poor state. The side drain pipes are available - I did replace these several years ago.

I don't want to rely on split and leaky drain pipes after spending so long derusting and painting the interior of the heater box.

Anyone know where I may be able to get a pair of these remanufactured?
I will try some of the rubber manufacturing companies off Google, but if anyone has any experience of a good company.

heaterparts.jpg
 
I'd have a chat with Ian Wilson at Rover Classics. He may well want to come in with you and buy a big batch (aka cheap), and will certainly know who to talk to.

Chris
 
Thanks Chris. Ian has had some of these remanufactured, so he was able to sell me a brand new pair this morning. :D

Splendid stuff - I am just awaiting receipt of some black anodised pop rivets and I have some black silicone sealant at the ready (left over from new kitchen) to seal the sections together!

Watch this space!
 
I used 22mm copper pipe 90` degree solder joints as replacements when I rebuilt my heater box, bit messy using sealant to hold them in place though.

I didn't know at the time there are replacements available - too late now.
 
In between major surgery on the house, I have made some progress:

HeaterJune2.jpg


HeaterJune1.jpg


A slight misunderstanding with Ian of Rover Classics resulted in me being the proud owner of a new pair of heater side-pipes, and not the small rubber 90 degree pipes that drain into the heater pipes (I already have newish heater side-pipes from a few years ago). I have sent Ian my old 90 degree pipes and he is looking into getting some made.
 
I have discovered a snag.

The main (top) flap control arm at the rear of the heater box appears to have suffered some previous damage. The splined end of the rod that connects with the adjuster plate, hass well worn spines and the inside of the adjuster plate is no better.

Consequently I do not know where the hinged rod sits (rotation wise) in relation to the adjuster plate as the bloody thing just spins around. I do not want to Araldite or similar it back together. I can only assume that the top flap has seized at some time and someone has attempted to force it and damaged the splines.

Has anyone got a cannibalised heater box which still has the main flap control arm and if do would they like to sell it?

Any help gratefully received.
 
What about pinning the shaft? I had a similar problem with mine on the fan/ flap side but recrimped it however I live in fear of it failing again and were I more conscientious rather than the lazy sod I am I would have devised a better solution such as pinning it.

Graeme
 
Back
Top