KDK907P - 1976 2200sc

Whitewash

Member
I decided to embark on a little bit of tidying up following an MOT advisory regarding pealing underseal and a small amount of surface rust on one of the sills........

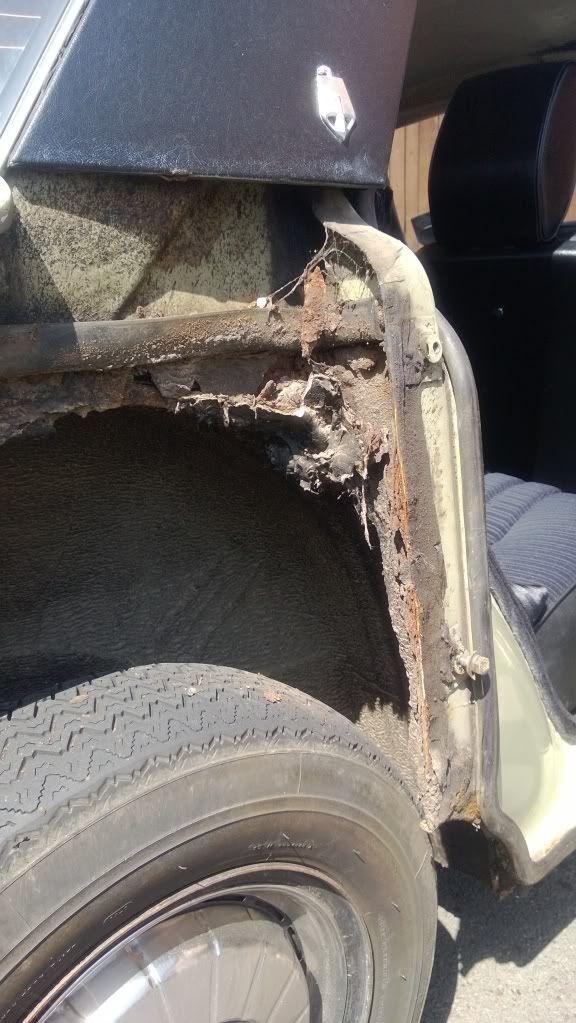
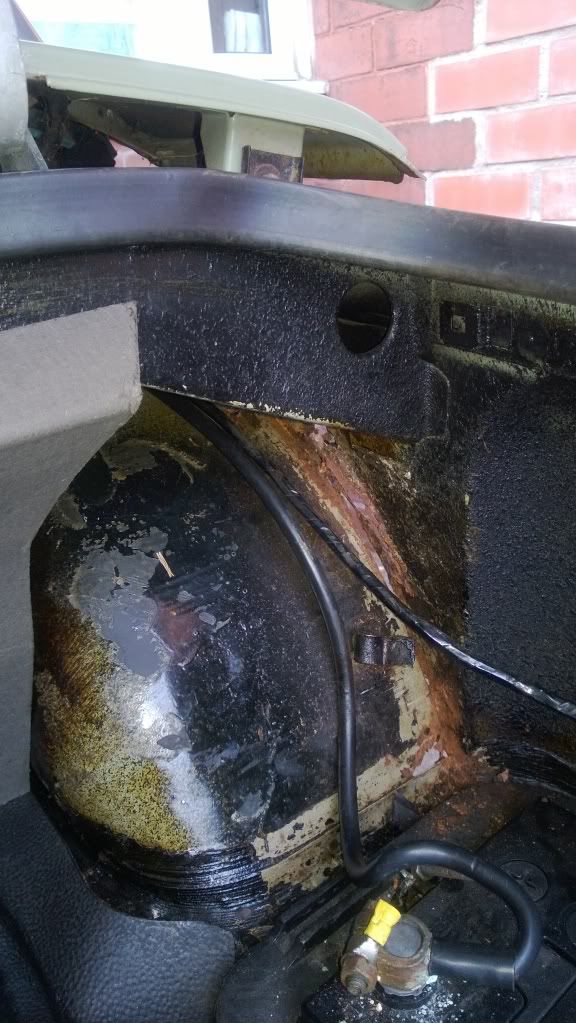
so i removed the sill cover to inspect and really wished that I had not
temporary_zps81404289.jpg


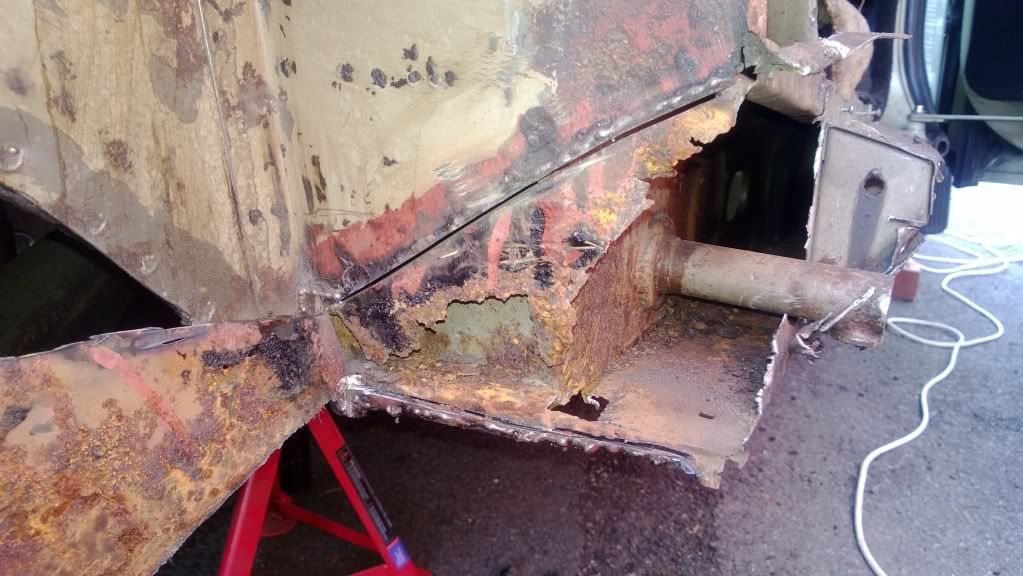
I have found a variety of bodged repairs mainly using the dreaded fibreglass and some using more unorthodox means....
temporary_zpsd8314b3f.jpg


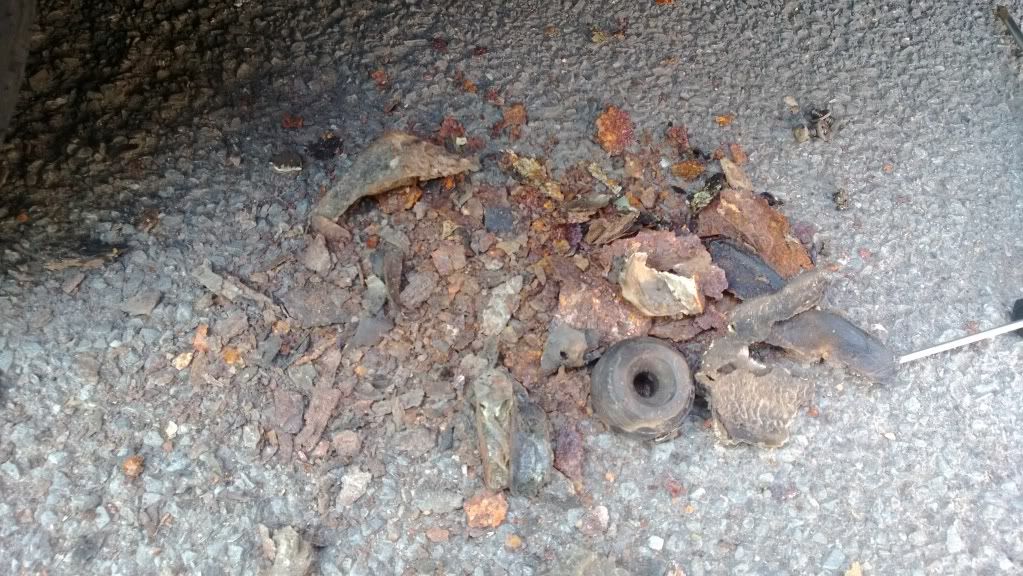
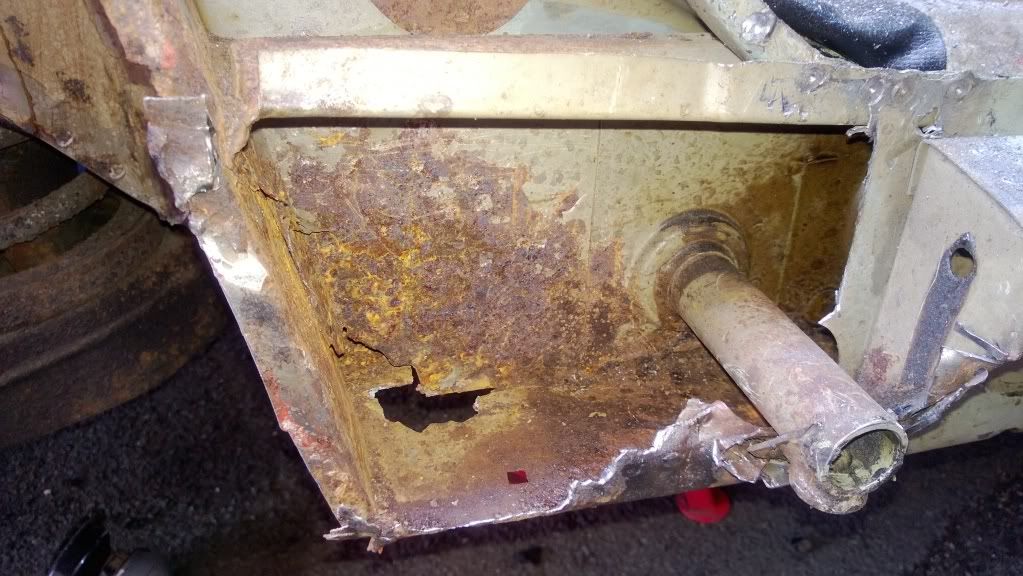
the closing panel has been filled with whatever would give the glassfibre something to hold its shape, namely a bump stop and various other bits... not too bad a repair, looks simple enough once hacked out, a small amount of plating will have it right as rain........
temporary_zps9630d56e.jpg

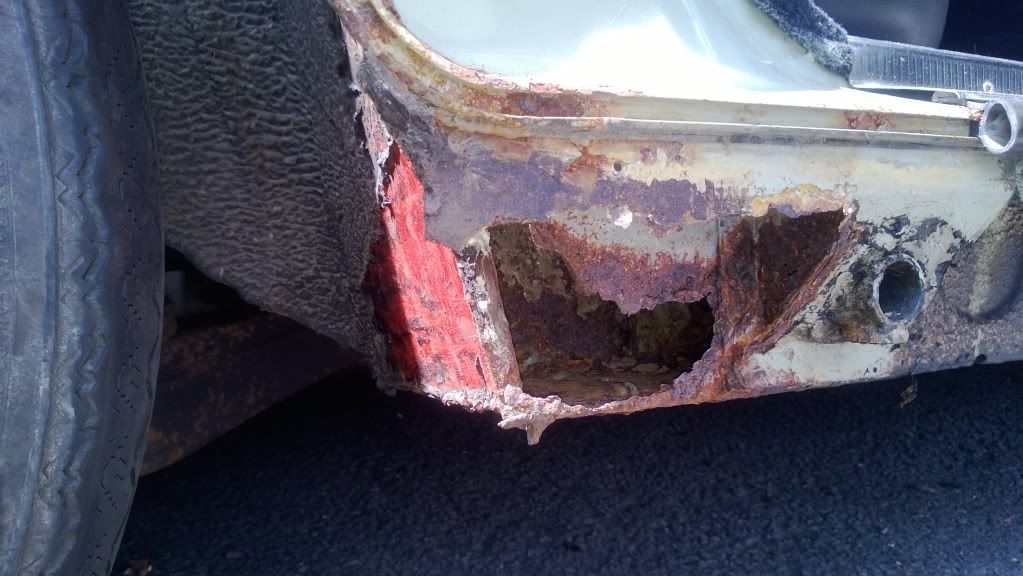
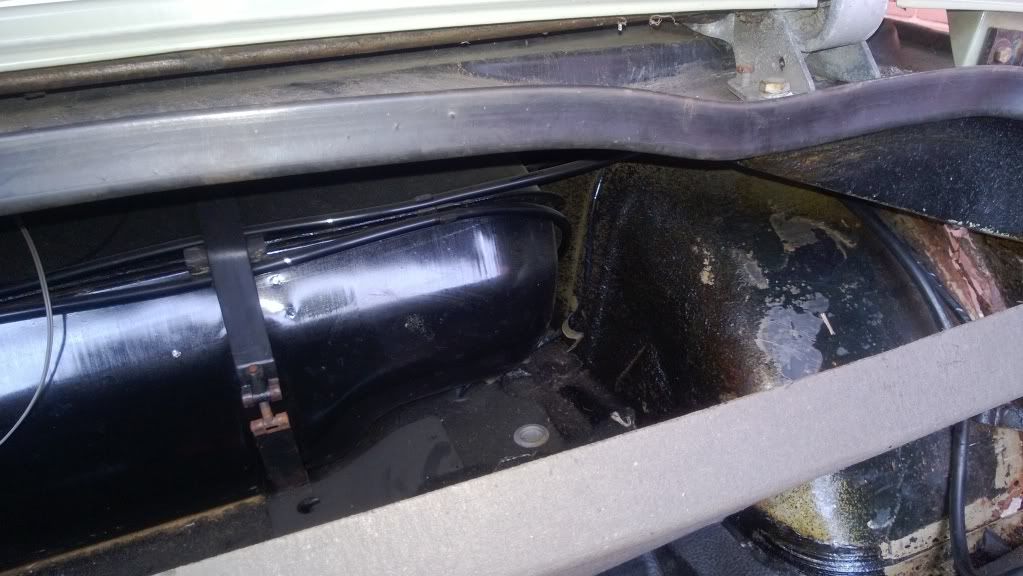
it even appears someone has replaced part of the panel (which appears solid) but clearly got bored with the rest of it and tried to turn it into a tvr...


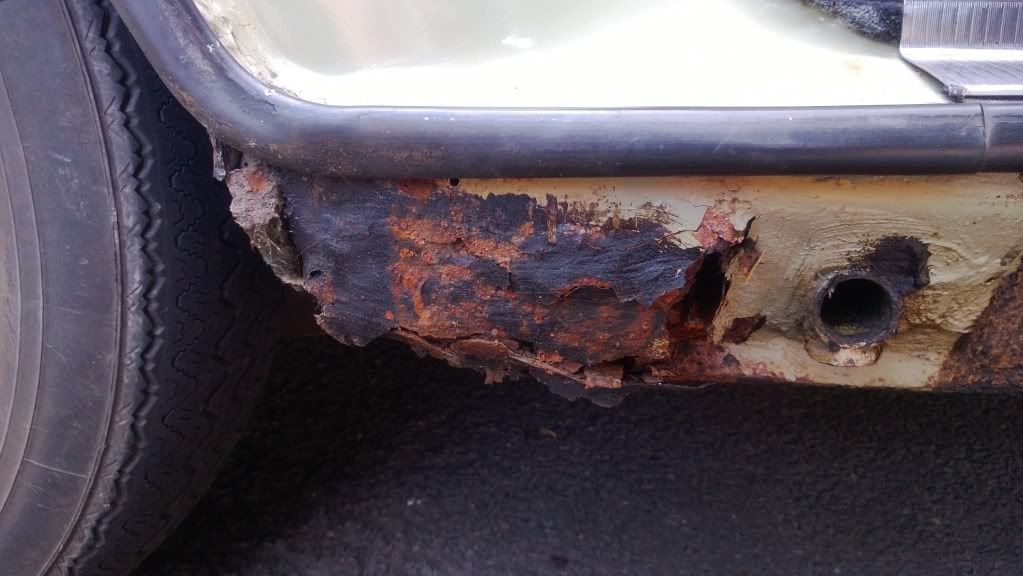
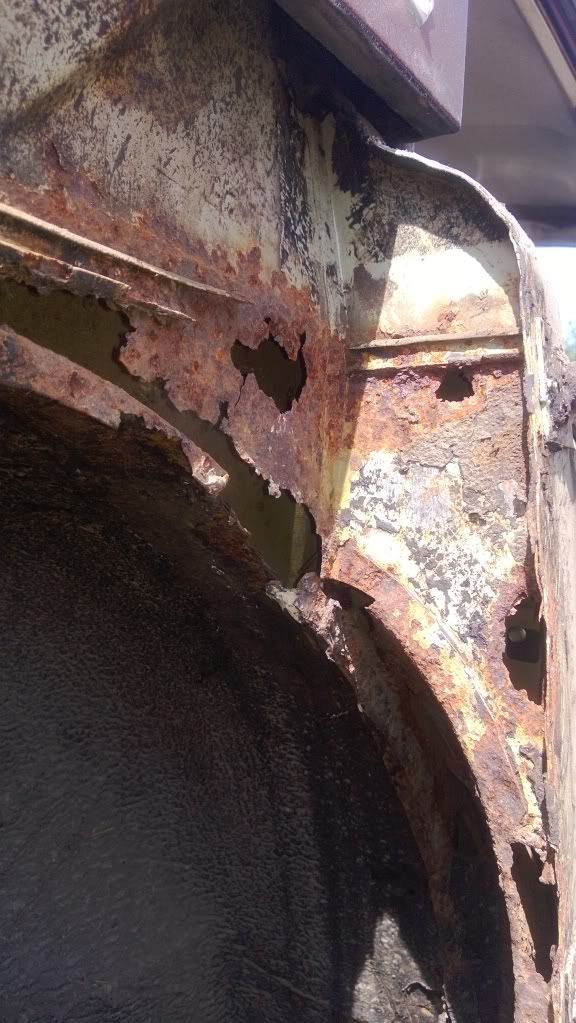
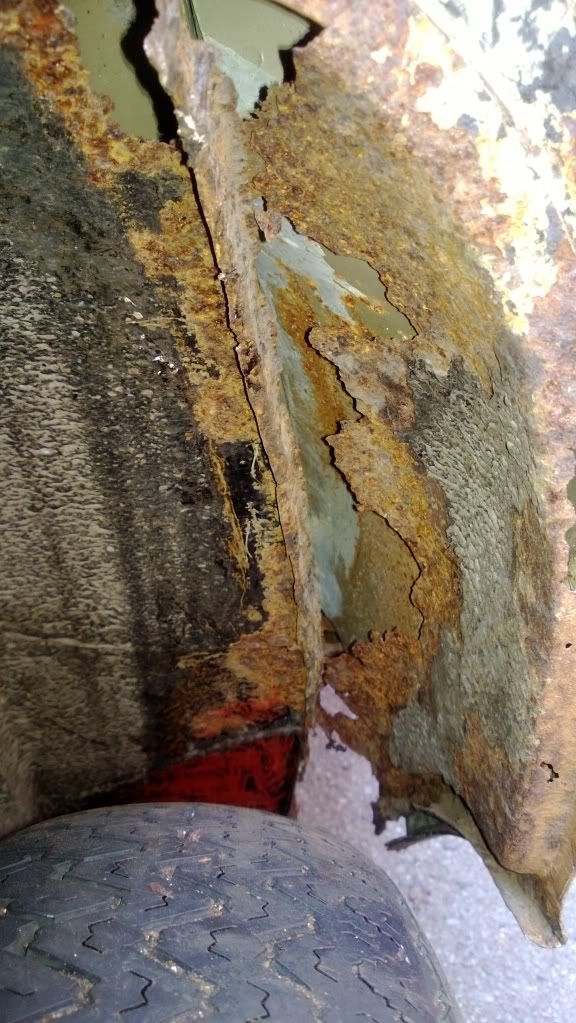
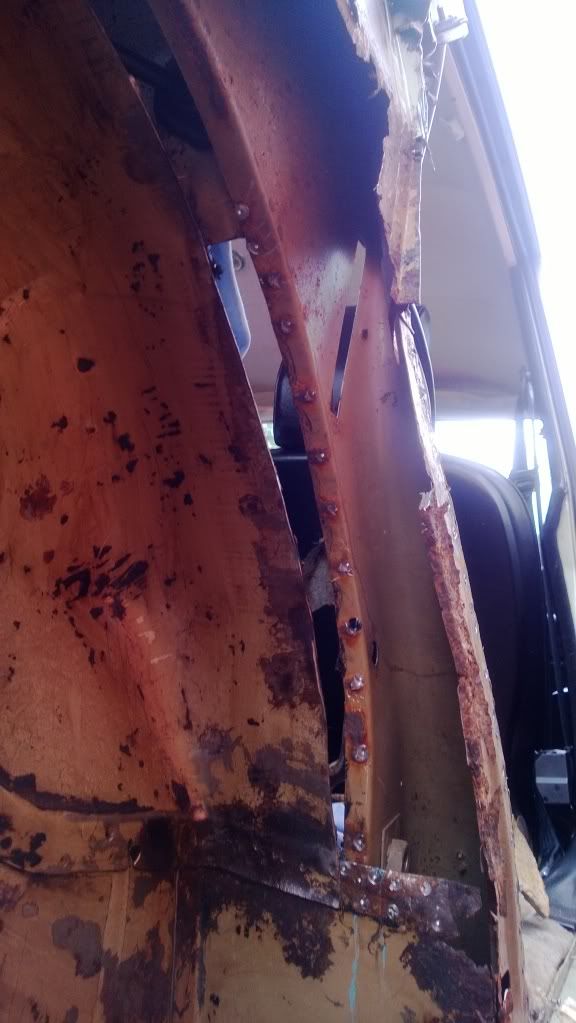
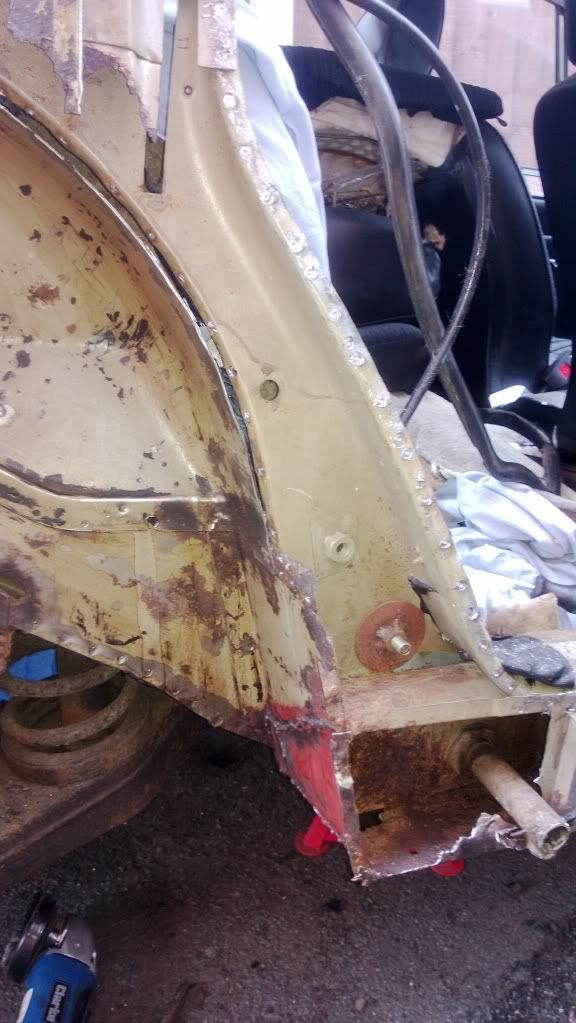
or so i thought until i removed the wing, looks like its been a bodge job from start to finish by whoever did the fibreglass, the leading edge of the pillar/wheelarch is full of the stuff
temporary_zps75408a2a.jpg


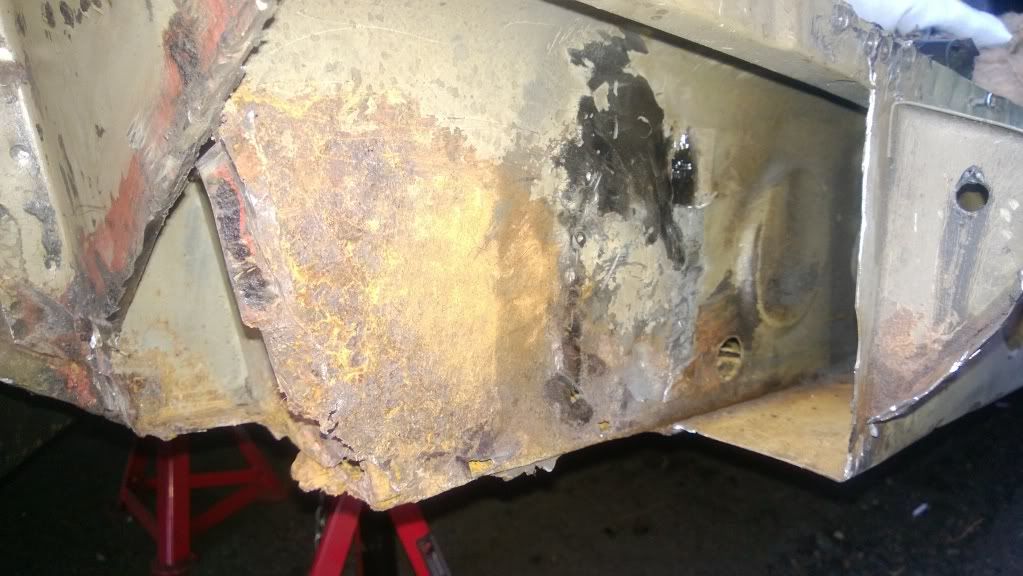
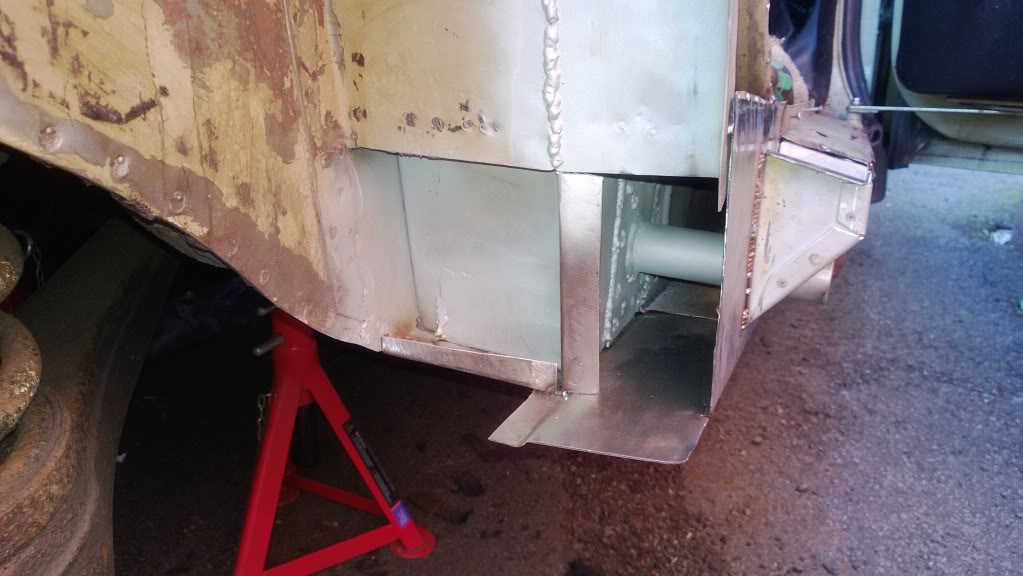
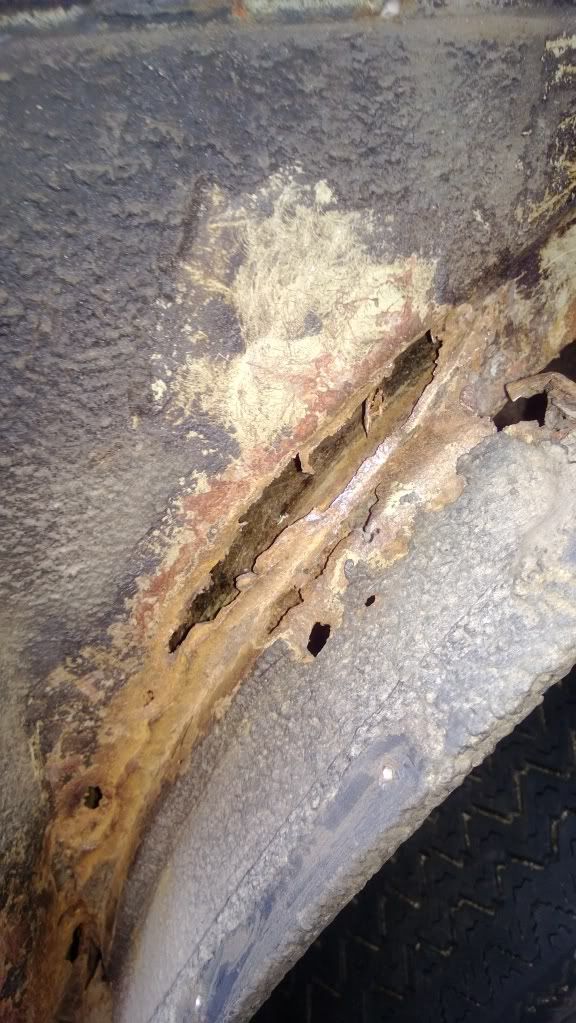
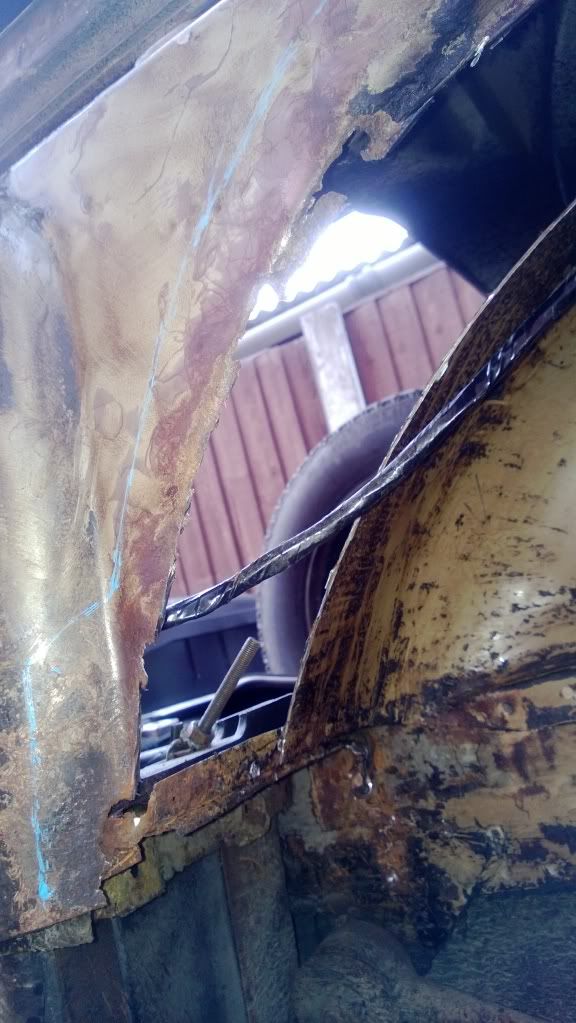
all hacked out and I can see what needs to be replaced and repairs and it aint pretty
temporary_zps0a935488.jpg

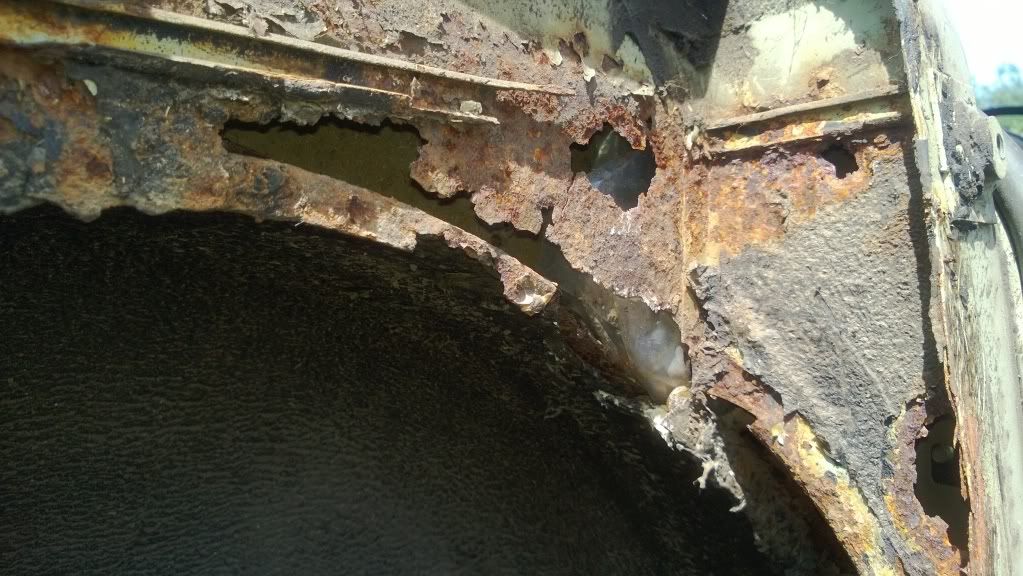
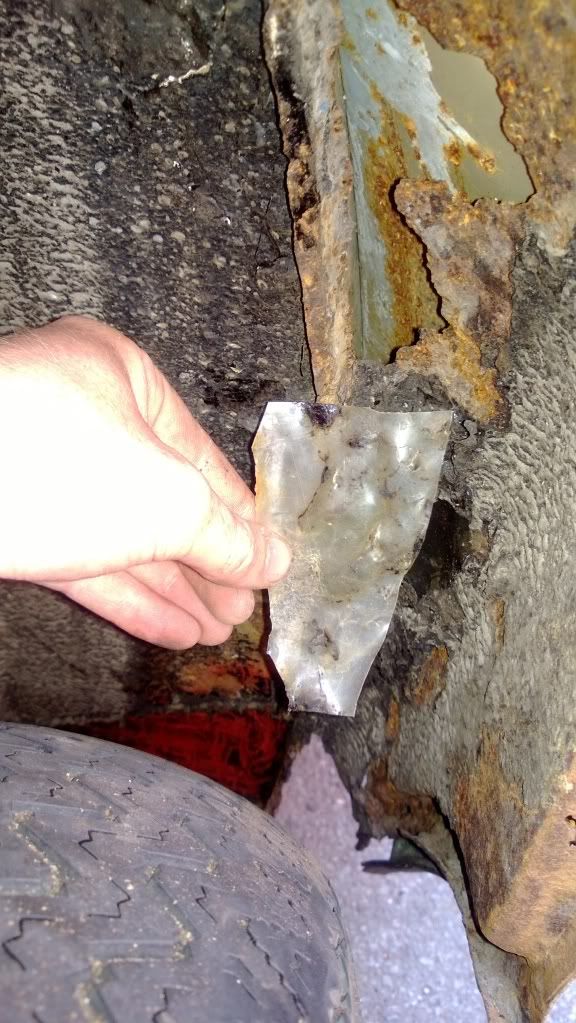
yes that is a plastic bag, clearly there was a shortage of exhaust bump rubbers that day!
temporary_zps7895dfa7.jpg


temporary_zpsac513018.jpg


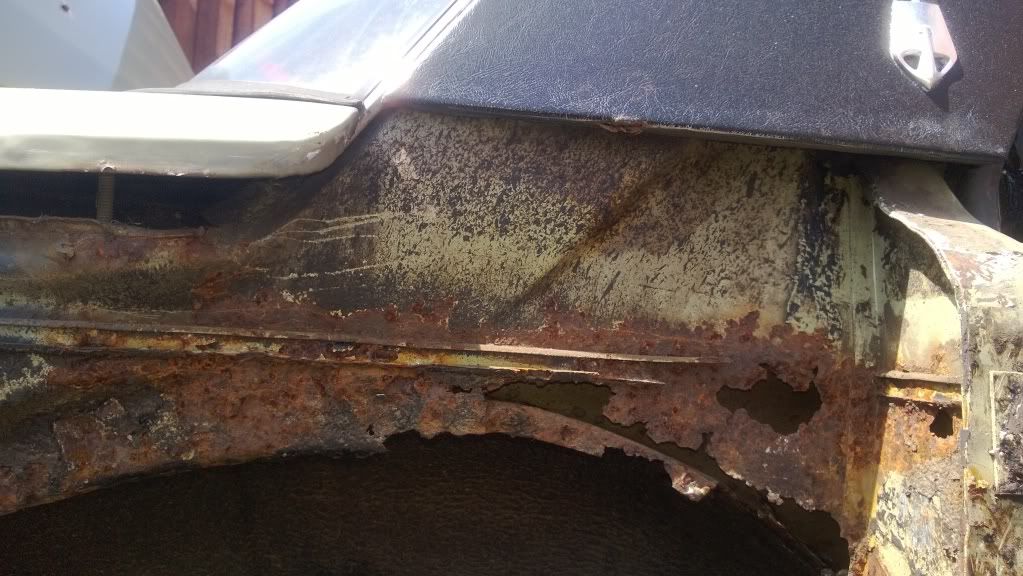
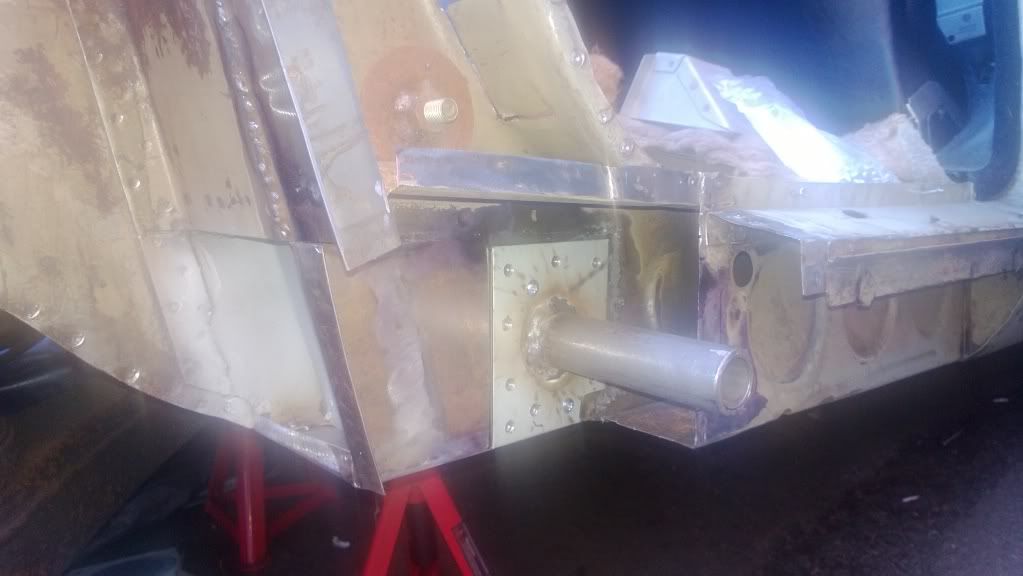
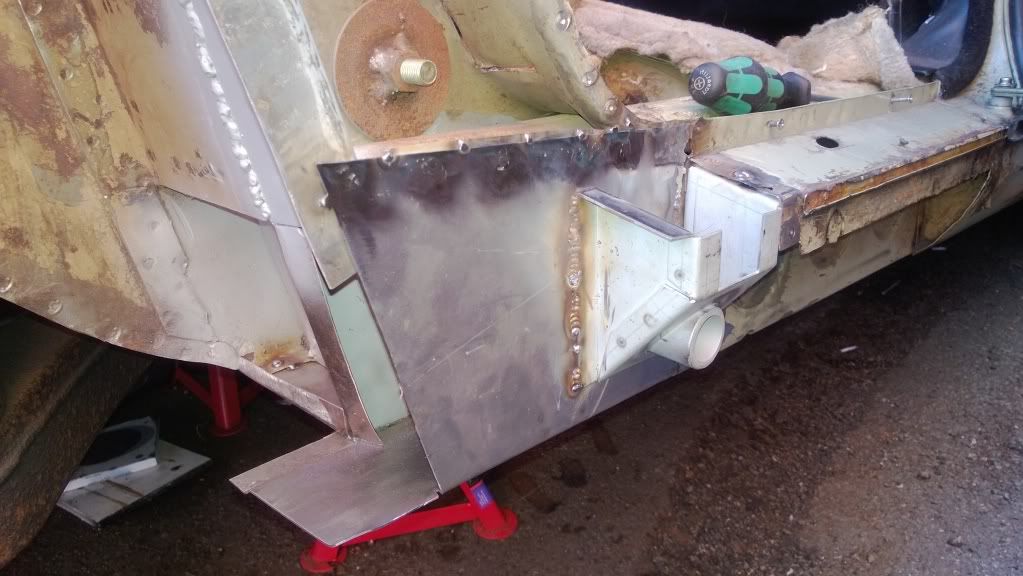
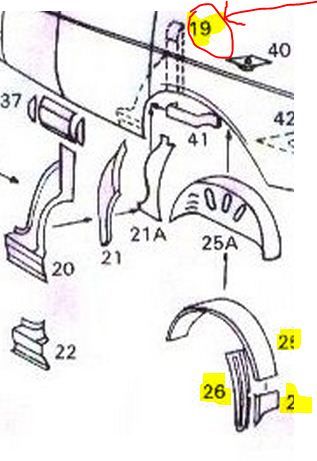
now to figure out what repair panels im going to need and what ill need to fabricate!
 
Well, in the panoply of P6 base units, that doesn't look too bad! At least you've got metal around to weld things on to!

For an idea of how things go together, JRW has a a set of exploded diagrams of where all his patch panels go on his web site. The parts book is quite helpful too in showing the layout of things. If you haven't already got one, then access the one on the Rover-Clasics site.

Chris
 
cheers chris

ive got the parts book for the p6 2200sc which is relatively useful

does anyone have a copy of this exploded diagram from JRwadhams, it doesnt appear to be on the site at the moment!
 
Whitewash said:
cheers chris

ive got the parts book for the p6 2200sc which is relatively useful

does anyone have a copy of this exploded diagram from JRwadhams, it doesnt appear to be on the site at the moment!

This came up in another thread fairly recently...found it!

Try the link in the last post on >this thread<

Good luck with the repairs!

Stan
 
vaultsman said:
Whitewash said:
cheers chris

ive got the parts book for the p6 2200sc which is relatively useful

does anyone have a copy of this exploded diagram from JRwadhams, it doesnt appear to be on the site at the moment!

This came up in another thread fairly recently...found it!

Try the link in the last post on >this thread<

Good luck with the repairs!

Stan

thats fantastic stan, just what i was after! now i know ive got less of a fab job on my hands!


partsrequired_zpsfe3c7a24.jpg


my only concern is regarding part indicated as "19" which the diagram appears to make look alot shorter than it should be so i dont know quite how much of the post is actually included, i also cant work out how many skins it has, has anyone fitted this panel?

the rest are bits of wheelarch which are all available, and the small bit at the top of the arch will be needed as well, not too bad really,


Ive removed all the underseal and waxoil (fecking hate that stuff) from the sills (well all i could reach without jacking the car up anyway!, theres nothing but surface rust that i can see, ill take it all back to bare metal and repaint it all, so at least something positive!
 
It'd be worth getting it clear in your mind what sort of finish you want to achieve. If you're not too worried about replicating the exact factory shape, you could fabricate most of the repair sections needed. That's the approach I tend to take as it means I can just get on and do it rather than wait for panels to arrive. It also means I can design the repair with ease of welding in mind - I hate welding upwards from below, so try to plan the repair in a way that allows access from above or the side as much as possible. Off the shelf panels don't always allow this so I'd probably end up slicing them in half which rather defeats the object of buying them in the first place.
 
quick question, to JRWadhams ever answer the phone? been trying all day and got nowhere!


ill fabricate some panels but others will need to be bought, my fab skills just aint there yet! :roll:
 
this evenings progress-

removed more underseal from the arch area, also removed more glass fibre and another bit of "constructional" plastic

temporary_zpsc927d4dd.jpg

constructional plastic

temporary_zps81365d33.jpg

all removed i can clearly see that rust mites have removed my inner D post ( i sincerely hope this is part of the "complete D post" that JRW sell)

temporary_zpsdec195b5.jpg

splash guard is a little rotten as is the seam between the inner arch and the splash, again lots of filler and glassfibre resin holding this together

temporary_zpsed30c413.jpg

same area from the inside, needs clearning up and a new bit of metal adding to reform where the panel comes down to the arch

temporary_zps7976a9f6.jpg

going to have to remove this as its too close for comfort to where im going to be welding and the vent pipe runs up the back of the post, removal should also give me the chance to sort out the fuel sender that doesnt send!

got to get some panels ordered this week and then get the car up in the air so i can start the work, ill also need to sort out some sort of windbreak as ill have to weld outside!
 
so it turns out that the inner Dpost part is not available (yet - apparently its in the prototyping stage) so ill have to make it myself, which should be easy... not!
 
ok a bit more work today, many spotwelds gave way to my drillbit, i now have a big blister on my trigger finger!

i started by cutting the arch out and detaching it from the various other panels it is spot welded to

temporary_zpsaf74e3c3.jpg

temporary_zps14ee5471.jpg


i then removed the D post to unveil the true extend of the rot, D post came off quite well actually, however it showed that there is clearly a lot of rot around the inner stiffner, so i removed that as well

temporary_zps3f06b939.jpg


i had bought a new stiffner but it appears to be about 2 inches too short so that was no use whatsoever, ill have to make my own but that shouldnt be too bad at all to do.

there is still quite a bit of rot around the inner sill, ill have to take the patch off and cut it all out as its not been particularly well done.
temporary_zps2dde7171.jpg


fun and games, but atleast if appears to have been designed to come apart quite easily with the help of a spotweld drill!
 
You've making good progress there. I've got a similar repair on going with my 3500S restoration so I know what it's like. Just be aware that you're working close to the fuel tank there and you might want to drain and remove it before you start welding around the wheel arch.

Dave
 
Fuel tank is approximately 10 metres away in the garage, i had exactly the same fears, didn't fancy it all going up in a puff of smoke....

:)
 
thanks, i didnt really want to cut out anything more than neccesary

temporary_zps138a4317.jpg

cut off the old patch to find the old rusted panel behind it, gaps had been filled with seam sealer, had they actually cut the rot out then it probably would have stopped there, but as it is its spread quite a bit up the inner sill around the jacking point. I had hoped to save the jacking point but you could move it slightly by hand as the panel has corroded and was now quite thin, so off with the jacking point!

temporary_zps9ece6035.jpg

i cant quite reach the last two spot welds on the jacking point but ill figure something out, then more cutting to replace the inner sill section around the jacking point and then i can start looking at reassembly.
 
Very challenging project you have dug into! But it helps that it is easy to separate the panels. Have you had any lack sourcing a new D-post? It not easy to make a neat homemade repair section for that I would think. Maybe some of the well known P6 specialists like Mark Gray, Coulin Gould or Wins might be able to help. Good secondhand D-post is probably the best option if the JRW panel isn't gonna be available again. Anyway, good work so far and good luck with the fabricating and welding.
regards, Barten
 
ive bought a Dpost from JRW, seems well made and its made from 2mm steel so its nice and strong, its the inner Dpost thats not quite available yet (within the next few days ive been assured) i dont mind making simple flat panel thats not too bad at all, but anything thats complex shaped is a bit too far for my meagre skills!


as you say its easier that everything is coming to bits quite easily, spot weld drill is getting some abuse ive had to charge the battery drill up 8 times and ive used most of a can of WD40 substitute as cutting coolant! :mrgreen: and so far ive got one massive oozing blister on my hand, a nice burn and 3 good sized gashes on my hands, no pain! no gain!!!
 
ive made a bit of progress of late, working outside means its a nightmare to plan to do anything as its either raining or too windy!

new jacking post mounted to new metal on the inner sill (its only held in place with self tappers in this picture)
temporary_zpsc31269a9.jpg


outer sill repaired and jacking post strengthener half attached (i ran out of welding gas! so will have to go and get a refill tomorrow!)
temporary_zps3e1bfafb.jpg


just need to close the rear of this section and weld the outer sill on the underside
temporary_zpsdb156fee.jpg


and then its on to the arch repair which means lots of fab. many of the panels that ive bought dont appear to fit particularly well which will mean a fair amount of jiggling and fettling to make them fit but the car is now getting heavier!
I have also noticed that both rear bump stops on my car appear to have disintegrated and fallen off, there is only the threaded portion still attached, which sheered off when i tried to remove it so more work in this area to put the bump stop back on!
 
some good work going on there :) jrw do the bump stop mounts - had to alter it a bit but i dont think i could have made the whole thing...

Rich
 
If the mount is OK, then my trick for removing the threaded part of the old mount is to clean it up with the grinder then build up a "nipple" of weld, taking care to avoid welding the mount itself. I then weld an old bolt onto the nipple and let it cool down before undoing it. This method has worked for me four times so far, they always unscrew easily after exposure to all that heat. With your obvious skills with a welder, you'll find it a doddle.
 
Back
Top