My 2000TC 'Minstrel' needs a lot of TLC..

Thanks for that, sdibbers. Trying to at least get it finished by end of summer before the cold wet weather returns. Don't fancy welding laying on the cold ground. Done enough of that when I was younger. Lol. Going to hopefully get all the welding finished in the next couple of weeks. But, we'll see what happens. Best laid plans and all that jazz. :)
 
Well I managed to get the front half of the o/s sill finished today. I started the day off by plating the extreme front end of the sill where the jacking point is:


Next I finished the welding of the underside of the floor where the undulations are below the driver seat floor. These 2 undulations needed to be worked and into the underside as the sill needed to be flat on the underside to allow the sill cover to be bolted on. I hope that you all can understand what I mean. :):


Some of you may spot that I haven't welded the end of the outer sill under the centre post. This is because I need to check behind the existing centre sill and maybe have to replace that part of the sill with new plate.

With the underside of the floor completed I moved on to finish welding the o/s front outer sill from the centre door post to jacking point:


Tomorrow afternoon I will underseal what I finished today.
Glad to say I'm almost there with the welding. All being well I should have it done by the end of this week. I have appointments every day between now and Friday so won't be able to start anything until at least mid afternoon tomorrow. Wednesday and Thursday are almost certainly a no go as the appointments are not too close to home. Still mustn't grumble. Well pleased with results today. Please let me know if you can see the photos ok?

I had 2 parts of the 7 I ordered for the service turn up today. Only ordered them teatime Friday! Got the plugs and oil filter. Just leaves Points, condenser, air filter, rotor arm and a flasher unit left to arrive.

More to follow in a few days........
 
18th August - I'm pleased to say that after doing a most of the service, ie. plugs, points, condenser, air filter and rotor arm, The Minstrel (2000 SC (formerly 2000 TC) is starting on first turn of the key. My new oil should be here by the end of the week and I already have the new oil filter to put on after the oil is changed. However, she is really running rich. Going to take the carb off and find out why I am having a problem adjusting the fuel screw. I can only move it very slightly, not even enough to make a difference :(
19th August - I have taken the carb off today and given it a good clean without adjusting any of the settings. I also found out why it was so hard to adjust the fuel mixture screw. I thought it was because it was very stiff and the screwdriver couldn't move it. Wrong! It was/is due to the air filter being in the way of the screw. My air filter is the frying pan shape and is just in the way of the adjuster screw. Not too sure how I am going to get around it in the short term. My son suggests replacing the filter with a cone filter. He has a couple of brand new ones he doesn't use. It just depends if there is enough room between the carb and the inner wing as to whether or not it will fit. Gonna have a look at that tomorrow.
20th August - I have replaced the carb and put the new air filter on today. As I said I managed to give the carb a good clean without adjusting any of the settings. Drained the old oil and put some diesel through the engine and turned it over a couple of times with the distributor cap off to get rid of the worst of the crap. Was like watching molasses flow as it drained! Put the new oil filter on and connected the battery. I got a big surprise when she fired on the 3rd turn of the key! Ran a little lumpy to start but settled down as she heated up. Took the choke off and just had to tweak the carb a tiny bit to get it to run even. Put a gas tester up the exhaust. Was really surprised when the reading came back on about 1.5 in the green. When we checked it before I took the carb off, it was all the way over right in the red! Now very happy to say my Minstrel is running lovely. Best I've heard her run anyway! Just got to finish the welding and wire the o/s front lights back in and she'll be almost ready for an MOT. Well pleased with this weekend's result! The air filter is still in the way of the fuel screw on the carb. I'll take a photo and upload it here tomorrow or Monday so you can see what I mean. Thanks to everyone for their help and sound advice.
Hoping to get the last bits of welding finished this week. Then it will be a question of wiring the lights back in and then cleaning and replacing the interior. Hopefully a couple of weeks she'll be ready for the MOT! :) :) :)

Here's the photo:
 
Last edited:
Had the engine running lovely yesterday. Started her up today to show my son how well she's running when we both noticed a water leak that looked like it was coming from the left hand side of the block. We investigated further and found the side plate/water jacket had been botched up with silicone sealer to fill a rust hole! When we took a 4" strip of silicone off we found 3 or 4 corrosion holes in the plate. We would not have seen any of this had I not pressure washed the engine last week. So I am glad I did. We have removed all the blots apart from 1 from the plate. To get to this last one we have to take the oil pump off as the filter and casing are in the way of getting the engine mount bolt off. The 1st photo shows the silicone strip hiding the rust! The 2nd photo shows the corrosion the silicone was covering near the bottom of the plate.

 
Last edited:
That's what we hoped but we have found that we cannot remove the last 24mm engine mount stud as the oil filter and pump casing are in the way. Any advice, please, Harvey?
 
I found that what work is either leave a few nuts on the stud and lock them off with each other. Try and turn the whole stud out complete with the big nut insitu.

I have also used a big stilson wrench. it bites a little into the thread but not bad enough to prevent reuse.

Colin
 
I'll give that a go tomorrow, Colin. Many thanks for that. I'm hoping to weld repair it. Although I think it may tend to buckle a bit as the metal isn't very thick. Guess there's no harm in trying. Lol Thanks again. :)
 
I found that what work is either leave a few nuts on the stud and lock them off with each other. Try and turn the whole stud out complete with the big nut insitu.

I have also used a big stilson wrench. it bites a little into the thread but not bad enough to prevent reuse.

Colin
Tried the 2 nut technique with no success. Both the nuts kept turning but not turning the main one I wanted. Lol.. So I had to take the oil pump off. I could then easily get to the nut with a 24mm deep socket.
You're wasting your time trying to repair that when you could be buying this:

ROVER P6 2000 2200 RH ENGINE SIDEPLATE AND GASKETS NEW NOS ERC 1163 534440
Thanks, Arthur. I saw that one last night. I also was sent a link for both the r/h and l/h plates and gaskets on eBay for £101 in pp. Going to try to have a look at the l/h as I think that maybe worn as well. Although that one isn't leaking. Thanks again, m8.
 
Finally I can say that's all the welding done. Finished the rear half of the offside sill and rear wheel arch sill end cap today. Just as well, as I am almost out of gas and was struggling to run partially corroded 0.6mm wire through my welder. I ran out of wire at the end of last week and so I thought I would use some 0.8mm wire that I have a 5kg spool of. Wasn't very successful as my welder is only a 105 amp and I needed a bit more power to burn it in. So my friend and neighbour gave me a part spool of 0.6mm yesterday. Problem was he'd had it a while and it had gone rusty. I tried using it, but it was spitting and spluttering so I took the worst of the rusted wire off and then sprayed the spool with WD40 last night and again this morning before I started. It ran great after that. I have now undersealed it and it's finished. Added some pics to show what I done today.
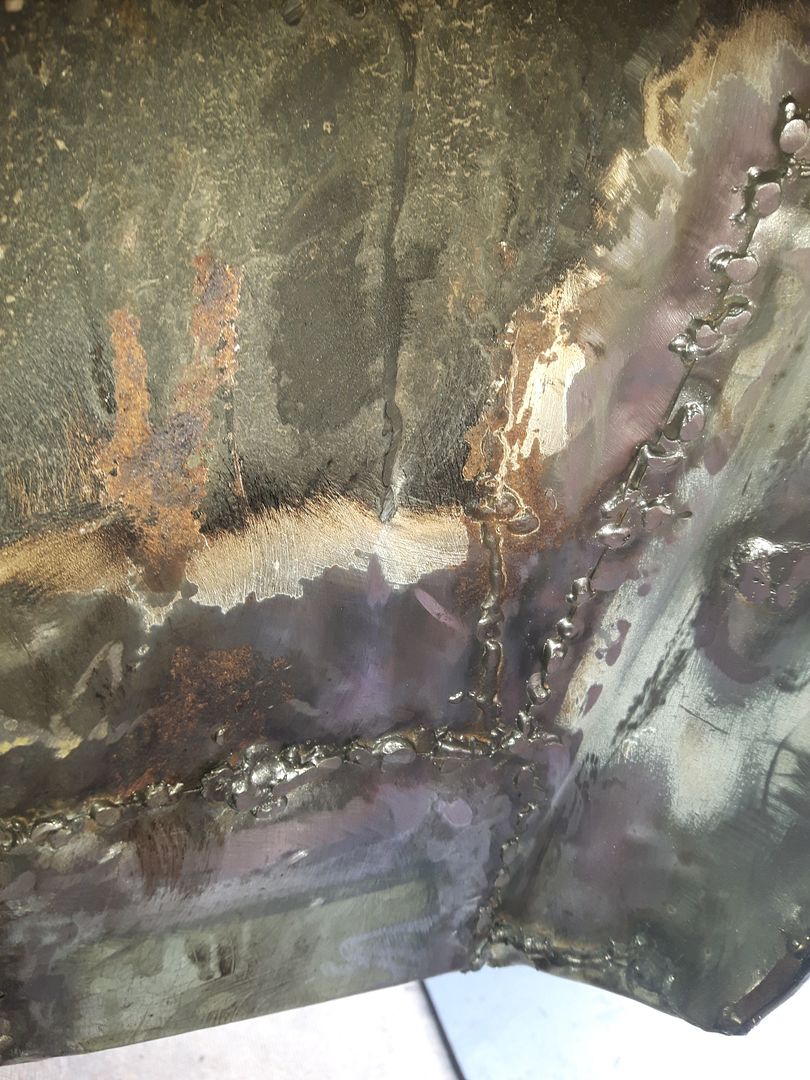
1. O/S underside of the rear sill end cap.


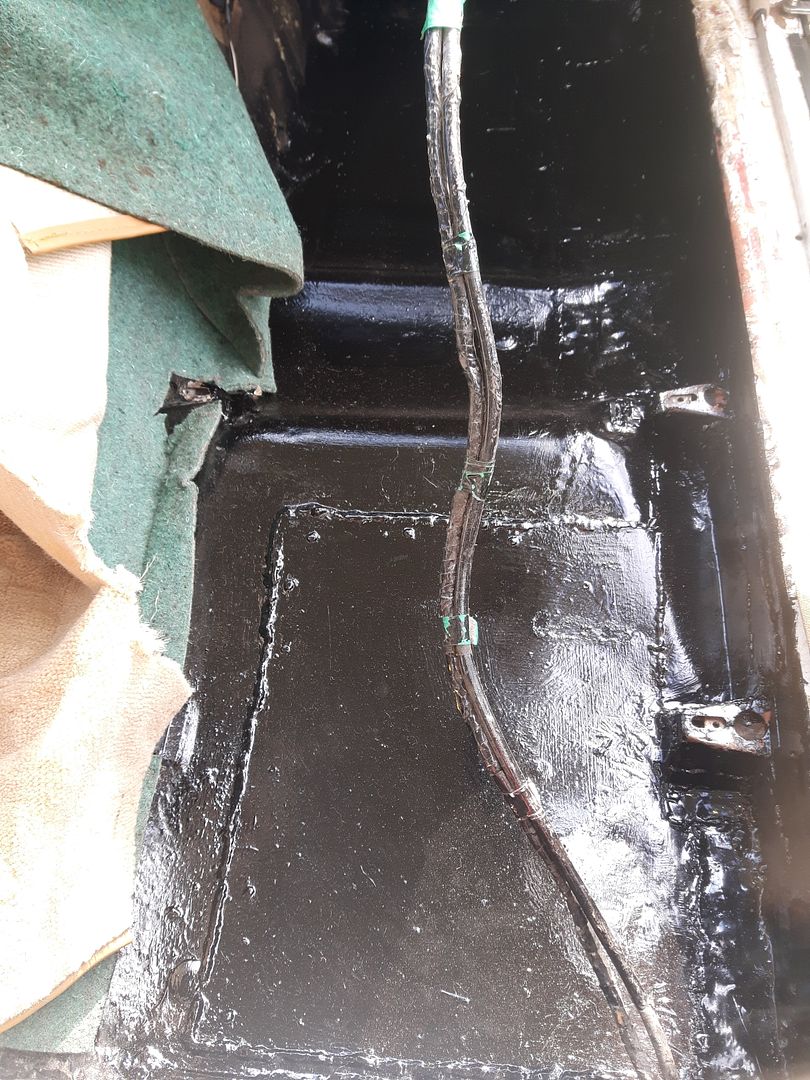
I decided to paint the floor inside with felt sealer. This will act as a sound damper as well as sealing the floor. Unlike underseal which takes and age for the smell to disappear, felt sealer doesn't leave a lingering smell and it looks good. I painted the floors on driver side and passenger side and also both outer sills in the sealer. The wiring that can be seen is the main loom to the rear lights.


O/S rear sill end cap under the wheel arch.


This now leaves the lights to wire in, the brakes to check and possibly renew, the interior to install and sort the engine side plate out.
I wish to take this opportunity to thank a fellow forum member Colin ("Arthuy") for all his help and assistance with the left hand engine side plate. Thanks to Colin I will soon be able to replace the plate and get The Minstrel running again.
Hopefully when I get the engine back together it will run a good as it did till just before the side plate had to come off.

My wife, Ann, washed and cleaned up the driver's seat today. What a fantastic job she done! I told her she can do the passenger seat and the 5 components that make up the rear seat. Needless to say, that didn't go down too well. Lol
A big thank you to all those who have had a big helping hand with advice or otherwise in The Minstrel's restoration so far.

P.S...Sorry the pics didn't come in the order I wanted them to. On my camera they were, but not when I uploaded them to Photobucket.....:(
 
Last edited:
In the pic of the rear end do you have a modified lower shock mounting plate?
Hi Colin.
Don't think so. As far as I know, the car is all original. However, saying that I have always thought the rear suspension looked low. The car doesn't sit what I would call level. The front seems very high compared to the rear. I can't take a pic to show you as my engine is jacked up waiting for the new plate. I'll post a pic when she's all back together and standing on 4 wheels again.
 
Hi all.
Firstly I would like to say a big thank you to Colin. (Arthuy) for his help with my engine side plate. He saved me a lot of money and time. It's guys like him that make this forum the great place it is. Thanks again, Colin.

Yesterday I have fitted the right hand side plate and refitted the oil pump, etc. Certainly looks than it did.


I have taken the exhaust manifold and exhaust off. I done this initially because I thought about changing the left hand plate. But after looking at it, I determined the plate was ok. No corrosion at all on it. I am going to spray the exhaust manifold silver. The exhaust itself was blowing at the first joint where the straight pipe fits to the downpipe. Someone had previously done a bodge up job by using silicone sealer to attempt to stop the blow! Hopefully I have repaired it now. Will refit it possibly today.

I have attached a photo to show the hole in the wheel hub. I am thinking of welding a patch over it. What would be your opinion? It is not a big hole and a patch about 1" square would do it.
 
Hi Stephen.
Sorry to put a downer on it but when these elbow sections rust like that it will be the tip of the iceberg once cleaned up by blasting there will be nothing left.
They are common for failing big time due to corrosion.
I think you will be better off finding a better one for safety sake seeing how much work you have done so far.
Regards
Clive.
 
Back
Top