Red Rover Revival

Well…. it has been a long time, hasn’t it!!

Longer standing forum members may remember my profile from 10-12 years ago when I was a pretty active contributor here. I haven't been on regularly for 8 years or more due to becoming heavily (some might say too heavily!!) involved in the P6 Club's committee. I have since left my role after longer than planned in post, and have gone back to being an 'ordinary member'.

The Rover is my first car and the only car I always intend to keep. It’s been garaged for the last 6+ years after the bottom end finally gave out on the way to the P6 Club’s national rally at Bowes, Co Durham in May 2015. I made the decision at the time to mothball it as a project until I had the time, money (!!) and energy to “do it properly”.

Well, a house sale, 2 business ventures, and a lot of committee meetings later, and I’m finally ready. Today I pushed it out into the daylight for the first time in over 6 years! Did a bit of an inspection to re-familiarise myself with the good, bad and ugly aspects of it, and started making lists of what I need to source. I also did a stock-take of all the parts I've amassed over the years and was surprised to find a few gems including a NOS bonnet badge, NOS rear lights and a NOS NADA front sidelight unit! (The NADA sidelight is superfluous to requirements so available if anyone needs one).

View attachment 21383
View attachment 21384

Some of the NOS bits I found including side plates, timing chains and light clusters:
View attachment 21385
View attachment 21386
View attachment 21387


A bit of potted history… The car is a 1972-registered 2000 TC, originally in Cameron Green but always Ford Spanish Red in my ownership. It’s a total ‘bitza’, with an origin-unknown early 446-prefix engine, tatty panels, saggy suspension, and worn interior. It’s been round the clock at least once (currently showing [?]53,000 miles) but I LOVE it and always have.

I bought it aged 21 and drove it everywhere the length and breadth of Britain. I rebuilt the engine after about 2k miles of ownership, which included a professionally reconditioned cylinder head from Clive Annable (new valves, unleaded seats, springs and skimmed). I rebuilt the short block myself ‘in situ’, which was a challenge but I was proud of what I achieved. The bores were ovalled, scored and the crank was definitely ovalling, but I did the best I could with it and got another 11k miles of pretty decent performance out of it before it gave up keeping oil pressure and developed the death rattle!

I bought another short block from Stan Barnes (‘Vaultsman’ of this parish) several years ago. It was from his ‘Rebekah’ project and is a late 400-prefix 2000 block. Stan had had the crank ground before I bought it, but it’s since been dispatched to a classic Mercedes engine shop in Crewe who have overbored it to accept NOS +0.060” 9:1 pistons, taking the swept volume up to 2050cc.
The flywheel has been skimmed and the crank harmonically balanced to (I’m told) +/- 1 gram (!!)

My existing recon cylinder head should still be good after a clean-up, check and quick re-lap of the valves. I’ll be refitting my preferred HIF6 carbs to it, as per a previous modification.

View attachment 21388
Meanwhile, I’ve got a replacement gearbox for reconditioning. It’s a genuine 23k miles ‘box from a ’73 TC, and will get new bearings, layshaft and seals, but the gear-clusters and selectors should still be good. The current ‘box makes the sound of a slide whistle on the overrun, so is almost certainly beyond saving!

Next up is the bodywork. The car has always been remarkably solid structurally (main reason I bought it) but does need some attention on the trailing end of the OS sill, where some older repairs are thinning a bit.
The majority of the panels aren’t worth saving, so I’ve started sourcing what I need to make a up a good set, and am going to send them to a local classic paint shop with a good track record in the area. It’s staying red (what else?) and will be a bright signal red shade from the RAL paint code system. And lacquered of course - you will not see me with a polishing rag!

View attachment 21389

The scuttle panel was removed today to be sent for a trial spray - partly to check the quality of their work, partly to check the paint shade I've settled on looks the way I want it when actually on a panel. If I like it, I can keep it without having to worry about respraying it again with the other panels to get the same paint batch, as it's barely visible on the car with the bonnet closed.


After that it can become a rolling project. Brakes need another rebuild (I DIY’d it 12 years ago, but don’t fancy them after all that time standing!). Suspension and steering also need a refresh. Interior is complete but tatty, but that’s all easily sorted as self-contained projects.


It’s the fiftieth anniversary of its registration on 1st July, so let’s see how close I can get it to drive-able in time for that!


I'll post my updates in this thread. Looking forward to being part of the CRF community again. It’s good to be back….

Michael
 
Got the scuttle panel back from the painters today. Very impressed with their workmanship and happy with the finish (bare-metalled and 5 coats of 2K & lacquer). I have asked them for a quote to do the remaining 14 panels.
View attachment 21541
My only sticking point is the colour. It looked great on the swatches, and even better on the panel in isolation, but when the panel is put on the car in direct sunlight, it looks too far into the orangey end of the red spectrum (very similar to Monza red), and I want a cherry-ish shade.
View attachment 21542
This was always going to be a case of trial and error, as I have a very precise image in my mind of the shade I want (and sadly you can't optically scan it there!) so the panel will have to be done again after another round of tester tenths!

Nothing lost - this process was mainly to check the workmanship of the shop and the lacquer finish met expectations, and was priced as a "sample work", so in that sense I am pleased with progress.

Michael
Good luck with your project Michael.I remember the help you gave me when I first sourced “Gertrude”It was and still is much appreciated
 
Some more progress this week.
We pulled the engine and gearbox out of the car. This was new territory for me as I've not disconnected a P6 gearbox before. When I rebuilt the engine 12 years ago, I left the short block and gearbox in the car.

When I slid underneath to disconnect the prop etc it became clear the gearbox was quite substantially out of line. The snub rubber is also entirely collapsed. I'll be replacing the UJ bearings as matter of course.

DSC_4970.JPG

Next step is to remove all the ancillaries and inspect/rebuild/replace as necessary before bolting them onto the new short block. I also need to crack on with rebuilding the spare low-miles gearbox. The existing cylinder head (reconned 10 years ago) will be reused after a clean and quick relap of the valves.

In the meantime, I can strip and repaint the engine bay while everything is out, and rebuild the heater box (again!) with foam that won't disintegrate like the previous attempt did! The brake and clutch hydraulics will be replaced wholesale. I'm hoping the front suspension also becomes easier to dismantle (fresh springs and dampers going in) now that the weight of the engine is off the front.
DSC_4993.JPGDSC_5012.JPG
 
Last edited:
Not had much of an opportunity to post an update here recently, but progress continuing apace collecting various panels and spares.

Now the engine is out, I'll be going through the steering gear and master cylinders.

Question - I've always instinctively preferred the manual steering setup (especially the earlier Adwest box on my car), but I know PAS upgrades are now much more achievable using modern electric pumps. My question is how 'positive' are the PAS boxes? And how many turns lock-to-lock? I find the standard manual V8 box to be like a ship's-wheel - wooly and far too many turns. If the PAS box gives good feedback, I might consider it as an upgrade while I have enough access to pull the box out.

Thanks
DSC_5014.JPG
 
Ask Johan re power steering. I believe his conversion uses a Corsa electric unit in the dash..

But then again, unless you're going for 185s or above, stop being a wuss and start working out ;)
 
I'm already running 185s on V8-section wheels. But you're right - PAS is a bit... "wussy"!
The thing is I've got used to it on a couple of other classics, and the P6 is much heavier to steer than our manual-steered MGB. But then again, it's also on its original steering box, idler and ball joints. So when I've reconditioned/replaced all of them, it should be better.... But if I'm going to convert it, now is the best opportunity!

Decisions decisions..
I have an idler on the bench that I would let go, it has a tiny bit of play, but nothing to speak of, you cannot feel any in your hand.
 
I have an idler on the bench that I would let go, it has a tiny bit of play, but nothing to speak of, you cannot feel any in your hand.
It'll almost certainly be better than mine then! I'll PM you now.

I'd like to recon a separate one to the one of the car so as to keep the base unit relatively 'moveable' in the meantime. I haven't opened one to work out how to recon them, but I assume they're just a big tube of some sort of yellow metal with a big fat swivel pin through it and some vanes on the end. I have a good machine shop likes little jobs like that
I had another re built, the shop used 3 small end bushes they happened to have that worked.
 
I haven't opened one to work out how to recon them, but I assume they're just a big tube of some sort of yellow metal with a big fat swivel pin through it and some vanes on the end. I have a good machine shop likes little jobs like that

There's a thick plate sat on top with some small valves in it - mine was covered in a grey sludge.

IMG_0854.jpg

Remove the plate and O ring, clean up and it looks like this

IMG_0856.jpg
 
There's a thick plate sat on top with some small valves in it - mine was covered in a grey sludge.

Thanks - that's useful to see. I've sourced one from cobraboy of this parish, and will be taking that and the steering box down to AutoSteer in Chester for inspection and reconditioning as required. I'm hoping I can get successful results with the steering box, as the current one is very vague in the dead-ahead.
 
I've only gone and found the right shade of red haven't I?!

A few weeks ago I had a scuttle panel painted up as an example piece of work by a local paint shop. But the colour I'd settled on turned out to be far too bright on the panel....

Got the scuttle panel back from the painters today. Very impressed with their workmanship and happy with the finish [...] My only sticking point is the colour. It looked great on the swatches, and even better on the panel in isolation, but when the panel is put on the car in direct sunlight, it looks too far into the blood orangey end of the red spectrum (very similar to Monza red), and I want a cherry-ish shade.

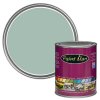
Well after much hunting, I have finally found what i'm looking for! A fellow P6 Club member has an original set of dealership swatches which includes the elusive Brigade Red. He's had it scanned by HMG paints in Manchester, who've added it to their heritage database under the code RD53. Here's a spray-off swatch of the HMG formulated paint against a boot badge, and it's exactly the shade of red I had in my head. I have also held it up against various panels on the car is different lights, and am sufficiently convinced it's what I want: cherry red with a bluey-tinged depth in the shadows, but still a very bright red in direct sunlight (unlike Richelieu). And most importantly (for me), it's looks like a Rover colour, many of which had that changeable quality in different light conditions. I feel Monza lacks this quality being too much of a straight red.
WhatsApp Image 2022-08-12 at 7.35.58 PM.jpeg

I've never been 100% sure Brigade was for me because there are so few clear photographs of original cars, and I've never seen a 'real' one in the flesh. A few years ago, Clive Annable completed a major restoration of 'XPG' ('Ol Rumbly') for a fellow forum member in 'Brigade', but I have since learned this was actually Craftmaster's "Deep Mason's Red" (596/22) coach enamel, and so not a reliable reflection of the shade. It's also so shiny, you can only see the sky when you photograph it (!!), so again I couldn't be sure it was the shade for me. But this swatch has convinced me.

I'm going to get some rattle cans made up to paint the inside of the bootlid spider brace before fitting the BMS kit, which will form the final test.

DSC_5508.JPG

The project marches on....

Michael
 
Not been on here for a while, but progress continues on the revival. Lots more parts collected, included some NOS goodies.

The big milestone this weekend was the return of the block from the machine shop.
DSC_6485.JPG
DSC_0613.jpg
It's 2048cc (+70cc over standard), blueprinted to accept +0.060" NOS hepolite pistons. The block was acid dipped (or is it alkaline?) so is spotless. It's in packing grease at the moment, but will be going into Land Rover Series 2A engine paint tomorrow, which is probably the same colour my original engine was before I repainted it silver/grey. Either way, I like this colour, so that's what it'll be.
Land-Rover-Series-2-A-Engine-Blue.jpg

The crank had been ground previously (the engine is from Stan 'Vaultsman's "Rebekah" project, circa 2014). Flywheel has also been resurfaced.
I want to get it booked in for balancing, but need to fit the later front pulley from my existing engine.

If anyone knows anything about ring gears, I'd appreciate your advice. This new engine is a late 400xxxxxG, which originally had an inertia starter. I want to fit the pre-engaged starter from the other engine (a true 446xxxxxA engine contemporary with, but not original to, the car), which of course means the pinion comes at the ring gear from the opposite side. This ring gear has a lead-in chamfer on the clutch-side. My question is did the later ring gears have a chamfer on the engine-side, or no chamfer at all? As a pre-engaged starter engages the ring-gear BEFORE turning, I can't see the necessity in a chamfer, but don't know. It's not clear from the parts catalogue either.
If there was no chamfer, I will leave this ring gear on. But if there should be, I will need to get a new ring gear and have it installed the opposite way.

Also, spigot bushes. Do they need to be reamed to size/centred after installing? And are they overkill to replace? Current bush visually looks uniform and undamaged.

I can then get the crank balanced.
 
Last edited:
I've got a NOS ringy thing in the garage.. if one is needed. It'll be in the pile of bits going up to the NEC over the weekend..
 
You can change the ring gear around on the flywheel to get the lead on the engine side to use the pre engaged starter. Some ring gears have lead on both sides.

Fit the spigot bush and check the running clearance using feeler gauges. Aim for 5 to 8 thou.
 
Fit the spigot bush and check the running clearance using feeler gauges. Aim for 5 to 8 thou.
Thanks Harvey. Stupid question, but how do I check the running tolerance with feelers? I've got a spare primary shaft to put in it, but how would I check the tolerance? They are too wide to give a proper reading, and would have to badly distorted.
 
Thanks Harvey. Stupid question, but how do I check the running tolerance with feelers? I've got a spare primary shaft to put in it, but how would I check the tolerance? They are too wide to give a proper reading, and would have to badly distorted.

Measure your primary shaft spigot and the spigot on your gearbox. Hopefully they will be the same, if not you have to account for the difference in the calculation. Then put feeler gauges in between the shaft and the bush. You will Muller the feelers a bit, so don't use your best 100 quid Snap-On set.
 
You will Muller the feelers a bit, so don't use your best 100 quid Snap-On set.
Gotcha, thanks. I figured I might have to bend a feeler to fit but just wanted to check I wasn't missing a trick.

Got a new bush on order. I assume the old one will need tapping to pull out? I might get the balancing shop to do it while it's there.
 
Back
Top