

You are using an out of date browser. It may not display this or other websites correctly.
You should upgrade or use an alternative browser.
You should upgrade or use an alternative browser.
Sparky's winter/spring/summer/autumn work
- Thread starter quattro
- Start date
arthuy said:Well done Richard,
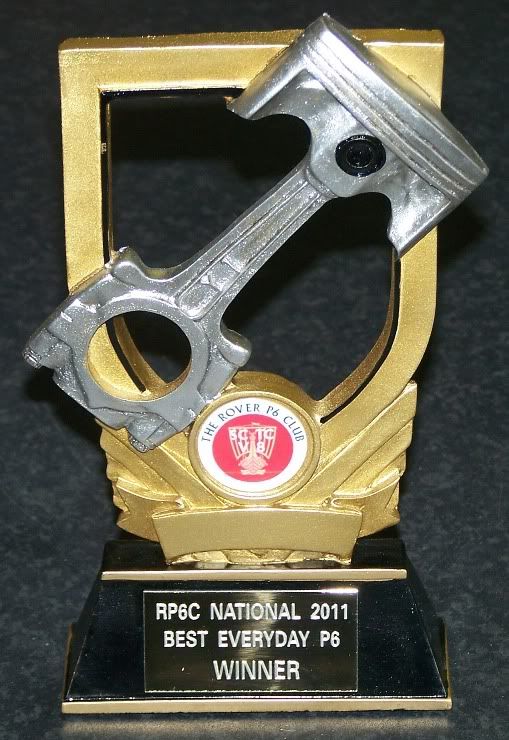
What was the trophy for?
Thanks all

It was for best everyday P6 Colin
Richard
happy days
Active Member
Having read your posts with all the work you put in, time, effort, expense and the health issues, congratulations don't seem enough so...... Bloody well done, fully deserved. Oh nearly forgot, you can't finish the post yet, one more thing you still have to do, the steering wheel
Mrs Happy Days says enjoyed the day and meeting Mrs Quattro
Mrs Happy Days says enjoyed the day and meeting Mrs Quattro
An thoroughly deserved award for all you patience, determination and hard work Richard. Well done..
Have to say, I love the badges too.
Ron.
Have to say, I love the badges too.
Ron.
Time for an update.
Sparky was quite happily taking me to work and back but was slowly developing a couple of problems.
Firstly there was a smell of burning oil and after a quick look I found was oil dripping onto the exhaust from the gearbox. I topped it up before going down to Dorset and was shocked to have to put in 600ml to fill it to the correct level. That’s after about 800 miles. I could have just topped it up and continued driving around for a while, but Greenpeace started following me around cleaning sea birds :shock:
Secondly, just now and again the fuel pressure would drop to nil. The first couple of times, it was quite low on fuel, and I thought I had run out, so pulled the reserve and the pressure came back up. Then it dropped with over a ¼ of a tank. I found that I could get it back by pulling the reserve out and in a couple of times, so a blockage somewhere?
So, he’s back on the ramps and coming apart slowly.
Now, this winter I was intending to some work anyway, so I have just started early. The list so far is:
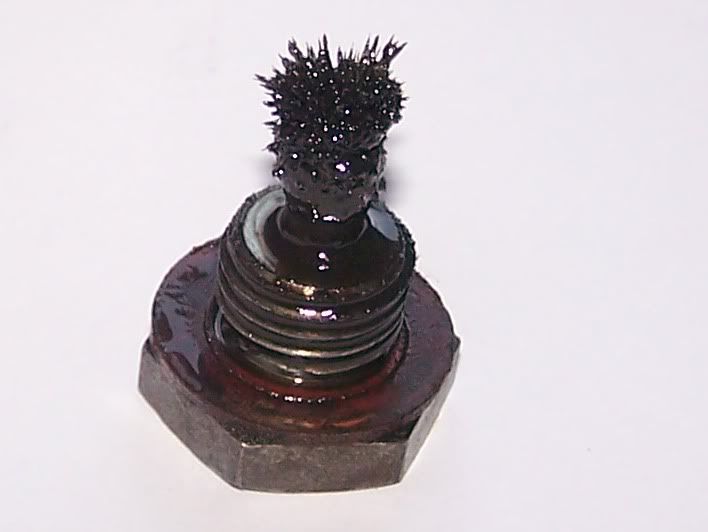
Strip gearbox and rebuild. Just after I bought the car I changed the oil in the gearbox and found the drain plug magnet looking like a Christmas tree, and now with the leaking it has to be done.
Rebuild heater. Top flap isn’t working and flaps need foam replaced.
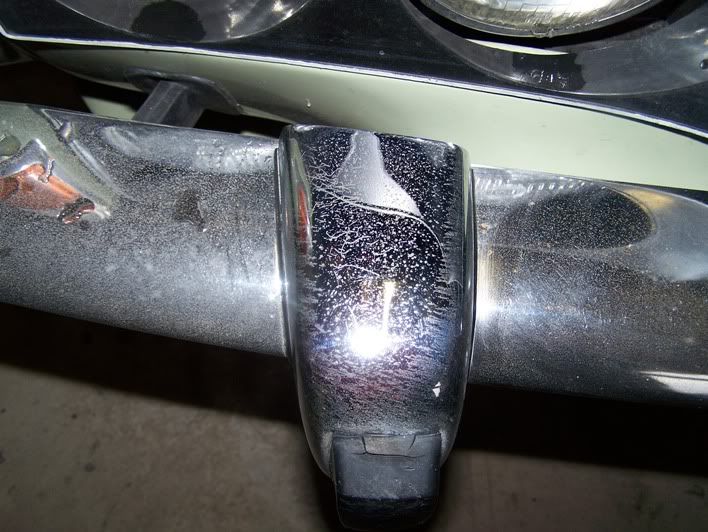
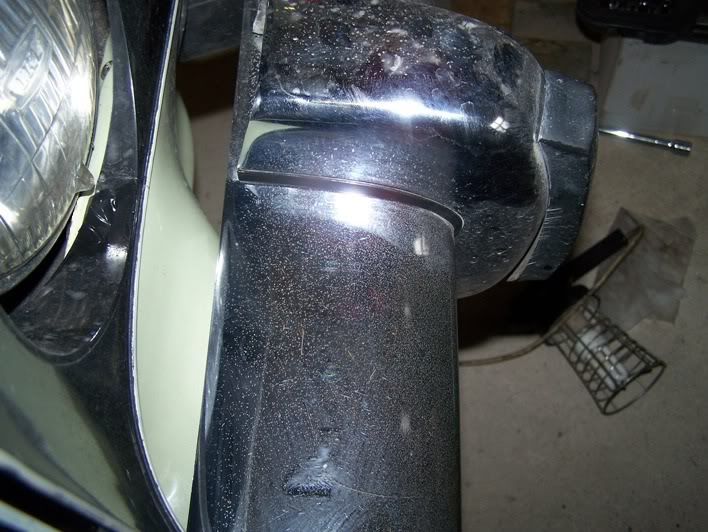
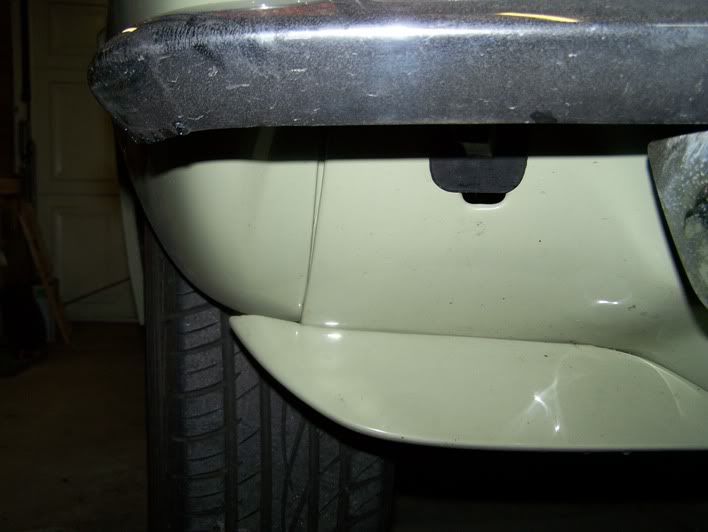
Chrome is quite bad in close up so will be re-chromed at Prestige in Wath. Been quoted £400.00 for the lot and I have heard good things about their work? We’ll see, sounds very good value if it’s as good as I am told. This is NOT Sparky's original bumper as it was twisted when I bought him and bought the bumper and over-riders from ebay.
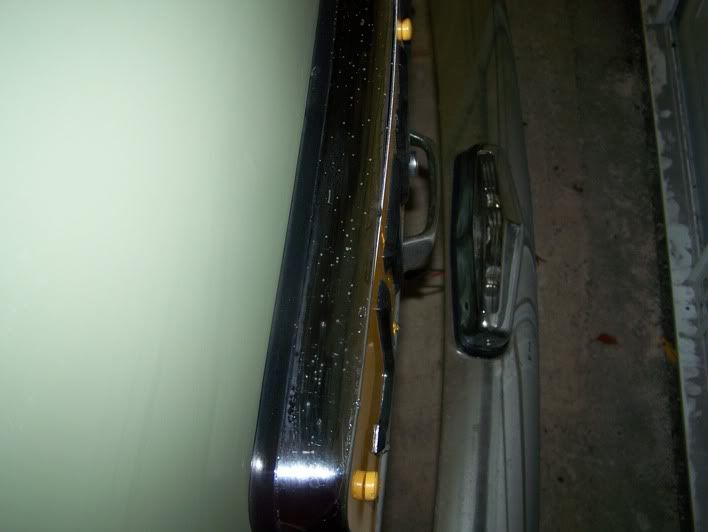
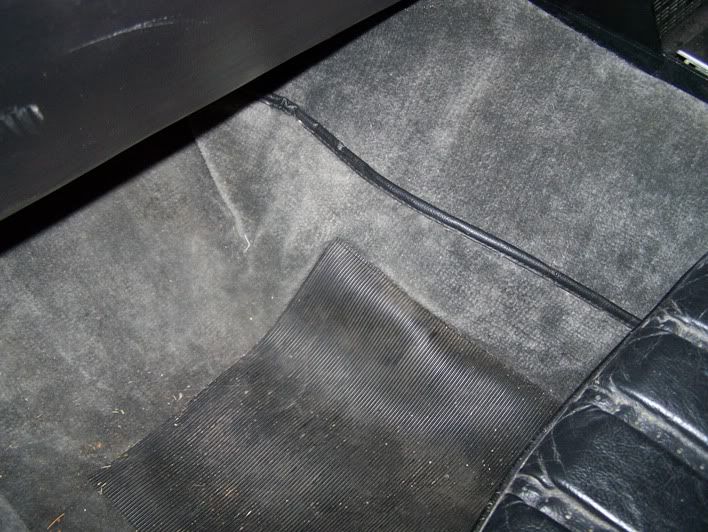
Vinyl has split on the roof and quarter panels have a bit of rot. The state of the roof (dirt and dust) comes from the area where I work. Everything gets covered in crap down there.
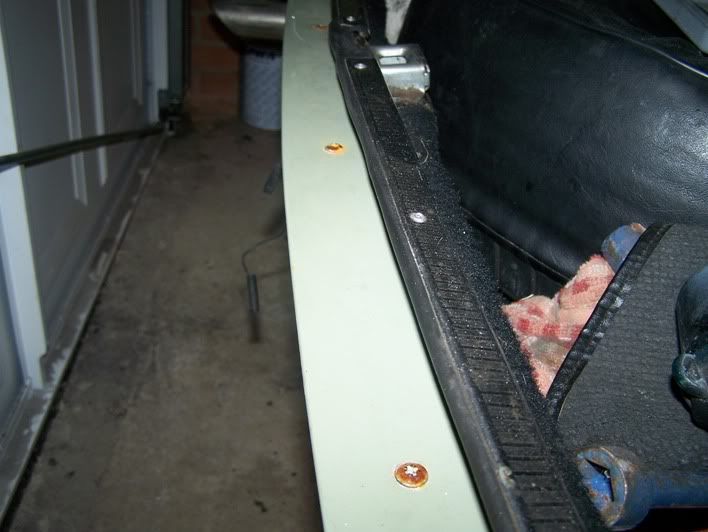
The very smart black flanged screws I got for the rear valance turned brown the first time a cloud went over, so they will have to be replaced.
Windscreen has a crack in it, and is still sporting damage from the vandals, so new one on the way.
Carpets are designed for the manual and Sparky was originally an auto, so will have to be cut down and re-stitched. That will teach me to buy carpets from ebay.
Spoilers don’t fit as well as they did before replacing the front wings and valance. The wing/valance joint is a bit out of alignment as well so a bit of fettling required.
And (I can’t believe I haven’t done this yet) I need to strip down the wiper motor as I have to turn it to delay to get it to stop.
That’s all I can think of at the moment, although I am sure there will be more.
Richard
Sparky was quite happily taking me to work and back but was slowly developing a couple of problems.
Firstly there was a smell of burning oil and after a quick look I found was oil dripping onto the exhaust from the gearbox. I topped it up before going down to Dorset and was shocked to have to put in 600ml to fill it to the correct level. That’s after about 800 miles. I could have just topped it up and continued driving around for a while, but Greenpeace started following me around cleaning sea birds :shock:
Secondly, just now and again the fuel pressure would drop to nil. The first couple of times, it was quite low on fuel, and I thought I had run out, so pulled the reserve and the pressure came back up. Then it dropped with over a ¼ of a tank. I found that I could get it back by pulling the reserve out and in a couple of times, so a blockage somewhere?
So, he’s back on the ramps and coming apart slowly.
Now, this winter I was intending to some work anyway, so I have just started early. The list so far is:
Strip gearbox and rebuild. Just after I bought the car I changed the oil in the gearbox and found the drain plug magnet looking like a Christmas tree, and now with the leaking it has to be done.
Rebuild heater. Top flap isn’t working and flaps need foam replaced.
Chrome is quite bad in close up so will be re-chromed at Prestige in Wath. Been quoted £400.00 for the lot and I have heard good things about their work? We’ll see, sounds very good value if it’s as good as I am told. This is NOT Sparky's original bumper as it was twisted when I bought him and bought the bumper and over-riders from ebay.
Vinyl has split on the roof and quarter panels have a bit of rot. The state of the roof (dirt and dust) comes from the area where I work. Everything gets covered in crap down there.
The very smart black flanged screws I got for the rear valance turned brown the first time a cloud went over, so they will have to be replaced.
Windscreen has a crack in it, and is still sporting damage from the vandals, so new one on the way.
Carpets are designed for the manual and Sparky was originally an auto, so will have to be cut down and re-stitched. That will teach me to buy carpets from ebay.
Spoilers don’t fit as well as they did before replacing the front wings and valance. The wing/valance joint is a bit out of alignment as well so a bit of fettling required.
And (I can’t believe I haven’t done this yet) I need to strip down the wiper motor as I have to turn it to delay to get it to stop.
That’s all I can think of at the moment, although I am sure there will be more.
Richard
JVY said:The very smart black flanged screws I got for the rear valance turned brown the first time a cloud went over, so they will have to be replaced
Put lovely stainless on mine Richard.
I like the contrast of them with the paint too.
Thanks all, yep just a few small jobs.
Pic for Mick
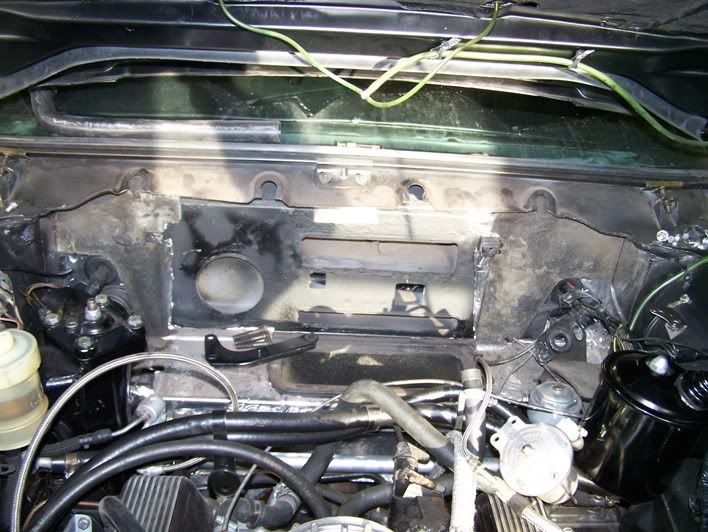
Heater is out, along with the wiper motor.
I’ve taken the sump off partially to paint it, partially to sort a small leak and partially because I wanted to have a peek inside the heart of the beast. Not sure what that gelatinous muck on the oil strainer is, I will investigate later.
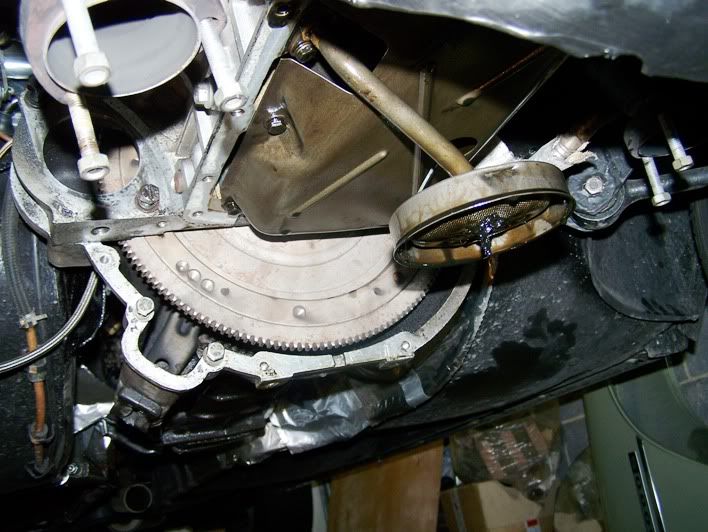
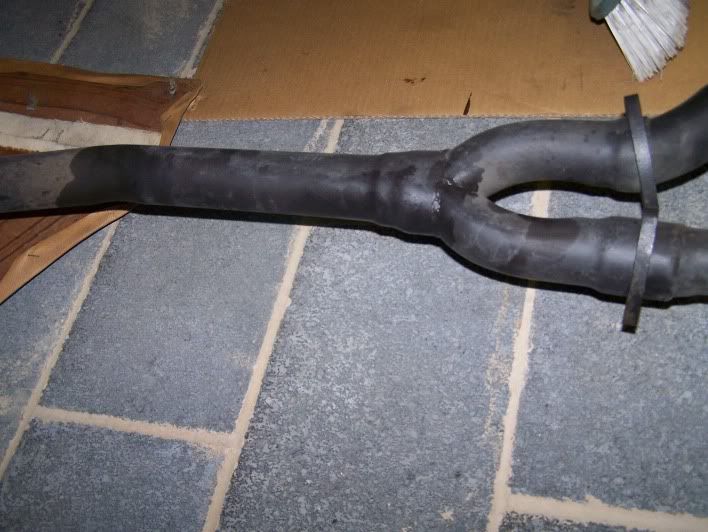
When I removed the flywheel cover plate I was surprised to see a small amount of clean oil drop to the floor. It turned out that the clutch slave cylinder was leaking quite badly. I didn’t bother looking at this when I put the car back together back in the summer as it was a fairly new bit. Just shows that you should never take anything for granted. This was obviously part of the burning oil smell, but there was red oil further back, so the gearbox still had to come out.
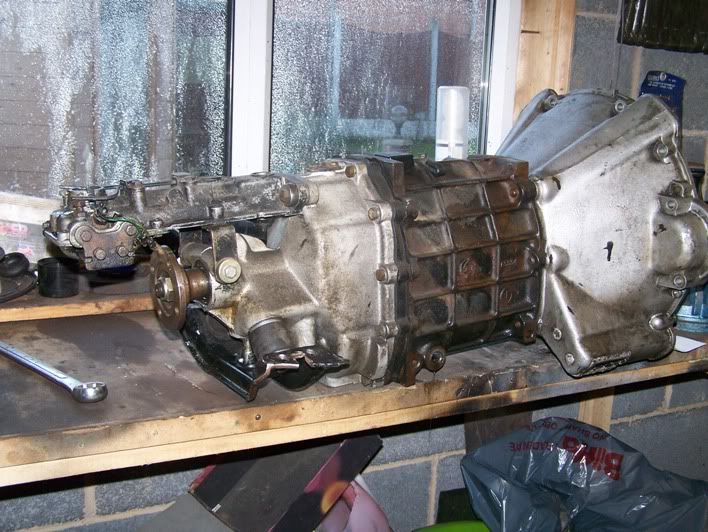
And here it is on the bench, with the final drop of oil dribbling into as bowl on the floor.
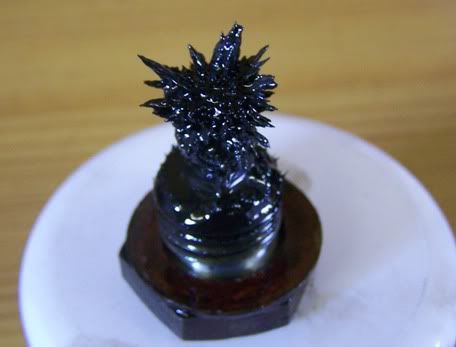
The drain plug magnet now looks like this. Not as bad as it was, but still producing swarf.
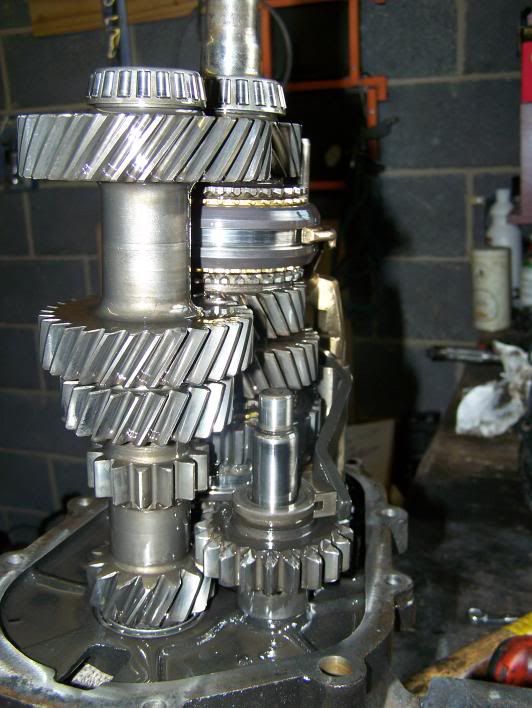
Rear cover off, nothing amiss in here.
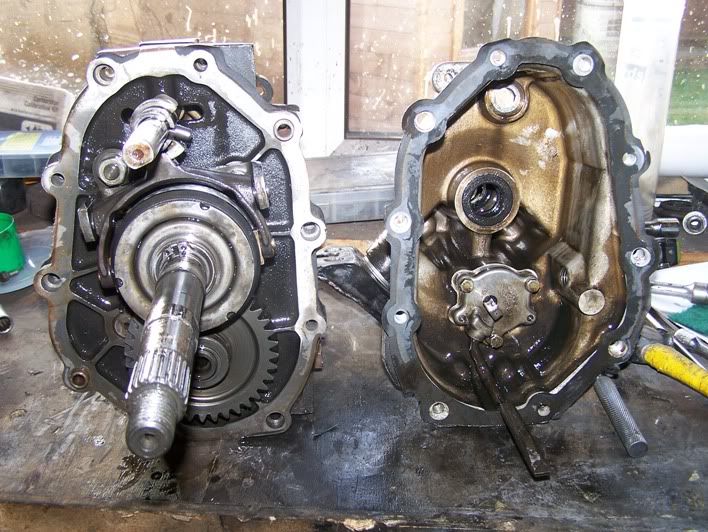
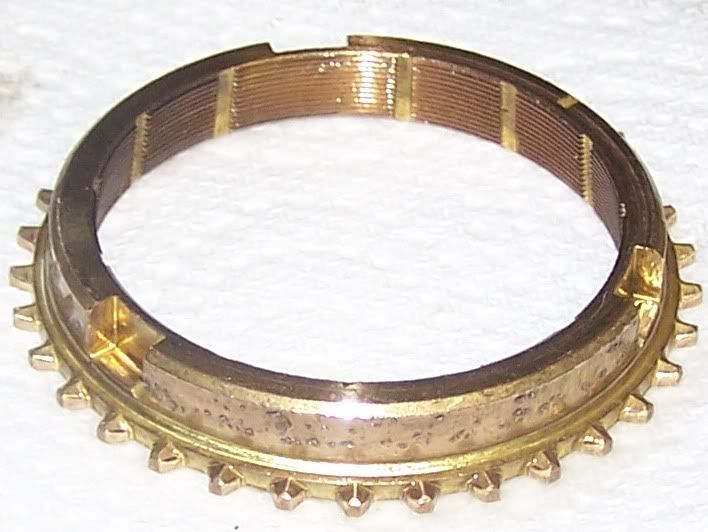
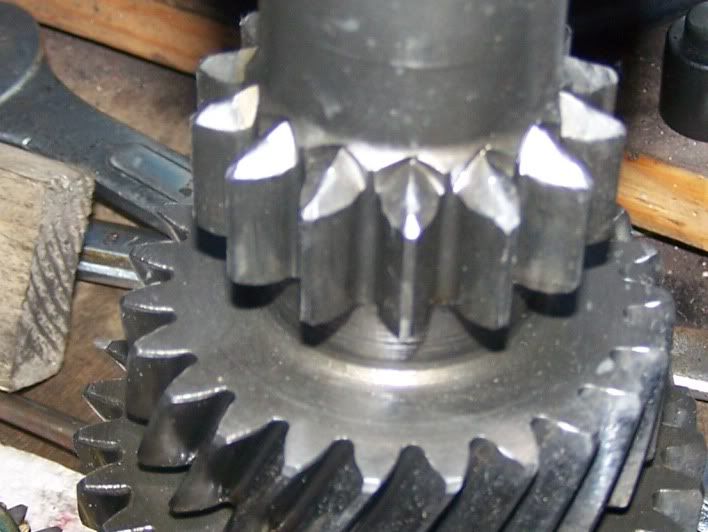
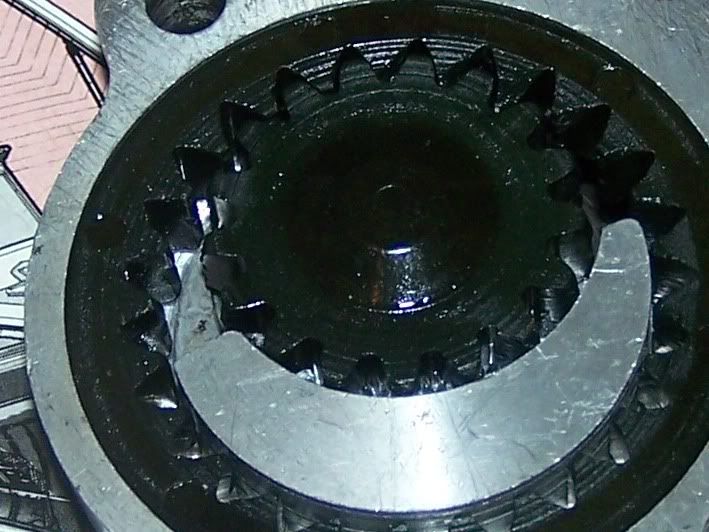
5th gear off and all looking in good condition. There are quite a few bits of it.
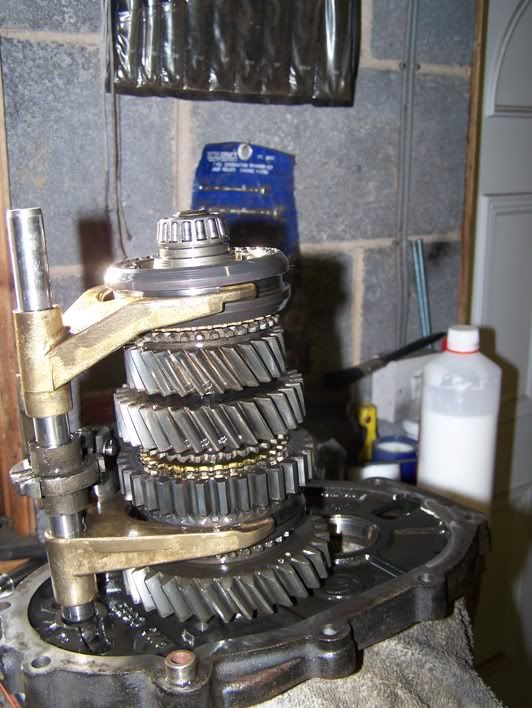
I haven’t stripped it down yet, but have had a good look at the mainshaft in situ. There are no signs of any chipped or worn gears and the only sign of anything wrong is the first gear synchro which has a lot of metal debris embedded in it.
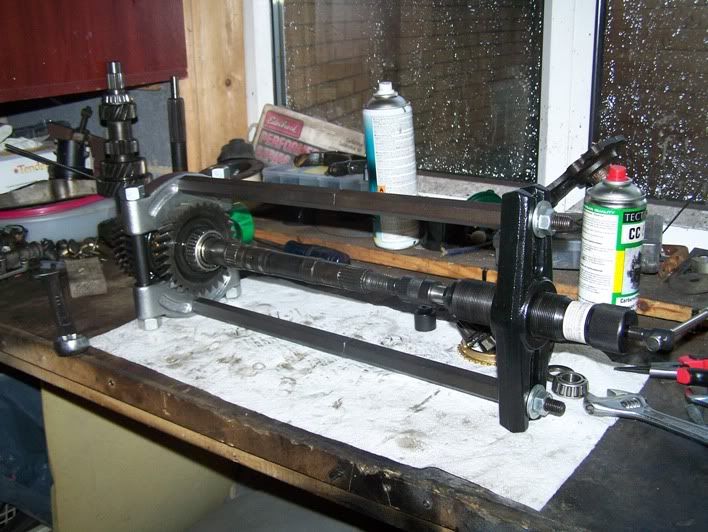
So, next job is a total strip down, clean up and examination – should be fun.
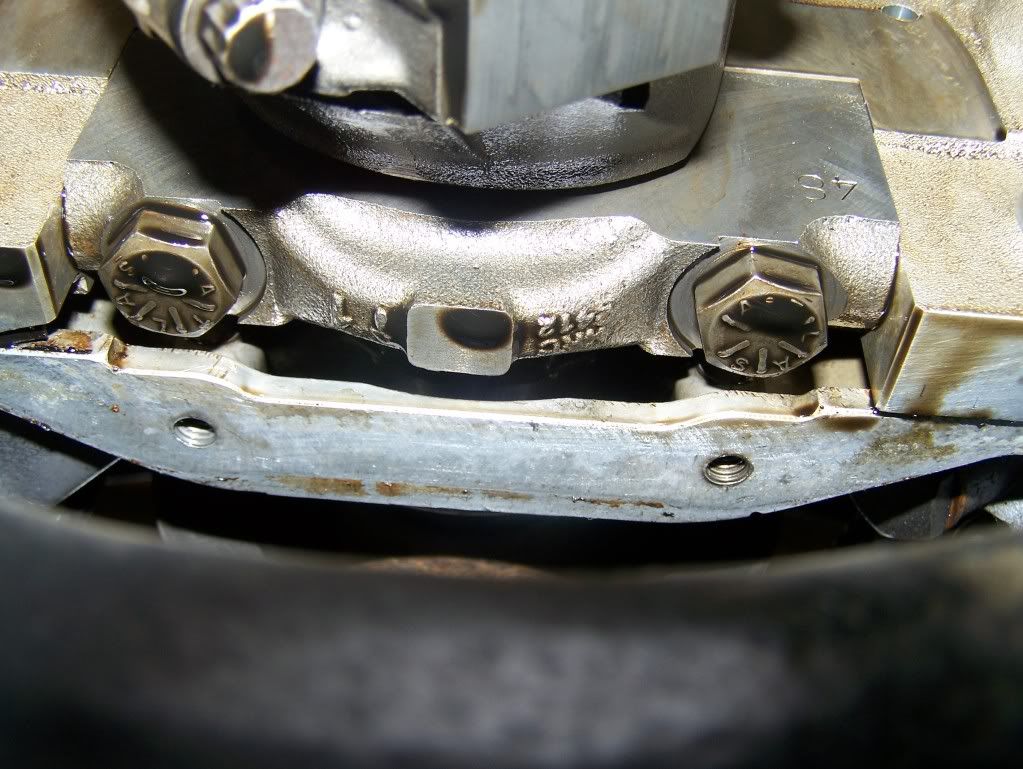
Took a pic of the main bearing cap when under there. This is what the cross bolted main cap looks like.
Richard
Pic for Mick
Not quite sure Dave, I’m going to have a look thoughDaveHerns said:Is that a bit of synchro hub on the gearbox drain plug magnet ?
Heater is out, along with the wiper motor.
I’ve taken the sump off partially to paint it, partially to sort a small leak and partially because I wanted to have a peek inside the heart of the beast. Not sure what that gelatinous muck on the oil strainer is, I will investigate later.
When I removed the flywheel cover plate I was surprised to see a small amount of clean oil drop to the floor. It turned out that the clutch slave cylinder was leaking quite badly. I didn’t bother looking at this when I put the car back together back in the summer as it was a fairly new bit. Just shows that you should never take anything for granted. This was obviously part of the burning oil smell, but there was red oil further back, so the gearbox still had to come out.
And here it is on the bench, with the final drop of oil dribbling into as bowl on the floor.
The drain plug magnet now looks like this. Not as bad as it was, but still producing swarf.
Rear cover off, nothing amiss in here.
5th gear off and all looking in good condition. There are quite a few bits of it.
I haven’t stripped it down yet, but have had a good look at the mainshaft in situ. There are no signs of any chipped or worn gears and the only sign of anything wrong is the first gear synchro which has a lot of metal debris embedded in it.
So, next job is a total strip down, clean up and examination – should be fun.
Took a pic of the main bearing cap when under there. This is what the cross bolted main cap looks like.
Richard
Hi Richard,
The gelatinous goo on the oil strainer is likely to be some form of silastic which has come away from where it has been used,... water pump, sump gasket etc.
The main bearing caps are huge compared to those on the non cross bolted engines, and especially to those on the P6B.
Ron.
The gelatinous goo on the oil strainer is likely to be some form of silastic which has come away from where it has been used,... water pump, sump gasket etc.
The main bearing caps are huge compared to those on the non cross bolted engines, and especially to those on the P6B.
Ron.
vaultsman
Well-Known Member
quattro said:So, next job is a total strip down, clean up and examination – should be fun.
Richard
I'll watch this with interest Richard...and hope I never have to refer to this thread!
Sure you'll have done some research but when I was casting about early this year for all things LT77, I found >this thread<
May, or may not, be of use to you - but good luck with the job.
Cheers,
unstable load
Well-Known Member
The fuzz on your magnetic plug is probably a bit of fair wear and tear, but also most likely the majority of it will be from the input bearing, if my old box is anything to go by.
Clean all the oil galleries really well and replace the pump gear while you are in there.
Clean all the oil galleries really well and replace the pump gear while you are in there.
happy days
Active Member
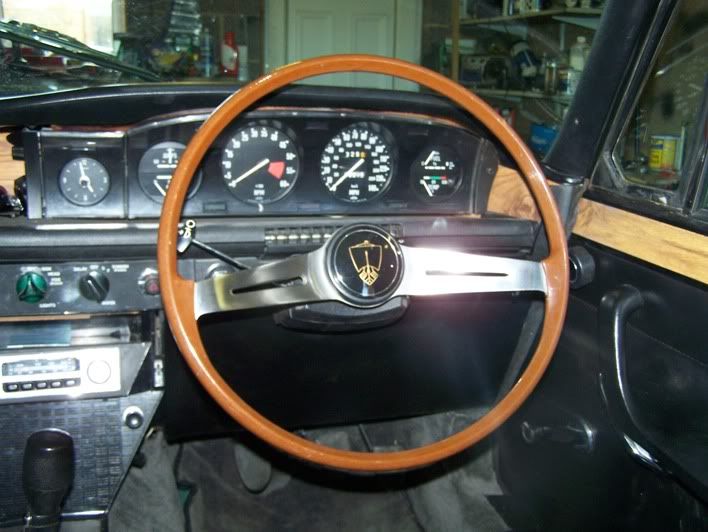
Richard Please remove the pic of the steering wheel as I keep having to close my eyes when looking through your posts. I'm not at all jealous. Honest
happy days said:Richard Please remove the pic of the steering wheel as I keep having to close my eyes when looking through your posts. I'm not at all jealous. Honest
I put that on there just for you Mick :shock:
vaultsman said:quattro said:So, next job is a total strip down, clean up and examination – should be fun.
Richard
I'll watch this with interest Richard...and hope I never have to refer to this thread!
Sure you'll have done some research but when I was casting about early this year for all things LT77, I found >this thread<
May, or may not, be of use to you - but good luck with the job.
Cheers,
Cheers Stan
I have had a good look at this site, which has a strip down of the 2wd LT77, and is excellent, being even more useful that the Haynes manual :shock:
http://www.roversd1.nl/sd1web/index.html
Click on Gearboxes.
Richard
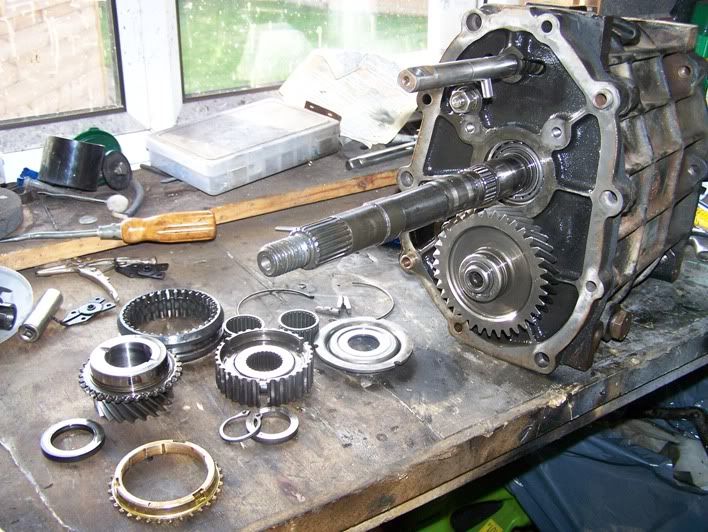
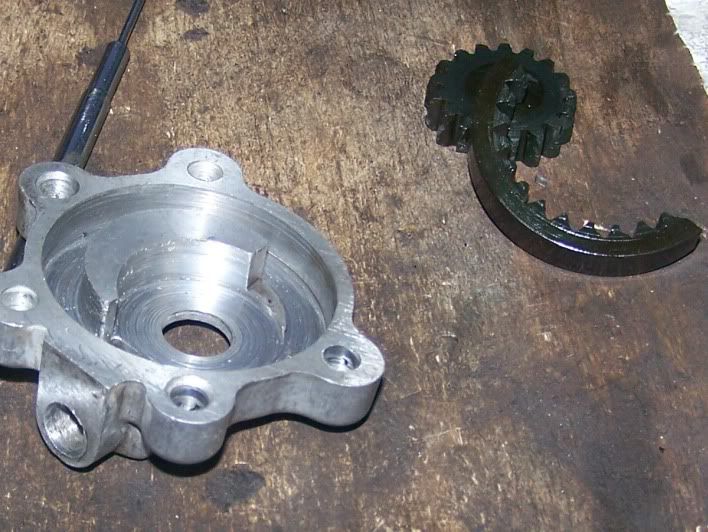
Thanks to the help of the manual (which will remain nameless) I eventually got the mainshaft stripped down.
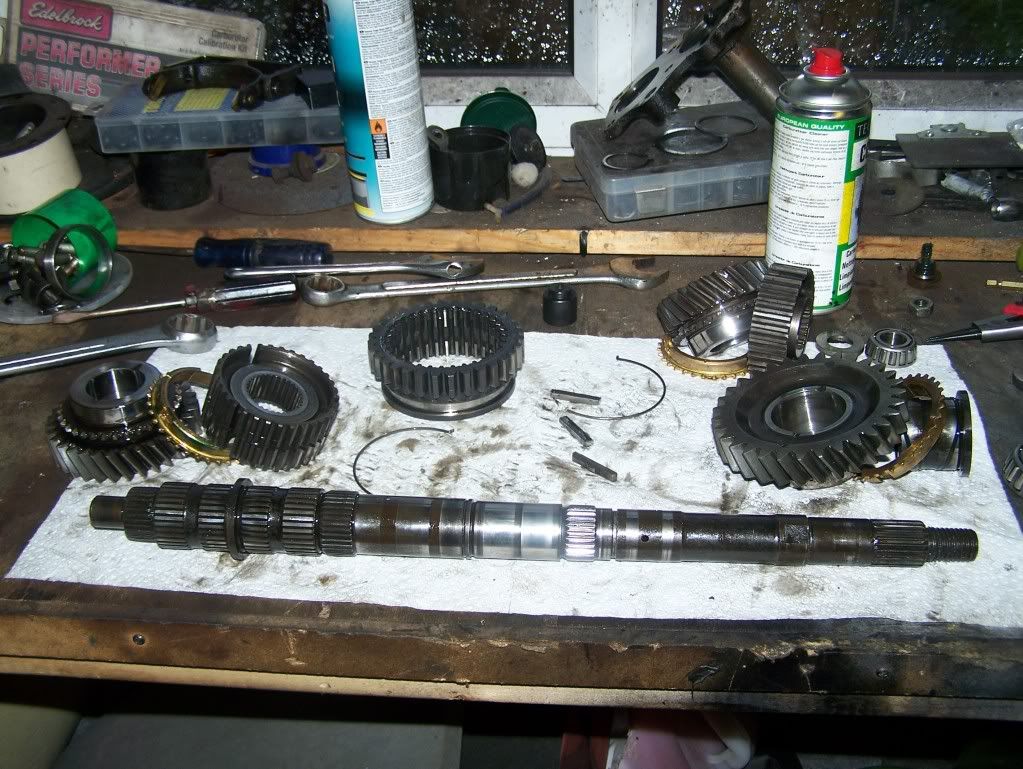
The manual said, “From the front of the mainshaft remove the pilot bearing and spacer.” Now it didn’t say how to remove it and I must admit to being clueless about it. The next picture showed how to pull off third gear and its associated bits, and lo and behold, the pilot bearing was still on there, being pulled off with it.
Then, the manual said, “Now take off the 1st/2nd gear assembly etc.” but again didn’t mention how to do it? I tried glaring at it, shaking it, gently prying at it with a screwdriver, and picking the whole thing up, holding it by the gears and banging it on the work bench.
Eventually I had to get a huge bearing puller and pull off 1st Gear.
Then tapping the end of the mainshaft on the bench whilst holding the rest of the gears etc, released everything else and the job was done.
After a very careful inspection, I did find a possible source of the metal bits, the reverse gear on the layshaft had a few small chips on it.
This really didn’t seem enough to make up for the amount that I found in the box though. After cleaning all of the gears, syncros, bearings and everything else, there was about a ¼ of a teaspoon of metal filings in the bowl. This along with the amount on the drain plug magnet (twice) seemed a little more than a few marks on the layshaft.
The gears are all fine, as are most of the bearings. The only noisy/rough one was the rearmost one on the tailshaft.
The oil pump was basically ronnied. Teeth were chipped badly.
Outer drive was in two bits and the housing was badly worn.
Although the bearings seem ok, I will replace them as I have gone this far, so need a complete set, a set of gaskets and seals, new oil pump, and the ferrasbestos (is that a real word?) oil ring as I managed to break it, and a set of the circlips.
I am slightly in the mind that I possibly didn’t need to strip this as much as this, and that smearing some sealant all over the seams may have stopped the oil leak, but never mind. I will feel better about it now that I know what’s going on in there.