

You are using an out of date browser. It may not display this or other websites correctly.
You should upgrade or use an alternative browser.
You should upgrade or use an alternative browser.
Sparky's winter/spring/summer/autumn work
- Thread starter quattro
- Start date
Have been doing a few bits but more of that later - with pics 
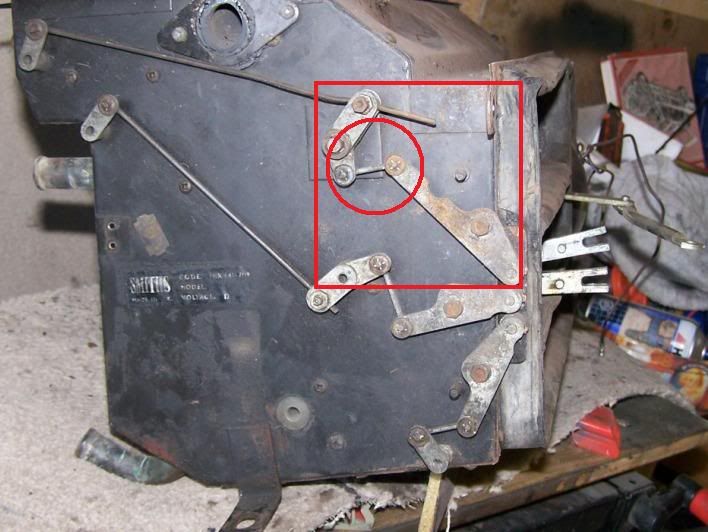
I have stripped the heater down as much as I can/want to. The right hand control (from inside the car or the upper one in the pic) which open internal flaps and the top flap has some play in it.
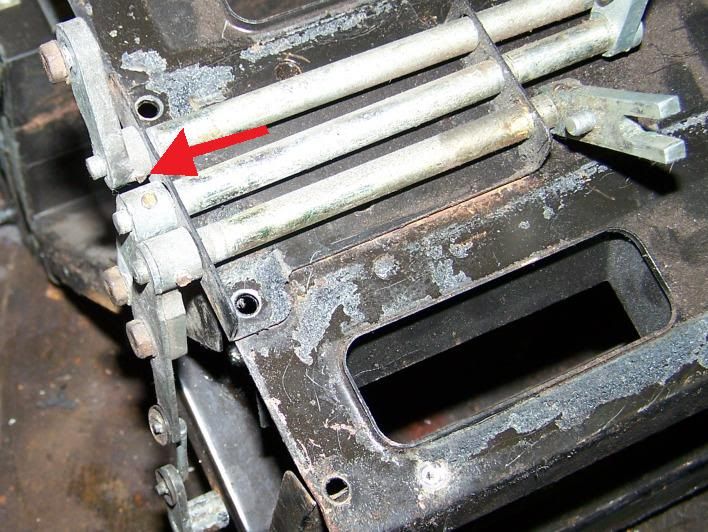
The one arrowed has (I presume) a spline and a locating pin. The lever can move around 20 degrees before the control moves, i.e. there is some internal play. Now I know this lever controls the top flap and opens the heater up to atmosphere, and then the lever continues downward (inside the car) to turn on the two stages of fan.
So is the play there to allow for this extra movement or is it as I suspect, just FUBAR?
Are the pins supposed to be there?
How do you get them out?
Why on earth did they use screws. rivets and spot welds all on the same panel?!!
If I need another one, anyone got a spare?
Richard
PS You should see what the seats look like now :shock: 8) :shock:
I have stripped the heater down as much as I can/want to. The right hand control (from inside the car or the upper one in the pic) which open internal flaps and the top flap has some play in it.
The one arrowed has (I presume) a spline and a locating pin. The lever can move around 20 degrees before the control moves, i.e. there is some internal play. Now I know this lever controls the top flap and opens the heater up to atmosphere, and then the lever continues downward (inside the car) to turn on the two stages of fan.
So is the play there to allow for this extra movement or is it as I suspect, just FUBAR?
Are the pins supposed to be there?
How do you get them out?
Why on earth did they use screws. rivets and spot welds all on the same panel?!!
If I need another one, anyone got a spare?
Richard
PS You should see what the seats look like now :shock: 8)
:shock:happy days
Active Member
I didn't have any pins in my levers, they were tapped on with a mallet. Mine also used to have play in them and it was the splines which were worn. Managed to get another heater and nicked the bits off it. If you do pull them apart try and mark the for reassembly as they are a pain to get in the right position if not marked.viewtopic.php?f=5&t=11535
I seem to have started lots of things, but not managed to finish any of them, until yesterday that is.
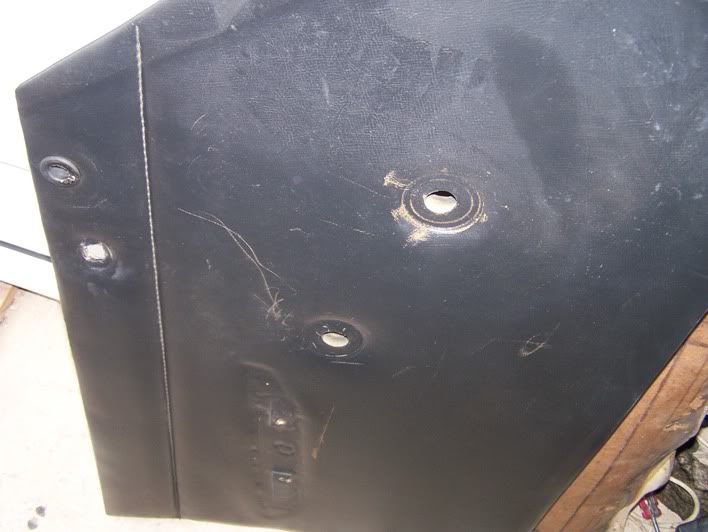
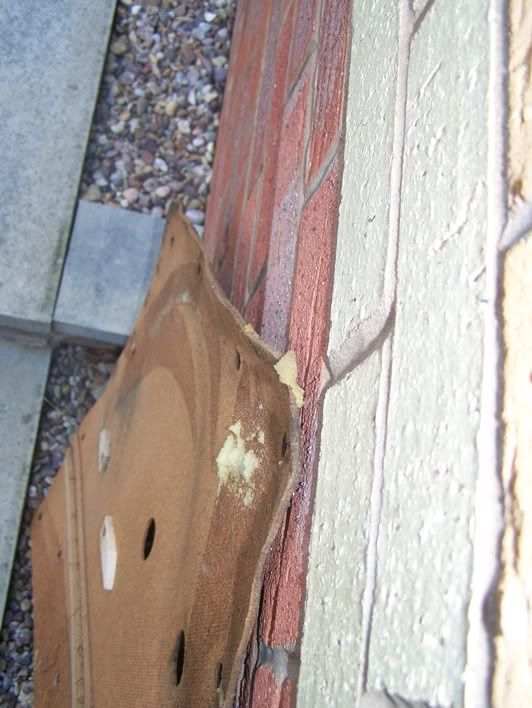
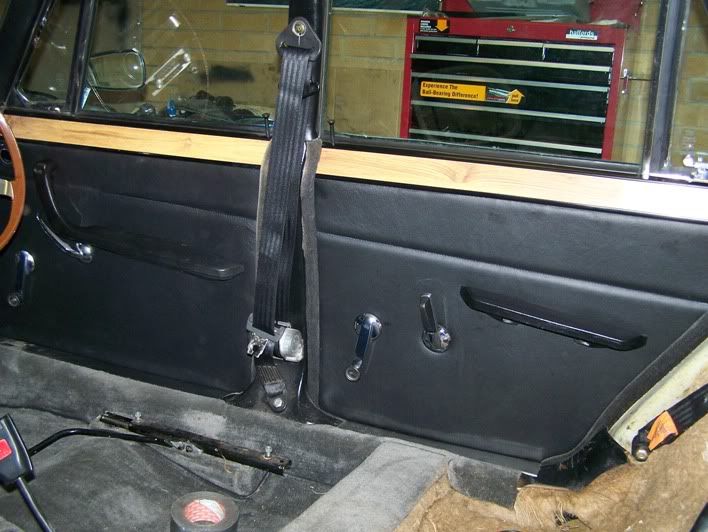
The door panels were bronze by the look of it, and had some time in the past been painted black. The gloves boxes were the same and the black leather seats I got from ebay were a lighter colour that had again been painted black. The door panels were not very hard wearing and the lightest scrape would leave a bronze scratch.
They were also a bit dishevelled and warped. So, after mangaging to get some of the money back from my op last year, I decided to have Sparky’s original seats recovered (the ones fitted when I got him, but not necessarily the original seats). I also thought I would go the extra mile and have the door cards and glove boxes done as well. The seats are being done in a good quality hide leather, and the cards etc in an 'off the roll' leather (not quite sure how you get leather on a roll, but who am I to argue).
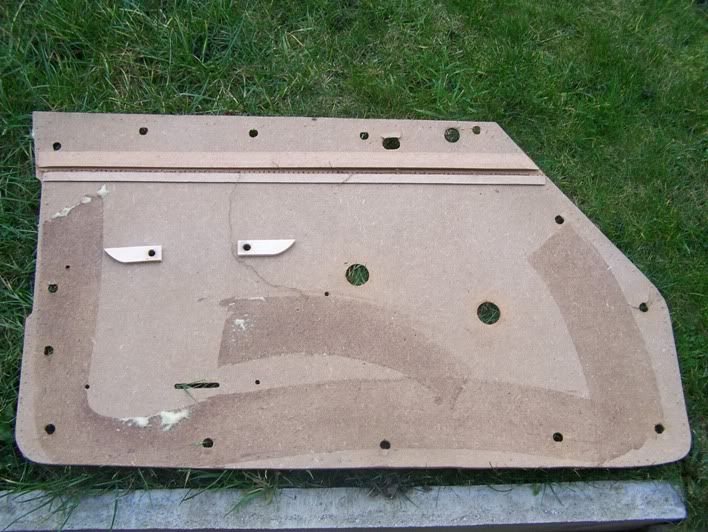
The damp had got to the old cards over the years and there were tears and clips missing.
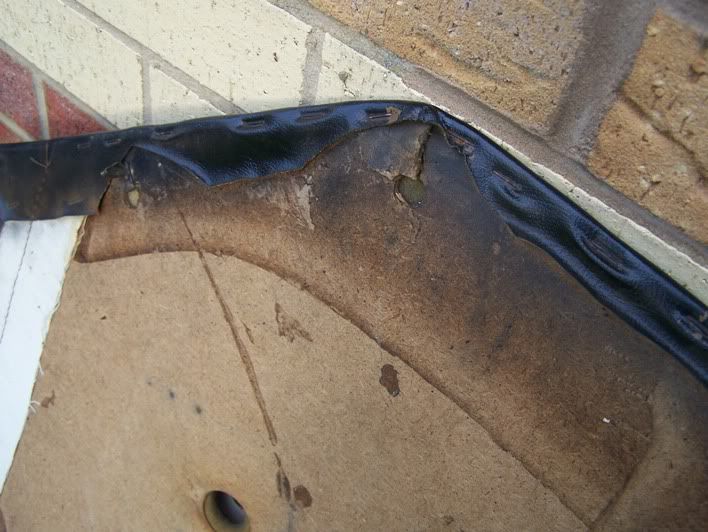
This shows how bad the warping was
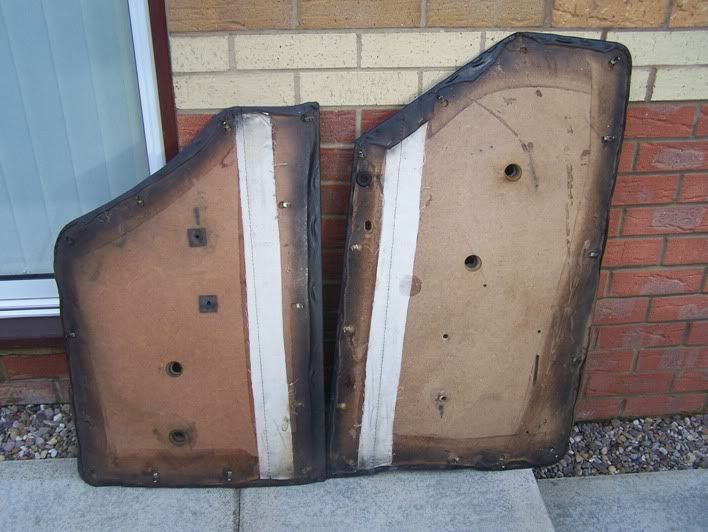
My intention was to strip them down, re use all of the formers and strengthening pads, and cut out some new cards from marine grade ply.
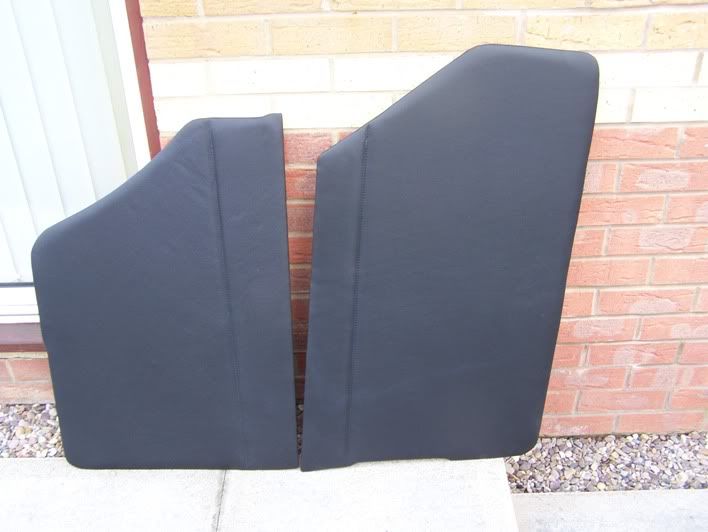
The car trimmer who was doing the retrim said he had the equipment to cut the new ones out better than me so he got the job. They arrived back all new and smelling of leather : cool :
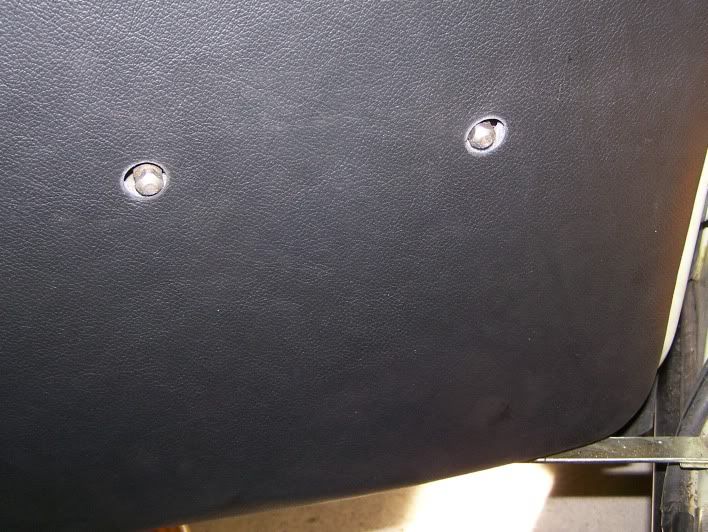
I had to fit all of the clips, then fit them to the doors, mark where the holes should be and then remove them and cut the holes out. I got it fairly close
The door pulls are not brilliant, but that can be sorted next year if I feel like it. Just need a clean then I am ready for the seats – which are late back due to illness of the trimmer
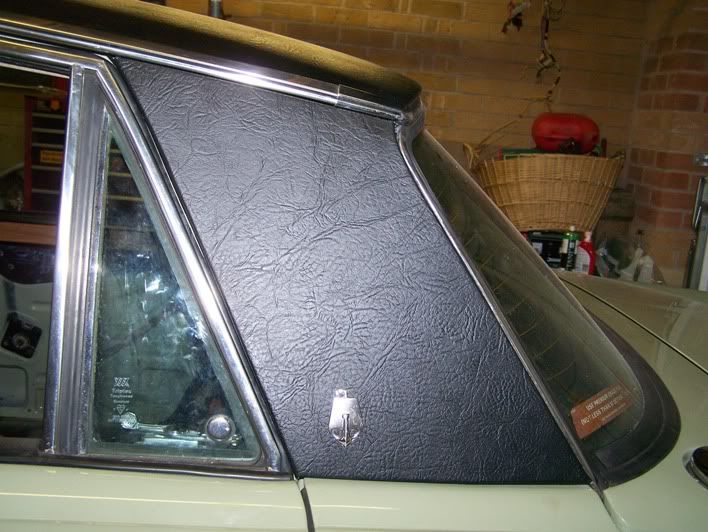
I have finished the quarter panels, after cutting out some rot and welding a new corner into one of them. Then vinyl on and fitted to car. All pics are at work so more of that when I remember to bring the memory card home.
Oh, and the chrome arrived back early
Next job, finish off the heater and refit.
The door panels were bronze by the look of it, and had some time in the past been painted black. The gloves boxes were the same and the black leather seats I got from ebay were a lighter colour that had again been painted black. The door panels were not very hard wearing and the lightest scrape would leave a bronze scratch.
They were also a bit dishevelled and warped. So, after mangaging to get some of the money back from my op last year, I decided to have Sparky’s original seats recovered (the ones fitted when I got him, but not necessarily the original seats). I also thought I would go the extra mile and have the door cards and glove boxes done as well. The seats are being done in a good quality hide leather, and the cards etc in an 'off the roll' leather (not quite sure how you get leather on a roll, but who am I to argue).
The damp had got to the old cards over the years and there were tears and clips missing.
This shows how bad the warping was
My intention was to strip them down, re use all of the formers and strengthening pads, and cut out some new cards from marine grade ply.
The car trimmer who was doing the retrim said he had the equipment to cut the new ones out better than me so he got the job. They arrived back all new and smelling of leather : cool :
I had to fit all of the clips, then fit them to the doors, mark where the holes should be and then remove them and cut the holes out. I got it fairly close
The door pulls are not brilliant, but that can be sorted next year if I feel like it. Just need a clean then I am ready for the seats – which are late back due to illness of the trimmer
I have finished the quarter panels, after cutting out some rot and welding a new corner into one of them. Then vinyl on and fitted to car. All pics are at work so more of that when I remember to bring the memory card home.
Oh, and the chrome arrived back early
Next job, finish off the heater and refit.
happy days
Active Member
Looks good, did the trimmer use ply ? How is the fit ?
happy days said:Looks good, did the trimmer use ply ? How is the fit ?
I picked up a load of caravan ply which has a very good water resistance a little while ago and he used that.
The fit was as good as all the other panels on the P6 :shock: so needed a little fettling. It took most of yesterday to fit them all and by the end of it I was glad when I'd had enough of it
They actually look better than the photos though so very pleased.
Richard
adamhotrod
New Member
I can't wait to see this interior all back together. I know you didn't set out to necessarily have a top class car but it certainly looks like it's going that way... lucky old Sparky!
adamhotrod said:I can't wait to see this interior all back together. I know you didn't set out to necessarily have a top class car but it certainly looks like it's going that way... lucky old Sparky!
Me too Adam, and no, I never set out to go concours, and Sparky will never be concours, but it is looking very nice
I have a problem at the moment with the heater controls. If you look at the area inside the square, the control arm moves in a clockwise arc and pulls on the link (in the circle) to move the little dog leg swivel, push the long link and push the top flap open. All ok so far, but if you carry on moving the control arm (by pushing the lever inside the car downwards) to start the fan, the bar cannot move as the top flap is already at the end of its travel. Curiouser and curiouser? So how does that work?
The car at the scrapyard had the same arrangement, but seems to be fitted differently.
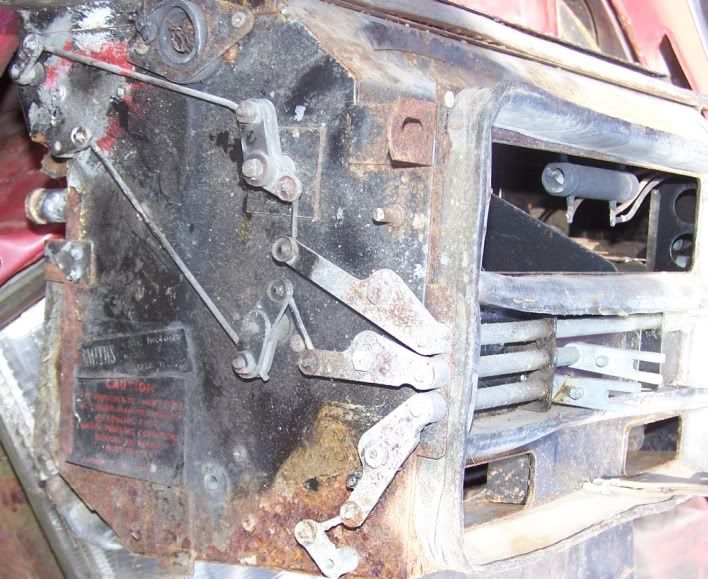
The small link in the heater is vertical to start with so opens the top flap in the same way, and as you push it further, it lines up with the dog leg and then can go past it, leaving the top flap where it was, but still allowing the fan to be used. In other words you get the necessary lost motion that is needed to get the system to work.
Try fitting Sparky's levers like this and the extended long link (connected to the top flap) hits the dog leg and locks it up before the fan comes on.
So, has it been incorrectly fitted in the past with a longer (too long) top link?
Or, are there two ways of fitting these - an old way and a new way, and I haven't worked out how the new way works?
Am I missing something obvious?
Will Mensa come round and ask for my membership card back?
Has anyone got and pics of the mechanism in its various stages of off,ram air only, first fan position, and full speed fan position?
:?
Richard
Quick the sun's out and I want to go for a drive! 8)
Cheers dave - I chopped it off and now works fine
Catch up time
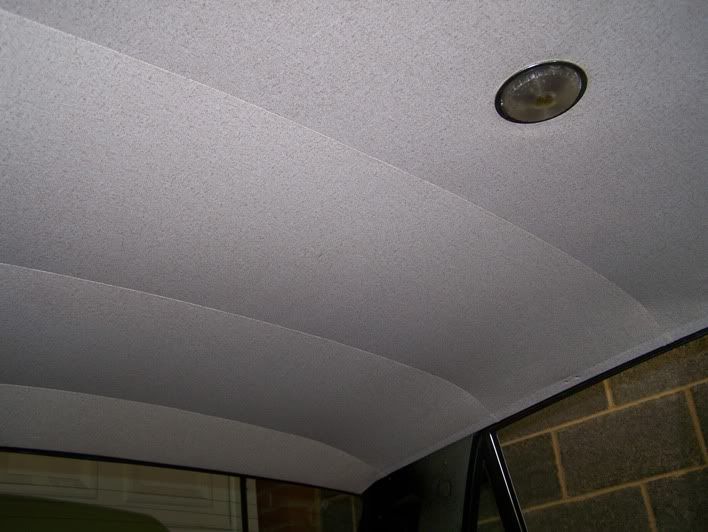
Headlining is in, after working out how to sort that pesky aerial lead, I just unplugged it from the radio and then unthreaded it from the dash, then fed it back through in the right place. Took a while but better than lifting the roof again and disturbing the sealant. I also had to patch up the split, by cutting off a spare piece from the overlap and sticking it on the back
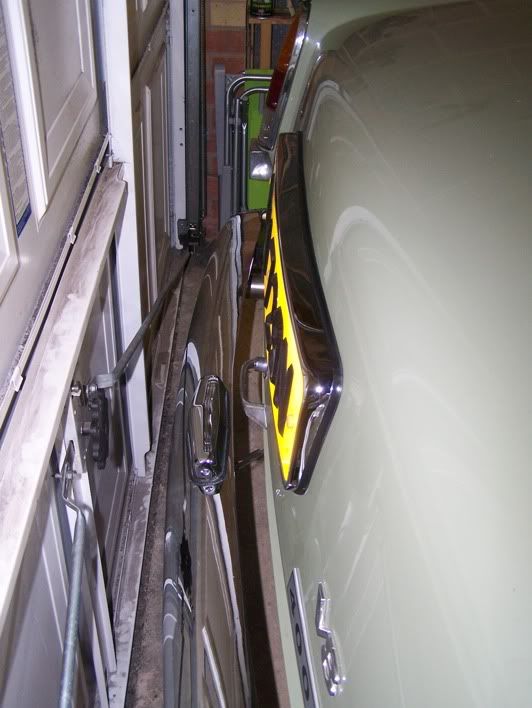
Quarter panels next. The N/S one was ok, just needed cleaning up, bit of paint and new vinyl. O/S had rusted through on the front lower corner.
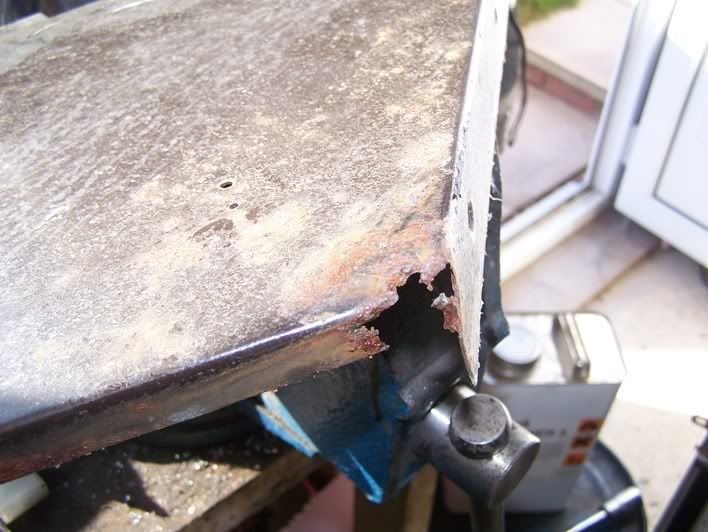
Chopped it out and welded in a new bit
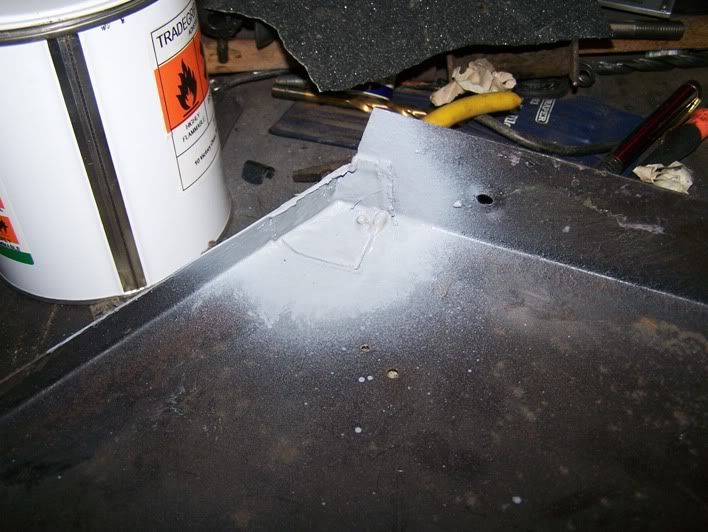
Painted them up with some spare paint I found,
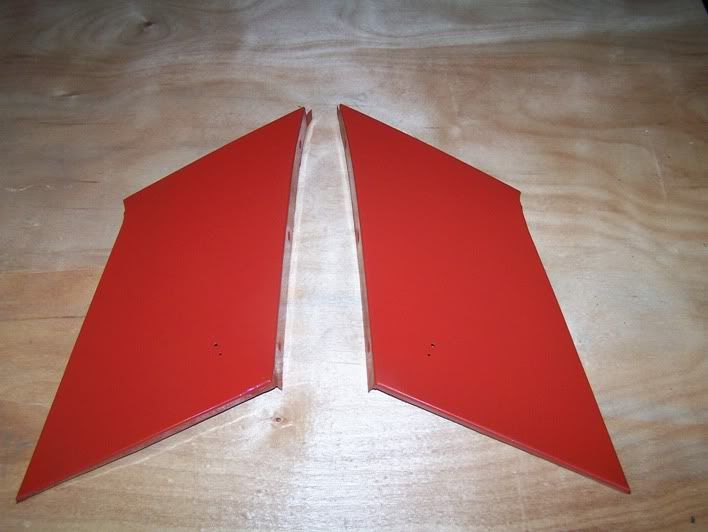
Then on with vinyl and back on the car.
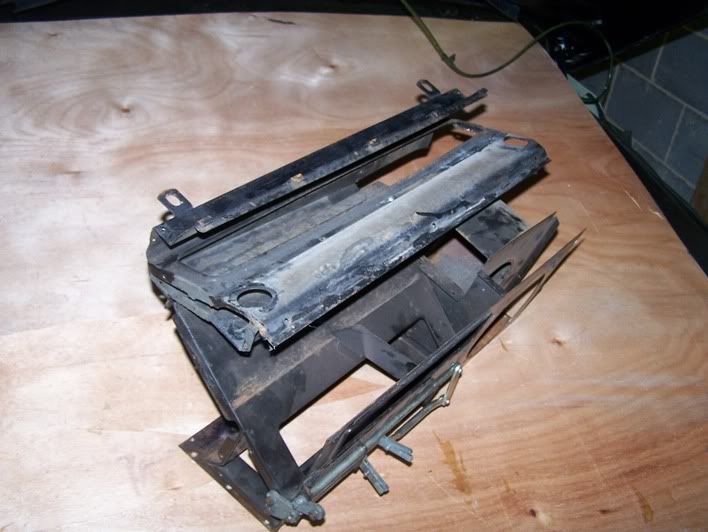
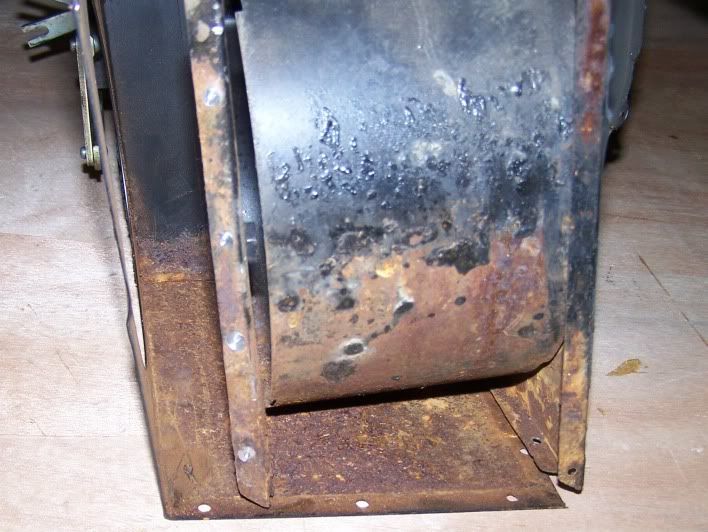
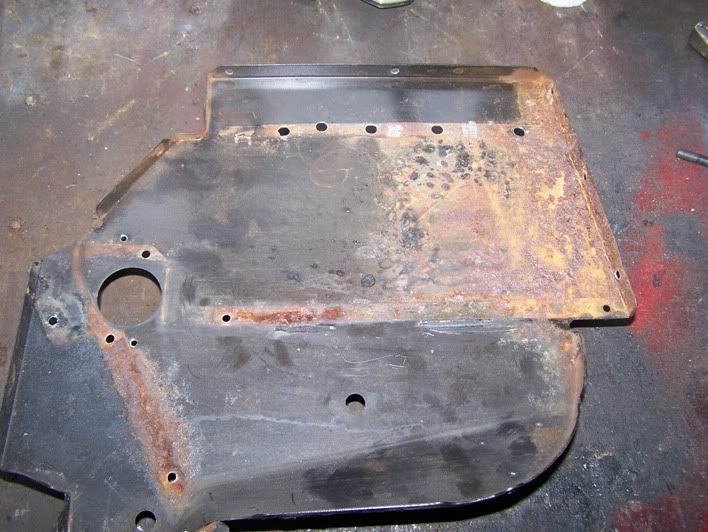
I stripped the heater down as much as I needed to, and gave the rust a good ol’ wire brushing before treating it with some converter.
There was plenty of rust to play with but no holes, so good news there.
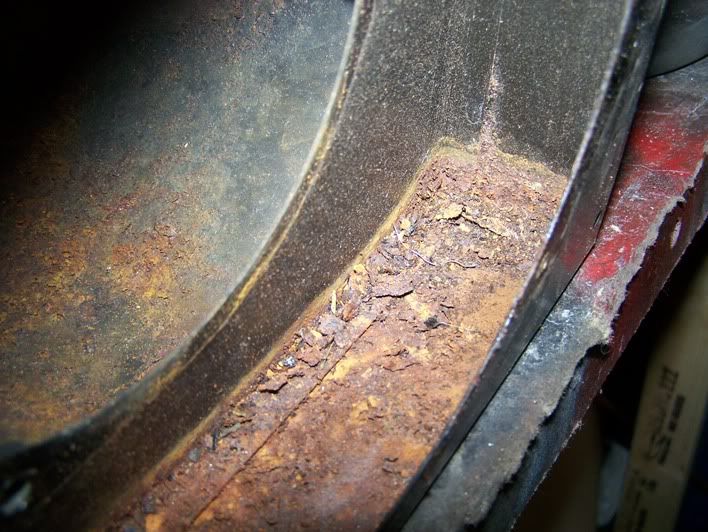
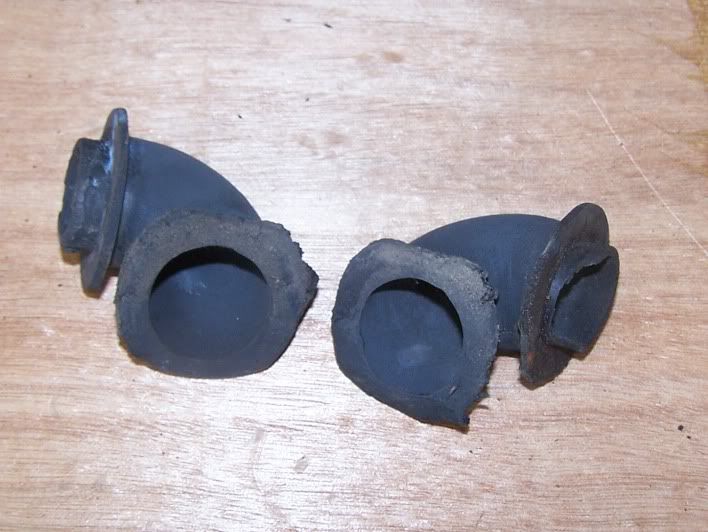
These little rubber corners were pretty much ronnied but as they are no longer available, I was careful not to break them.
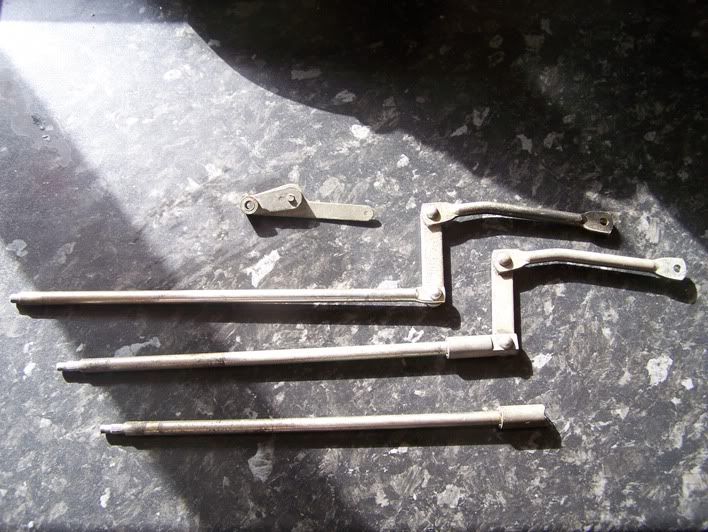
I had some fun with the control arm as the splines had gone. I drilled out the pin (which shouldn’t have been there anyway) and managed to snap the end off (top one) I managed to find one but was told that the fitting at the other end was damaged (bottom one), so I thought I could make a good one out of the two. Well, that didn’t work as they are totally different so I had to get one from the scrapyard (centre).
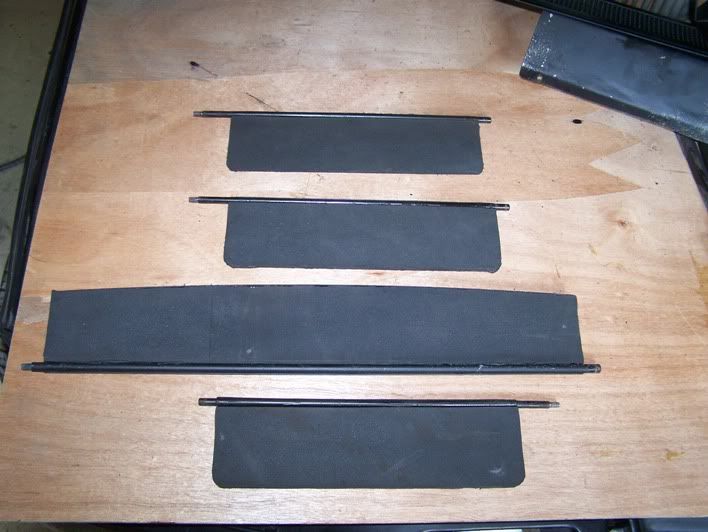
The flaps had been refoamed sometime in the past, except for the middle one which had disintegrated almost completely.
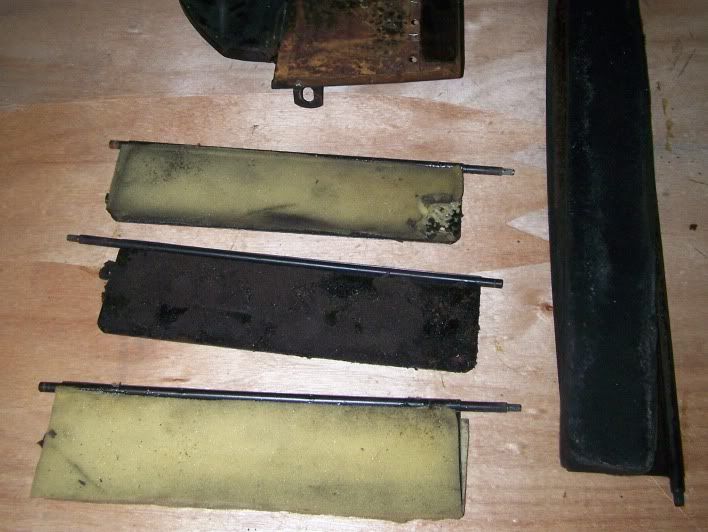
I used some mouse mat foam to refoam them. Hopefully they will last a good while now.
The control rods on the side of the heater had been repaired badly sometime in the past and one of them was too long :shock: viewtopic.php?f=7&t=12593&start=0&hilit=heater
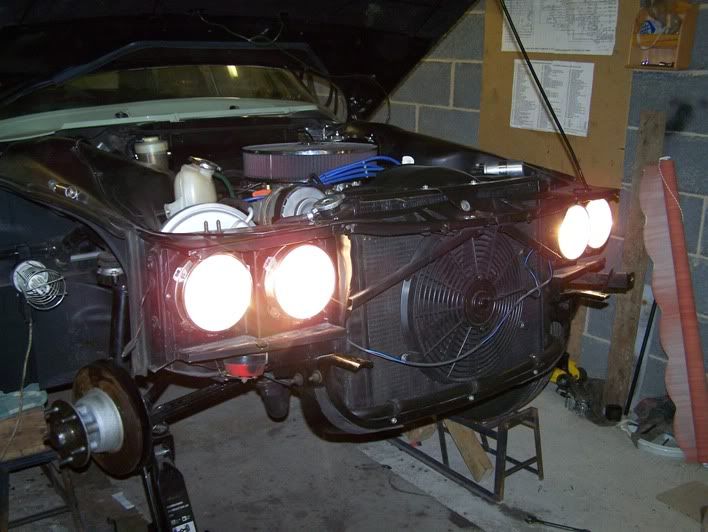
When I first got the car, the halogen headlights were fitted but didn’t always work. To make them reliable I had to fit some original sealed beam units. After the fuse box melting problem a year or so ago, I decided to fit some relays for the headlamps and try to get the halogens to work. I used the original wiring to fire the relays whilst running the power straight to the relays from the back of the light switch – from the shunt to switch wire. They are certainly a lot brighter than the sealed units so excellent result there
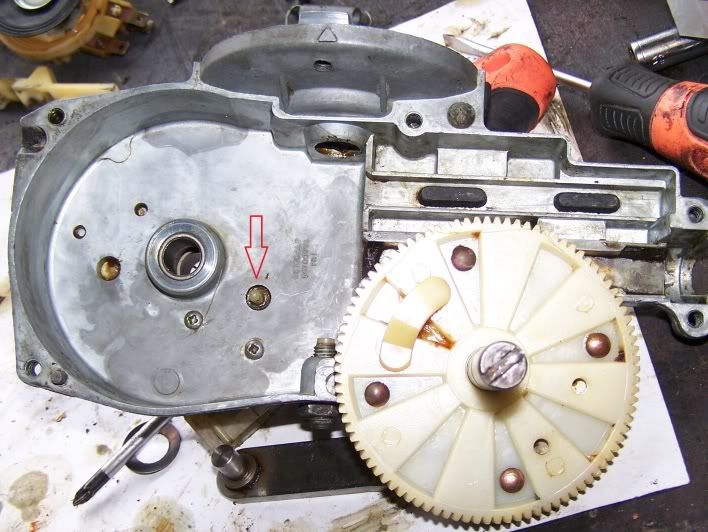
Sparky has always had a problem with the wipers. They would not ‘self park’ and could not be turned off without turning them to ‘delay’ and disconnecting the delay system from under the bonnet. So I took the motor apart. After a good clean up I found a switch (arrowed) behind the drive gear which should have been actuated by the lump on the gear wheel. The two screws were loose and allowed the switch block (inside of the plastic 5 pin plug where the power comes in) to move away from the motor so the switch wasn’t pushed in far enough.
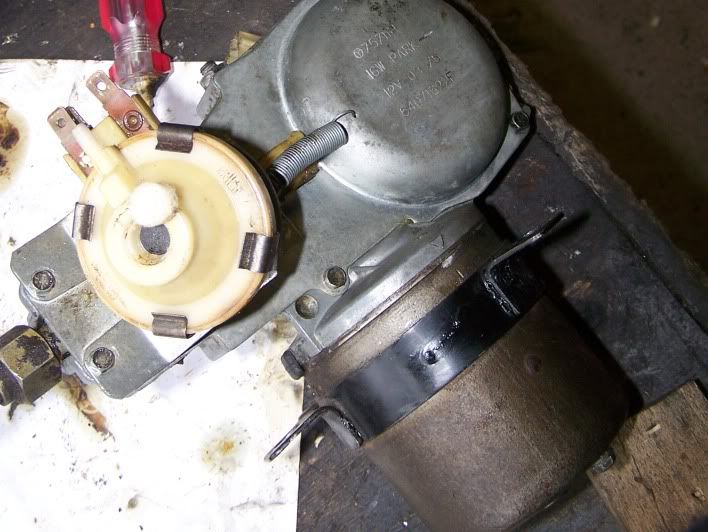
When back together I had a look for the piece of foam which is supposed to be in the delay mechanism and found a small circle of plastic and some dirt, which I suppose used to be foam. I cut out a circle of foam and dropped it in, and now it works, well to a fashion anyway. The adjuster on the steering column doesn’t work but turning to the switch to ‘delay’ gives a delay of a few seconds but is not yet adjustable. Better than nothing and sorting the adjuster and tubing out is now on 'the list.'
It would be all together and driving about now if the brake caliper had not started leaking :evil: viewtopic.php?f=14&t=12730&start=0&hilit=quattro
So he looks like this at the moment, a week to go before back on the road, no seats yet and now no brakes :twisted:
Richard
Catch up time
Headlining is in, after working out how to sort that pesky aerial lead, I just unplugged it from the radio and then unthreaded it from the dash, then fed it back through in the right place. Took a while but better than lifting the roof again and disturbing the sealant. I also had to patch up the split, by cutting off a spare piece from the overlap and sticking it on the back
Quarter panels next. The N/S one was ok, just needed cleaning up, bit of paint and new vinyl. O/S had rusted through on the front lower corner.
Chopped it out and welded in a new bit
Painted them up with some spare paint I found,
Then on with vinyl and back on the car.
I stripped the heater down as much as I needed to, and gave the rust a good ol’ wire brushing before treating it with some converter.
There was plenty of rust to play with but no holes, so good news there.
These little rubber corners were pretty much ronnied but as they are no longer available, I was careful not to break them.
I had some fun with the control arm as the splines had gone. I drilled out the pin (which shouldn’t have been there anyway) and managed to snap the end off
(top one) I managed to find one but was told that the fitting at the other end was damaged (bottom one), so I thought I could make a good one out of the two. Well, that didn’t work as they are totally different so I had to get one from the scrapyard (centre).
The flaps had been refoamed sometime in the past, except for the middle one which had disintegrated almost completely.
I used some mouse mat foam to refoam them. Hopefully they will last a good while now.
The control rods on the side of the heater had been repaired badly sometime in the past and one of them was too long :shock: viewtopic.php?f=7&t=12593&start=0&hilit=heater
When I first got the car, the halogen headlights were fitted but didn’t always work. To make them reliable I had to fit some original sealed beam units. After the fuse box melting problem a year or so ago, I decided to fit some relays for the headlamps and try to get the halogens to work. I used the original wiring to fire the relays whilst running the power straight to the relays from the back of the light switch – from the shunt to switch wire. They are certainly a lot brighter than the sealed units so excellent result there
Sparky has always had a problem with the wipers. They would not ‘self park’ and could not be turned off without turning them to ‘delay’ and disconnecting the delay system from under the bonnet. So I took the motor apart. After a good clean up I found a switch (arrowed) behind the drive gear which should have been actuated by the lump on the gear wheel. The two screws were loose and allowed the switch block (inside of the plastic 5 pin plug where the power comes in) to move away from the motor so the switch wasn’t pushed in far enough.
When back together I had a look for the piece of foam which is supposed to be in the delay mechanism and found a small circle of plastic and some dirt, which I suppose used to be foam. I cut out a circle of foam and dropped it in, and now it works, well to a fashion anyway. The adjuster on the steering column doesn’t work but turning to the switch to ‘delay’ gives a delay of a few seconds but is not yet adjustable. Better than nothing and sorting the adjuster and tubing out is now on 'the list.'
It would be all together and driving about now if the brake caliper had not started leaking :evil: viewtopic.php?f=14&t=12730&start=0&hilit=quattro
So he looks like this at the moment, a week to go before back on the road, no seats yet and now no brakes :twisted:
Richard
Mikep
Active Member
Looking good Richard, new vinyl really makes a difference. You're not the only one who forgot the aerial I remembered just before we were to fit the headlining and realised it should of been behind the channel. At this stage we weren't going to fit a radio but we at least wanted an aerial in there for later on, I decided not to bother with it at that stage, I will worry about fitting a new wire when I fit a radio.
Mike
I remembered just before we were to fit the headlining and realised it should of been behind the channel. At this stage we weren't going to fit a radio but we at least wanted an aerial in there for later on, I decided not to bother with it at that stage, I will worry about fitting a new wire when I fit a radio.Mike
I knew there must be a way of doing it without taking the roof off, Rover wouldn't expect people to do that to replace the aerial lead, although I nearly cut it and to rejoin it later, glad I didn't
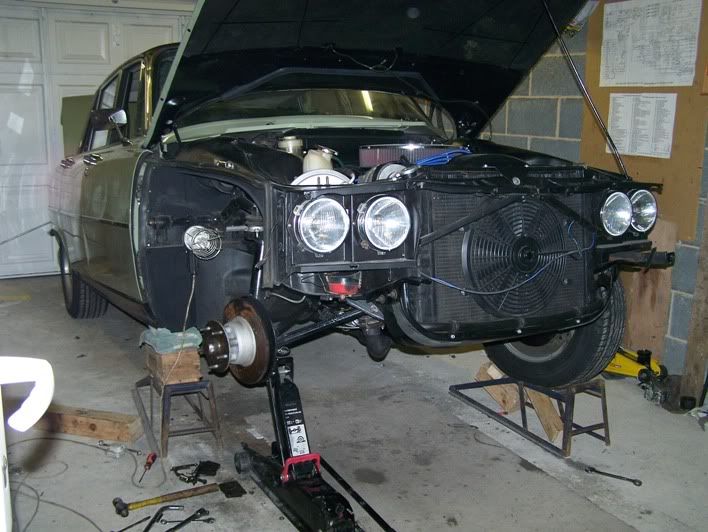
Well, I got the wings back on, and justly fettled too. The front valance now fits without the overlap it suffered from. I haven't fixed the valance yet as I need to attach (loosely) the headlight wiring across the back of it. Don't want that dangling about.
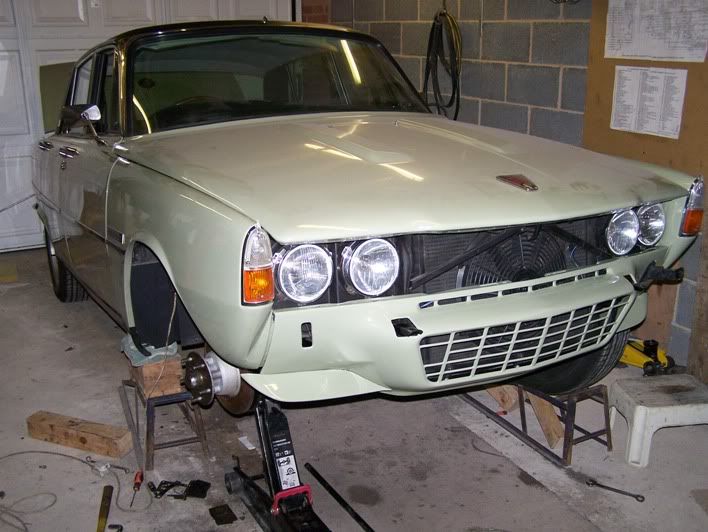
Next job, put the front bumper back together, vacuum the inside and wait for the seats and brakes.
I am itching to get driving now 8)
Richard
Well, I got the wings back on, and justly fettled too. The front valance now fits without the overlap it suffered from. I haven't fixed the valance yet as I need to attach (loosely) the headlight wiring across the back of it. Don't want that dangling about.
Next job, put the front bumper back together, vacuum the inside and wait for the seats and brakes.
I am itching to get driving now 8)
Richard
DaveHerns said:Isn't there room for the aerial lead behind the detachable section of roof lining at the front and then down behind the A post trim ?
I'm fairly sure that's where mine is
Mine wouldn't bend enough to allow it to do this Dave.
The seats turned up and I fitted the rear ones. I forgot the arm rest, which had not arrived, needed to go in first :evil: never mind.
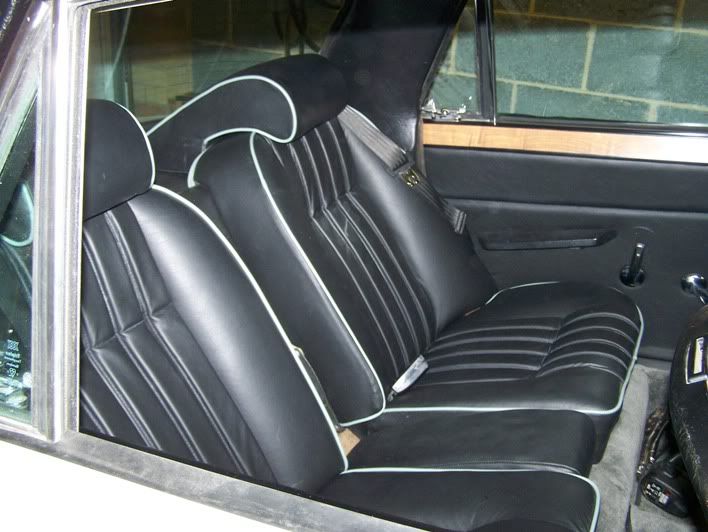
When they got back from the trimmers, neither of the front reclining mechanisms worked, so I had to dis-assemble the seats and sort them out. I take it he didn't know how they worked :? and just slapped them back together the best he could. He says he isn't doing any more classic stuff and it's too complicated :shock:
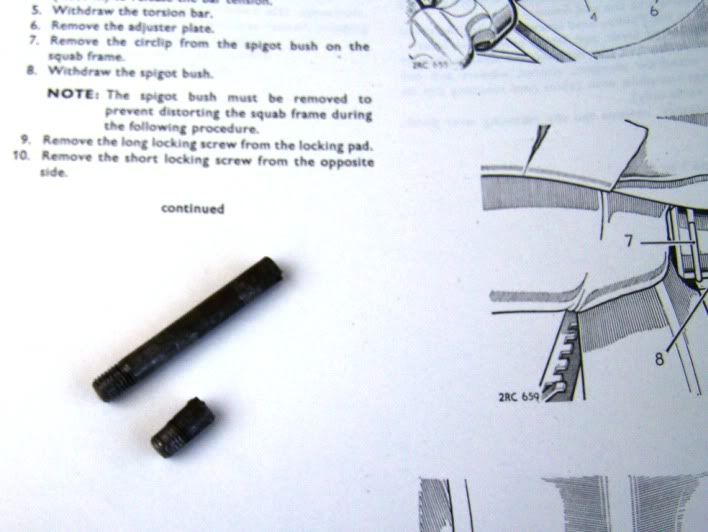
The short locking screw had no thread left on it so was totally FUBAR so I found a bolt which fitted and cut the head off and then cut a slot into the top so that it fitted. Luckily the female thread just cleaned up with a tap, so all was well after a good clean and regrease.
It took nearly four hours to sort the passenger seat and get it fitted into the car. Looks nice now though, will just have to do the drivers seat now.
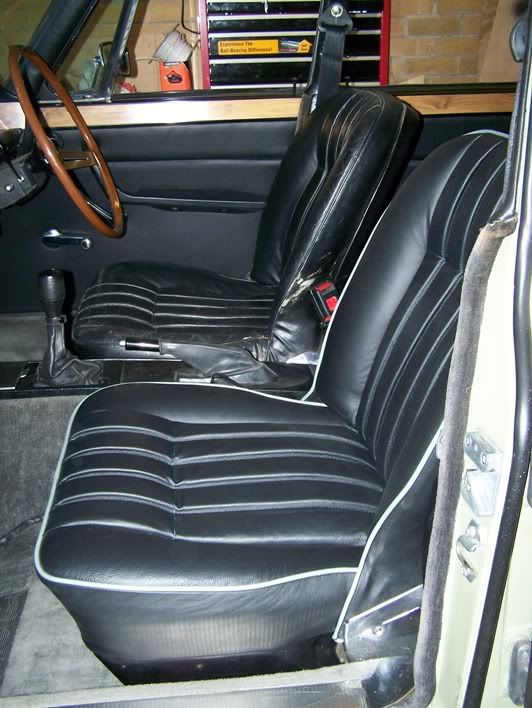
Lucky I have a spare driver's seat.
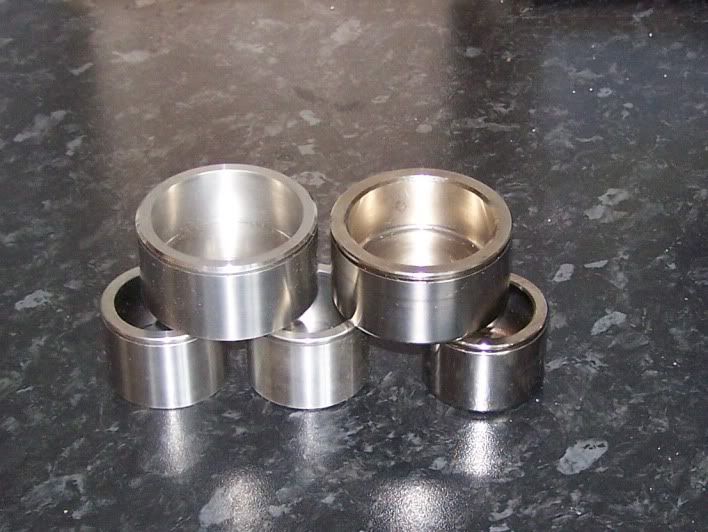
The stainless pistons arrived and were .4mm wider than the others. 40.76 against 40.32. Not much but they did seem to fit better. I have changed the drivers side ones but still have to do the N/S, which wasn't leaking anyway.
It occurred to me that even though I had not changed the N/S pistons and had the wrong drivers seat, that the car was actually back on the road. It was taxed from 1st April ,insured MOTed, brakes worked fine, and the car was back together. So instead of sorting out the drivers seat, etc, I went for a drive :shock:
Yes, Sparky has emerged from the garage and is now sitting outside of work all sparkly (under the thin coat of dust), I'll take some pics when I have washed him.
Richard
testrider
Active Member
Nice one Richard, the seats look great. You've had plenty of things to sort out this winter but you were right to put Sparky back on the road last Summer even though not all of it was finished.
I have a similar sitaution with HOT - it's insured and taxed and there's nearly 3 weeks left on the MOT so I'm going to temporarily put it back together to use it for a few days even though I've only completed the work on one side just to remind myself why I'm doing it.
quattro said:It occurred to me that even though I had not changed the N/S pistons and had the wrong drivers seat, that the car was actually back on the road. It was taxed from 1st April ,insured MOTed, brakes worked fine, and the car was back together. So instead of sorting out the drivers seat, etc, I went for a drive :shock:
Yes, Sparky has emerged from the garage and is now sitting outside of work all sparkly (under the thin coat of dust), I'll take some pics when I have washed him.
Richard
I have a similar sitaution with HOT - it's insured and taxed and there's nearly 3 weeks left on the MOT so I'm going to temporarily put it back together to use it for a few days even though I've only completed the work on one side just to remind myself why I'm doing it.