water leak

P6 3500 automatic 1974
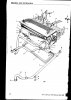
Pipes from the heater.
One goes through to the pump, this one has a leak by the "S" connector. I purchased a new rubber "S" no good, still a leak.
Thinking this was a leak in the metal tube, I by- passed it with a copper tube. over the rocker cover as a temp. solution
So, the pipe comes out of the heater, through copper tube straight into pump.
So why is it that the metal pipe under the manifold still leaks?
I am under the illusion that two separate pipes run under the manifold, one into the heater and one out,
To look at the pipes I would have to remove the manifold.
Any answers gratefully received, thank you Brian
 
There's just one metal pipe under the intake manifold. If I remember correctly it is retained by a clip on the underside of the intake which can't be accessed in situ. The intake manifold is connected to the heater matrix by another formed hose. If it, or the hose from the heater to the return pipe, has a split that'll leak onto the valley gasket at the back.
 
Thanks for the info lads. So, I have to remove the inlet manifold to check? Would you have a drawing of the pipes from the two connections at the back of the engine, after exiting the heater. I am at the moment baffled by there only being one pipe?? I was hoping I would not have to remove the manifold. (enough to do already on the rest of the car). Well, I cannot go out, so it looks like another day in the garage, Thanks again, regards Brian
 
One hose goes to the pipe under the manifold, the other goes to the rear of the manifold.

I had an annoying leak on mine which collected at the back. I ended up sliding bits of cardboard under it to see if I could catch any drips and therefore seeing where it was coming from. Also, (not with the engine running!) try taking some pictures under there with a mobile phone, you'll be surprised at the quality of pictures you can get.
 
Thanks for the info lads. So, I have to remove the inlet manifold to check? Would you have a drawing of the pipes from the two connections at the back of the engine, after exiting the heater. I am at the moment baffled by there only being one pipe?? I was hoping I would not have to remove the manifold. (enough to do already on the rest of the car). Well, I cannot go out, so it looks like another day in the garage, Thanks again, regards Brian
 

Attachments

  • img20200501_13471877.pdf
    50.3 KB · Views: 23
just had my heater unit out an d back in .looking at the Pdf etc see an item numbered 39..have no idea what that is as didn't see anything like it. during strip down or rebuild. hmm wonder if I will have issues later ?
 
These are grilles that are screwed to the footwell duct openings inside the car. They are not attached to the heater box, so it is normal that you did not see them.
 
After removing the manifold, I found the leak was from the underside of the thermostat, so now hopefully that's sorted. BUT! another problem, after buying another battery, I cannot get a spark on a lead?? This should probably be in another post, but, old cars do not have ballast resistors, relays etc. Easy peasy, battery- switch- coil- dizzy, no problem.
My car has not run for many years, even so, just to switch on the ignition, should give me a live at the coil?
What I would like to purchase is a basic ignition wiring diagram of the 3500 auto, later model. Preferably in colour, and large print. I am getting to bloody old for all this agro now.
One more begging post, I need a driver handbook, any out there for sale.
Lastly, all of you, keep away from this dam virus, and keep the classic car clubs running
Regards
Brian
 
The ballast resistor is in the wiring loom between the fuse box and the coil. Have you checked the wiring to the coil with a voltmeter?

Does the engine turn over?

I found the correct wiring diagram for mine, scanned it, then printed it out onto four A4 sheets. It's on the wall of my garage, and it is very useful :) not colour though. What is the letter at the end of your chassis number? This will tell you which wiring diagram to use.
 
I cannot get a spark on a lead?? This should probably be in another post, but, old cars do not have ballast resistors, relays etc. Easy peasy, battery- switch- coil- dizzy, no problem.
My car has not run for many years, even so, just to switch on the ignition, should give me a live at the coil?
There should be two wires feeding the coil, one from the ignition via the ballast in the harness and another from the starter, which is only live when cranking. Probably both white / yellow
 
This should probably be in another post, but, old cars do not have ballast resistors, relays etc. Easy peasy, battery- switch- coil- dizzy, no problem.
Actually P6’s all have ballast resisters from the factory. They can fail woth age and to add to the fun they are hidden in the wiring loom.
 
Actually P6’s all have ballast resisters from the factory. They can fail woth age and to add to the fun they are hidden in the wiring loom.

Or attached to the side of the coil, if the wire has broken down.

And a lot of older cars have ballast wires and/or resistors.

On speaking with Ranald White, you can remove it from the system and run the car without the resistor, without any adverse effects.
 
On speaking with Ranald White, you can remove it from the system and run the car without the resistor, without any adverse effects.

Well, sort of. You need to swap the 1.5 ohm coil for a 3 ohm coil if you bypass the ballast resistor or risk the coil overheating.
 
Hello Quattro,
Thanks for the reply, end of chassis no. is E. new battery is turning over engine, I'm still not sure about the live at the coil, I put a bulb on the coil, this lights up on turning the engine, this of course is straight from the relay, but, once the relay lets go of the starter motor I am not getting a live?
regards Brian
 
Last edited:
Hi, Actually it comes from the starter not the relay, but that's beside the point because that side of it works. It's the live from the ign switch that's failed, so check the loom for likely damage, check the connections on the back of the tacho for security and to see if there's power there. Failing that run another wire to bypass the failed one in the loom, or if you're feeling brave unwrap or unpick the loom and replace the failed wire.

Colin
 
The feed to the coil from the ignition switch is going to 9V or so, and may not light a 12V bulb. You really need a voltmeter or you may end up chasing a non fault.
 
Thanks for the reply, end of chassis no. is E.

Same as mine, that makes things a little easier :)

The power comes from the ignition switch, to 19 on your fusebox (top of fuse 19-20) then up to the ballast resistor and to the coil (white with a yellow tracer). The other wire on the +ve side of the coil will be from the starter motor and will also be white with a yellow tracer.

With the ignition on, the voltage should be around 9V and with the engine turning over, it should be around 12V
 
Back
Top