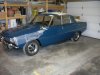
The engine was running reasonably well before I started work, in spite of the carbs being in terrible shape and very old fuel. There was a “splashy” sound from the exhaust so I anticipated that the valve timing was probably out a bit. There was no burning oil in the exhaust and the compression on cylinders 2, 3 & 4 was 170 psi. Cylinder 1 was 155 psi. The engine was running extremely rich due to the issues with the carbs and I attributed the low compression on cylinder 1 to some carbon buildup on the valve or seat. Oil was leaking from every possible spot on the engine.
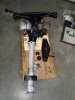
I planned on a complete engine teardown to address the oil leaks as a minimum. While in the engine, hone the cylinders and replace the rings. Replace the crank and cam bearings, the chains and tensioners and check the valves for any issues. I was hoping for a fairly straight forward engine overhaul.
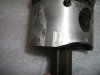
On teardown a few issues were discovered. The main one being that one of the cylinders was badly scored. Both the piston and cylinder wall had damage. The score in the cylinder wall measured over 10 thou. I already had 30 thou oversize pistons in the engine. The choices seemed to be to find 40 thou oversize pistons and live with a slight remaining score in the cylinder wall or source a new engine block. It became apparent fairly quickly that 40 thou pistons were going to be difficult to find. I could source a new block but would have to travel 1100 kilometres each way and dismantle an old engine and see if it had any remaining cylinder bore tolerance. I cast about for other ideas and came across the solution to bore the cylinders to the 2200 nominal bore. I thank Steven Dibbers for the counsel he provided on this solution. I sourced 2200 pistons, rings and con rods for the job. After considerable arm twisting and dire warnings from the machine shop I was using to bore the cylinders, they did the required work and fit the new pistons. The exhaust valves in the 2000 TC head were showing some wear. I also figured that the valve springs had 175000 miles on them and should probably be replaced. I also began to think that it would be great if I could find a 2200 TC cylinder head. They are hard to find, and probably harder now that I have picked this one up. It was a NOS head, bare except for valve guides. It had slight corrosion on the mating face and required slight milling to get a good surface. Don’t ask me how much I paid for it! I am trying to forget. The machine shop minimally milled the gasket surface, knurled the valve guides and installed eight new valves and new valve springs.
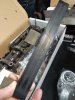
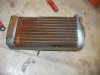
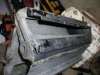
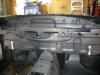
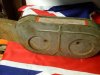
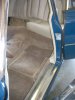
There were a couple of other items that arose during the engine work. The baffles in the sump had both suffered some high cycle fatigue breaks. I have attached a photo. Once again, probably not unexpected after 175000 miles. I found a specialty sheet metal fabrication shop locally. They took the old baffles, created the required CAD drawing and used their CNC laser cutting machine to cut exact duplicates. They also bent the openings in the baffles and the required bends in the overall plates. We used slightly thicker plate so they would be a bit more durable. They fit like gloves into the sump and all at an extremely reasonable price for this type of custom work.
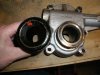
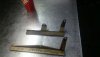
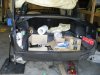
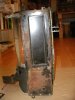
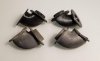
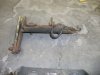
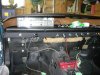
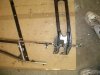
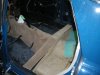
Both of the chain guides/dampers had some surface wear. The mounting arm on the lower guide had broken. I sourced new upper and lower guides. The new upper guide design is different than the old ones. They are longer and have a different mount for the upper bolt. I had to come up with a properly sized spacer and a longer bolt to mount the new design guide. Photos attached below.
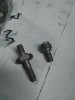
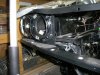
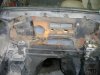
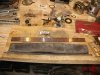
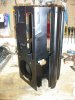
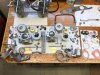
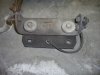
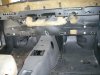
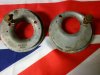
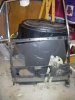
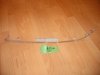
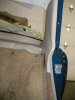
With all I had read about corrosion of the engine side plates, I decided that I would remove mine and check for corrosion. It turned out that they were in perfect condition. Of course there are some highly specialised fasteners used for the side engine mounts that need to be removed in order to remove the side plates that were damaged during the removal process. Photo attached. Fortunately JRW came through with used fasteners for me in short order.
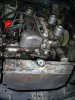
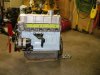
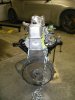
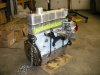
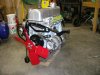
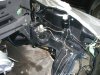
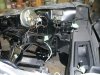
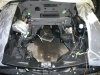
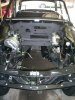
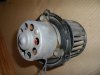
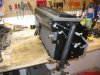
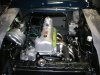
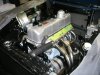
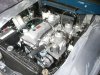
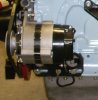
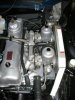
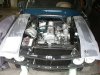
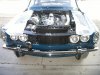
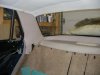
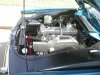
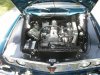
I assembled the engine and went through the fun of setting the valve clearances. Geoff Unwin was great with providing the proper sized shims through a couple of iterations. Adjusting clearances on an engine that has already been set in the past is fairly easy. Just add or subtract the necessary amount from the existing shim. When doing this on an engine that has not been set up before, finding old shims and trying them out takes a lot more trial and error. I was also going from a 2 shim set-up to a single shim and that also let to some more difficulties. But the engine assembly was complete and ready for the car. Photo attached. Of note in these photos is that I replaced the original dynamo with an 18ACR alternator. More on that later.
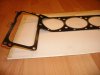
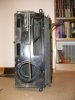
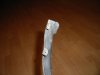
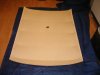
One last note on shipping. Why or why did FedEx decide that it was necessary to put a 90 degree fold in my new 2200 TC head gasket? Photo attached, taken after I had tried to straighten it. The next one was shipped attached to a piece of plywood.
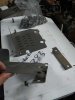
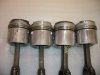
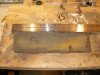
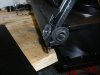
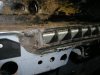
I found some photos of the pistons and thought I would add them to the post. Three were in reasonable condition, one, not so much (see photos). The scuffing on the sides of the 3 pistons 90 degrees to the centreline was mostly as expected. The scuffing on the side of the fourth was much worse and a gouge in the piston and cylinder wall more towards the engine centreline drove the decision to go to the 2200 nominal size pistons and bore.