Sparky's winter/spring/summer/autumn work

josephp6man said:
hi richard,
the rear rain channel finisher is easier to just tap off backwards than prise off. same when refitting push it on from the back. the long rail itself i used a hard pice of wood to tap it upwards then off rather than screwdrivers which could distort / twist it.

ian

Hi Ian

I'll try that when refitting that rear finisher, thanks for that :)

I haven't been able to find any info at all about removing those stainless trim bits. I haven't twisted them but have put a few little dents in from the screwdrivers, but can easily tap them out.

Cheers

Richard
 
Some good info there on roof removal Richard. I tried to get a copy of that Classics with the P6 roof article at the weekend but the few places I looked didn't have it. Maybe don't need need it now thanks to your post :wink: .
 
Try to do too many things at the same time and you will make a mistake :shock:

I have removed the fuel pump and lines from under the O/S rear seat because I have fuel pressure problems, so when I have this lot off I am going to move it because I don't like it there. So, the reserve cable which goes to the back of the car, under the O/S rear seat is now too short. I am going to move the pump anyway as it makes too much noise there. Now, the cable was routed from the centre consul into the engine bay and back down under the car, so I can re-route it by feeding it down into the hole where the reverse light wires go and make it reach further to the back of the car. I have already measured and cut the floor carpets and was in the process of sewing the edging and rubber mat back on - that made me thumb hurt :shock: . So the centre consul had to come out, and I then thought that the particle foam under the centre tunnel carpet had disintegrated when I put the car back together last year so I bought a pre-cut underlay from ebay instead, which could be the source of the road noise as it maybe wasn't as good as the foam at sound proofing, so as the centre consul was out I tore that lot out and replaced it with a 10mm high density closed call foam.

100_1806.jpg


Then back in with the carpet

100_1807.jpg


And after what seemed like a sewing marathon, but wasn't really very long at all

100_1810.jpg

100_1811.jpg


Tip - If you're going to replace the underlay and re-cut the floor carpets, measure the floor sections AFTER you do the tunnel. So its a snug fit but looks a great deal better than it did. Pleased with the result :D

The only bad bit is that the pile has been crushed down by the original position of the rubber heel mats and stands out rather. It does look like the pile has been cut to fit, but I am hoping it will come out with time.

Richard
 
That looks great Richard, I'm sure the pile will recover and add in a bit of wear, should be looking like the rest after a few months use.
 
That looks sooo stylish... Maybe you can give the crushed pile a bit of a going-over with a stiff brush to help it out some?
 
I am hoping that the pile just recovers on its own when I start using the car again, I will just have to wait and see. Just a few bits I have done over the last week or so.

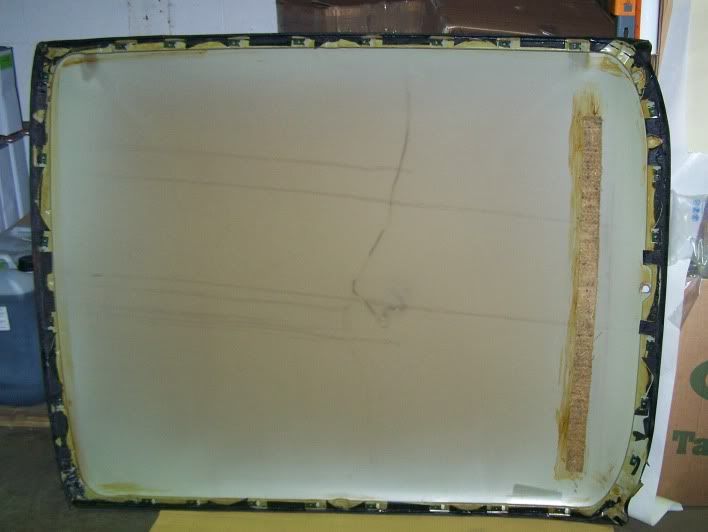
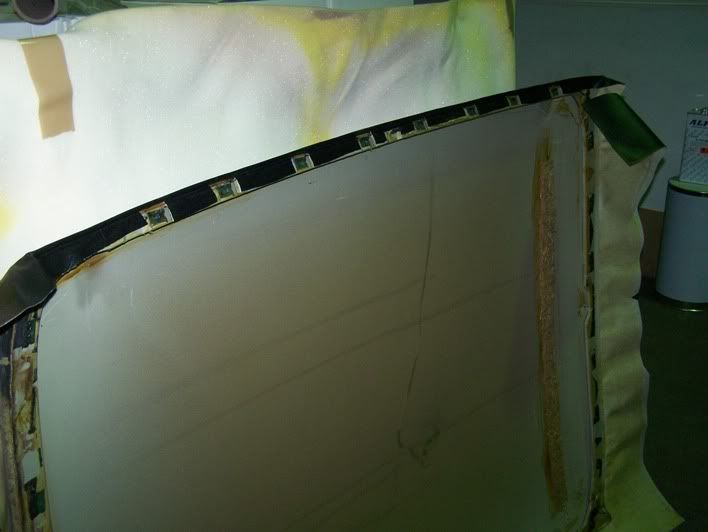
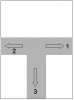
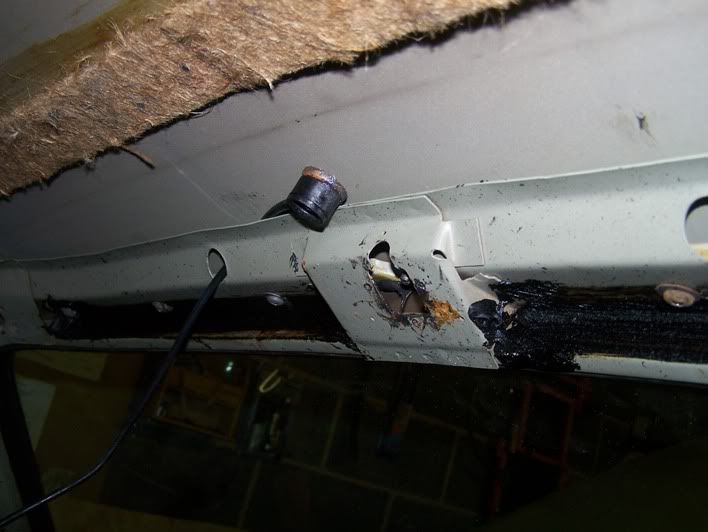
I managed to get the roof panel to work and took a pic of the underside in case there were any complicated bits and I needed a closer look. Always a good idea to get loads of pics.
100_1814s.jpg

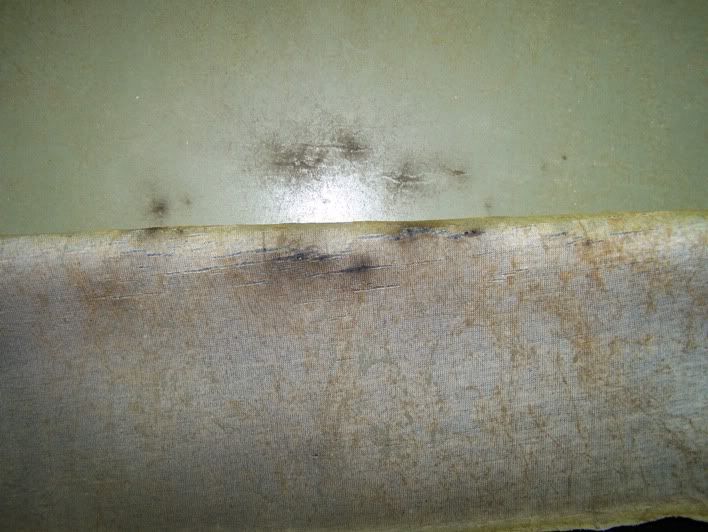
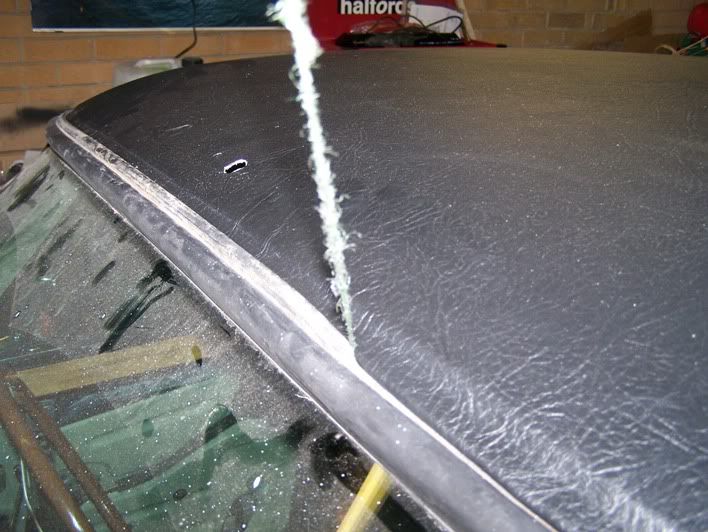
I found it quite easy to peel the old vinyl from the roof panel, surprisingly easy in fact. I noticed that there were splits in the cotton scrim under where the marks were. There were also a number of small holes and black marks on the roof in this area. Not sure what caused his but it did look like it was deteriorating.
100_1820s.jpg

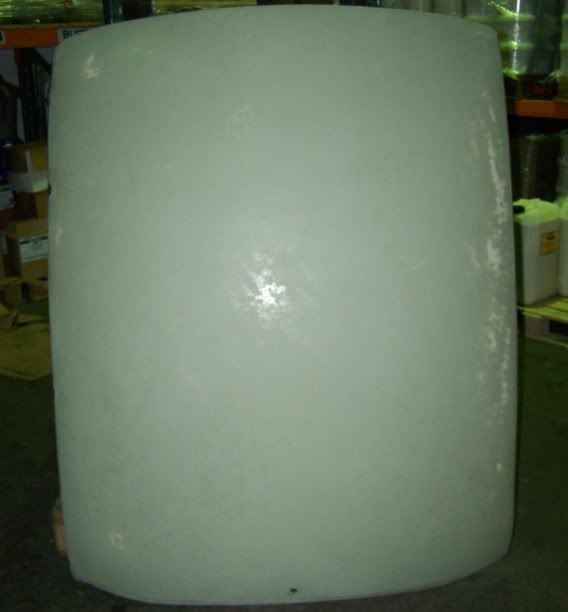
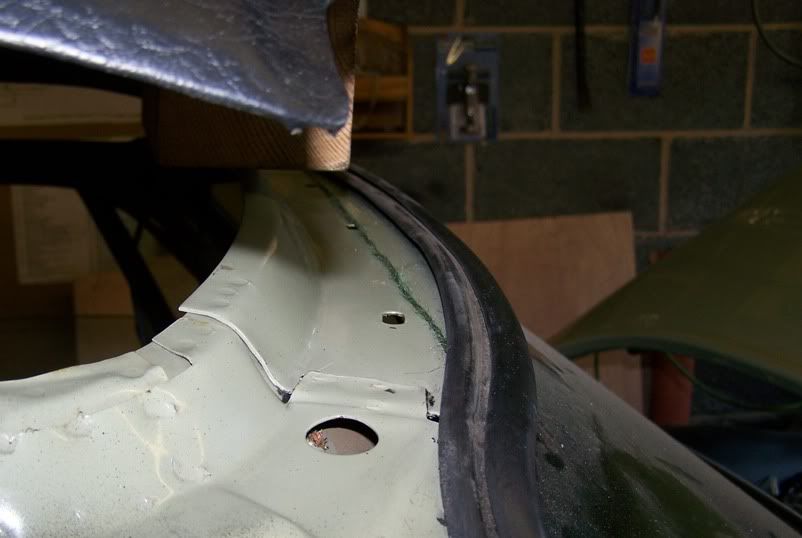
I cleaned the old adhesive residue off and then rubbed the whole panel down with some wet n dry.
100_1828s.jpg

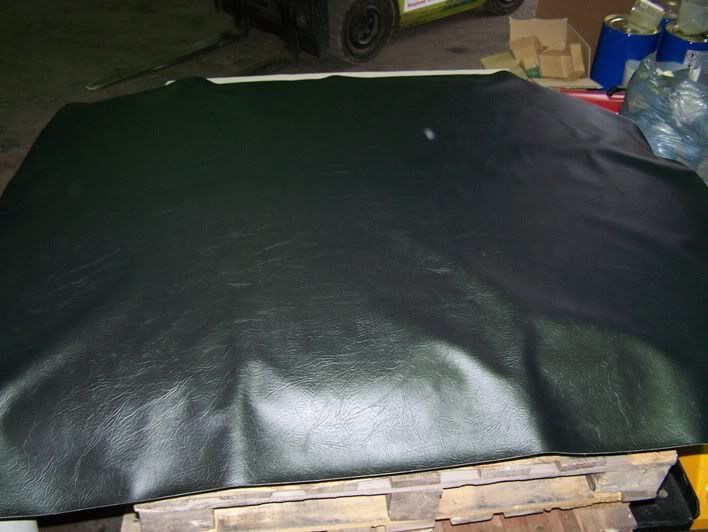
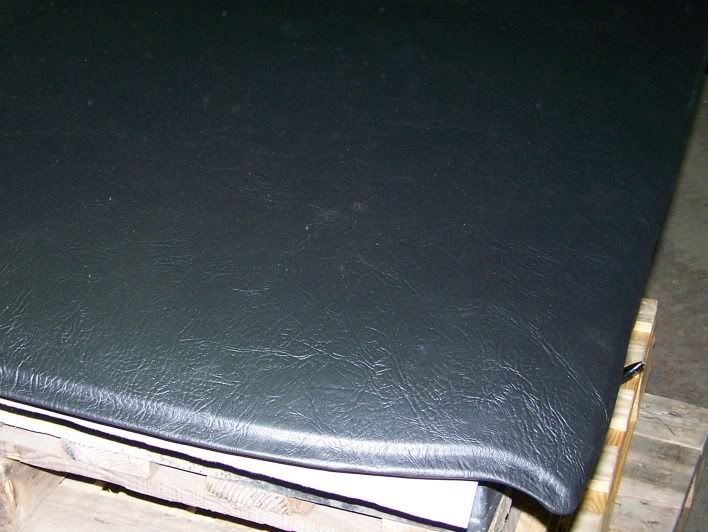
Draping the new vinyl over the roof, I couldn’t work out how it was going to fit over the compound curves.
100_1834s.jpg

I had read not to try and stretch it, so braved it and just applied the glue. I used a hand applied high heat contact adhesive and coated the whole of the vinyl in one go, then the whole of the roof. Don’t try to do the roof or vinyl in sections i.e. do the centre third first then fold it back and do the ends afterwards. It doesn’t work :oops: DAMHIK
100_1839s.jpg

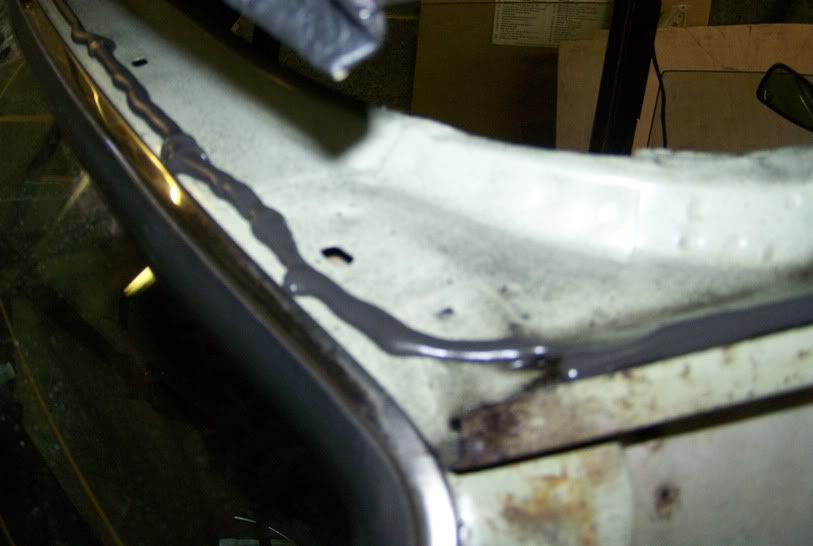
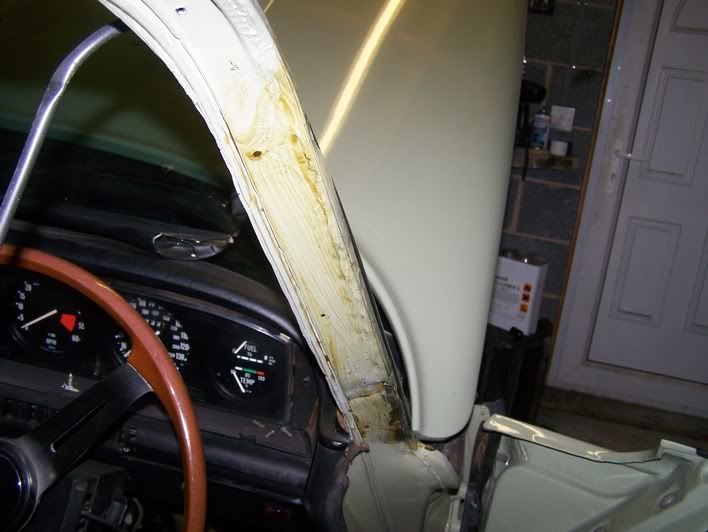
Then up on its side on some packing foam to pull the edges over, and cut out all the little tricky bits.
100_1841s.jpg

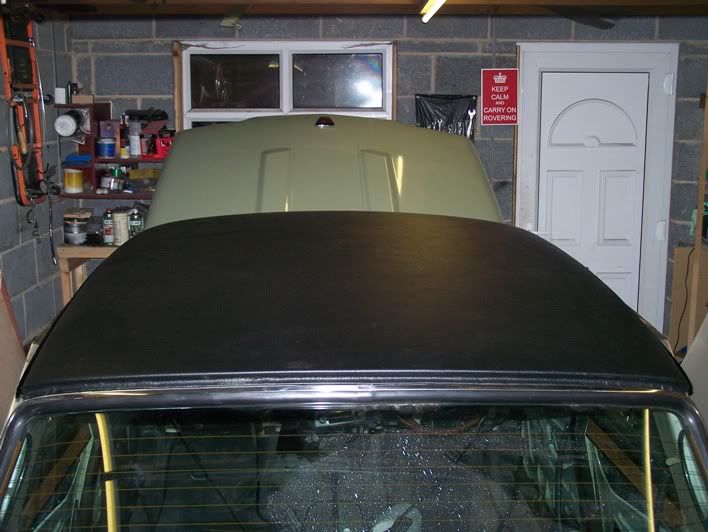
Took my time with this and got some good definition on the corners.
100_1842s.jpg

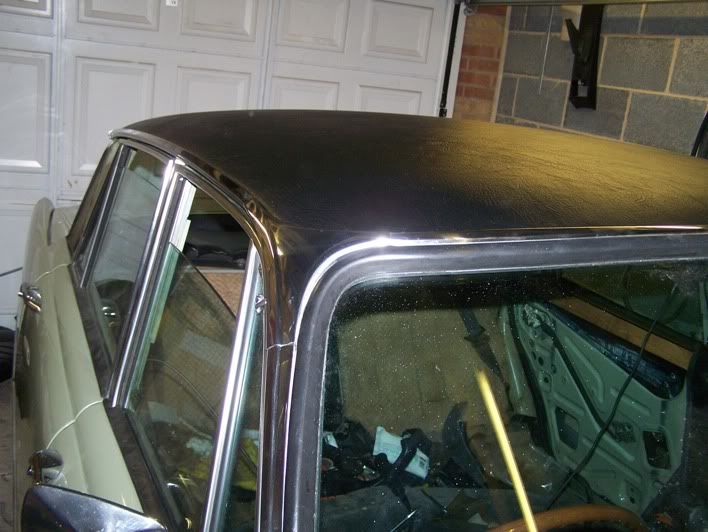
Then managed to get it home yesterday and just dropped it onto the car.
100_1857s.jpg

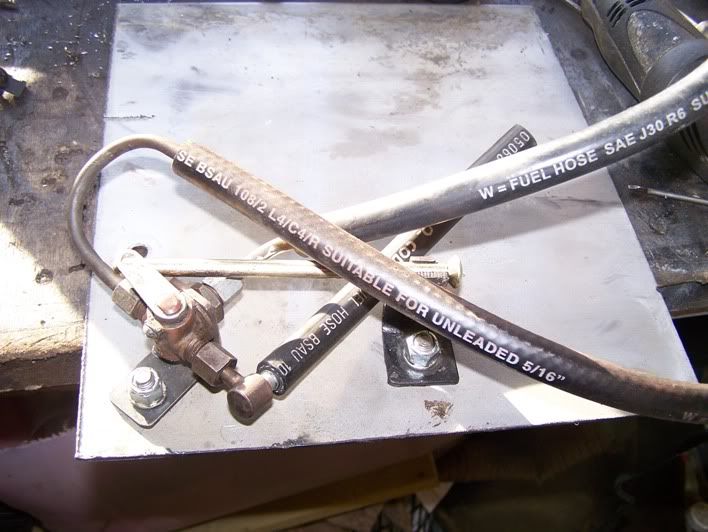
I had finished the fuel system, pump is now in boot and the reserve switch is up above the diff extension. All connected up and working. Mud flaps on, rear wings back on, rear scuttle adjusted to match up with the boot lid and wings, and car off the ramps. Unfortunately, I had the camera at work so no pics, well except for this one where I had started to fit the reserve switch onto a 2mm plate prior to cutting it up to use as a bracket.
100_1837.jpg

Next job is to seal the roof up and get it bolted down, then.... well…. lots of other stuff :D
Richard
 
Gee you did a nice job putting the vinyl on the roof Richard... :)

I have never seen fuel hose before that says "suitable for unleaded".

Ron.
 
Good job on the roof - looks good.
I have to do mine soon when the weather warms up, and have just one question - did you start applying the vinyl at one side and work your way over to the other side, or did you start in the centre of the roof and go outwards on both sides?

Keep up the good work
Glen.
 
:) Roof looks excellent Richard - well done. I was curious to know exactly what adhesive you used? Also, did you apply any heat to smooth out bumps near the edges or did you manage just to stretch them out?
 
I used a product called Tradegrip HH, which is a hand applied contact adhesive with a high heat resistance. Alpha S1358 can also be used.

I must admit that this is NOT a one man job and I enlisted the help of the Works manager and the Van Driver.

I used an old dining room table that we use at work for labelling stuff, and poured the contact adhesive onto the vinyl, spreading it out with a four inch glue spreader (that's a 100mm to young'uns). Pour it on in strips and spread it all in one direction ensuring you work from the wet edge, i.e. do not allow the leading edge to dry out.

The glue on the vinyl will take longer to dry than on the roof panel, so do the roof panel second.

Then, pour on a strip across the roof and spread it out with the glue spreader along the length of the roof.

Let the glue tack off, i.e. it needs to dry before you put it together, so allow it to become knuckle dry, tap it with your knuckle and you shouldn't get any glue on your hand.

Then get a couple of helpers to hold the vinyl above the roof and lower it so that the centre hits first and rub it outwards. I rubbed it out towards the side of the roof and flattened it down fully. The with the helpers still holding the front and rear off the roof. I took the front offside corner from the driver and just smoothed the vinyl down forwards so that the vinyl was now stuck from the centre to both sides and to the front

Now it's just a case of smoothing gently from the centre towards the O/S front corner allowing the vinyl to compress slightly to take up the compound curves, a lot easier than it sounds. The the rest of the corners one at a time and job is done. Leave it overnight to fully bond and then start with the folding it under and getting it tight into the corners.

I didn't heat it as I assume the damage on the old vinyl was caused by heat damage, although I am not sure of it. I can just imagine me spending all that time on it just to ruin it with a heat gun :shock:

So it was all applied cold, although I did heat the factory up a bit as it was rather cold in there.

Richard
 

Attachments

  • Untitled.jpg
    Untitled.jpg
    8.6 KB · Views: 998
Nice work. Sticking vinyl sheets down looks tailor made for a whole string of comedy disasters, but you've done a good job.

How are you going to operate the reserve tap, have you extended the cable from the dash? I need to sort this on EMF soon as laying on the floor and reaching up through the suspension to the tap is not cool 8)
 
testrider said:
Nice work. Sticking vinyl sheets down looks tailor made for a whole string of comedy disasters, but you've done a good job.

How are you going to operate the reserve tap, have you extended the cable from the dash? I need to sort this on EMF soon as laying on the floor and reaching up through the suspension to the tap is not cool 8)

The previous owner had a longer reserve cable made but as I was fitting it further back I needed to re-route it. It now fits and works ok, not quite sure how he did it though.

On Sunday I got some wooden blocks and raised the roof so I could fit it properly. I fed a piece of string along under the windscreen rubber

100_1858.jpg


Then a good splurge of Butyrub non setting sealing goo all around the roof just outside of the fixing holes.

100_1859.jpg

100_1860.jpg


Then it was a case of smearing some washing up liquid along the lip on the back of the roof panel and easing it into place in the rear windscreen seal. I pulled it backwards from one side and it popped in, then went around the other side and pulled it backwards from there and it popper in that side, but popped out the first side :shock: After doing this for a minute or so, I pulled the O/s into place and put the fixing screw into the corner, then went around and pulled the N/S Into place. A bit of faffing around but certainly easier than removing the screens.

I then dropped the front off the block and eased the string out, pulling the rubber out and onto the top of the roof panel.

100_1861.jpg


Then in with all the screws and carefully doing them all up to pull the panel down into place.

I then painted the rain channels :oops: - I really must do these things in the right order, but never mind, I managed to do it without painting the newly vinyled roof. Then slapped a load of Dinitrol on

100_1862.jpg


before replacing the stainless trim.

100_1864.jpg


Now it's just a case of putting the cable back on the aerial and refitting the headlining

100_1863.jpg


I don't swear a lot but seeing this brought me really close to it :evil: :shock: :? For anyone who hasn't done this, the aerial lead should be inside that channel, not draping over it.

Richard
 
Back
Top