Seat Refurb

vaultsman

Well-Known Member
Given the recent arctic weather...

...the wuss in me decided I needed an indoor project so it was time to make a start on Occie's interior makeover with the Woolies kit I picked up at the NEC last month.

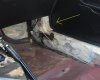
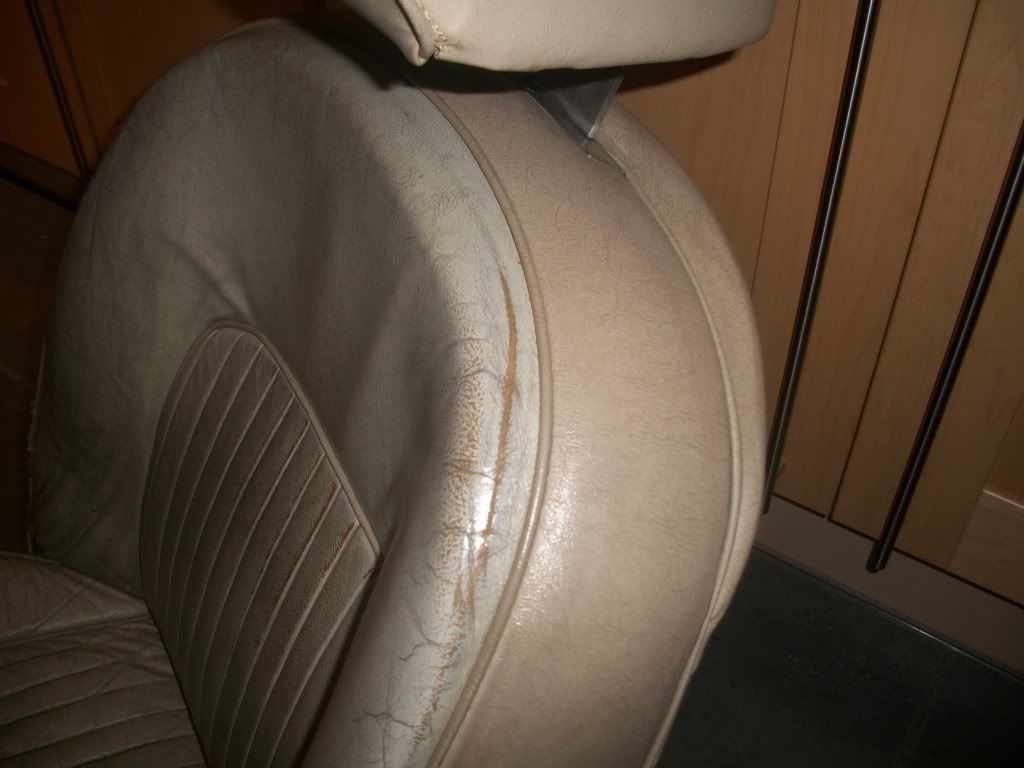
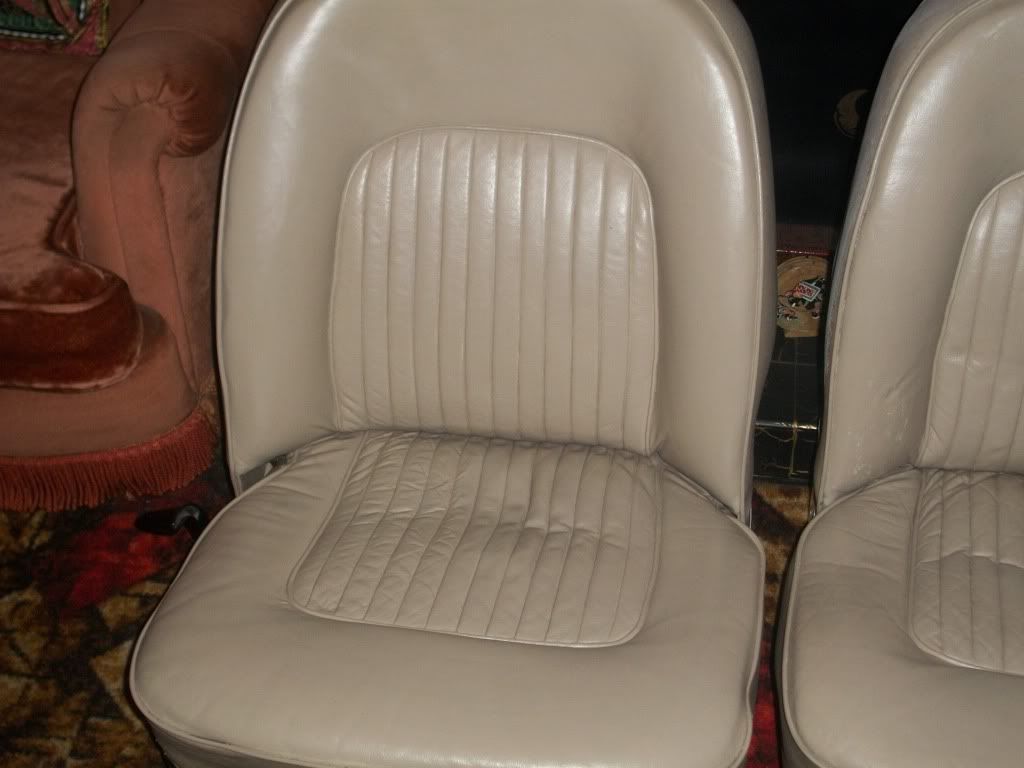
Unsurprisingly, the driver's seat was showing it's age and general neglect worst of all...

100_2559.jpg

100_2562.jpg

100_2564.jpg

100_2565.jpg


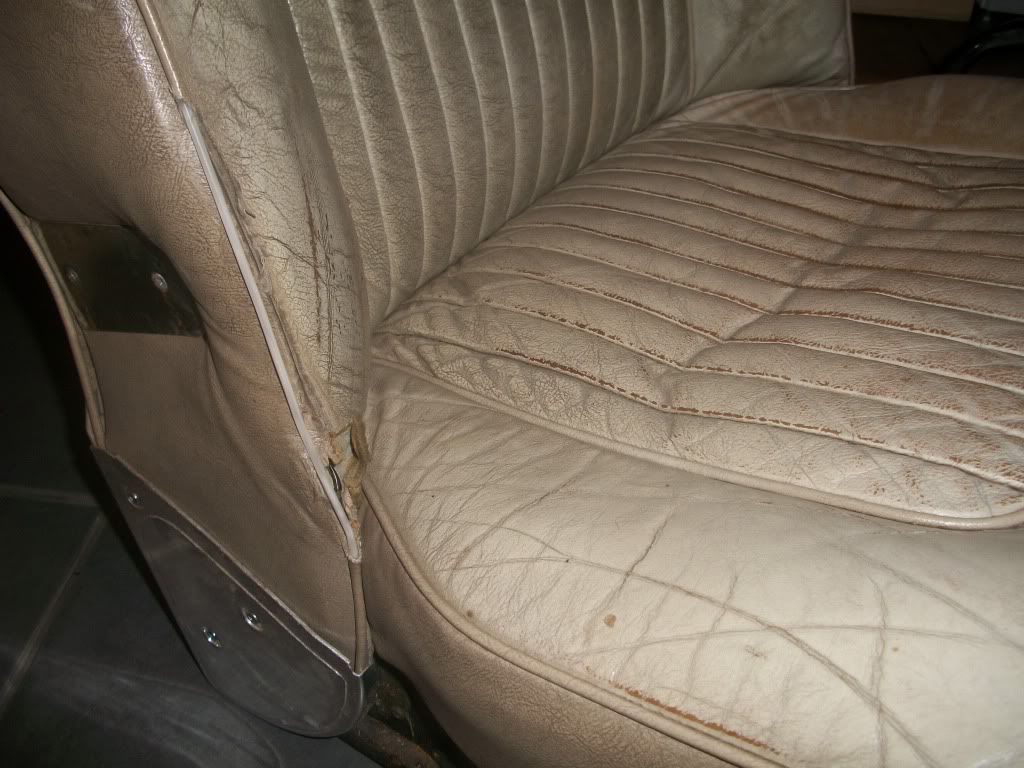
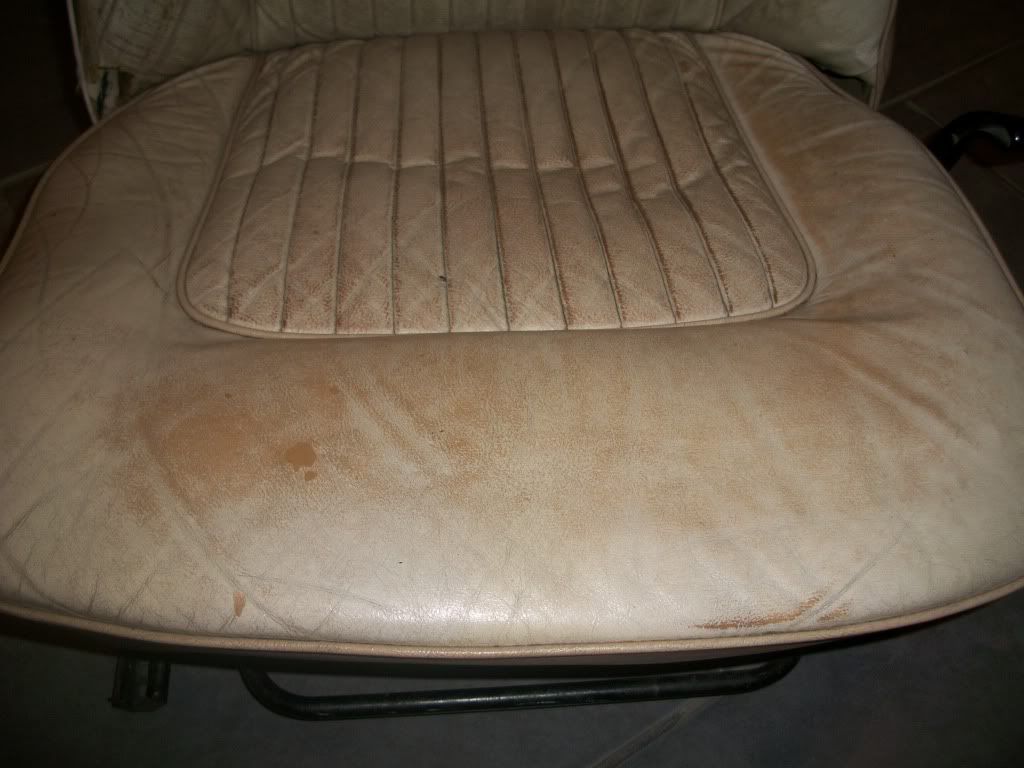
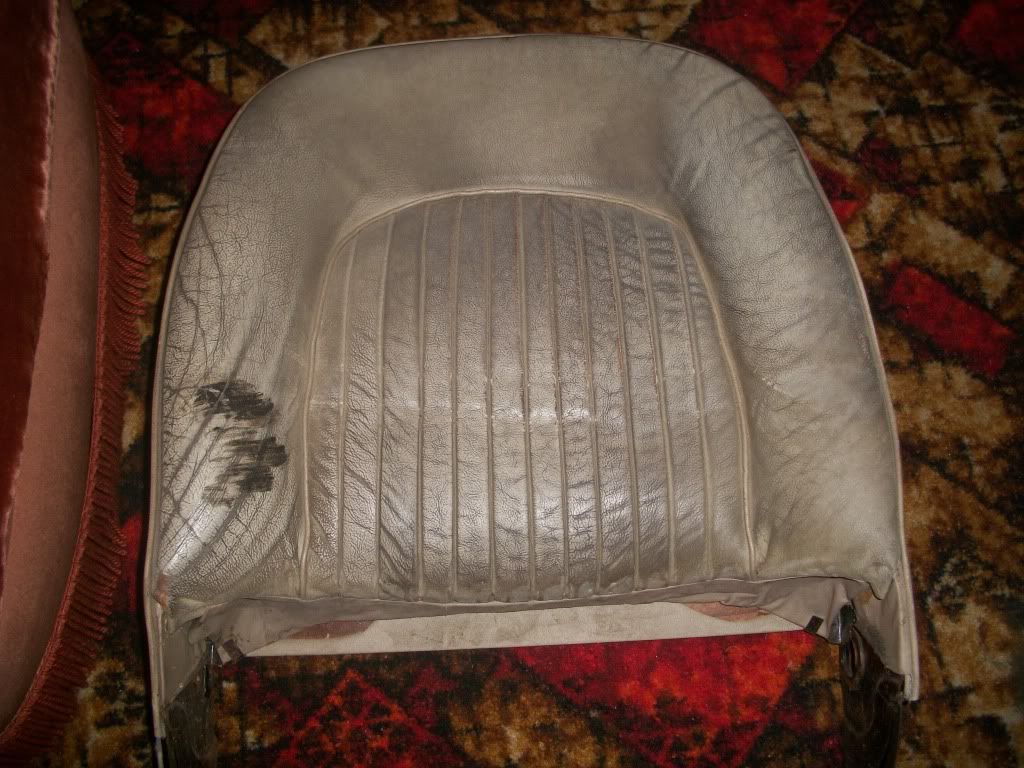
The front passenger seat was a little better, but with a 1" slit across the front of the cushion. I'd picked up a no-rips (though filthy) driver's seat for a fiver when I went to collect the gearbox I'd bought on ebay, so the plan was to use the the cushion on the passenger side and the squab to replace that on the driver's side...
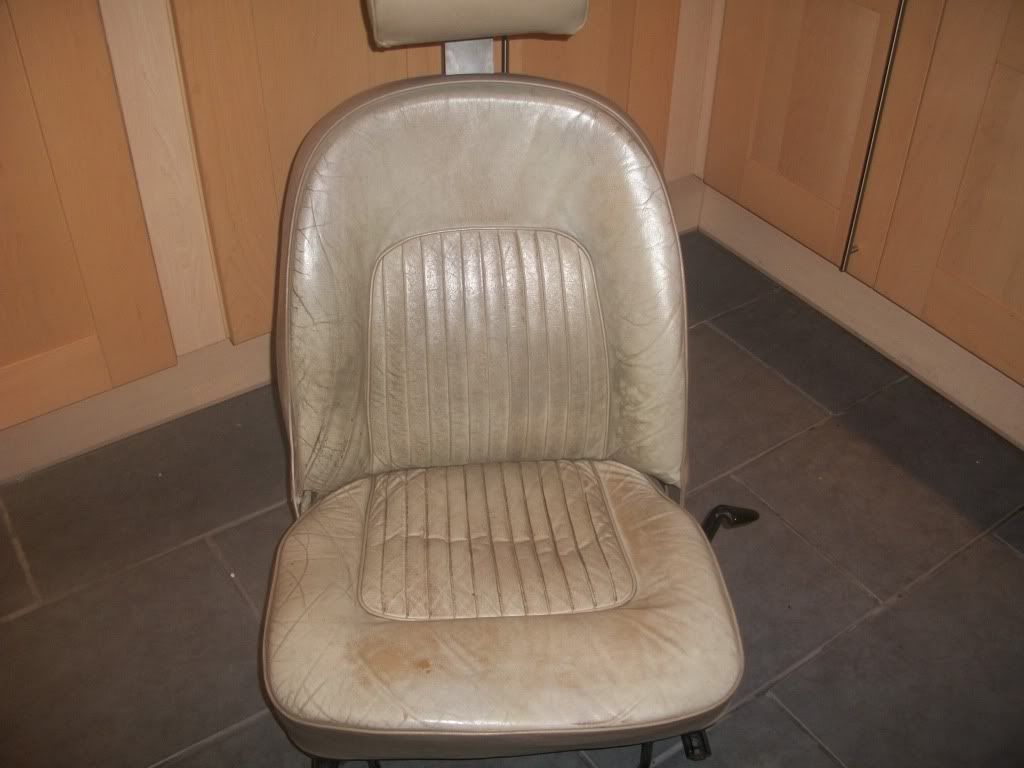
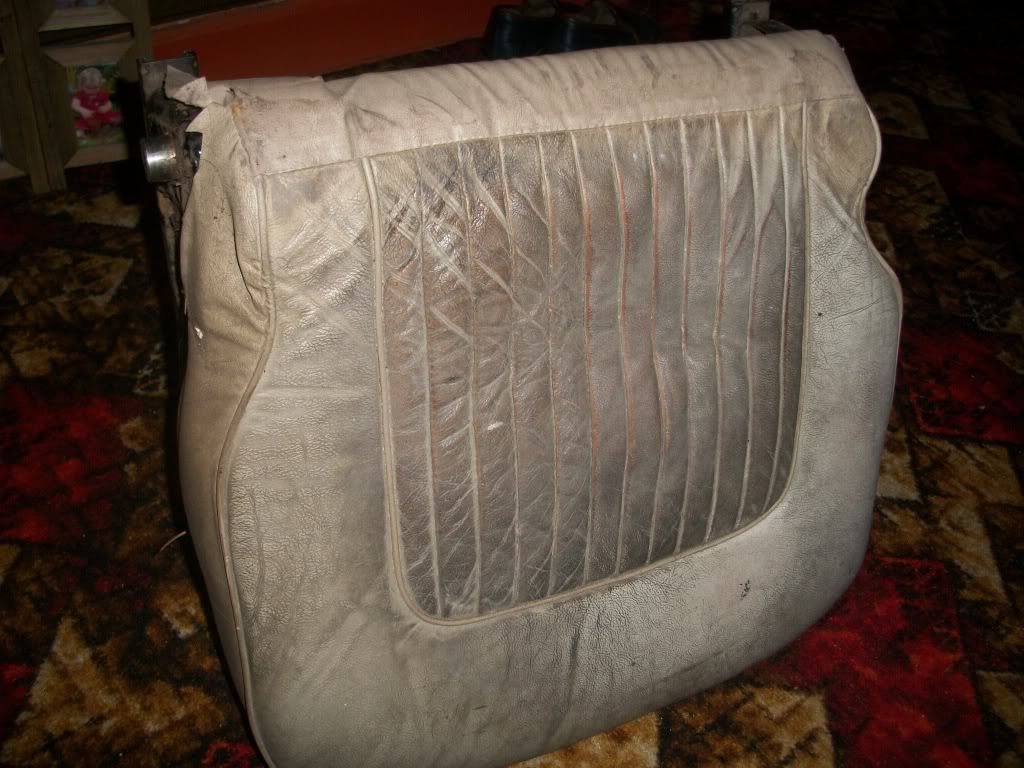
ebay seat...
100_2388.jpg

100_2553.jpg


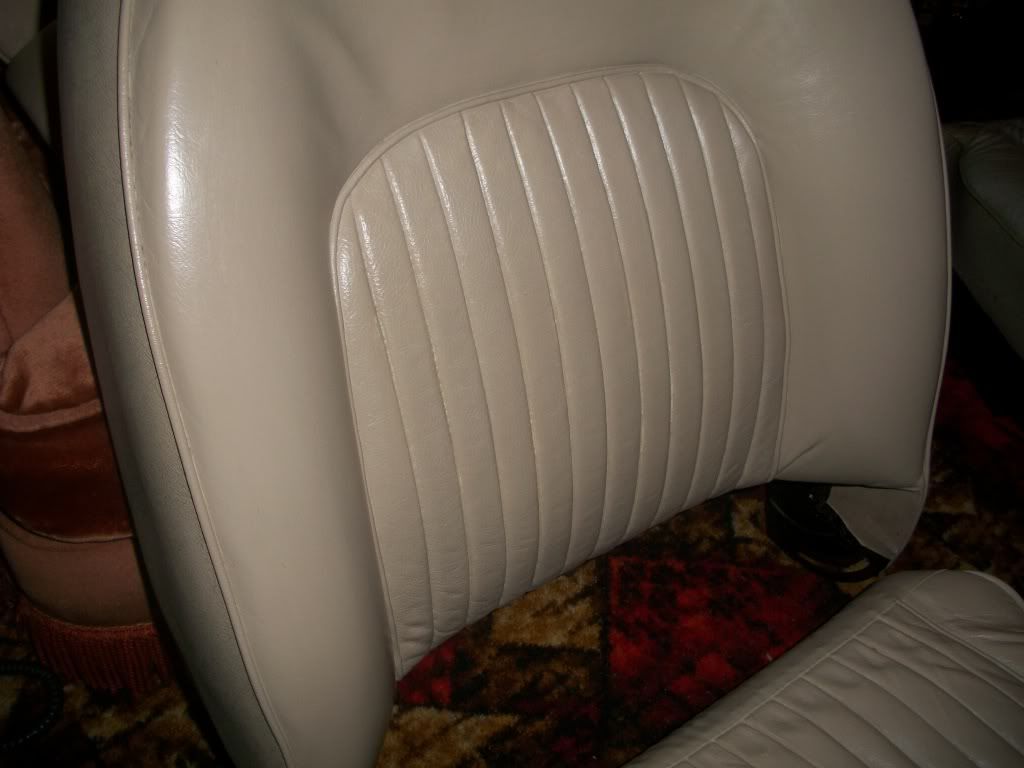
The Woolies did what it said on the tin, although I had to supplement the cleaner with some (top tip!) Dri-Pak Soap Flakes. Not surprising I guess given the muck that needed to come off! :)

My thanks to Brian-Northampton for his walkthrough on his method, and I'm pretty pleased with the outcome. There's a couple of bits that need a touch of rework but generally not bad at all!

100_2638.jpg

100_2637.jpg

100_2636.jpg

100_2640.jpg

100_2634.jpg

100_2639.jpg


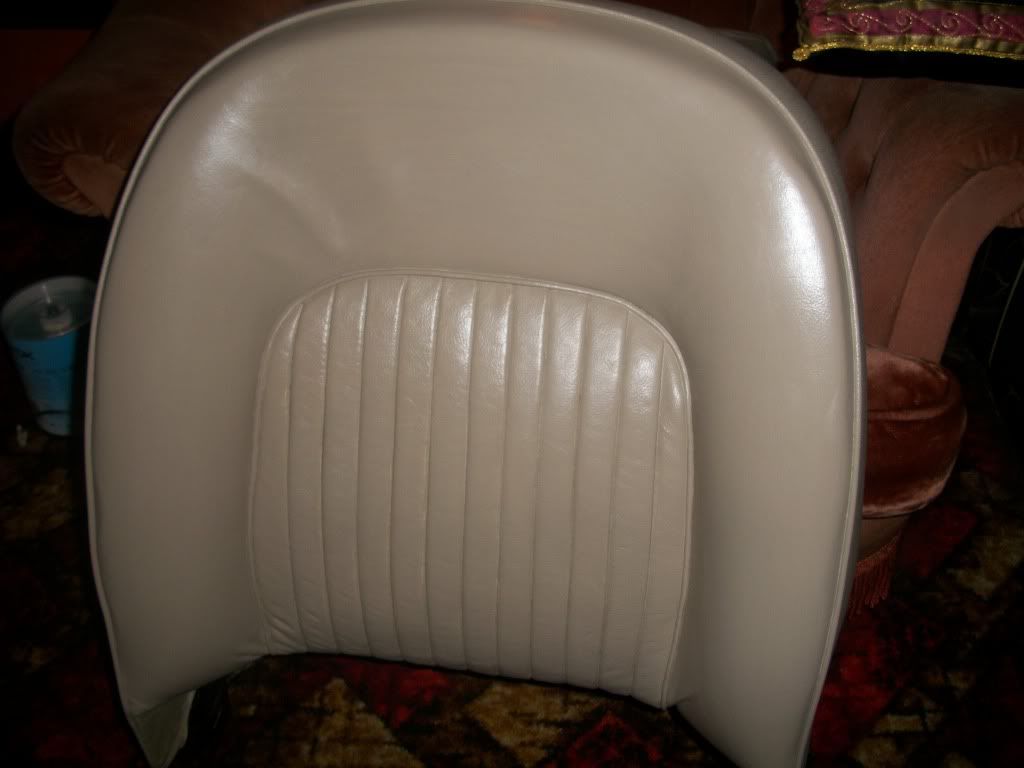
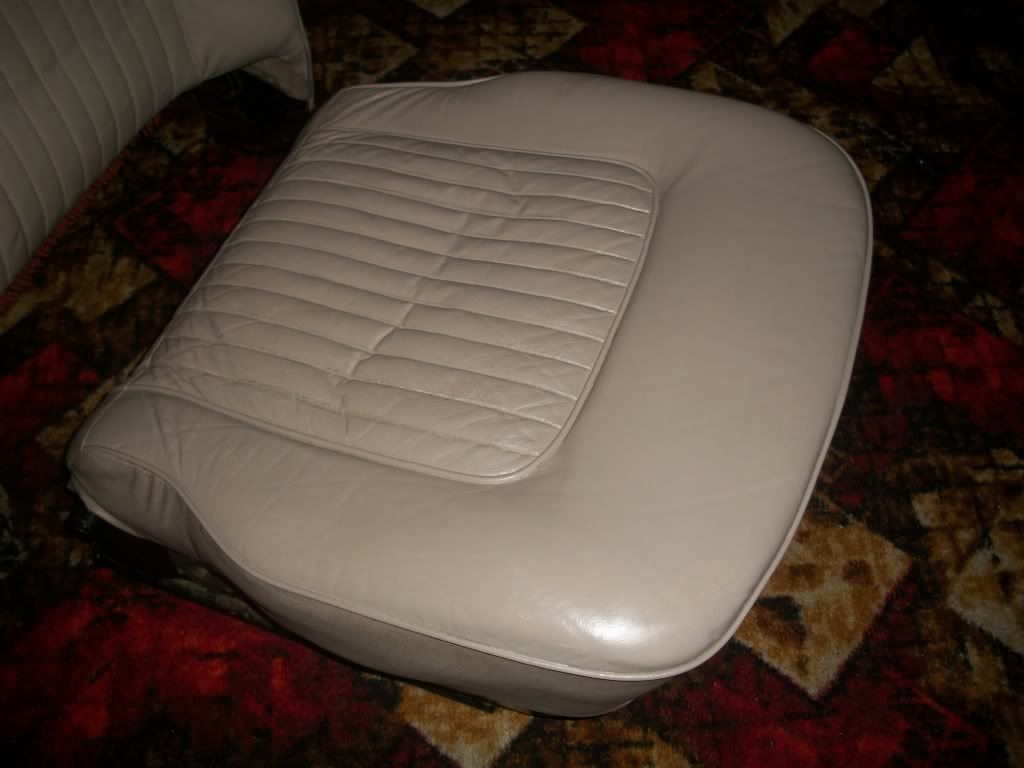
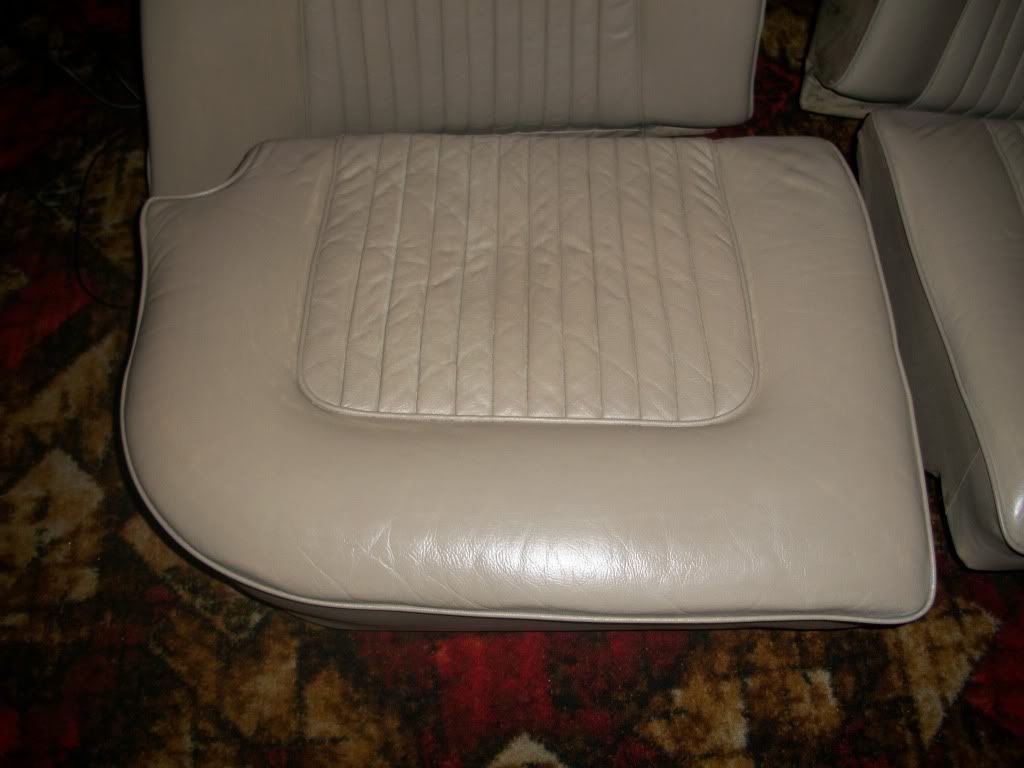
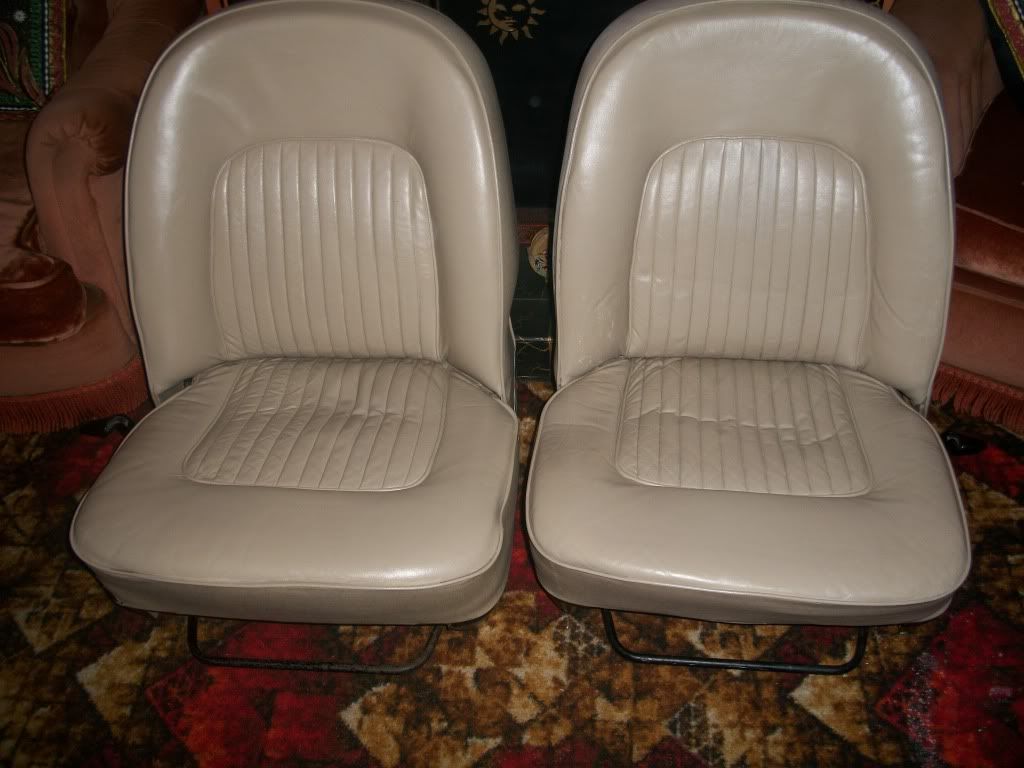
Note the 70's-contemporary carpet. Just out of shot, there's the lava lamp and the Tretchikoff Chinese Girl print (only kidding on these..honest! :D )

Coverdale will be getting a call soon to move things along!
 
Stan

Great job on those seats. That will make a huge difference to your interior. Isn't it great when stuff just works :D

Dave
 
Hi Stan,


They look fantastic :D what a difference! think I'll go the same route with mine, no rips but 38yrs of grime!

So you clean the leather & then add the dye I guess, may I ask how much the kit cost you?

Many thanks Damian
 
They do look good! I always thought those kits would be snake oil - really surprised and impressed!

Rich
 
Brilliant job there Stan :D

What you can't see, is the new aroma which smells like newly tanned leather - for a while anyway :)

I did the rear ones last year, front ones coming up soon

Richard
 
Nice one Stan,

They have come up beautifully! You can see the difference much better on the lighter seats than on black, the difference is startling. Did you use wire wool with the cleaner? That's what I had to do to get rid of 30+ years of grime.

You end up using a hell of a lot of elbow grease (very expensive stuff, I had to keep buying bottles of whisky to refill my elbow grease :wink: ), but the results are worth it.......... Reminds me, it's time to get the hide food out again and keep mine supple.

We all end up spending ages on the exterior, we often neglect the interior - yet when we're driving, the driving experience in a well maintained interior is soooo worth while.

Well done.

Oh one other thing .... When you get your carpet from Coverdale, and start the fitting, the most difficult bit is the bottom of the A-Post, when you get the carpet, you will know exactly what I mean. You will look at it and think - "coverdale have cocked up - that'll never fit!". It's the bit that I never took a photograph of, and it's the bit that has the most questions on this forum. For the benefit of everyone else that follows us, can you remember to take some step by step photos of how you fold the A-Post carpet and post them up?

Remember to keep your old sill carpet, unpick the stitching on the folding around the A-Post (it's folded and stitched under the sill plate) so that you can replicate the fold.

Nice one Stan - Keep it going!

Bri.
 
I have just fitted a Coverdale sill carpet. The two main problems are firstly that the carpet is much thicker than the original, so making it fold and sit correctly is very hard. Secondly, the carpet will never fit well around all the wiring I seem to have in the area, it is more of a covering up exercise! A fair amount of trimming was necessary, and it still need a little 'massaging' to make it look good. Not a five minute job!
 

Attachments

  • DSCF1111_1.JPG
    DSCF1111_1.JPG
    61.4 KB · Views: 777
  • DSCF1231.JPG
    DSCF1231.JPG
    118.9 KB · Views: 777
I needed to trim along the top edge of the carpet to make the sill kick plate fit. There seems to be a reasonable amount of extra there. I folded the excess near the front so it formed a 'V' pointing downwards, and tucked it under the sill plate as it seems was done originally. Now I know where it goes, I am thinking of trimming a bit out here as I have ended up with three thicknesses of carpet under the front end of the sill plate where the fold is, which is a bit thick!
 
Wow, they look fab!
I've got seats in similar condition to yours that i've been thinking of redying. It's definitely a Woolies kit for Christmas after seeing that! They look A1, well done.

Just one quick question to you and everyone... You know that plate bolted to the side of the seat backs? (I assume they're to give adequate space for securon inertia seat belt reels) Are they factory fitted or have you made them up yourself? If so, is it relatively easy to dismantle the seat and fit?

I could really do with a solution like this myself. Getting sick of both belts sticking and nearly getting caught in the doors all the time! But I don't want to change the seats for the S1 style with the cutouts, as they're in pretty good knick- no rips or wavy piping.

Any pointers would be really appreciated! Cheers Gents
 
Thanks for all the comments guys and...

Dave3066 said:
Stan

Great job on those seats. That will make a huge difference to your interior. Isn't it great when stuff just works :D

Dave

...like you say Dave...wonderful when stuff works! :D

DamianZ28 said:
Hi Stan,


They look fantastic :D what a difference! think I'll go the same route with mine, no rips but 38yrs of grime!

So you clean the leather & then add the dye I guess, may I ask how much the kit cost you?

Many thanks Damian

I guess like all jobs, the key to a good result is in the prep. As Brian says it's worth spending ages on the cleaning. I used a nail brush and a soap flakes solution to get the worst of the muck off, whilst wiping the leather constantly to stop it getting too wet.

(Aside: Soap Flakes...who remembers Lux? Found this tip on the net and it works! Don't use detergent as it's too astringent on the leather.)

Then onto the Woolies cleaner, again with the nail brush, and getting into all the pleats to get them really clean. Next a run over with wire wool to give a bit of a key, then a good feed with hide food - leaving it a couple of days to be absorbed.

Next up, the dye which you rub in with a soft cloth (supplied with the kit). Spend a long time with the first coat rubbing it well in and give it at least 1/2 an hour to dry. I used 3 coats all over and I've ended up with about 1/2" left in the bottle...which I'll need to touch up a couple of small areas.

After the dye, stage 3 is the sealing paste which is gently rubbed over the surface then lightly buffed off. If you're too vigorous with it, it can start to lift the dye out. After this, I left the seats a couple of days at room temperature then gave them another dose of feed.

I used the No. 2 kit which Woolies advertise as enough for 4/5 seats and for which they charge £60 including postage. They attend quite a few shows over the year so you could arrange to have a kit made up and collect from their stand. I paid £50 at the NEC for the Buckskin kit.

http://www.woolies-trim.co.uk/c-117-leather-renovation.aspx

Well worth it I think. Not just for the result, but it's a really satisfying job to do as well. Especially if it involves whisky as well, sez Brian! :wink: :)

I've got a few jobs to do on Occie in the garage over winter...as well as the carpet set after Christmas...so I'll keep the seats indoors and give them another feed or two.
 
That looks the donkeys b~~~ocks,looks really good Stan,you have done a really good job on them,keep up the good work mate :D :D :D
 
redrover said:
Wow, they look fab!
I've got seats in similar condition to yours that i've been thinking of redying. It's definitely a Woolies kit for Christmas after seeing that! They look A1, well done.

Just one quick question to you and everyone... You know that plate bolted to the side of the seat backs? (I assume they're to give adequate space for securon inertia seat belt reels) Are they factory fitted or have you made them up yourself? If so, is it relatively easy to dismantle the seat and fit?

I could really do with a solution like this myself. Getting sick of both belts sticking and nearly getting caught in the doors all the time! But I don't want to change the seats for the S1 style with the cutouts, as they're in pretty good knick- no rips or wavy piping.

Any pointers would be really appreciated! Cheers Gents

Hi,
I seem to remember your seats are Sandalwood? Did you want to re-dye to Buckskin? I don't think the standard Woolies kit is good for a re-colour...it's more for renovating an existing colour. Be worth you giving them a ring before ordering.

The guard plates on the side of the squabs are factory, and as far as I know are standard on all Series II front seats to give clearance for the inertia belts. Although I could be wrong there...often am! :)

Cheers,
 
bri p6rover said:
That looks the donkeys b~~~ocks,looks really good Stan,you have done a really good job on them,keep up the good work mate :D :D :D

Thanks Bri...and, if you remember, you were with me when I was haggling (unsuccessfully :roll: ) for a better price at the Woolies NEC stand!

Cheers mate,
 
To redrover. There are three basic seat structures in the P6 (ie ignoring the trim variations, leather, vinyl, cloth, flat pleat, box pleat). First is the true S1 seat, with a fabric back and roll of cushioning at the top of the back and no cutout on the side of the seat for the inertia reel. Then S1 1/2, which is fabric back again, but now has the depression in the side with the chrome plate. Finally S 2 with the vinyl covered fibreglass screw on back, also with the depression and chrome plate. The bad news is that the depression is structural - it's pressed into the seat frame. The good news is that you can get inertia belts that fit in the gap if you have S1 seats.

The other varaition of note is with headrest sockets. All S2 seats have them. I think all S 1 1/2 seats have them, although I'd be prepared to be surprised by a few exceptions. Most S1 seats don't have them - they were an option at that stage. You can fit headrest sockets to an S 1 seat by buying a couple of scrap S 1 1/2 seats and swapping the bits over. S 2 seats won't do as the rear profile is slightly different and the sockets are welded in instead of screwed in. There is enough vinyl on the S1 seat to stretch over the increased width, so no upholstery required.

Chris
 
Thanks Bri...and, if you remember, you were with me when I was haggling (unsuccessfully :roll: ) for a better price at the Woolies NEC stand!

Cheers mate,[/quote]

I can remember it,he was a greedy t~~t,ha ha,by the looks of it,it was well worth the money tho, i wish i bought one now :wink:
 
Back
Top