1969 NADA daily driver project

Andries

Member
Hi Guys,

As promised, with pictures! I will bring her up to par (at least) in the coming weeks combined with school.

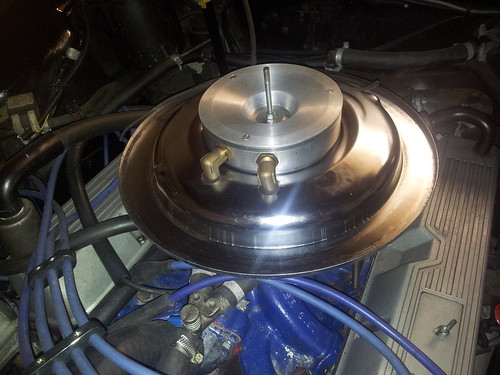
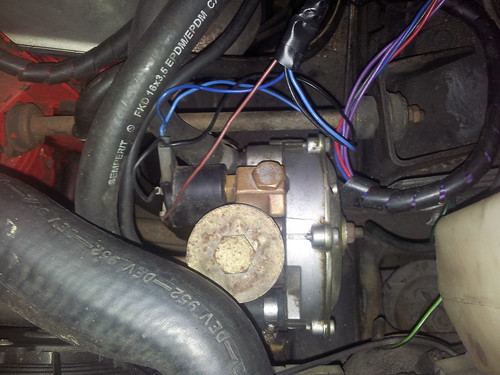
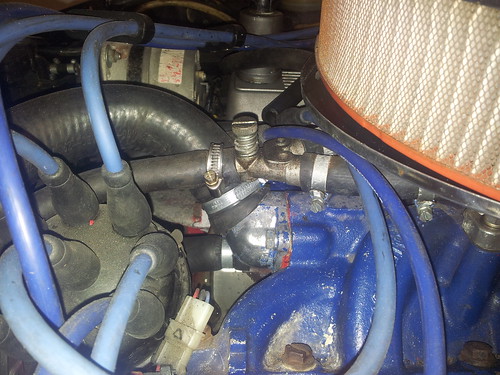
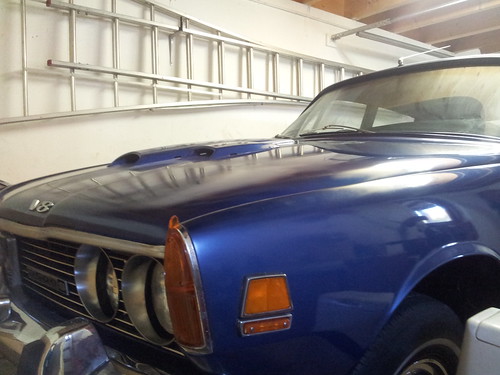
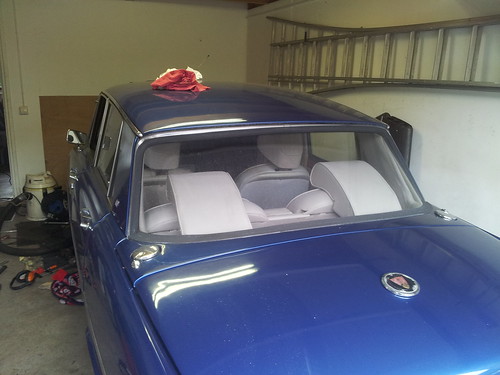
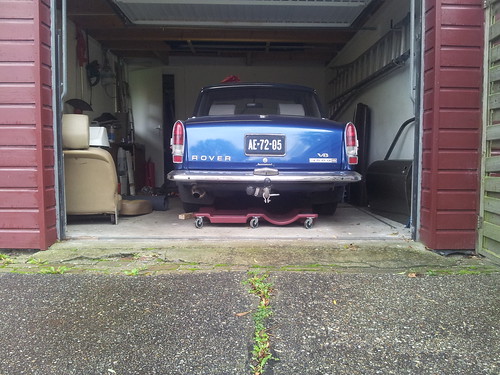
Quick spec of the car. She is an 1969 NADA 3500S in Dodge Viper metallic with 3.9l carburated by a Weber 500. Incorporated in the airfilterpan is the LPG distribution for a 80L LPG tank that is taking up all the space in the boot. Topping up the LPG tank is done with the mirrored petrol filler cap on the RHS. GM180 gearbox from a SD1. Electronic Ignition is fitted (lumenition), twin electric cooling fans and uprated radiator. Wolfhead shocks forward and overcoils at the back, s/s exhaust.

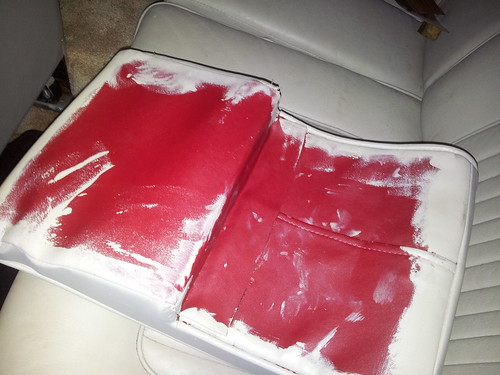
No airconditioning or sundym, does have power windows. Full ET's on the lovely ( :roll: ) repainted interior. I have pictures of the car with boxpleat Toledo Red interior with the same ET's (I can still see the red shining through). Guess the previous owner didn't like red.. or boxpleat, she's fitted with flatpleated seats now.

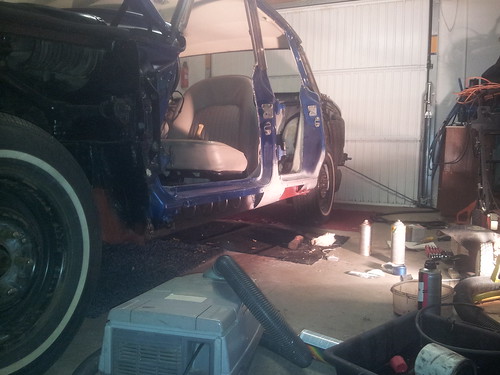
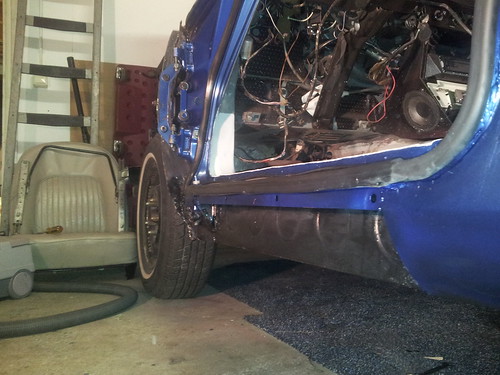
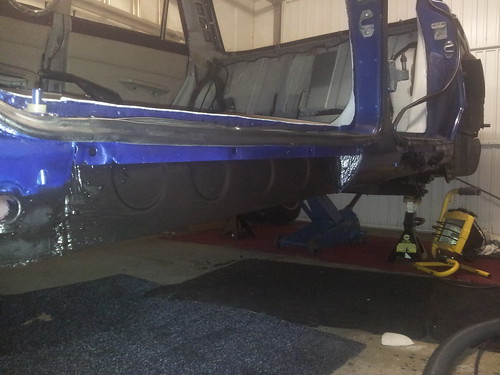
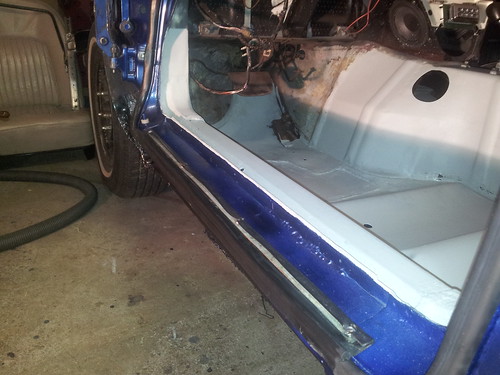
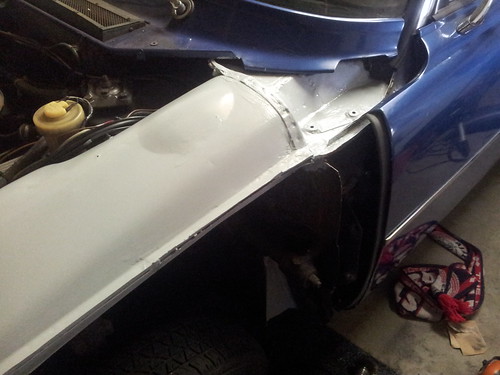
She has a lot of exterior rust, I coped with some of it already on the front wings near the running lights. It's quite easy to deal with as the colour is available at the local auto parts shop in a spray can, I'm not going for a full respray. Want to get her sorted first, stop the rust and drive!

Already fixed the terminal rust on the top of inner wing on the lefthandside of the car, really grotty and hard to weld!


20121110_121224

Double filler caps


20121110_121333

No overriders!


20121110_121320

3.9L


20121110_121153

Best regards,
Andries
 
Andries, I like everything about your car- especially the colour
Hope you're very happy with it, how does it drive with that engine/carb/gearbox setup? :D
Jim
 
rockdemon said:
Looks very nice - would like to see some pics of the lpg tank setup!

Rich


20121117_191533


20121117_191551


20121117_191604

I assume you can imagine the amount of bootspace being lost with a cylindrical shaped 80L tank! It's HUGE, especially considering the amount lost around the tank. I'm thinking about a flat one and covering it up flush at the level of the battery. Allows me to put a crate of groceries etc.

corazon said:
Andries, I like everything about your car- especially the colour
Hope you're very happy with it, how does it drive with that engine/carb/gearbox setup? :D
Jim

There are to many niggles to really drive any long distances. I drove her from the political capital of the Netherlands ( :roll: ) to my home in the southwest, which is about a 100 miles with motorways and single lane roads along the 'Delta' works. She drove nicely, 130kph out of the tunnels near Rotterdam port so enough oempf I guess! Last few drives have small test drives so can't really say. Front end will be together next week so then I will go for another drive.
 
Interesting car. Keen to hear how it drives with that box; I now have two ZF 4HP22s stored in the garage as starting points for the conversion project I'll undertake when my slightly tired 35 gets to a certain point.
 
Andries,

A very nice project. Thanks for the details/picture in the email. I'm out of the UK more often than I'm in it these days, but am still trying to keep track of the NADAs out there.


Regards,

Chris
 
that looks a very neat setup... 80 litres is a big tank for a p6!

very neat job on the inner wing there :)

Rich.
 
The problem with the LPG setup, for the moment, is that you can't count on policians to keep their promises. In Holland, like everywhere else, they have the tendency to alter their previous proposals. They are looking for a way to ban all the daily drivers older than 25 yrs. Lot of people are driving Merc 190D's/Amazon's and the lot so if they skip the complete oldtimer excemption I'll keep the LPG. If they skip the excemption for Diesels and LPG cars I'll throw out the LPG installation and use petrol.

Also talking about a card with '60 days' that you are allowed to drive it, a year! Just tax everything that's is vaguely fun and people will keep paying, brilliant isn't it?

WarrenL said:
Interesting car. Keen to hear how it drives with that box; I now have two ZF 4HP22s stored in the garage as starting points for the conversion project I'll undertake when my slightly tired 35 gets to a certain point.

ZF 4HP22 is a dream for me. Lock up, 4 speed while the GM180 is a regular 3 speed from the SD1. Kickdown is vacuum controlled and it's a little harsh to kick in sometimes. You can imagine that when you put the throttle down you don't have a linear build up of vacuum, there's is a small peak in the amount of vacuum generated so at every rev range under about 100 kph she'll kick down as soon as you step slightly on the throttle! I will follow your conversion with great interest when the time comes!


To do list for today ;
Fit the lefthand front wing and sort out all the electrical connections for the sidelights!

Regards,
Andries
 

20121125_111115


20121125_111107


20121125_111319

If you follow the link underneath the pictures you will end up on my photostream and will see more! :wink:

Front is finished now, have dealt with the rust in the front wings and dents in the bonnet. New mirrors fitted (what do you guys think and what car did they originally come from?). New underseal and sorted out the electrics of the sidelights! Now quite sad about the toledo red interior it used to have.. I have pictures of the car with it, now it's leatherpaint galore :evil:

Thanks for all the replies,
Andries
 
I really like the look of the twin petrol fillers! I know your second filler is for LPG, but has anyone ever tried to modify the petrol tank to accept twin fillers?
 
Absolutely brilliant project, and I look forward to hearing more about it. I'm hoping to LPG my P6 this year, and I'd previously considered a mirror petrol cap, but wondered if it might prove awkward to fill?
 
FrazzleTC said:
Absolutely brilliant project, and I look forward to hearing more about it. I'm hoping to LPG my P6 this year, and I'd previously considered a mirror petrol cap, but wondered if it might prove awkward to fill?

The LPG filler, which is some cars is mounted below the bumper, is flush with the base unit underneath the filler cap. You'll need an extension piece that can take the LPG nozzle from the local pertrol station and screw it in. It's awkward because the nozzle from the petrol station hits the filler cap, looks great though. I don't know how people run on LPG, there's no way to get it to run on petrol decently, but it won't start on LPG. I'm throwing it out because of Dutch law, it needs a hydrostatic test anyway so I might as well take the whole system out. As it was there before I bought the car I can't make up anything about the way it's wired.


I'm having the car welded up by a local specialist in the next month, after that I'll post some pictures. I'm supplying all the panels so the pictures might be interesting. After that I'm going to built it all the way back to standard spec except for the Weber and Kenlowe's.
 
Big update!

I've had her welded up over the last few weeks by a local specialist as she had her sills butchered in a very professional way! Came across loads of fillers, chickenfence, pieces of a file and a lot of rust. The rust went up al the way to the top of the inner sill of the lefthandside (passenger side UK), took out the jacking poins, post supports and the front of the rear wheelarch. As I could've done it myself, I chose not to this time! It would've taken me the better part of 2013 and it will never be done to my satisfaction due to limited welding experience and I just don't have the guts to grab a angle grinder and grind everything out thats rotten. So I ordered the repair panels from JR Wadhams, which are great pressings, and instructed the local welder about P6's! He was very impressed with the amount of thought that went into the base unit by Rover. Altough the seat mounts between the inner sill and the floor were a bit of a pain.

Work that has been done ;

- Outer sill completely (LHS)
- Inner sill completetly(LHS)
- Flootwell area (LHS) replaced by 2MM thick steel.
- Pocket underneath the back seat (LHS), deleted the lower jacking point and replaced by 2MM thick steel.

Having said that, now it's time for the finishing touches and get her going! I've primed the outer sill with a ferro-etching primer, 2 coats. Then I applied your basic rustpreventive paint in flat black in 3 coats and I'm done now. The sill supports, top of the sill (step), D-post and the channels for the door rubber have been resprayed in the current colour. Wheelarches and other common rust spots have been brought back to bare metal and received the same treatment as the outer sill. After that I refitted the door rubbers, fitted new strikers for the courtesy light and the ignition buzzer and painted the rear suspension because I was in the neighbourhood anyway.

Pictures!


20130330_232753


20130401_223837


20130403_233313


20130403_233330


20130401_223829
 
Your specialist looks to have done an outstanding job! At least with all of that sill work done, you know it won't need much welding done for a while!
 
FrazzleTC said:
Your specialist looks to have done an outstanding job! At least with all of that sill work done, you know it won't need much welding done for a while!

I would hope so! Altough he forgot the bottom part of inner pressing on the D-post of the RHS leaving a gap of about 2", made a repair panel myself and welded it shut last saturday. I had him treat the sills and all the cavities with a wax which liquifies when driving or heating up so it should be fine for the next couple of years. As I'm very close to the North sea there's a very salty climate, put that together with all the salt they throw on the roads in the wintertime and the humidity and you have a very dangerous climate for the Rover's. Is it the same in the UK?

Small update ;

Rear suspension is painted and I'm going to fit the doors today! Hopefully I can turn her around when the rain stops and repeat the whole process on the RHS. Cosmetically, she will be sorted in a month or so. Technically, I'm not even close. I've decided I really don't like the GM180 box due to the lack of a sump plug and the electronic speedo transmitter. The park doesn't work and I don't really see the point over a BW65 box. I could pick up a BW65 for about a 100 euros, or I could take the road unknown and go for a ZF 22 HP.. Did anyone complete this conversion? The troublesome part is the BMW box and finding a Range Rover bellhousing.. Don't want to buy a complete RR-box as that's a serious budget blow for something I won't use!
 
Update, pictures to follow when in get's interesting!

The car developed a headgasket leak which I spotted when I changed the sump gasket (cork, dribbling on dad's drive :oops:) so we've took weber, inlet, rockershafts, heads etc off. One bolt sheared off, but once the tension was off it was easy to remove with precision pliers. Ordered a complete new set of bolts from RPI. Anyway, the heads are to be skimmed and the valves to be reset into the seats. Hopefully get it back over the weekend and install my new ignition system next week. I'm ditching the lumenition and 7mm leads and have gone for the RPI system. I'll try to make an assesment on the forum somewhere.

Oh, and the LPG system is in the shed.. turned out that it caused more than it really cured. For one I didn't like the way it was wired in, nor did I like the impact on the cooling system or the overall installation. Maybe I'll built it back to my own standards one day but for now.. I'll be running pertrol! Gas is useful in the kitchen! :)
 
Underbonnet light

I've fitted an underbonnet light which I think is an useful addition to any car. It is standard on the Federal models but it was removed on mine. Is the easiest of circuits on these cars. It has it pick-up point in fuse 1-2 (interior light, map light) witch isn't controlled by the ignition. Basically, you can remove on fuse holder and replace it with a connected one. That wire goes to the underbonnet light, which is exactly the same as the interior roof light. On Federal models it's pop riveted and the rivets aren't visible due to the central scoop but there are many alternatives available. The earth is connected to a striker switch which closes upon a small box section of metal secured to the rear bolt of RHS bonnet hinge. The best route for the wire is through the bonnet strengthening beam.

Cylinderheads

Developed a small headgasket leak, probably due to age and that the outer four bolts were tightened on the same lb/ft as the other 10. I've had them skimmed (8/100) and the valves re-seated. Will be fitted with new bolts, tin gaskets. In the meantime the inletmanifold has been painted and the rockercovers will me changed to the original R O V E R type. Here are the pictures.

20130506204044.jpg


20130506204034.jpg


20130506204016.jpg


20130506204006.jpg


Kind regards,
Andries
 
Back
Top