Basic fault finding

Ru5ty

Member
I have a '74 3500 auto with a rear mounted facet fuel pump using a mechanical ignition. This is the first P6 I have owned and I am not a competent mechanic but I am keen to learn. The plan is to do as much of the work on the car as I can.

After successfully completing an Epic 24hr 800 mile journey to my home in France he promptly broke down. Driving home from work, with a full tank of fuel he was running fine. The engine temp was good, just getting into the green when I pulled out onto a roundabout from stand still and experienced a sudden loss of power and the engine stalled. It was sudden, there was no misfiring or any other symptoms leading up to it. The engine turns over fine but does not fire. Initially I suspected vapour lock so I let the engine cool down, but nothing changed.

So this is what I have checked so far:

Fuel pump is working (it is noisy), there is no strong petrol smell around the car so I don’t think it’s a leak.
There is a spark from the coil’s HT lead, although not that strong however I have no experience so not sure how strong it should be. It has Lucas HT leads which have a very high resistance reading on my multimeter - I don’t remember the figure, but it did make me raise an eyebrow.
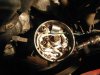
Distributer is not damp and contacts seem OK.
There is a spark from spark plug 1 – again it is not strong, but I have no reference, actually it does not spark with a flash, rather it transfers electricity to the engine block- I tested simply by removing the spark plug and holding it close to the engine block as I do not have a spark plug tester. Is this an acceptible method?
Secondary coil is reading 17 ohms (20k setting on meter) primary 35ohm (200 setting), the Haynes and workshop manuals seem to completely forget about the coil….I cannot find a reference to normal operation tolerances and there is no mention of the coil other than in the fault finding section that I can find.
Have not tested the condenser yet, need to read up on that tonight.

This is all I have had time to do this week, so any advice is welcome, but please keep it simple - assume I know nothing. You are talking to an idiot who struggled (and failed) last night to even remove the elbows to look at the air filters -I released the hose retaining clamps and transmission dipstick securer and pulled with all my strength but could barely get the LH side elbow to move, I was worried about damaging the air filter box (which i was pushing against) so I stopped there and went to bed. Is that normal, what is the trick?

So what are the next stages of fault finding the non starting engine to go through?

Any advice is truly welcomed.

Cheers
Russ
 
With such a sudden engine stop, it could be the ignition system. A coil for an ignition system with a ballast resistor should have around 1,5 ohm. A coil for an ignition system without ballast resistor has around 2,3 ohms. So it is wise to check the coil resistance again and eventually buy a new coil as these are not so expensive. I would also consider buying an electronic ignition.
Powerspark (Simonbbc) supplies rather cheap systems and there are lots of others. Recently there was a thread about several electronic ignition options.
Also check the points. If these have the correct gap and if the plastic part tat runs over the cams is still in good shape.
I am currently changing my points distributor for an electronic one on my P5B because i had problems with the ignition. As i have a lot of spares, i could swap items and found the points were sometimes giving problems. It were not Lucas points and these design wise didn't look so solid

Further loosen the fuel line at the carburetor and put this in a can and put the ignition on and check if there is fuel getting to the carbs. A blocked fuel filter is unlikely but is still possible

The elbow can be pretty tight but i don't believe the air filter could cause such a sudden breakdown

Peter
 
If you've been cranking the car and its not firing, you should be smelling some fuel being blown through the engine. But the most likely cause of an instant cut-out is always electrical. Fuel would splutter as the float chambers emptied.

The easiest method is simple substitution. You are really going to need keep spare points (IN THE CAR EVEN IF YOU HAVE AN ELECTRONIC IGNITION MODULE) anyway and a good coil can be had for £15. If there is nothing obvious check the wiring around the coil for anything coming adrift - clean all the contacts on the connectors and make sure they are located properly.

The coil should read almost nothing side to side (not inc. the balast) but 10koms upwards to the centre from both sides.

An ignition lead of course will only lose you 1/8th of your cylinders anyway. You can eliminate the lead from the coil to the distributor by simply swapping it with another one.

You won't be able to test a condenser with a basic multimeter fully one with dedicated capacitor testing is needed. In theory using the resistance measure this should tend to infinity as it charges, however the current from the multimeter might be so small it simply leaks away and you can't really tell.

Consumables are so cheap for these cars then you most definitely should have stocked up in the UK (I'm going in December with that purpose in mind!) including transmission fluid as this is absurdly expensive and difficult to get in Europe and only £20 for 5 litres in blighty.
 
Thanks guys, really appreciated.

This has been a real challenge for me. After establishing that I had a spark from the coil and sparks at the plugs I investigated the fuel system but found nothing amiss, fuel pump is strong and i could see bubbles in the fuel filter. Back to square one. Lots of headscratching and re testing with different results and conclusions each time...very frustrating and somewhat confusing as it kept challenging what i thought i understood. The problem was that the problem was intermitent - sometimes i had a spark, sometimes not. Inthe end it was the points...they sometimes stayed closed. I am not sure why the problem is intermitent but after opening the points gap (without a feeler guage) til i could just see air between them life returned, although it is running pretty rough now (it was smooth before the sudden failure). I presume once i get the gap accurate (I now have a feeler guage) smoothness will return. Any tips on this? Any tips on hand cranking the engine to get the points in the correct position?

Anyway, i had fun and learnt a lot in the last week. Most important lesson was the need for Electronic Ignition. pic of my dizzy cap attached.

I am going to go for the Lumenition optic and i presume i need the PMA050 - FK114 for 35D8 but not sure if it is the correct one?? pic of my dizzy cap attached.
http://www.rimmerbros.co.uk/Item--i-GRID006400

What type of coil should i go for? I dont think i need a performance coil but maybe an upgrade of the one i have is necessary - it looks very old, but i think is OK however i would like to change it for piece of mind.

Cheers
Russ
 

Attachments

  • dizzy cap.jpg
    dizzy cap.jpg
    127.7 KB · Views: 1,161
Lumenition systems are excellent and people have had them running for decades. I fitted one to a Dolomite years ago and the instructions are good. I use the cheaper type from Simonbbc for my P6. All of these magnetically switched types need you to reset the static timing when fitted.

A higher performance coil can be used with most systems. TBH I didn't much notice any performance difference - perhaps with the auto and not revving much it just isn't demanding enough of the charge/discharge cycle. Although you'd think with twice the frequency of firing to a 4 cyl it would. Aparantly you can open the gap of the plugs a bit for a wider spark...

What does definitely make a difference to starting is an electric fuel pump, especially when sat for a bit (obvious really fuel is at pressure before you crank).

Rover V8s are notorious for chewing points hence the popularity of various forms of electronic ignition (any number of threads to search on the topic).
 
Ru5ty wrote,...
I am going to go for the Lumenition optic and i presume i need the PMA050 - FK114 for 35D8 but not sure if it is the correct one?? pic of my dizzy cap attached.

Hi Russ,

Those are the correct Lumenition parts to obtain for your distributor. As Peter mentioned, the instructions are easy to follow and the kit is easy to install. Just remember not to shorten any of the wires and the original or an equivalent ignition coil must be used. If you wish to purchase a new coil, ensure that the primary resistance is between 1.2 and 1.5 ohms and no more. The ballast resistor is also retained with this specific Lumenition system.

Ron.
 
Thanks guys

My Lumention kit has arrived and I plan to have a good fiddle this weekend. There are a couple of points I am not fully clear on - could someone point me to a thread which details exactly the installation proceedure? When I search 'Lumenition' on this forum I find lots of random threads which mention it, but I need a walk through to help me out. My confusion is where exactly to attach the power feed wire - I have never added wiring to a fuse box so need to my hand held a little through this process.

Cheers
Russ
 
Hi Russ,

For the Power module, you can connect the wire for power before fuse 19-20, which is also on the ignition side of the ballast resistor. In this way, power is always available so as to keep the engine running even when that particular fuse has either blown or been removed.

You will need to fit an extension piece in so as to reach the fuse box, as the wire (certainly on my Power Module) is not long enough to reach.

Ron.
 
Thanks Ron

I didnt get a chance this weekend, but I will be back with more stupid questions when i do no doubt.

I really appreciate the help.

Russ
 
Before fitting the electronic ignition i am trying to get the engine running smoothly. At the moment it starts ok from cold, but after a few minutes starts to deteriorate, missfiring on certain cylinders until it just stops after about 3-4 minutes.

Spark plugs are out and checked. Gaps OK, but they the tips are black (but dry) indicating a rich mixture.

I now want to check the points gap - when i got the car started after the breakdown it was by turning the dwell angle screw to open them but without measuring anything. Question is what is the best method to turn the engine by hand to get the points open at the peak of the cam lobe? I have been trying and failing to do it with the key.

It is an automatic so cannot do it by pushing the car in gear.

I think i will let a professional set the static timing and dwell angles accurately, but first i need it running well enough to get it to the garage!

thanks Russ
 
OK sorted it. Really awkward access to the bolt on the flywheel!

Points had closed up again?? Anyway engine is running sweetly again. Phew.

Looking forward to getting the electronic ignition on so i dont need to worry about this. :D
 
On to fitting the Lumenition.

Going into fuse 19-20 on (what i think is) the ignition side is 3 white wires, one thick and the other 2 thinner. Looking at the diagram one goes to the coil, one to the ballast resistor and the other to the ignition light. I presume I have to go into either the coil or the ballast resistor wire, but which is which?

Do I just splice into the wire?

Cheers
Russ
 
Hi Russ,

I am assuming that your Rover is a suffix D? , although your distributor is an early type with the triangular base plate.

The three white wires that branch off from the ignition side of fuse 19-20, one originates from the ballast resistor, another from the ignition switch, whilst the third comes via a Lucar connector, having taken inputs from the tacho and the ignition light.

Given that all three white wires connect together at fuse 19-20, you can choose any of them, but given a choice, choose the one with the largest cross sectional area.

I have attached a photo from my Rover illustrating how you can form a connection. Cut the white wire, strip off a suitable length of insulation from each piece, bind them together thence fit them into a connector as shown. The extension wire that you will be running from the power module will then plug into this connector as shown.


You can buy a range of connectors in addition to a spool of 25 Amp wire from Jaycar or Dick Smith or equivalent. Ideally you should use a pair of crimpers to secure the wires into the terminals (connectors), so a possible purchase also.

Ron.
 
Thanks Ron, you are a star.

I do not know exactly what the chassis number or the engine number is as I havent managed to find them. I presume the chassis number was covered over in a previous restoration as it is certainly not in the position shown in the manaul/haynes.

Looking at the circuit diagrams I think it is either a D or E, although the early type distributor has thrown me slightly.

Just to confirm, ignition side of the fuse box is the wireing going to the top of the fuses? Also another thing that puzzles me slightly is why not go into the wire close to the coil in the engine bay rather than from the fuse box?

Cheers
Russ

For those that like pictures:
 

Attachments

  • Dudley FR1.jpg
    Dudley FR1.jpg
    124.5 KB · Views: 917
Hi Russ,

Apologies for the delay in coming back to you.

To confirm the chassis suffix of your Rover given the number isn't where it should be, you can go off your engine (not the engine suffix), assuming that is the original. The high compression 10.5 :1 were used up until and including suffix D. The 9.25 : 1 engines appeared in suffix E. My Rover is a 1974 model, suffix D and the original engine was the 10.5 : 1 issue. Another means that you can use to verify the chassis suffix is by the rear of the front seats. If they are soft then that is a suffix D, hard fibre glass means suffix E. The transmission is another clue, type 35 suffix D, type 65 suffix E.

The input side of the fuses feed into the bottom, whilst the output side are those going out the top.

The wires running to the coil are after the ballast resistor, while the Lumeniton power supply must come from the ignition side, hence using the input side of fuse 19-20 is ideal.

Ron.
 
Thanks Ron

Electronic ignition now installed! thanks for the advice, saved me going into the wrong wires!!

Cheers
Russ
 
Back
Top