Heater woes - any help?

quattro

Administrator
Staff member
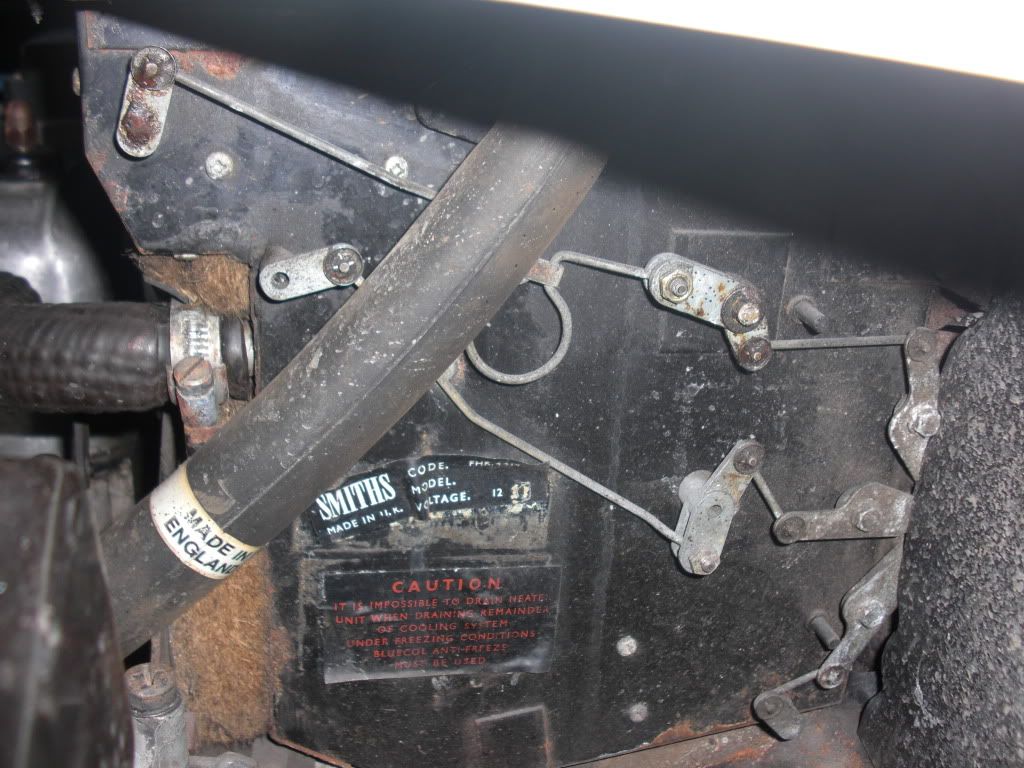
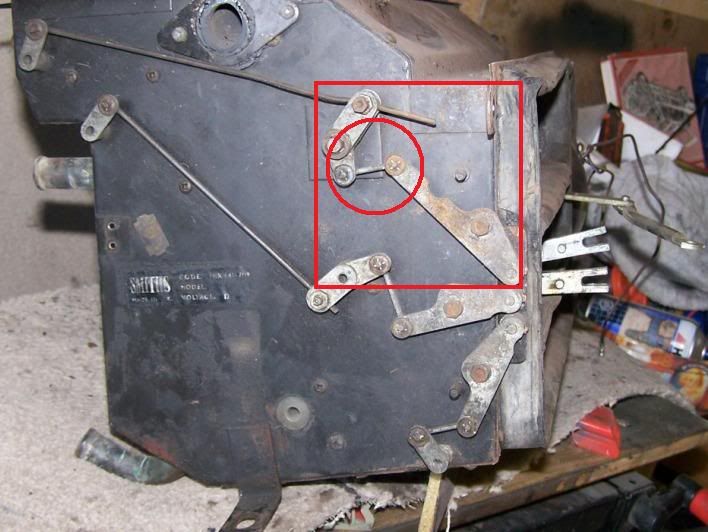
I have a problem at the moment with the heater controls. This is what Sparky's heater looked like on removal, if you look at the area inside the square, the control arm moves in a clockwise arc and pulls on the link (in the circle) to move the little dog leg swivel, push the long link and push the top flap open. All ok so far, but if you carry on moving the control arm (by pushing the lever inside the car downwards) to start the fan, the bar cannot move as the top flap is already at the end of its travel. Curiouser and curiouser? So how does that work?

sparkyorig.jpg


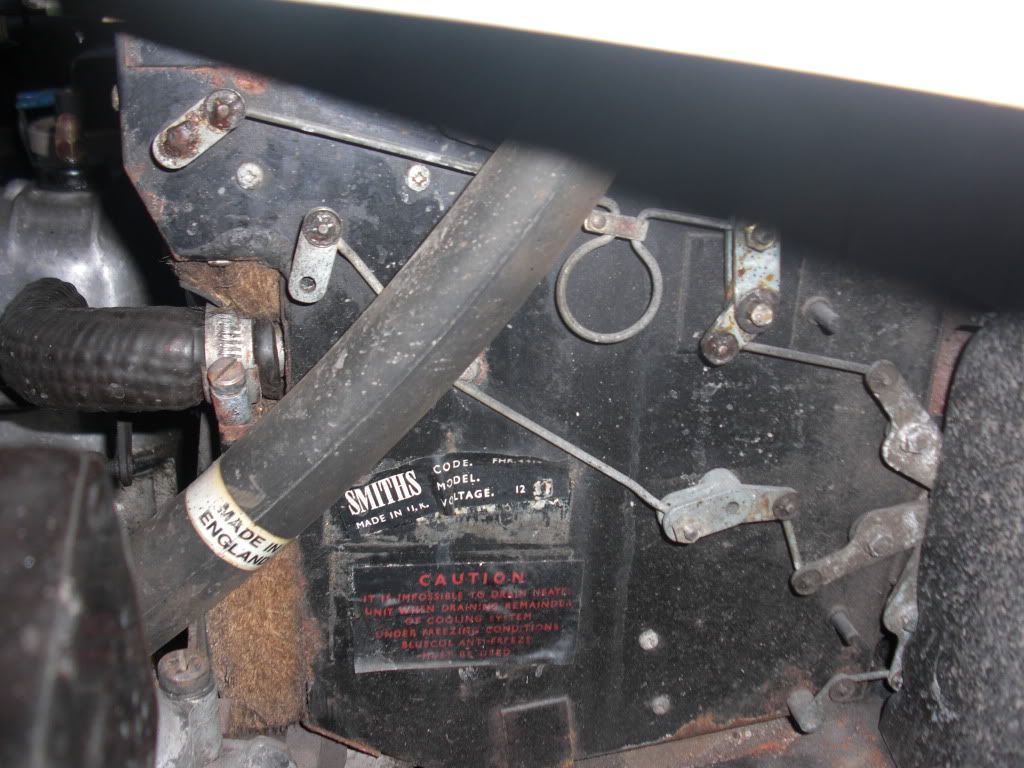
The car at the scrapyard had the same arrangement, but seems to be fitted differently.

redsetup.jpg


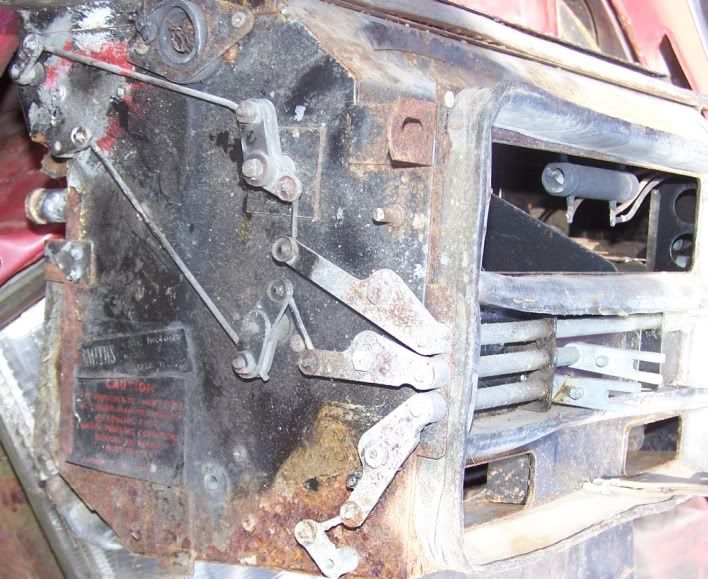
The small link in the heater is vertical to start with so opens the top flap in the same way, and as you push it further, it lines up with the dog leg and then can go past it, leaving the top flap where it was, but still allowing the fan to be used. In other words you get the necessary lost motion that is needed to get the system to work.

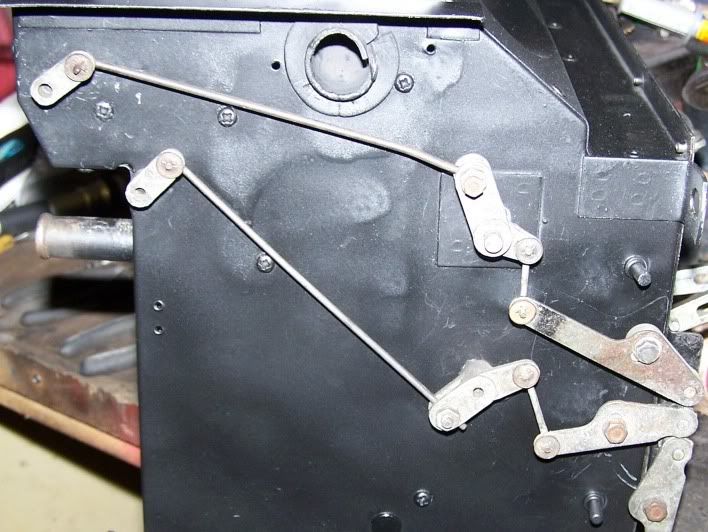
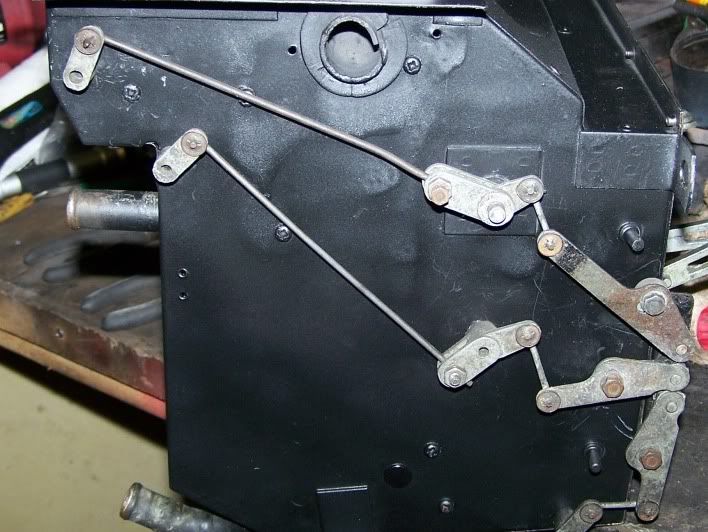
Try fitting Sparky's levers like this and the extended long link (connected to the top flap) hits the dog leg and locks it up before the fan comes on.

So, has it been incorrectly fitted in the past with a longer (too long) top link?

Or, are there two ways of fitting these - an old way and a new way, and I haven't worked out how the new way works?

Am I missing something obvious?

Will Mensa come round and ask for my membership card back?

Has anyone got and pics of the mechanism in its various stages of off,ram air only, first fan position, and full speed fan position?

:?

Richard
 
The linkage arrangement on the bottom heater is correct as far as I know.

I've just taken this picture of the linkage on EMF. This is with the flap open but the fan motor not on.

DSCN7810.jpg


When you move the blower lever down more the the first lever goes over centre, but doesn't move the second lever or the flap.

I think this means you need to trim the excess off the top link rod on Sparkys heater box.
 
Cheers Paul

I was tempted just to lop the end off, but am always cautious as it's not easy to weld it back on when it becomes FUBAR :D

I am going to have another long look at it, and cut to suit

Thanks again

Richard
 
Richard

Are there no diagrams in the workshop manual that show the layout of the heater levers? I know there's a section on how to set them up but I thought there might also be a diagram. Interestingly your top lever has a cut out in the upper edge that the scrapyard heater and Paul's do not have :?

Could this be another previous owner bodge job to get it working when he couldn't figure out the layout?

There is something fundamentally different about the orientation of Sparky's heater levers versus the others. The small lever at the top flap looks to be in the same position your 2 pics but only Sparky's shows the short arm in the circle as being horizontal. It's vertical in the others.

Dave
 
Are the levers splined / fitted to the links in the same positions in the 2 heater boxes ?
Maybe not and someone made up a longer link in an attempt to cure the problem ???
 
There are pictures that show the lever positions in the book, and also give the procedure for adjusting them. Looks like "Sparky" has been "got at" as far as the long rod is concerned but the general orientation of the levers looks closer to how it's shown in the book than the other one does. ISTR some of the rods need to be able to go over centre so that flaps move only at certain times rather than all going through a full range of travel at the same time. The book will probably make the whole thing a lot more complicated than it needs to be. You should know what the levers and flaps should do, so just adjust them until you get the required result.
 
Thanks all

The small link can be vertical in some positions of the top flap and horizontal in others, so nothing to help there really.

There is a diagram in the manual but it's not very good, as it shows the dogleg piece back to front, the small link is twice as long and the top link has some sort of spring arrangement in it. It does say how to set it up, which is good but not after the splines have been repositioned and there is nothing in there to check whether Sparky's heater has the splines in the right place.

I have worked out what all of the flaps do so just have to get the dremel out and chop that link up. (made a decision there :shock: )

I took a load of pictures of the scrap heater to check whether the splines were fitted correctly so no problem there Dave, they are the same. Just confused as to why that top link is over length, and conscious of the fact that the reason I stripped the heater, was because it didn't work! The top flap that is.

I just need to adjust the top flap until it is fully open at the point that it goes 'over centre', but need to get it into a position that it will actually go over centre, which it doesn't at the moment.

Oh well, off to the garage. This should be fun :)

Richard
 
If it's any further help Richard I took these pics of Lady C's heater when I got home.

All three levers all the way down

CIMG5278.jpg


All three all the way up

CIMG5279.jpg


Dave
 
Cheers Dave

Yours is as the manual with the reverse dogleg and sprung top link :shock:

I have sorted it by chopping around 2" off the end of the top link

This is the top flap closed
101_1990.jpg

Top flap open
101_1991.jpg

and top flap open with fan on i.e. control lever all the way down
101_1992.jpg


I have used the scrap yard car's control arm as it doesn't have the indent which could have been added later, I just don't know. The important thing is that the top flap opens, stays open when i want it to, and allows the lever to go down far enough to turn the fan on. So a success :D

Richard
 
Back
Top