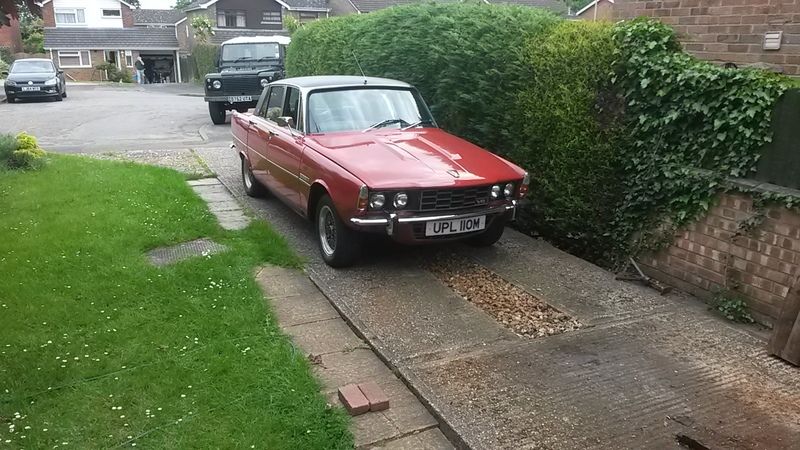
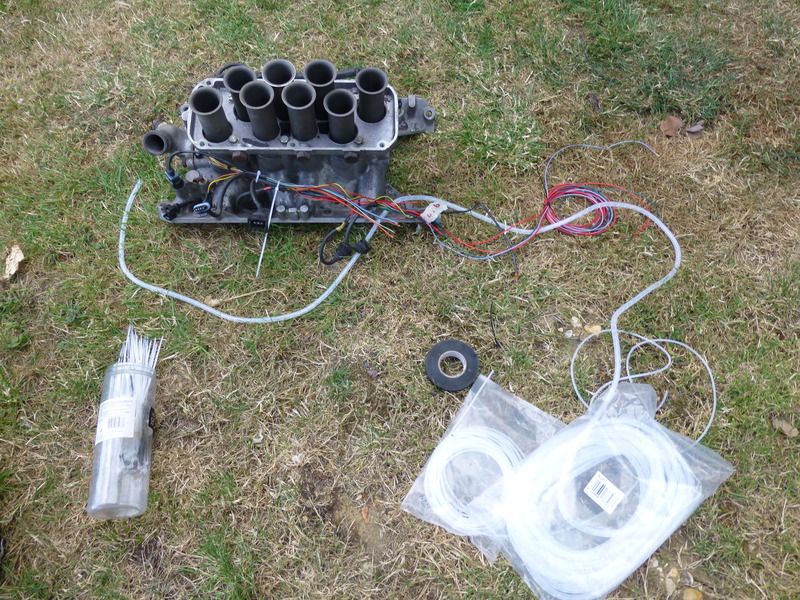
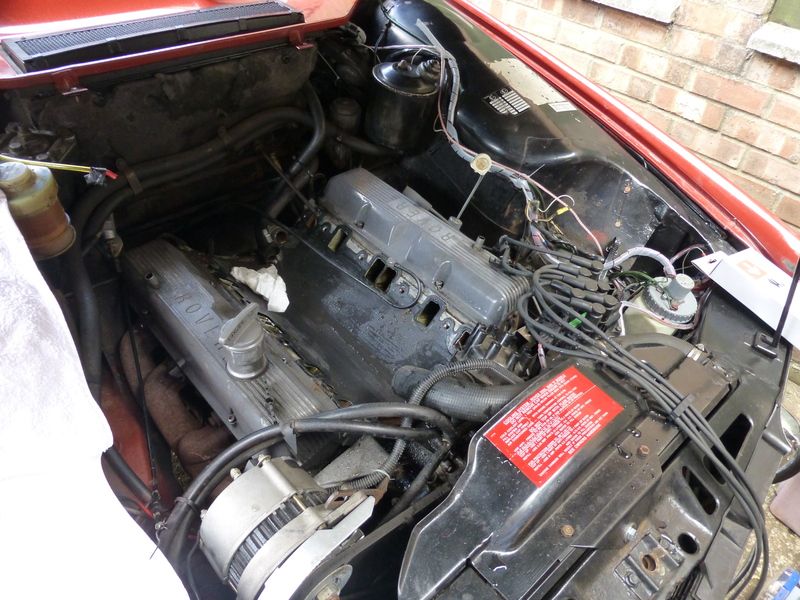
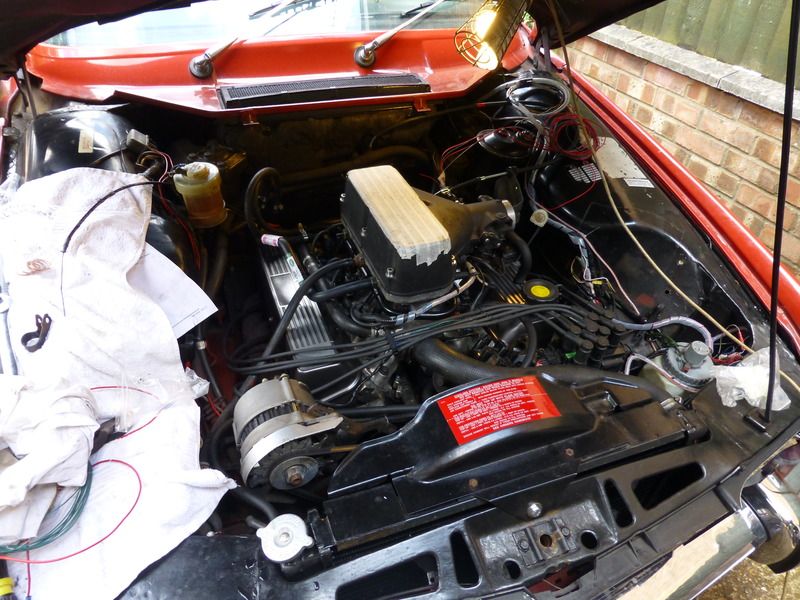
As I have alluded to in various other posts the Red Rocket is now Fuel Injected – courtesy of some old Range Rover/Disco parts bought off eBay, driven by my Megasquirt unit. So as a recap, here is how things looked originally:
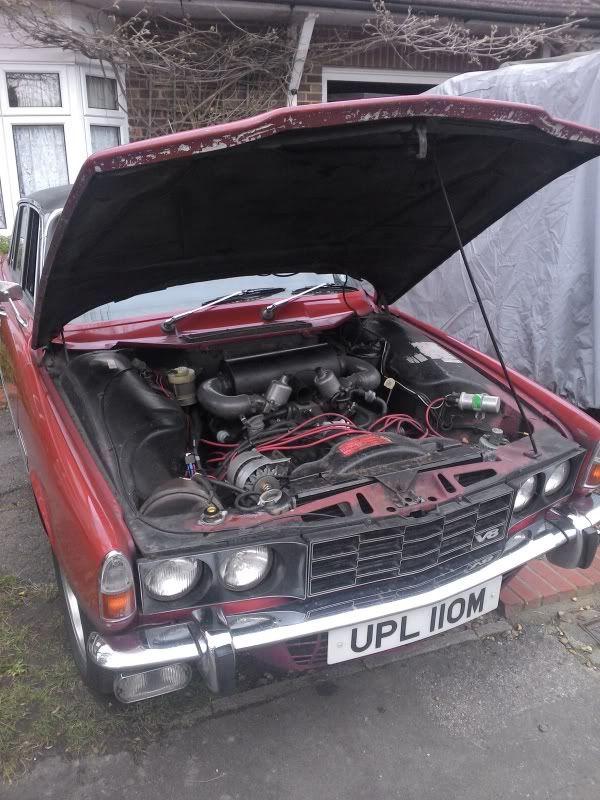
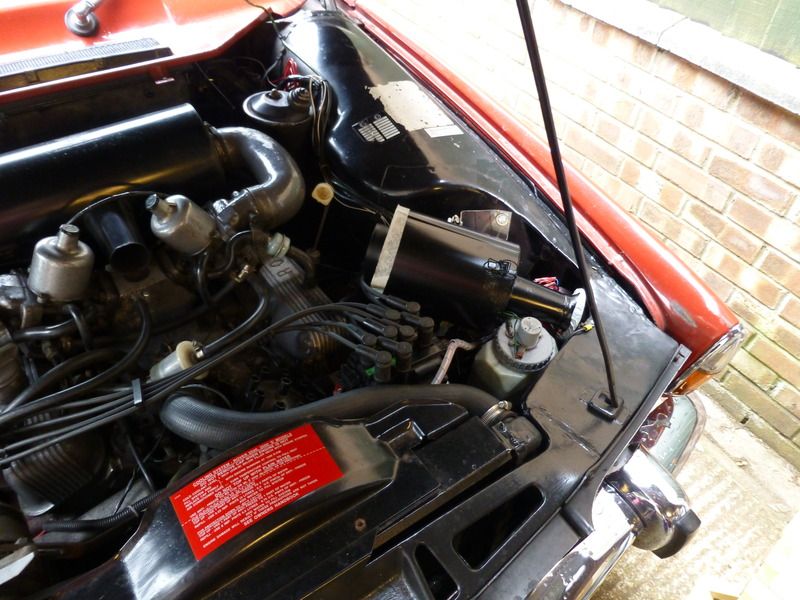
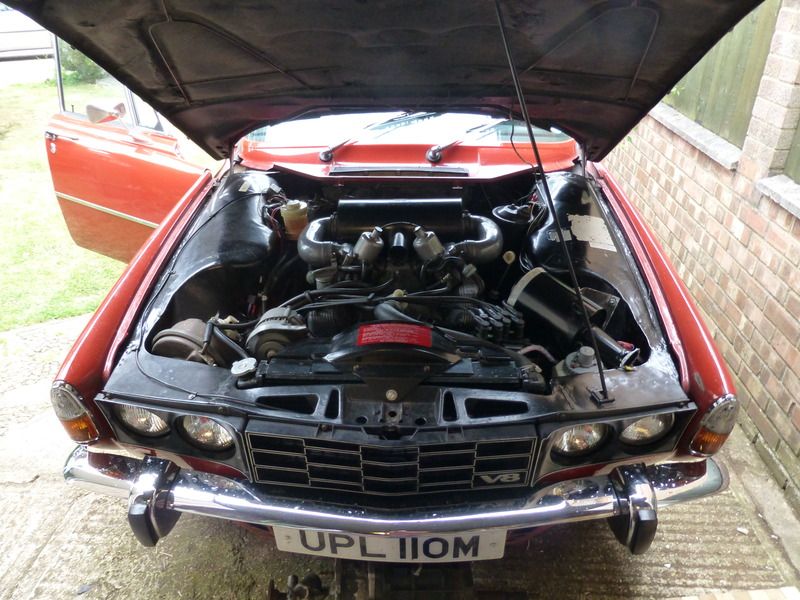
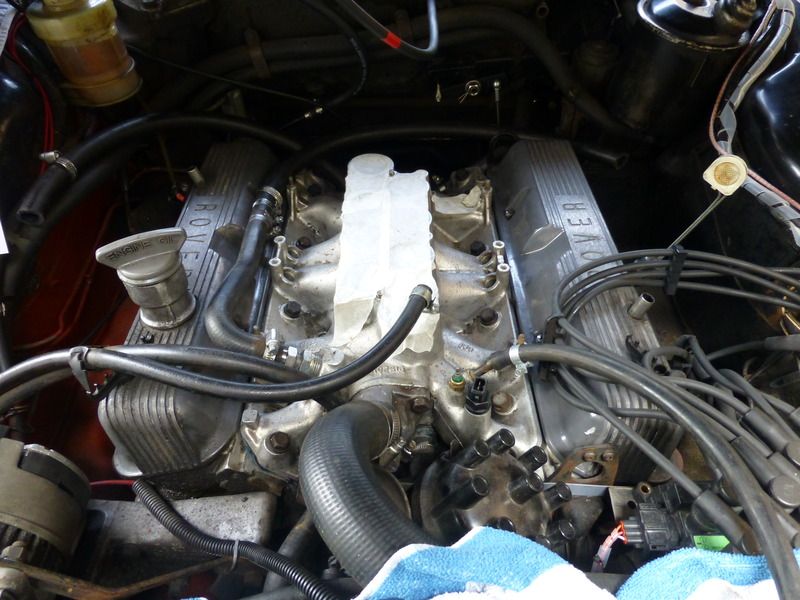
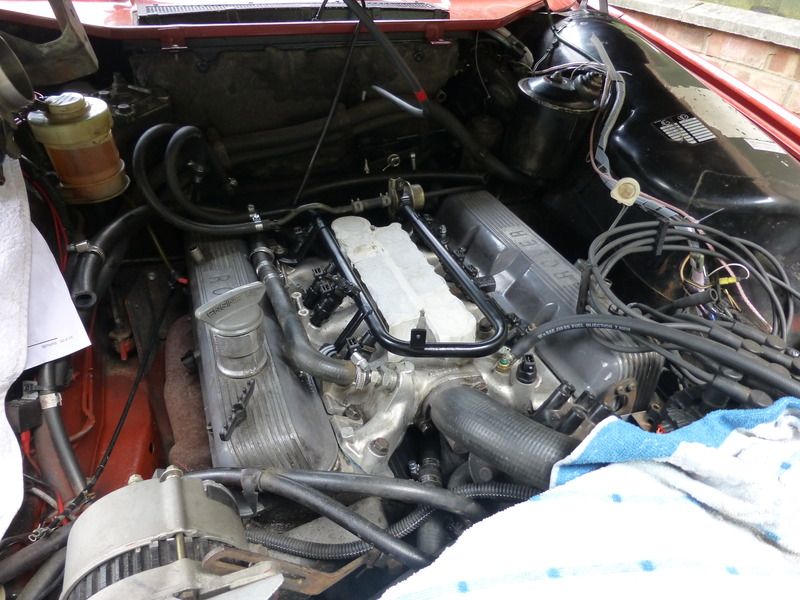
And here is how it looks now (it's still a 3.5 despite what the plenum says):

So how exactly did I get here? And why have I bothered? (this is a question that I have asked myself a few times recently when I had a few teething troubles – more later)
Well, I wanted the small extra power gain offered by the switch to EFI – various figures are banded about, but more importantly I wanted the boost in economy that fuel injection could offer. With EFI you have the ability to specify fuel cut on overrun, and you can easily determine what air to fuel ratios (afr’s) you want to run and when, allowing you to develop maximum power when needed, and yet still run incredibly lean when appropriate.
The advantage of using Megasquirt over standard EFI is that by connecting my laptop or phone I can see exactly what is going on with the engine, and quickly diagnose problems. I can capture datalogs, and I can make changes to the tune with a few clicks of the mouse.
(For more information on Megasquirt go to
http://www.msextra.com)
So where to begin? I have been running around with the Megasquirt driving the ignition only for over a year now, and I got my wideband oxygen sensor fitted and working probably 6-9 months ago so I had visibility of the mixtures.
I wanted to get as much prep work done as possible with the car still on the road, so I set out working through the list of things that could be completed before taking the plunge and whipping the manifold off:
-Sort out the mounting of the air filter
-Work out the throttle “see-saw” mechanism to convert from the standard P6 pedal to cable throttle.
-Run wiring from boot to engine bay
-Mount MS properly (I had previously just cable-tied it to some stick on pads affixed to the fuel tank)
-Fit a better auxiliary fuse box
-Refurb some later rocker covers
First step was to get the SD1 air filter cleaned up and painted. I had already removed the rust with electrolysis ages ago and it had been sat around in grey primer ever since. I cracked out the black satin and gave it a spray.
I decided that the best place for it was behind the passenger side headlight. After offering it up I realised that my coilpacks would be in the way… I modified the existing bracket so that they would bolt to the passenger side head instead, using the existing bolt holes.
With that done and with (just) enough space for the filter I made up another bracket to bolt the filter can to the wing using the redundant holes for the original ignition coil.
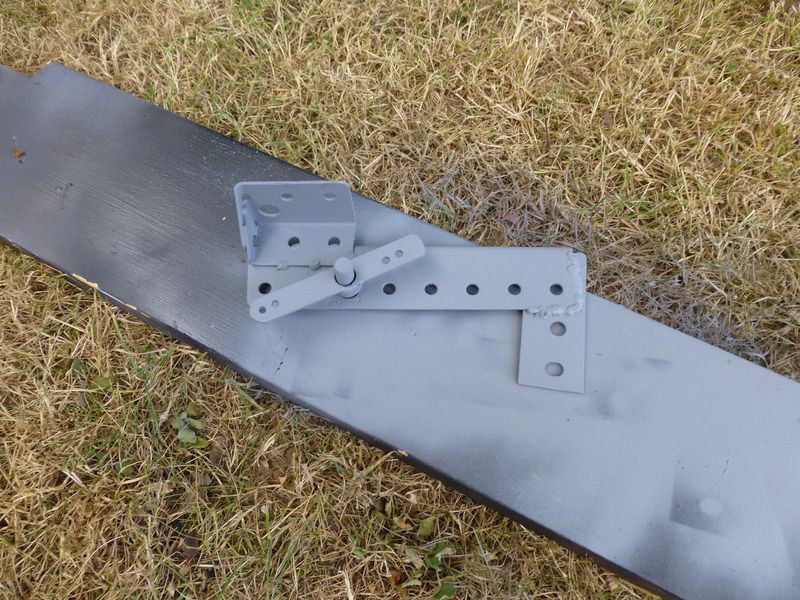
Next up was the throttle see-saw. I decided to make up something that would bolt in place of the existing l-shaped bracket that the original P6 throttle linkage to the carbs is supported by, thereby allowing me to easily revert to carbs should it become necessary. Some dexion racking, a seat-belt bolt, spacer and part of a multi-point front door lock were cobbled together with the welder to give a functional and rigid (but not pretty) seesaw. The linkage from the pedal pushes the right hand end of the see saw up, in turn pulling the left hand end down and actuating the throttle cable. This was primed in grey then also got painted black:
Next up came the wiring. I had run a few things forward already for the Ignition and for the Wideband, but that still left me the task of running the following:
Injector 12 volt feed
Injector Bank 1 ground (Switch to ground by MS)
Injector Bank 2 ground (Switch to ground by MS)
Throttle Position Sensor (TPS) VREF
Throttle Position Sensor Signal
Coolant Sensor (CLT) +12v
Inlet Air Temp Sensor (IAT) +12v
Idle Air Control Valve (IACV) 1
Idle Air Control Valve 2
Idle Air Control Valve 3
Idle Air Control Valve 4
Shared Sensor Ground, TPS, IAT, CLT (Back to Megasquirt)
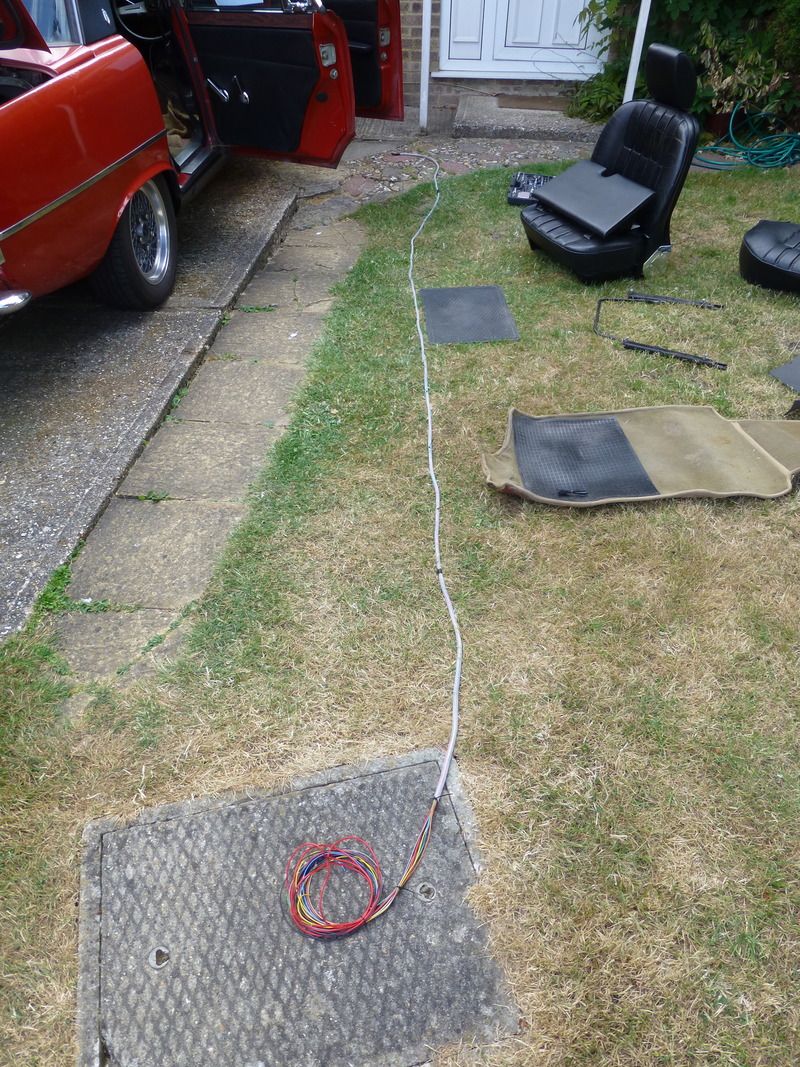
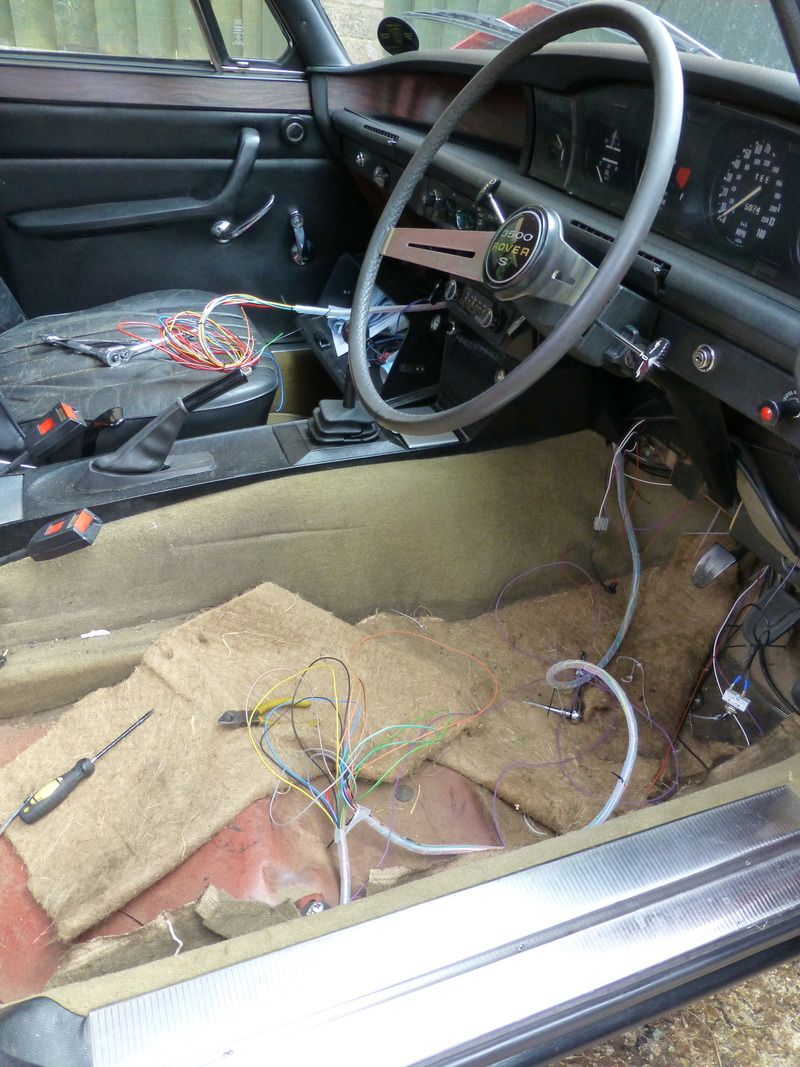
The drivers side seats and carpets were removed to give access to everything for routing the cables. I ended up laying out the individual wires across the front garden, tying one end off to an axle stand before beginning the laborious task of spiral wrapping everything. The wrap keep things neat, and protects the cables from chafing. It also gives you one larger cable to run, rather than having to run each one individually. I followed the main battery lead to the front of the car, before diving across behind the dash. Everything was coiled up and left in the passenger glovebox ready for when it would be needed:
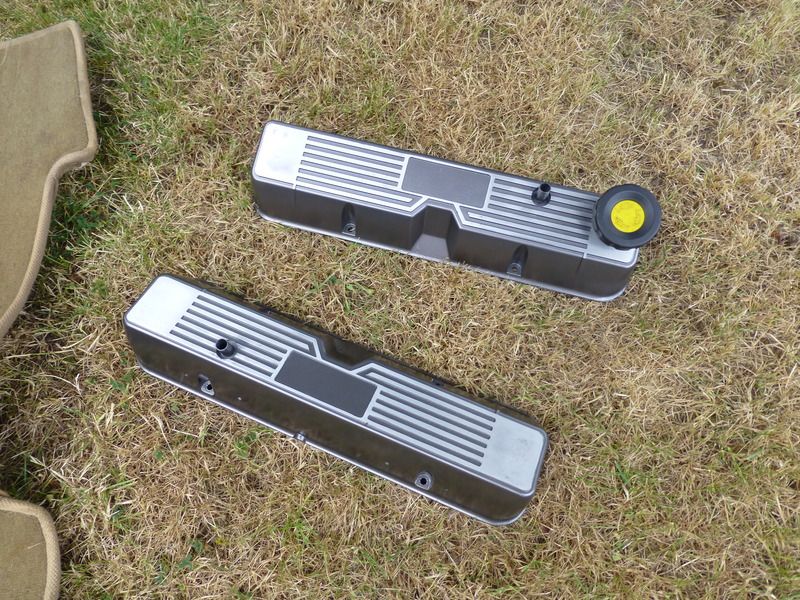
I had also been busy repainting a pair of rocker covers I picked up off eBay for a tenner. I stripped the paint off them, etch primed and then painted them. The ridges of the covers were rubbed back between colour coats with 1500 grade wet and dry, before they were lacquered:
Back in the garage I had already started getting the loom for the engine side ready, this entailed unpicking an old loom and putting it back together as needed, this got spiral wrapped too:
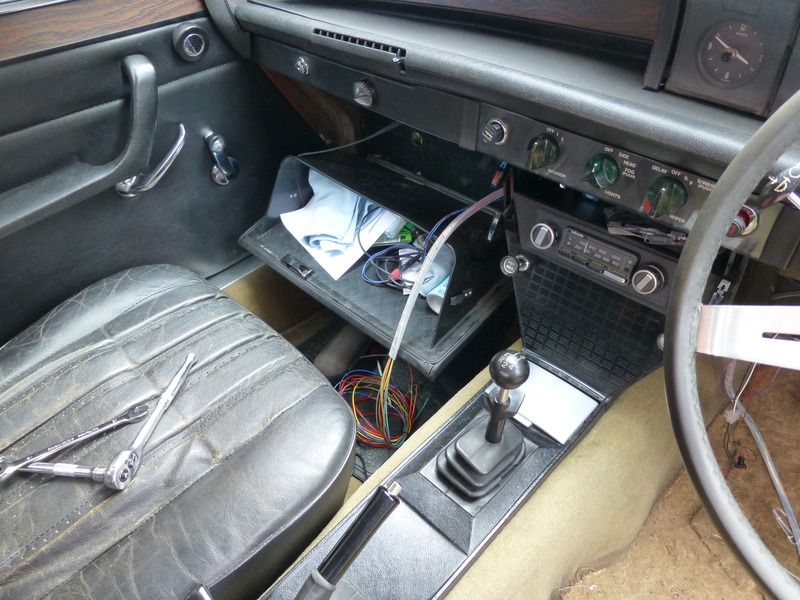
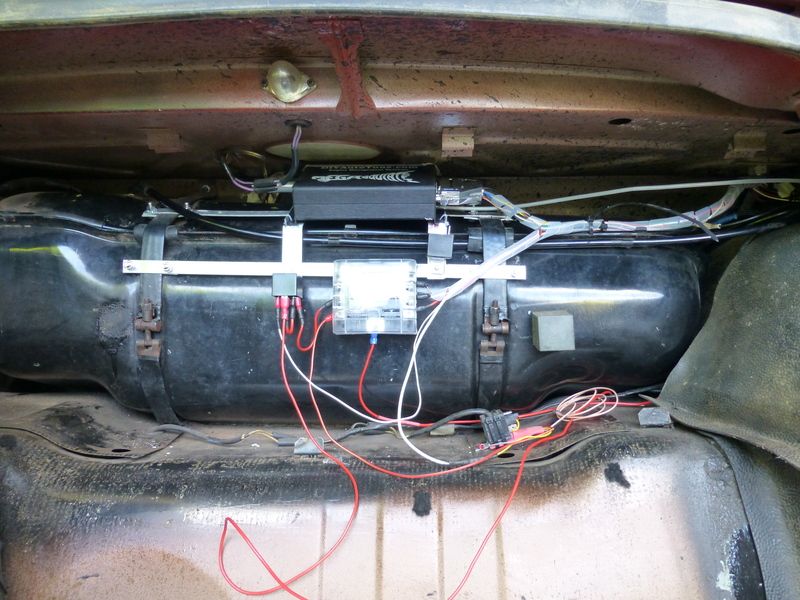
I then set my attention toward mounting the MS is a secure fashion. My philosophy throughout has been to only drill holes when absolutely necessary and so with that in mind I decided the best way was to somehow clamp to the fuel tank straps. I bought some Aluminium angle and some strip, and riveted it together to form a frame which the MS, auxiliary fusebox and fuel pump relay would bolt to (Ignore the second relay plonked upside down on the right):
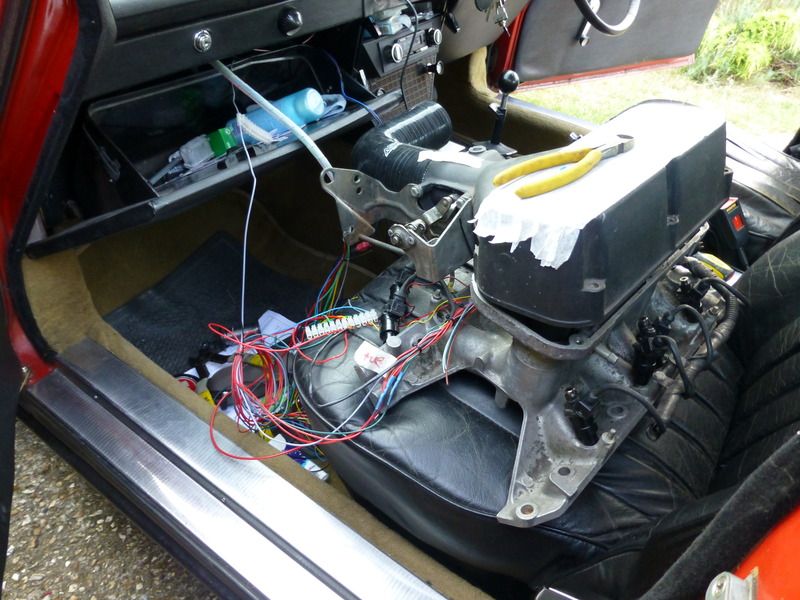
The next step was to test that all the injectors still worked, the IAT, CLT and TPS were reading sensibly and try to get the idle air valve setup and working – this is did by simply sitting the whole lot on the passenger seat and wiring everything together temporarily with chocolate blocks:
Everything read correctly, so with all of these tasks complete I was ready to take the plunge…
I took the Thursday and Friday off of work, and roped my Dad in as a spare pair of hands.
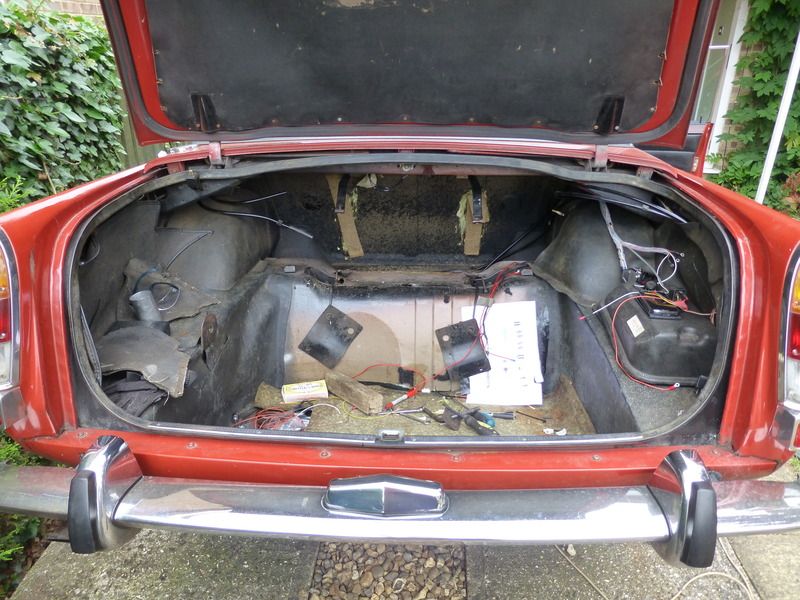
First task was to get the fuel sender working. The sender had never worked since I got the car, and I had proved the gauge worked. I drained the fuel (55 litres worth) and out came the tank:
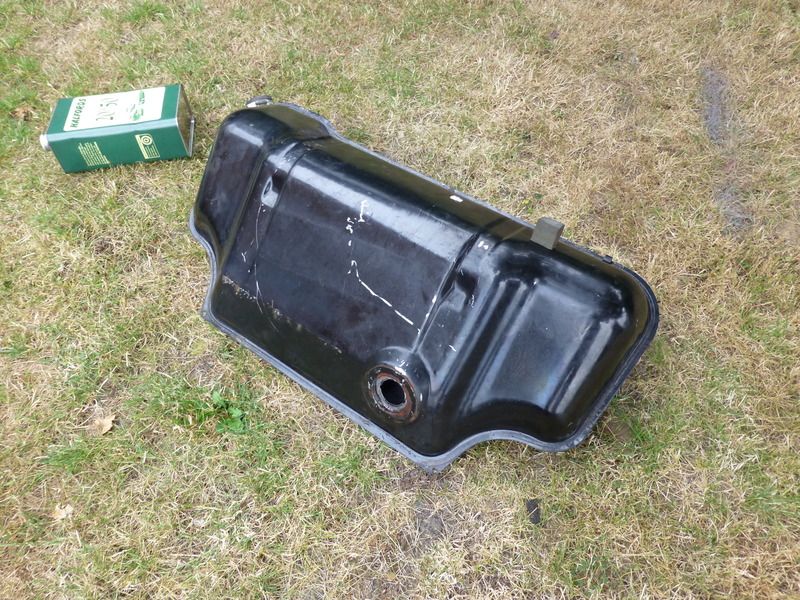
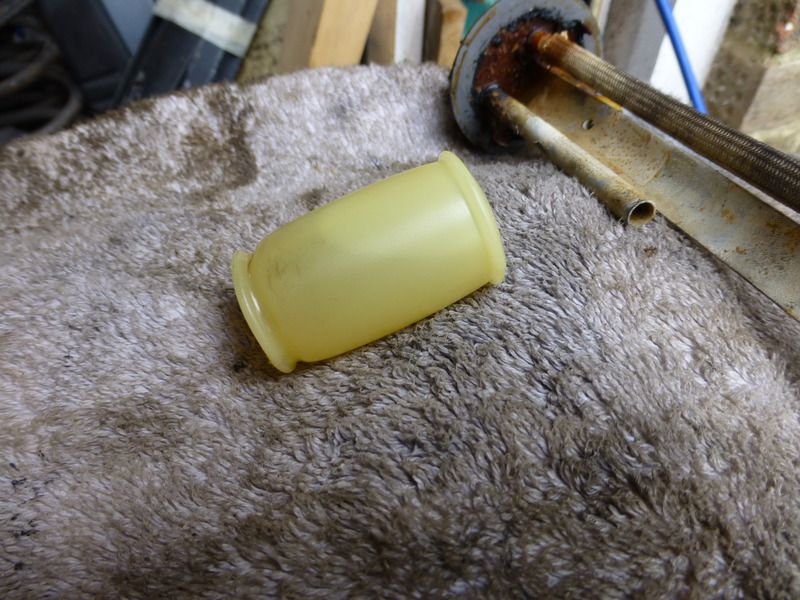
On removal of the sender it became clear why the gauge didn’t work. The float was holed:
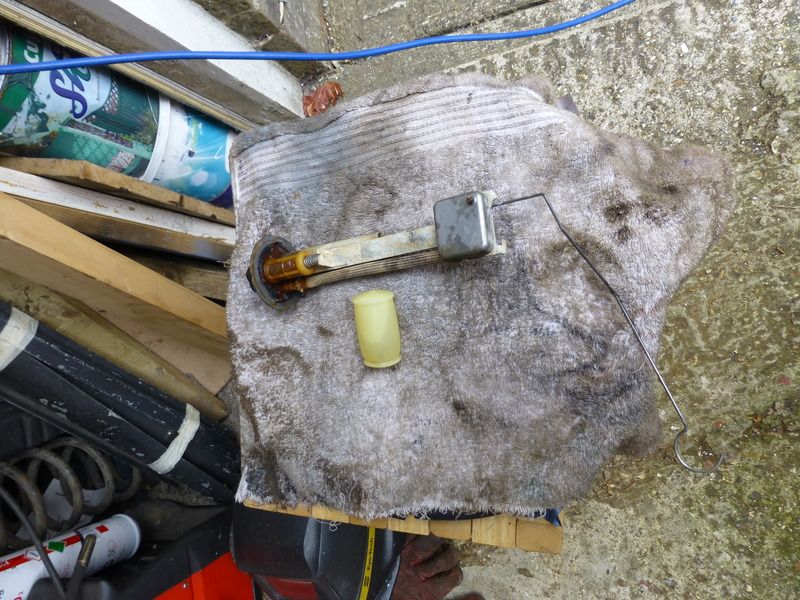
It was full of fuel:
Luckily, Dad hadn’t left home yet and so a quick call ensured he grabbed the float from a spare sender unit we had sitting around for one of the Series Land-rovers – it turns out they are the same.
I tested the unit by connecting it back to the car, but waggling the sender arm gave intermittent results at the gauge. I ended up popping the metal cover off to expose the innards, I then slightly bent the contact strip outward slightly so it would provide greater contact pressure and gave everything a quick blast with electrical contact cleaner. On reassembly it worked perfectly, and I had a working gauge again, result!
The tank was refitted, and then it was time to focus on the front end.
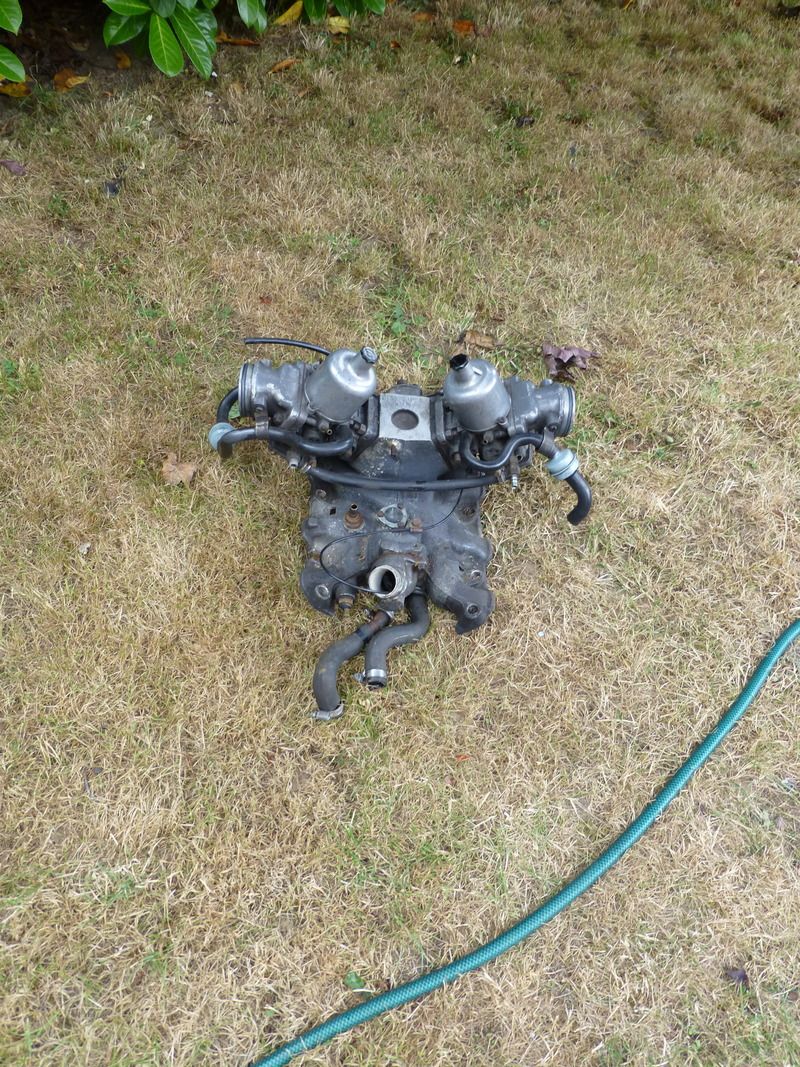
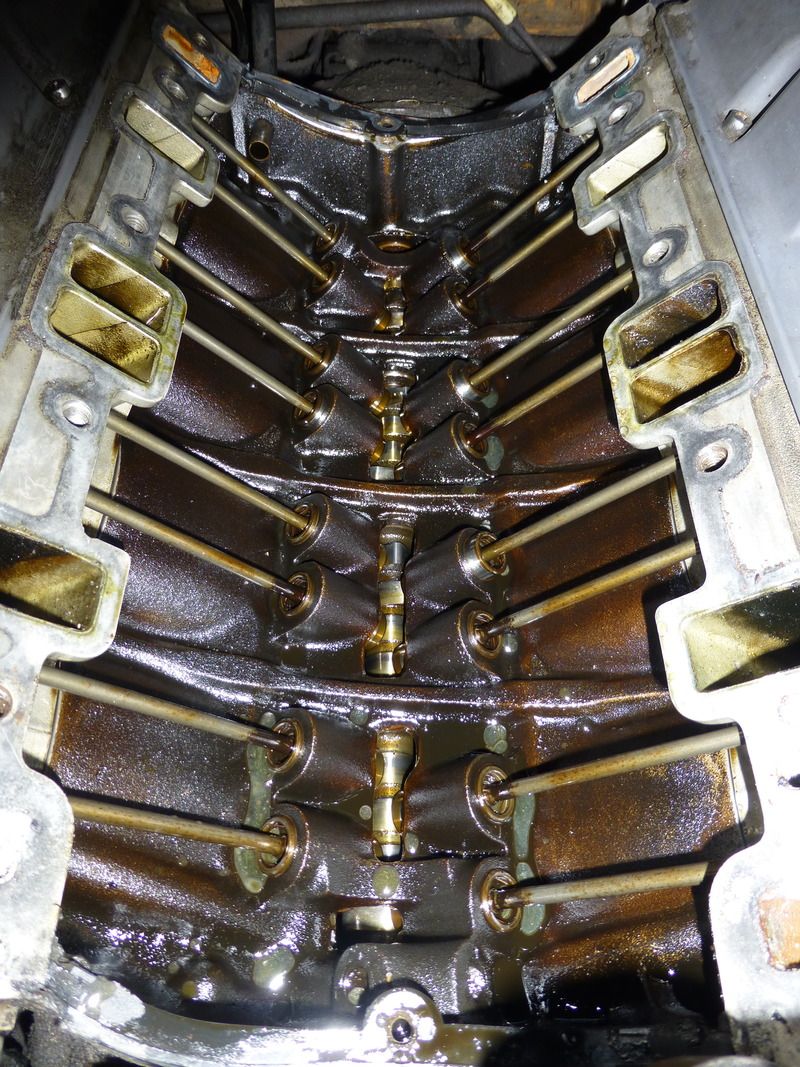
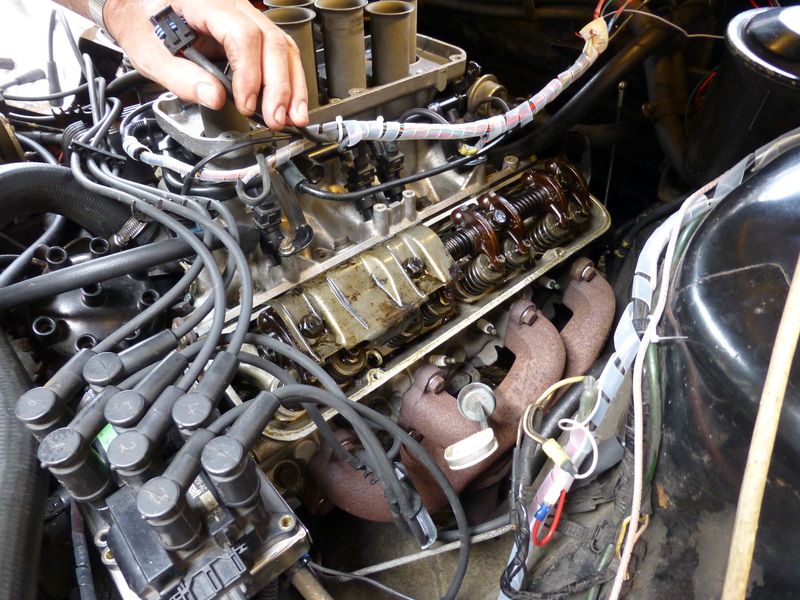
Air filter box and elbows were removed. Coolant was drained down, then coolant and fuel hoses, cables, wiring and throttle linkages were disconnected. The inlet manifold was soon removed, revealing that the valley was still fairly clean and that the cam still looked to be in good order since I was last in here:

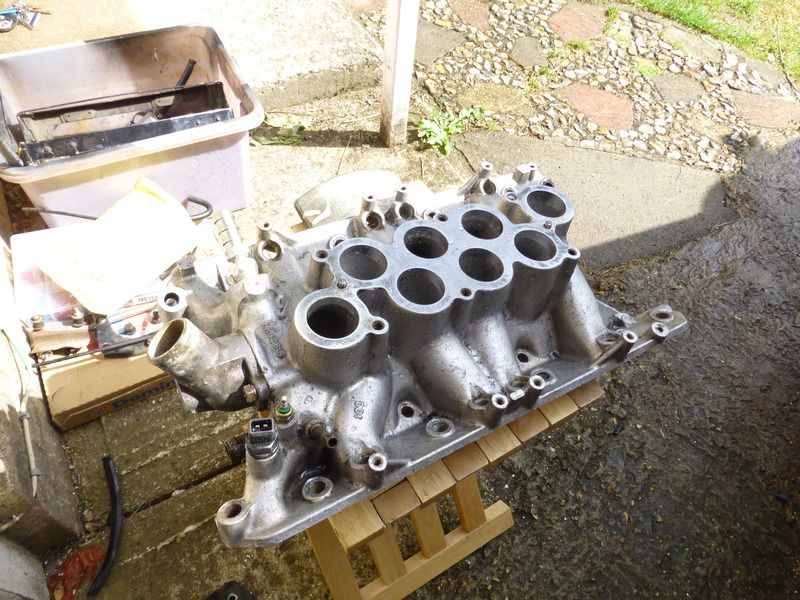
The new manifold was given was last rinse off and dried before it was fited:

Then the coolant connections were made:
The injectors and fuel rail were fitted and plumbed:
Rocker covers were removed ready to be swapped for new shiny ones, my rocker gear is still nice and clean:
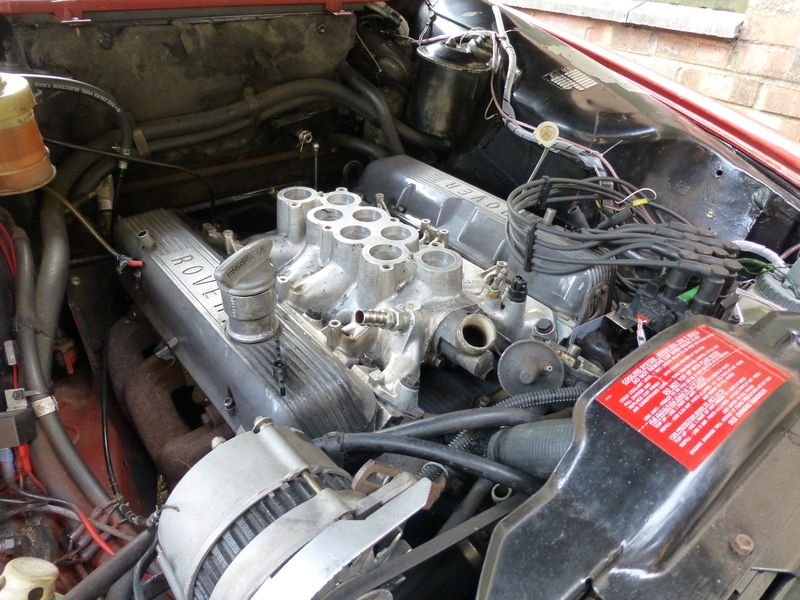
Then the plenum went on:
And the filter and air piping, voila! :
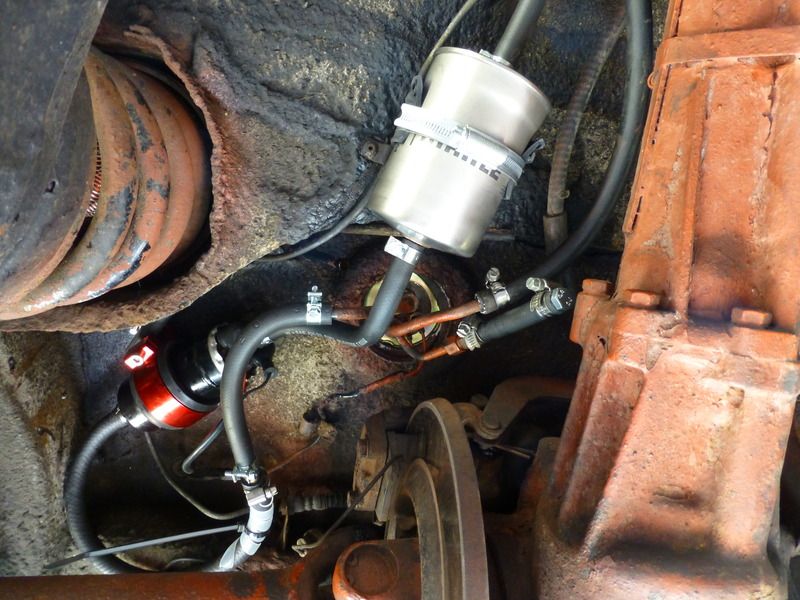
So I then moved to the back of the car. New nylon hardlines had been run front to rear, and these were connected up. The efi pump was connected simply gravity-fed from the tank, then pumping through an EFI type filter before the injectors:
The moment had come, and the first start was imminent! To my relief it started straight away using the default fuel map, however it was oscillating between 2600rpm and 500rpm, up down, up down, up down… a few minutes later working through the MS menus on my phone and I had turned off wideband feedback, upped the fuel and then turned off overrun fuel cut. Success! I now had a stable idle, of 2600rpm…
Some 20 minutes and multiple restarts later and I had got the idle air control valve setup properly and the idle at a more respectable (and neighbour friendly) 750rpm. I could now begin tuning…
This however proved to be problematic, first of all the car was jerking a lot on applying the throttle. I soon diagnosed this as a faulty throttle position sensor, giving erratic readings. To get round this I switched the acceleration enrichment to fully MAP based and therefore ignore the TPS. Next issue was that my initial fuel pump setup was obviously not up to scratch. The pump could be heard cavitating and became incredibly noisy after a mere 20 miles or so!
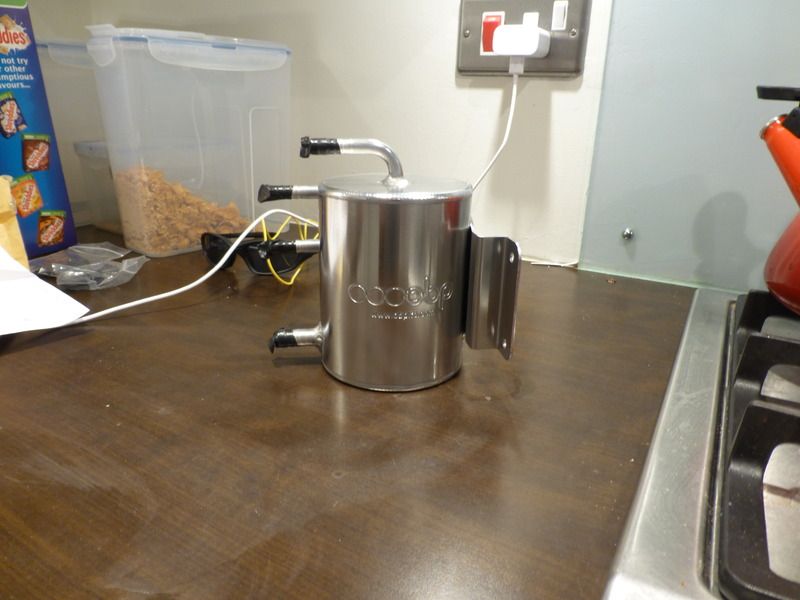
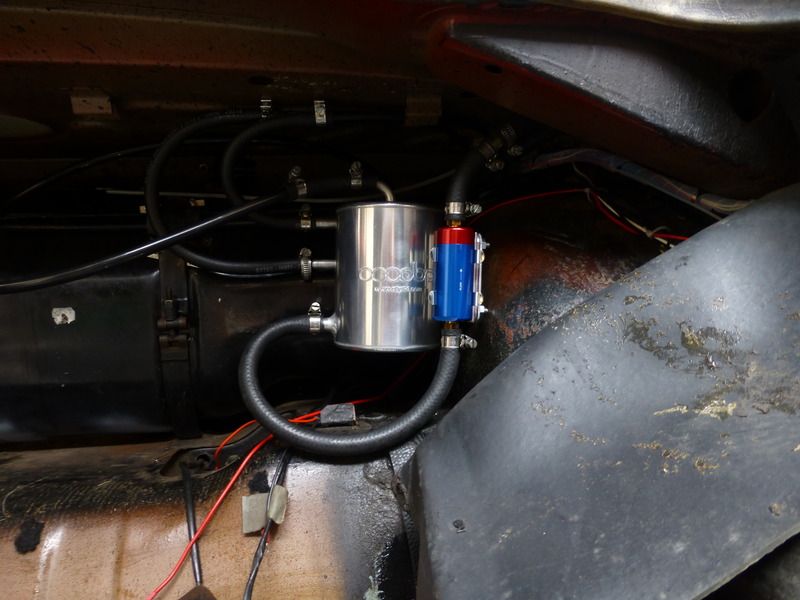
This led me to add a swirl pot to the system, and replace the EFI pump. I purchased a 1 litre unit from obp solutions but try as I might I could not find anywhere to get it to fit under the car without being too close to things that were hot/rotating/moving. It therefore ended up in the boot, fed by my original facet silvertop pump under the car. This led me to having to drill a few holes, argh :
This seemed better, and the car ran for a week or two before the second pump then died on the M3 one damp Friday morning on the way to work. I could see things getting leaner and leaner on the laptop, and the car was making less and less power. Luckily I made it out of the 50mph average section where there is no hard shoulder, there was almost no warning but once again the pump had become noisy…:

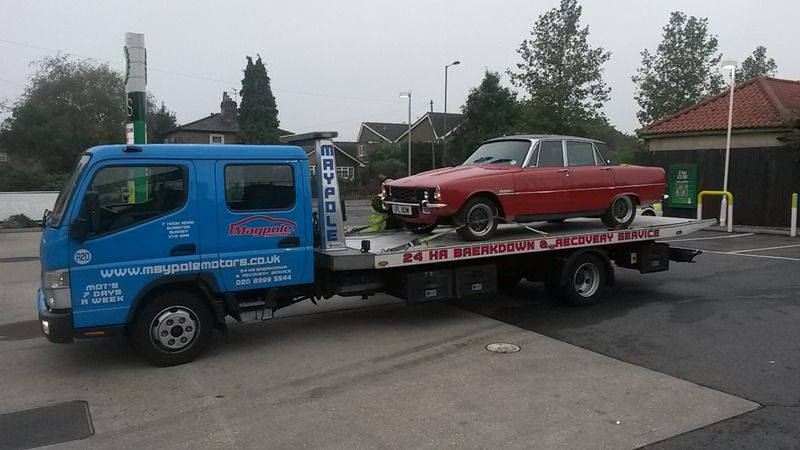
I got moved off the motorway to the BP at Kempton Park. Before the AA recovered me home.
I then decided that I should try restricting the return from the swirl pot to the tank, and this is when I discovered that I had plumbed the thing wrong! I knew what I wanted to do, but must have got a couple of the pipes mixed up during installation. The order should be:
Top > Return to tank (fuel out)
2nd down > Return from fuel rail (fuel in)
3rd down > Feed from main tank (fuel in)
Bottom > Outfeed to EFI pump (fuel out)
I had mixed up the feed from main tank and the return to tank, so I probably had a swirl pot half fuel of air!
I have now put a restriction in the return to the tank which was made by hacking the head off a bolt and then drilling a 2mm hole through it. This made a big difference to the running of the low pressure pump, it now runs quickly for a few seconds after keying on, before slowing down to a slow tick-tick as it did before on carbs. Previously it was running at near full speed almost constantly.
With this all corrected I refitted the first pump (I had kept it clean and put it to one side, don’t ask me why but I never chuck stuff out right away) and it runs silently! The car has since done about 300 miles on this pump without it dying, and I have a new one on order just in case.
Tuning wise, I have almost got the VE table sorted, and will shortly be moving onto other bits and bobs like acceleration enrichment, warmup enrichment and overrun fuel cut. Even with the various losses of fuel from pump changes etc I have got approximately 21 mpg on the last tank or two, so not too bad but still a way to go.
Performance is incredible – put your foot down and it will pull hard all the way to the red line, where before it used to run out of steam after 3750rpm or so. The sensation of being pushed back into your seat is more pronounced than before, and taking my wife out for a test run and showing her what the Red Rocket can do now actually made her scream! Engine braking is fiercer than before, with the leaner mixtures being achieved under overrun conditions, something that fuel cut will improve even more. I would say that the exhaust tone even sounds a little more purposeful and less “splashy” (if you know what I mean).
What is currently preventing me from tuning the acceleration enrichment and fuel cut is the lack of throttle position sensor. LR in their wisdom changed the method of engagement from previous versions of plenum so that it is the opposite and a replacement sensor is £100 with no cheaper replacements to be found… I have made up an adaptor to change from the blade type of drive on the throttle spindle to the much more common “D” shape drive that a lot of TPS’s seem to use. I just need my brother to 3D print me off the required spacer I have drawn up to allow me to mount everything.
And in other matters the rear suspension has started clunking- and the boot is letting water in! Argh!
Oh well, onwards and upwards… More to come as things progress