PNP
Member
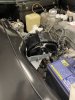
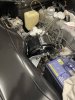
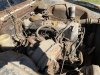
I’m replacing an aftermarket brake booster (a pbr 44 for the other Aussies) with an original Lockheed unit. Looks like the orientation that you mount it doesn’t seem to matter? Having it sit with the vacuum valve on the side would make it easier to install the vacuum hose