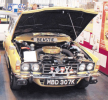
P6B S Project Car

Aaaah all is clear now! I thought it was a funny place for a brake line... My car has the pump and tap under the tank so the line runs up the other side of wall and comes out where your rubber hose is
 
The run on Sunday out to Yarra Glen on a nice twisty country road was so good that I think I will shelve rebuilding the 3.9 until the current 3.5 (or the gearbox) dies on me. Only sign of age/wear is a slight lack of pull on some climbs, but she handled everything nicely in 4th or 5th, and it was very enjoyable.
fJL3kDI.jpg


Not sure if there is any connection, but...Sundays run was with a 2.5" hose running from the air cleaner inlet to the cavity behind the near-side lights, screen washer. Cooler air than is coming off the radiator on a hot day cant do any harm.
 
Last edited:
Went to install a tyre valve extension hose on the spare (so I dont have to dismount it to check), got no reading??? In the end...it was dead flat. Have done maybe 2k kms with it like that. And its date code seems to indicate it was made in 1998! The rest of the tyres are 2019 I think, so should be ok a while longer. Some tyre places say replace anything more than 8 years old, but a knowledable Traffic copper told me there is NO rule about tyre age here.
 
Looked into spacing the tow-bar further away from the rear valance, and removed the bumper from the bar......fixed with M6 nuts and bolts! Should be 5/16 UNF, which is whats going back in. In the end the irons bolted to the body are too short to enable moving the whole assembly. Bugger. In reassembling it all I find something odd (apart from the overriders being handed) - the RHS boot edge as it opens is barely clear of the overrider top edge, despite it being barely clear of the reflector, while the LHS boot lid is well clear of its overrider. Will get under there again and measure some things to see where the discrepancy starts from.
 
Last edited:
Note that my bumper mounts are part of a locally made towbar, which is seen on many P6 down here. I tried measuring all sorts of parts without making any progress. I tried tightening the RHS mounts with some torsion on that end of the bumper - it helped a little, but the clearance between the boot lid and the overrider was still significantly different right to left. Then I remembered that I had a spare bar that came with the car. Off with the current bar - which notably was the last thing the PO had plated before I got the car - having covered the ends of the wings with cloth to protect the paint. And the other bar - not quite as bright and clean, but qquite good? Slipped straight into place, the mounting bolt holes all lined up, so fitted the bolts firmly but not tight, and tried fitting an overrider - getting to hate removing and refitting overriders! With the RHS overrider in place but not tight the clearance was much improved. Fitted the LHS overrider, both clearances were good, if not quite identical. Locked everything up, still good. The platers of the bar must have screwed up something in the mountings? Nearly there.
Now to move the number plate light...guess what - the base is covered in rust, and the mounting of the copper bar is fragile. Will try to save it, but will order a new one if I have to. At least the major issue is fixed now. As soon as I find my touch up I will repair the damage to the RHS boot lid corner.
F7KmsTw.jpeg
 
Last edited:
I found an old P6B air cleaner casing - painted a dreadful red, pretty scrappy condition. Cleaned it back to bare metal, painted it silver. Cut the input nozzle off ~1" from the body. The inlet is now 45% bigger area than original. Transferred my big filters into it, installed, and connected some 3" flexible pipe to it. This may get a little compressed by the bonnet where it goes over the LHS plug leads. Will report back if I can feel any changes on the road.
wLSrw4W.jpeg
 
Went for a little run today. Found a non-powered temp gauge driven by a thermocouple, so I clipped the gauge wire under a wiper, and put the thermocouple above the dizzy - no engine contact. Ambient air 20C. After a couple of miles the guge became steady on 40C. Stopped to take pic, temp climbed to high 50s. After a few kms downhill. very little throttle temp came down to mid 30s, then back to ~40 after a few more kms on the flat. No detectable difference in performance either way. The bigger inlet probably wont show up until its working hard.
f4N7RLi.jpeg
 
Good idea to check your plugs in the near future - you may see a leaner mixture with the larger snorkel and air volume.

Out of interest, is your cold feed inlet near the radiator or away from it - sucking in warm air may negate the benefits of the larger air volume. I had a similar set up as this (below), but it wasn't clear where the cold feeds were starting from. I routed mine to below the radiator
1712225082390.png
 
Last edited:
I routed the flex pipe down to the area behind the LHS lights and windscreen washer. Yes, will check the plugs soon.
 
I had richer jets fitted when I had twin K&N filters on and it was too much - only went up one jet size too. I reckon you'll be fine with the new induction setup.
 
Thanks, thats encouraging. I tried measuring the air in the filter casing mouth the other day, and it was discouragingly high, but back at home I found the hose inlet had worked its way over close to radiator, so I will have to try that again. Also proposing to wrap the flexible hose in some tape to reduce its heat takeup - black plastic.
 
Correction - gauge is a Bourdon tube type , not thermocouple. Since seeing air into filter housing getting quite warm I have wrapped the plastic tube in silver tape in an atttempt to reduce the heat getting to the tube.
 
Last edited:
A bit of luck lately. Looked for ages for a windage tray, finally found one used on WINS! Then I found an SD1 oil pickup locally, complete with brace. Then I found the #4 main cap on my 3.9 block had a threaded hole for the brace bolt, which I hadnt noticed before. Had to drill the windage tray for the bolt but thats easy. Just need a few 1/4 UNC bolts for the tray, a 5/16 UNF bolt for the pickup brace, and a ~1" tubular spacer under the tray. The 3.9 oil pickup was not braced - wonder why? The 3.9 sump is noticeably heavier gauge than the SD1 part.
Bim3fJ0.jpeg


The plate in the background is ABB-935 from the 928 I imported from Saudi, since sold.
 
Last edited:
Checking the SD1 front cover oil pump - seem to remember clearance of gears to cover plate is critical, and of gears in the pocket. On the cover all I can find is with a straight edge over the gears the clearance to the body should not be less than .002" - mine is .006". Gasket measures just under .020". Brand new gears. Any comments welcome.
The gears in the pocket are a very good fit - can just get a .002" feeler past the gear teeth tips. The is no mention in either the P6b, SD1 or Discovery books about checking this clearance, but I have a vague memory of a picture of testing this clearance, but cant find it...?
 
If your gears are proud of the body by .006", and your new gasket is .020", and assuming this will compress by a couple of thou, this will give end float of .012". This seems a bit too much, I would find a thinner gasket and aim for @ .005" end float.
 
Thanks, will see if I can source a thinner gasket. Any comment on the gear clearance in the pocket?
 
Thanks, will see if I can source a thinner gasket. Any comment on the gear clearance in the pocket?
Two thou cl on the vanes sounds good, it would be nice if there was no excessive scoring.
You could purchase some gasket paper and custom make your own gasket by experimenting with different weights of paper.
 
Local source says their gasket (ERR1990) is genuine, at .3mm, which I make almost .012". Book calls for min clearance of .002"...Should give a good clearance, depending on how good their measurement is.
 
Since I saw fluid in the booster air valve case I decided to do the brake master as well as the booster - looks like its been there a long time - nice and crusty with rust. Remove the reservoir it says - bugger! 1 of the 2 bolts from plastic to bracket is a major pain to access, and the 3 bolts on the bracket are not much better. Moving the radiator overflow tank was nice and easy, provides more space to work. Anyway, no rush, proceeding slowly.
 
Back
Top