sdibbers
Well-Known Member
Copied and pasted from my Members projects thread. I thought others might be interested in my findings so far.
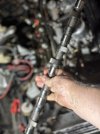
After some family related stuff I have finally got back to the car. The fast road camshaft I had reprofiled by Piper Cams has been sitting in its box for 6 weeks giving me the eye. I was able to get into fitting it this weekend.

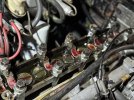
First I had to remove the old camshaft. You know the routine if you have a 4 cylinder engine. Disengage the top tensioner, lock camshaft at no.1 cylinder exhaust peak and then painstakingly remove two head bolts, remove bearing cap, fit spacers (in my case bit nuts). Torque and onto the next pair. I have to be frank, its my least favourite job on these engines, its such a faff!
Because the new camshaft has been changed quite a bit I wanted to at least have a ball park stack for the shims. So I started by adding 0.020" to the existing shims, plus the difference in clearance. (New exhaust is 0.012" Intake 0.010" vs 0.014" and 0.009" respectively).
I poured fresh engine oil down the inside of the camshaft to hopefully minimise dry bearings on start up.
I then fitted new bearing shells. and poured new high zinc engine oil and assembly lube over the bearings and tappets.

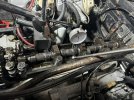
I then fitted the new camshaft, bearing caps, torqued head bolts and fitted cam sprocket back on cam. Using a dial indicator I then measured how much clearance we had on each valve.

Using my spreadsheet (less chance of me screwing up the calculations!) I then removed everything again and changed the shims. Reassembled the camshaft etc and measured, this time with feeler gauges. I wasn't convinced that the numbers from the indicator were accurate due to the cushion of assembly lube and also the probe could only just touch the surface of the tappets. Sure enough, some were off. So, off with the cam AGAIN! Adjust shims and reassemble. This time all 8 were within spec exactly.
Next was to change the valve timing to Piper's specifications; 106 deg for No. 1 EP. There's a write up on how to do this on the 4 cylinder forum
With that set I could deploy the tensioner, put the back plate on the rearmost bearing cap and double check my work. Then valve cover, reconnect vacuum lines etc.
Piper say you should start the engine at 2500rpm from the get go, they even say make sure the fuel pump is primed and ready as low RPM grinding can damage the new cam surfaces. So I used the priming lever on the mechanical pump to ensure the float chambers were full and ready. Then fingers crossed and turn the key! Car started after one revolution of the crank! I then had to sit on the car and hold the revs at 2500 or higher for 20 full minutes. So, I sat in the garage, with the engine at fast idle and cringed about the noise I was making for the neighbours! Straight away you could feel the difference in the engine. Smoother, readiness to rev, quietness (sounds silly but even at speed the engine was quieter, I wonder if the old cam had some wear I hadn't detected).
So, was it worth it? I drove the car to work today. This involves motorways and fast side roads. Power is certainly up a bit. But the biggest change is torque through the range. Its ability to accelerate in the 60-80mph range is very impressive now, certainly enough to catch me out a couple of times. Any incline at motorway speeds are not even noticed now. I instinctively squeezed the throttle for a hill this morning and found myself passing everyone! Its made for a more relaxed and powerful drive. I'm very much looking forward to seeing how Beryl does on the track in two week's time, time to go Alfa hunting!
After some family related stuff I have finally got back to the car. The fast road camshaft I had reprofiled by Piper Cams has been sitting in its box for 6 weeks giving me the eye. I was able to get into fitting it this weekend.

First I had to remove the old camshaft. You know the routine if you have a 4 cylinder engine. Disengage the top tensioner, lock camshaft at no.1 cylinder exhaust peak and then painstakingly remove two head bolts, remove bearing cap, fit spacers (in my case bit nuts). Torque and onto the next pair. I have to be frank, its my least favourite job on these engines, its such a faff!
Because the new camshaft has been changed quite a bit I wanted to at least have a ball park stack for the shims. So I started by adding 0.020" to the existing shims, plus the difference in clearance. (New exhaust is 0.012" Intake 0.010" vs 0.014" and 0.009" respectively).
I poured fresh engine oil down the inside of the camshaft to hopefully minimise dry bearings on start up.
I then fitted new bearing shells. and poured new high zinc engine oil and assembly lube over the bearings and tappets.

I then fitted the new camshaft, bearing caps, torqued head bolts and fitted cam sprocket back on cam. Using a dial indicator I then measured how much clearance we had on each valve.

Using my spreadsheet (less chance of me screwing up the calculations!) I then removed everything again and changed the shims. Reassembled the camshaft etc and measured, this time with feeler gauges. I wasn't convinced that the numbers from the indicator were accurate due to the cushion of assembly lube and also the probe could only just touch the surface of the tappets. Sure enough, some were off. So, off with the cam AGAIN! Adjust shims and reassemble. This time all 8 were within spec exactly.
Next was to change the valve timing to Piper's specifications; 106 deg for No. 1 EP. There's a write up on how to do this on the 4 cylinder forum
With that set I could deploy the tensioner, put the back plate on the rearmost bearing cap and double check my work. Then valve cover, reconnect vacuum lines etc.
Piper say you should start the engine at 2500rpm from the get go, they even say make sure the fuel pump is primed and ready as low RPM grinding can damage the new cam surfaces. So I used the priming lever on the mechanical pump to ensure the float chambers were full and ready. Then fingers crossed and turn the key! Car started after one revolution of the crank! I then had to sit on the car and hold the revs at 2500 or higher for 20 full minutes. So, I sat in the garage, with the engine at fast idle and cringed about the noise I was making for the neighbours! Straight away you could feel the difference in the engine. Smoother, readiness to rev, quietness (sounds silly but even at speed the engine was quieter, I wonder if the old cam had some wear I hadn't detected).
So, was it worth it? I drove the car to work today. This involves motorways and fast side roads. Power is certainly up a bit. But the biggest change is torque through the range. Its ability to accelerate in the 60-80mph range is very impressive now, certainly enough to catch me out a couple of times. Any incline at motorway speeds are not even noticed now. I instinctively squeezed the throttle for a hill this morning and found myself passing everyone! Its made for a more relaxed and powerful drive. I'm very much looking forward to seeing how Beryl does on the track in two week's time, time to go Alfa hunting!

