My 3500s project - future daily drive

Quagmire said:
Hopefully work should be better next week and my wife is away on business so I should get some quality time in the evenings to crack on.
Don't you let your wife hear you say that the only 'Quality time' you get is when she's not there :shock: :shock: :shock:

You're either brave :) stupid :? or she knows anyway :roll:

That said, I did get a few hours in myself last night, to do some jobs on Rover, as the Mrs was out working between 6PM and 1AM 8)
 
Quagmire said:
Kingston's one way system is not in my list of favourite places at the mo, finished a long week (20hrs overtime) to come home last night to a penalty notice for stopping in the yellow box on Clarence street...
I'm so sorry to hear this...!!! I hate all these ruddy yellow boxes that get in the way! I understand what they're for but the buses seem quite happy sit in them and hold us up!!! It is just not right...
 
Time for an update.

My back right wheel has always had a small vibration at speeds over 65mph due to it being buckled. I would have just swapped it with my spare but the problem was that the spare was silver... I'm not complaining, the wheels cost me £89! :LOL:

Whilst my wife was away last week I cracked on in the evenings out in the garage:

Nitromors seems totally useless these days, so had to remove the paint manually. Initially started by using the sharp edge of my stainless steel ruler and some stanley blades to scrape the majority off, then switched to 180 paper. This was taking forever so went to 80 grade- eeek! Once all the paint was removed I went through the following grades to get things shiny and mark-free again:

180
240
320
400
600
800
1200
1500

then:

T-cut
Autosol
Brasso

My arm ached afterwards! Anyway the wheel was primed, painted and the centre was lacquered. I have opted to leave the rims naked aluminium as my others are as washing and semi-regular waxing seems to keep them looking ok, and I was worried the lacquer would peel off the rims with there being no key for it to stick to....

I am pretty happy with the result! Just need to get my two new tyres put on this and the rear passenger side, consigning my wobbly wheel to being a spare.


Inspired by Quattros post I thought I would also post up a few pics of what I have been collecting for my EFI changeover.

Inlet manifold with busted bolt - I wondered why the ram housing was held on with only 5 bolts, and this was the reason. The manifold is over at my Mum and Dads, where my Dad and their neighbour (who has an amazing workshop) are currently working on getting it out.


Injectors are with Dad to test on our home made rig. We run white spirit through them into identical jam jars for a set number of pulses. We weigh the jars before and after to see how much was flowed by each and how closely they are matched.

Fuel rail was checked and seemed to be ok (a few we have seen were rusty inside). I gave it a blast through with WD-40 to disperse any moisture and have blanked off all the openings for now. Still need to check the PRV, but will do that with compressed air next time I am at my parents.

Ram Housing cleaned up, as well as the 10 bolt heads I have. These were done with Fairy Power spray, some elbow grease and a hose, then finished off in the parts washer we have in the kitchen:


I am currently deciding whether to do ignition first or fuel. The fuel side of things is getting complicated and tight on space if I want to keep the reserve (which I do). Most likely it will be ignition as I have most of the parts and it gives you a chance to check all your sensor readings are normal etc, before they can actually affect any of the running of the engine :shock:


Yesterday I was free so did a few things. Refitted the finger guard on the alternator:


Removed the wideband from the Landrover (MS doesnt need it once tuned, but it is handy to have it in if you want to see whats going on) and went to fit to the car. Problem! The nose of the wideband is much wider than the narrowband I was using as a bung and fouls on a blob of weld at the bottom of the boss where the weld has broken through. Will need to file the blob off and retap some other time:


Then my radio aerial had come loose and was letting water in recently. I removed the visors, rear view mirror etc and tightened it back up. Put a tiny smear of sikaflex to help it seal too. Sorry, forgot pictures on that one.

Then I adjusted the points, as I have done a few thousand miles on them now. Things were running even smoother than ever after that :D

Finally I decided to see if I could do something about my wobbly to the point of being usless speedo. Sure enough the right angled drive was a bit sticky, blew it through with WD-40 and then oiled with a few drops of 3in1 and it was good as new :p Still hasnt fixed it though, I need to do the cable too next, but it is markedly better!


Then I gave it a thoroughly deserved wash. :mrgreen:
 
Me again!

Well this week the wife and I took a trip oooop North to see the A4's at the NRM's Shildon site, carnage! One member of staff said that they had been expecting 6000 people a day in the last week, and that they had (by Weds at least) been seeing over 15-16,000 people a day!


On the P6 front, I changed the engine oil and filter, air filters, and gearbox oil. I also cleaned and fed the seats.

This evening I finished lapping the valves in on my new heads:


Will give them a final clean up and then can start refitting the valves.

Also, according to fuelly (which I have been using since I got the car back on the road) the Red Rocket and I have completed 10,000 miles together! :mrgreen:
 
Quagmire said:
This evening I finished lapping the valves in on my new heads:


Will give them a final clean up and then can start refitting the valves.

That looks like a 3.9 exhaust valve, with its anti-reversion lip just above from the shiny bit. I don't know what benefit these give. Perhaps a more efficient combustion due to less residual exhaust gases?
 
So today was a productive day - I replaced the rear section of exhaust on the Landrover and gave it an oil & filter change, then moved onto the P6 :D

First of all hoovered the old girl out, its amazing how much crud accumulates in the footwells!

Then I cracked out the wire brush and rust killer and set to derusting and converting the inside bottom edges of the rear doors- no pictures of this unfortunately :oops:

After lunch I decided it was in need of a wash and wax (so now if neilc or grifterkid spot me I wont be so embarassed!). As I was out of wax and having read some reviews online I thought i'd give something new a try - Turtle wax "ice" paste. This is labelled up as a polish but is actually a wax. The reviews looked good, so I was hopeful of decent results - i am pretty pleased with how it worked :mrgreen: The paintwork on the Red Rocket is pretty dire really, but looks ok from a distance. I am really only waxing as a way of preserving what is there until I can get it sorted... Normally i do a "proper" wax a couple of times a year, and use Autoglymn "Aqua wax" in the interim because its so quick and easy. The nice thing about this "ice" stuff is that it can go on rubber and plastics safely without making them all white looking.


The paste is weird, you load it up onto the provided soft sponge and rub it on, it goes on clear so can be hard to see. Strange stuff, when you buff it off it really grabs the microfibre cloth...


Oooh- shiny:


The other two are feeling neglected - I have to remind them that the Rover does the most mileage of any of them by far, and so gets special treatment :wink:


Micro blisters (from where it sat under a cover for 10 years)


Can't see them from this distance! :LOL:


Knackered now!

*edit - almost forgot, I also ordered a trigger wheel and vr sensor mount and this arrived a couple of days ago:

 
This week the Rover has been good as gold (as always), the only hiccup being when I came out of work on Weds to find some bloke had been drilling holes all over the NCP I park in, consequently covering my lovely shiny car in concrete dust! I thanked him profusely :D Not the cars fault, but a nuisance nonetheless... :evil:

It doesn't look too bad in the picture, but when looking at it in reality the whole bonnet looked grey...


This evening my lovely wife is away for the night so I thought I'd make myself useful and finish rebuilding my ten bolt heads. They are all back together now:


Someone did mention before that the holes for mounting ancillaries on the 10 bolt jobbies are different to the original P6 ones(think it might have been Ron) can anyone confirm if this is the case and if so, what the differences are exactly?

Thanks all,

Jamie
 
So this Friday I left work early (flexitime) and headed over to my parents place. Plan was to get the crank pulley off, and refitted with the 36-1 toothed trigger wheel (shown in the post above) required to run Ford EDIS-based distributorless ignition.

Let the pictures commence!

Start with a working car:


Drain coolant:


Remove the fan cowl/cover thing to expose the Electric LR Disco fan I fitted some time ago:


Done:


Rad removed:


What I thought would be my nemesis:


Tried using bars, poles anything I could find to get better leverage, but was just winding the car across the driveway - so I cracked out the impact wrench, and 5 mins later I had this, Hurrah!:


Fan belt removed, Power steering belt slackened off:


It's off!:


Marked to keep alignment (i'm 100% sure that this is not required, but I have OCD with this kind of thing)


Disassemble:


Start reassembly:


This later changed so that the trigger wheel was spaced further forward. This was needed as there was not enough clearance between the body of the VR sensor and the fanbelt. I opted to not refit the shield as there is now not enough depth on the locating prongs on the front of the pulley, and I didn't want it going off centre and out of balance...

Next day...

I decided that I wanted to keep the sensor bracket nice and simple, but it also needs to be sturdy to avoid the sensor vibrating about. Dad had some square tubing around. Everything was offered up to see how it would work and the sensor was then mounted on the bar:


Then some holes were drilled to allow it to be bolted to the gubbins that supports the power steering assembly:


Clamped into position:


Holes were then drilled in the bracket behind and the bar was bolted up:


The wheel was then setup relative to TDC and the sensor. On a V8 EDIS requires that the wheel is positioned so that at TDC, the missing tooth has passed the sensor tip, and the sensor is aligned with the 5th tooth. This requires a little bit of offering it up, removing, adjusting, offering it up and so on...

Sensor gap set (between 0.75mm and 1.5mm), radiator back in.


Then I went to put the fan back in and found the motor body was now fouling on my new sensor bracket. The bracket was removed and the top portion trimmed to half depth, the first 2-3 inches are now just u-channel but it still never going to flex! You can make out the top of the bracket in this picture:


Tada! Car all back together :D :


Hopefully thats the hard bit done now. Next I need to figure out where I am going to mount the EDIS module, the coilpacks and the Megajolt and wire it all in! When I come to fit Megasquirt it will take over ignition duties from the Megajolt.
 
Quagmire said:
This week the Rover has been good as gold (as always), the only hiccup being when I came out of work on Weds to find some bloke had been drilling holes all over the NCP I park in, consequently covering my lovely shiny car in concrete dust...


Jamie

GIT...!!!

On another note can you please stop taking your car to work as every time I see it it makes my desire to own another P6B stronger and stronger and I might break...!!!!!!!!

On another, another note I do hope to see you and your glorious motor at Walton Bridge at the end of this month...

Walton Bridge Breakfast Club

As always, great work on this great car :wink:
 
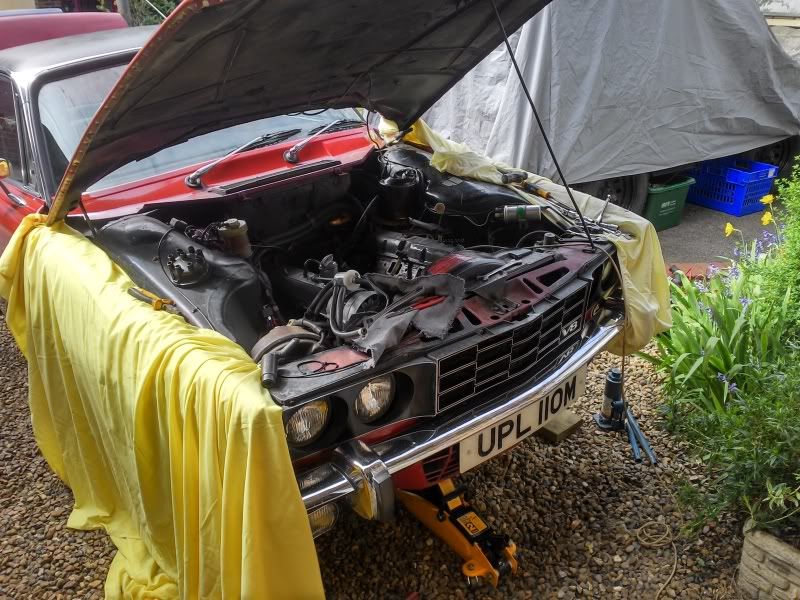
Have had a busy but productive weekend. I booked the Friday off, as my wife was away for the day Saturday. This gave me two days to get my 10 bolt heads on... :D

DAY 1

Remove some stuff:


And more:


Then jacked the car up and sat it on heavy wooden blocks so I could get underneath. I had thought I could just undo the exhaust manifolds from the heads as I would on the 90, but nope - seems its easier just to lift the heads with the exhaust manifolds attached. I undid the downpipes:


Take more bits off:


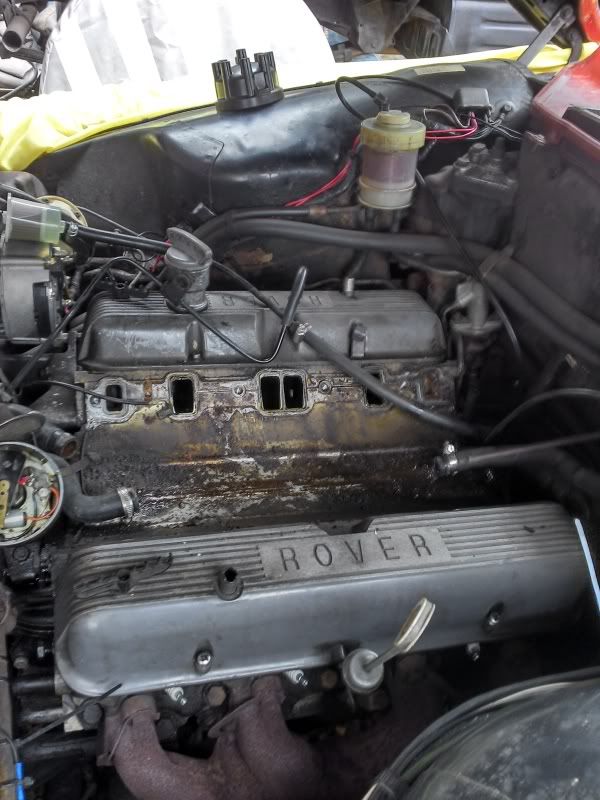
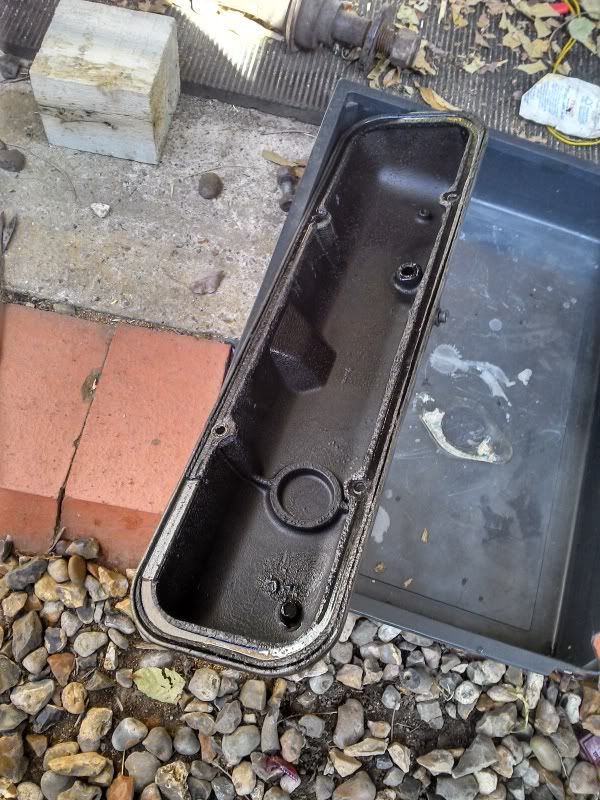
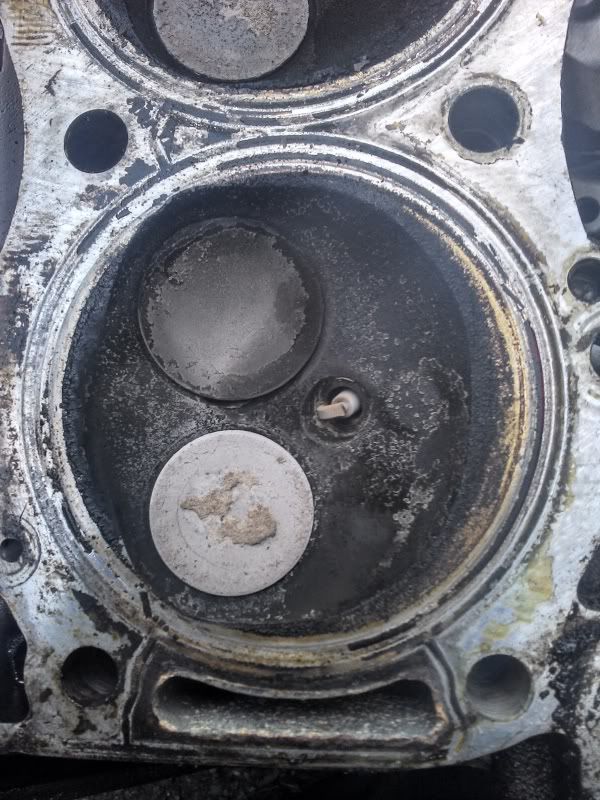
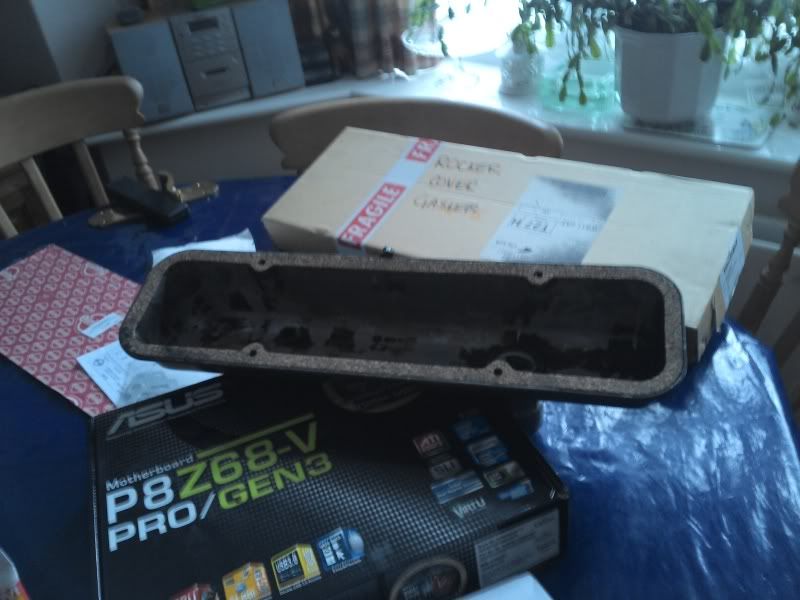
Rocker covers off - its black in there, but no sign of the cornflake type things you get in really bad ones. Smelt a tad burnt, but again not terrible:


Was surprised the passenger side rocker had not been leaking more - a big chunk was missing from the cork gasket:


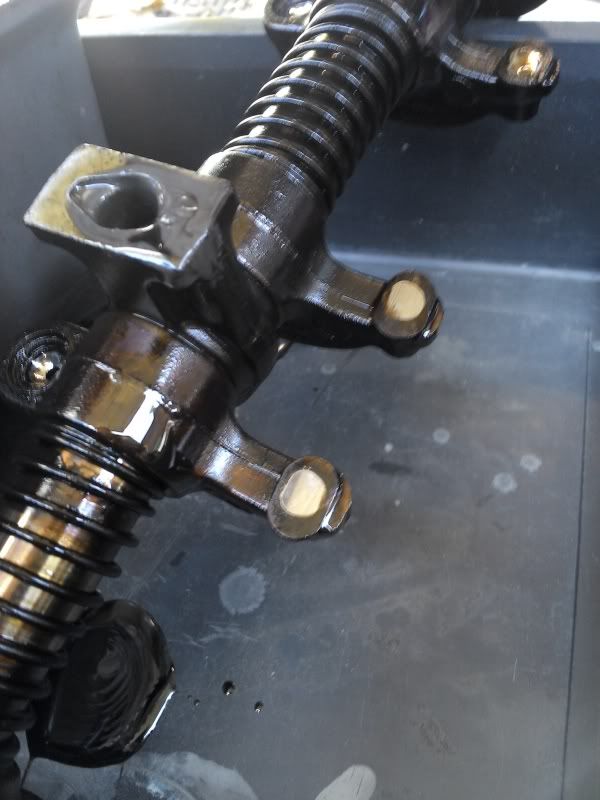
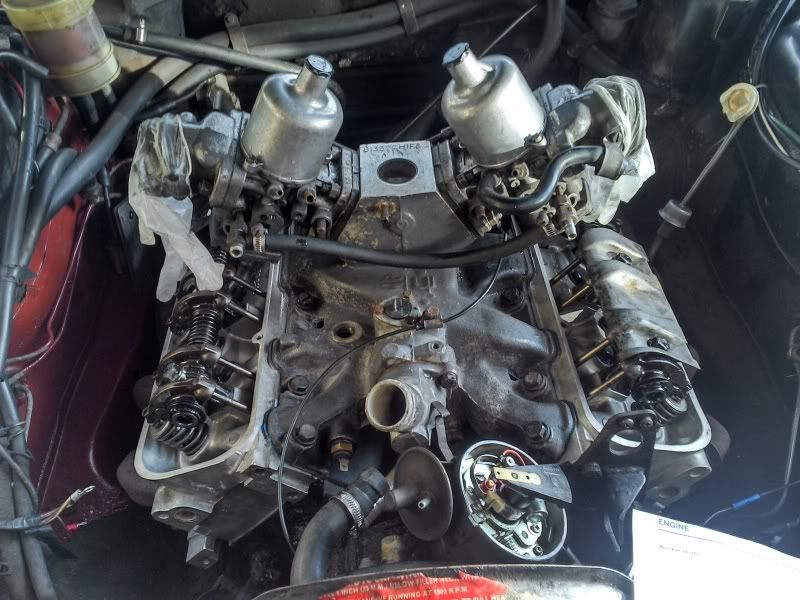
The rocker gear was in good shape - no up-down movement on the shafts, and the pads were perfect.
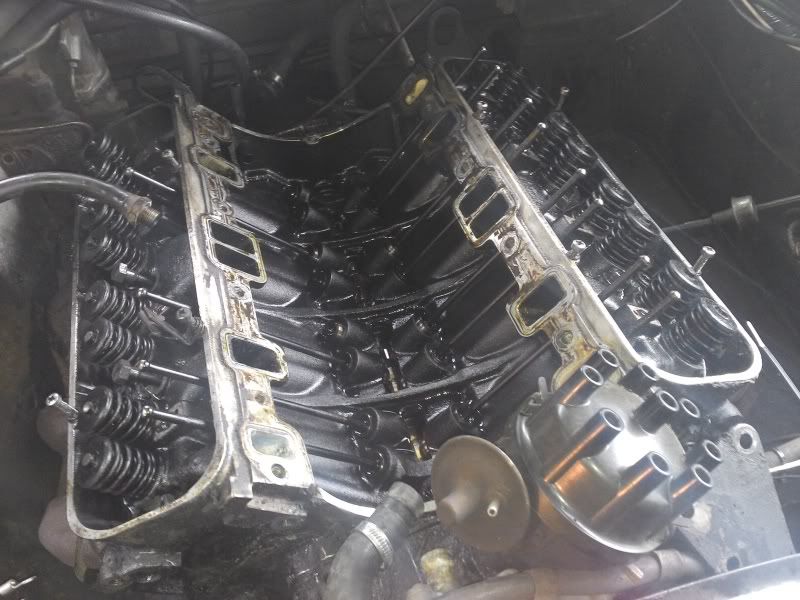


Keep going:


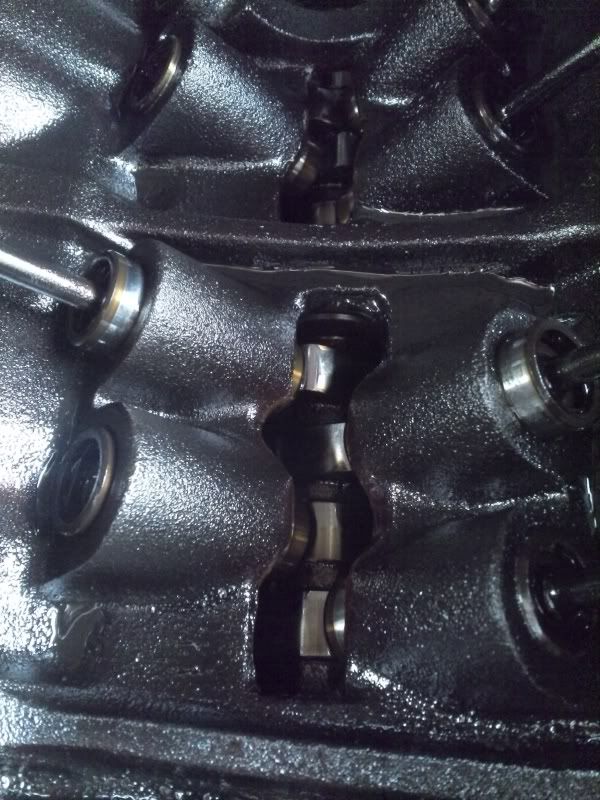
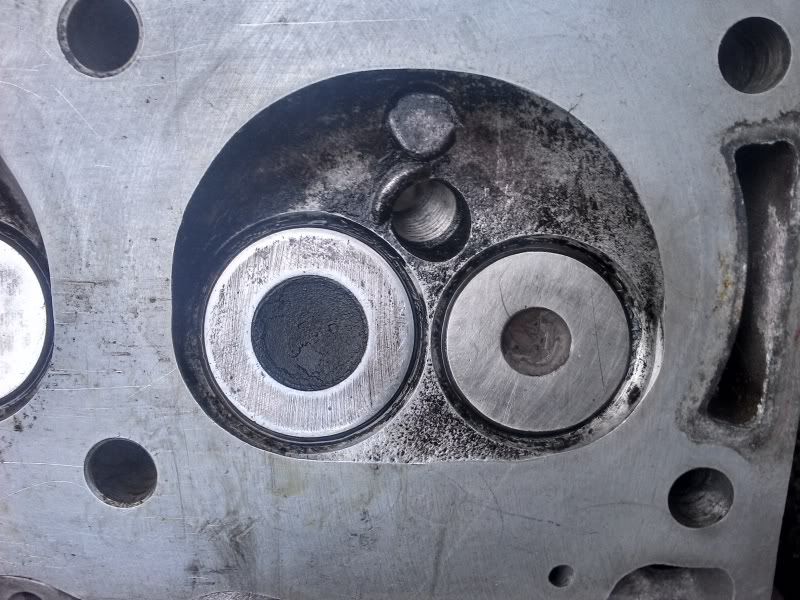
Cam looked ok - not knackered, but showing signs of some wear:
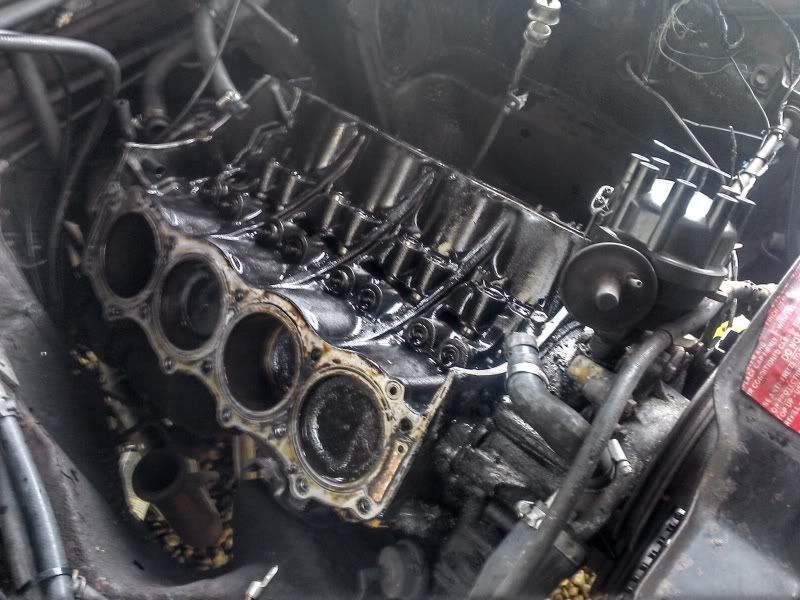
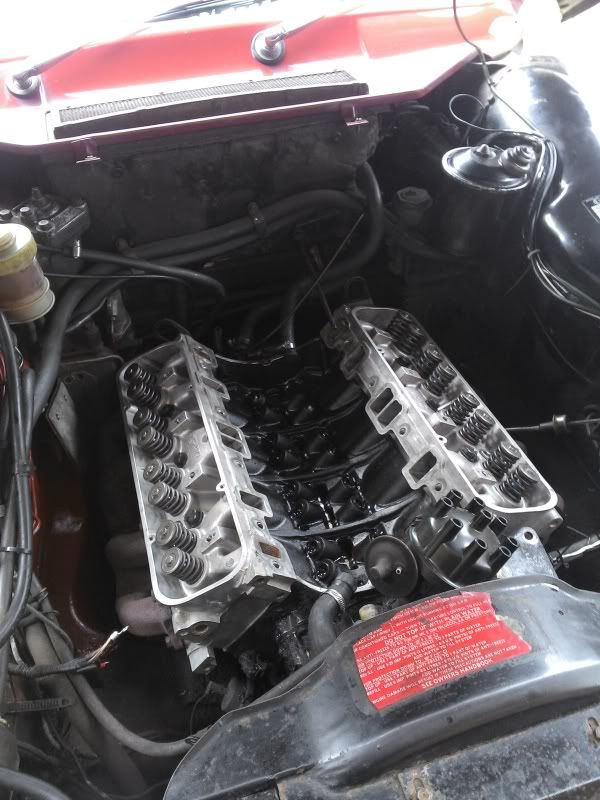
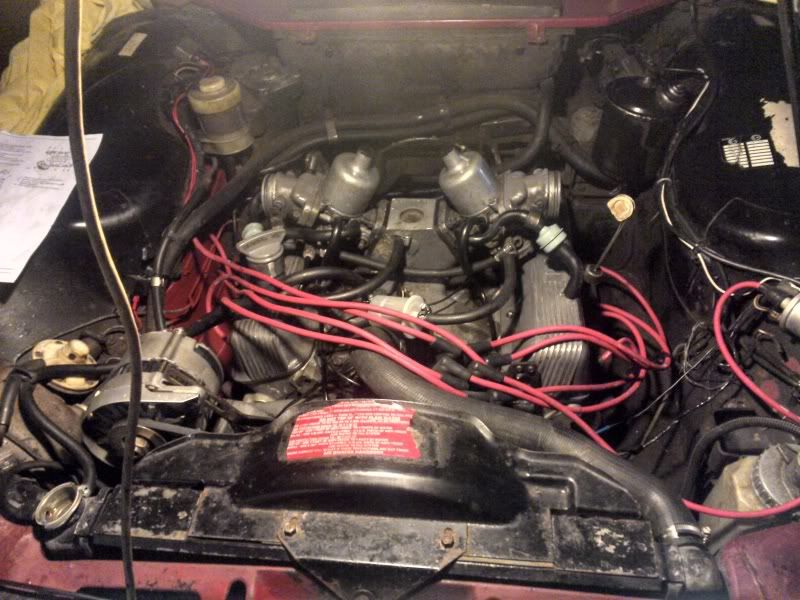


Voila! Heads off. :


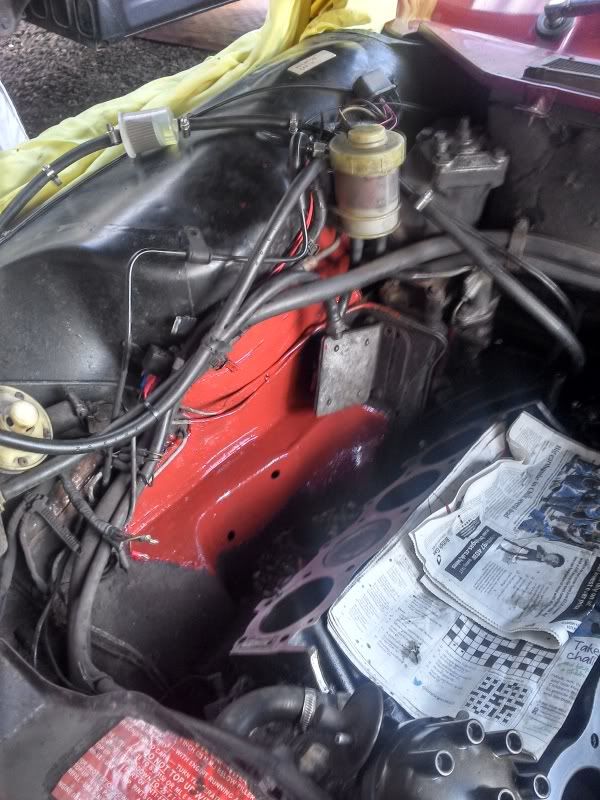
Whilst I had access to it, the inner wing on the drivers side needed some paint to prevent deterioration, the existing paint was flaking off. I will revisit this when the engine comes out at some point:


Cleaned up the block faces:


DAY 2

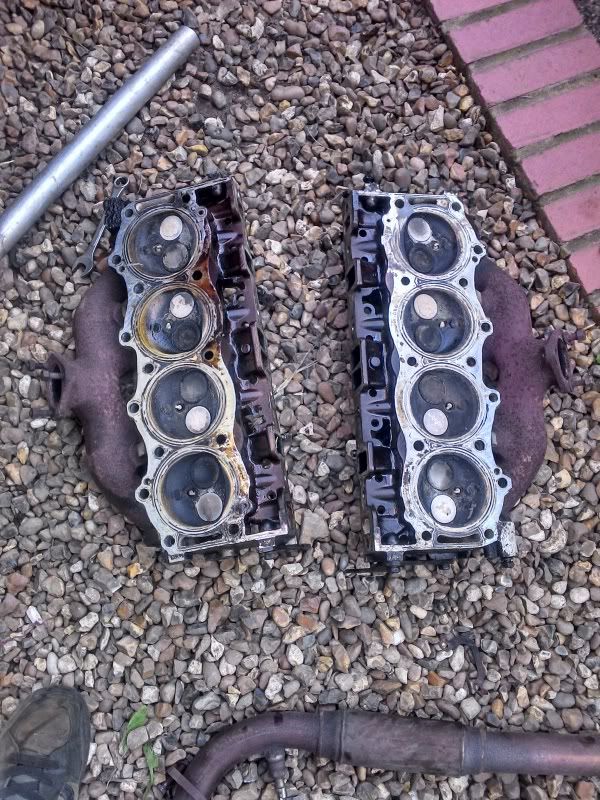
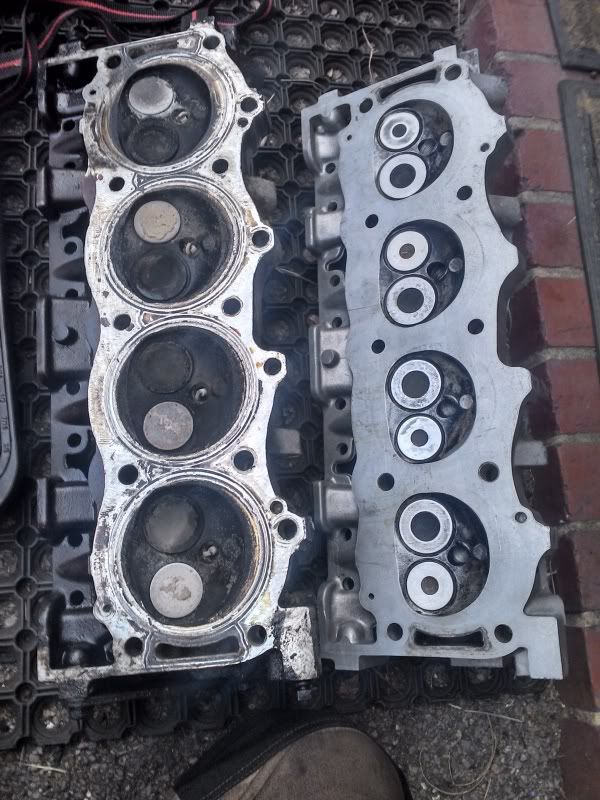
P6 Head vs Discovery one, note the difference in valve sizes and the difference in chamber size due to the change in gasket type:


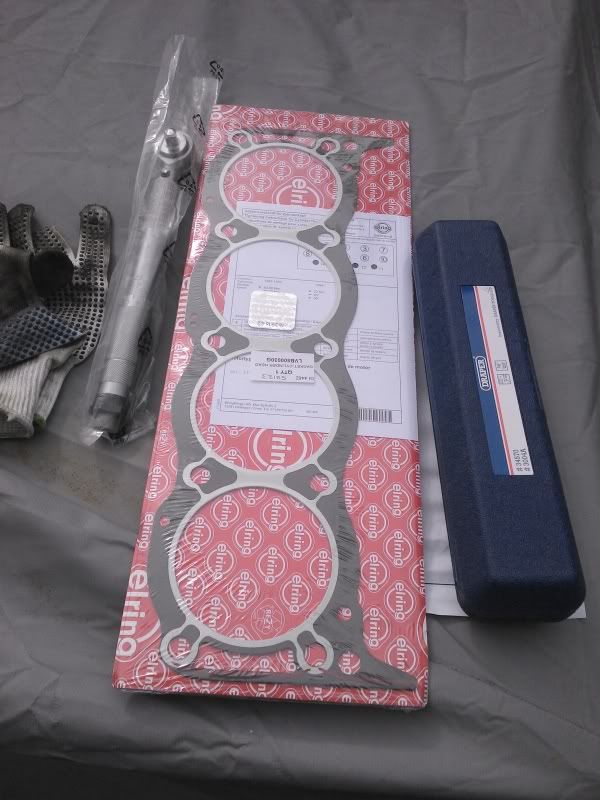
Nice new Ering gasket:


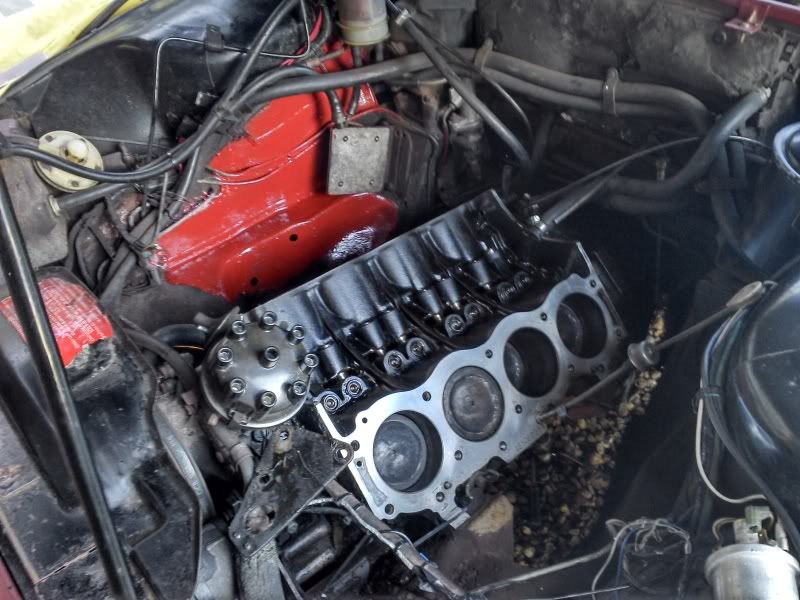
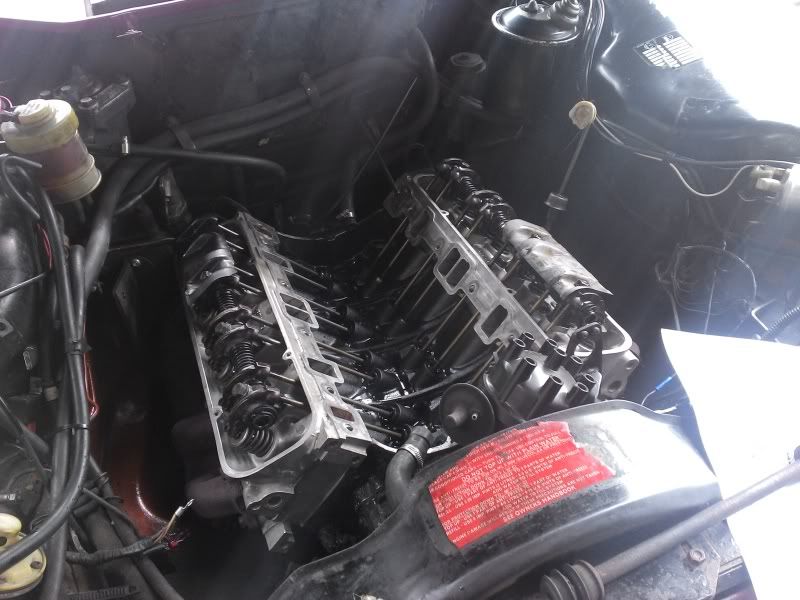
Heads were given one last light rub over (and i mean light) with a little scotchbrite and wd40 to remove light surface scratches from handling. They were then cleaned off thoroughly, as was the block and we end up here:


Assembly is the reverse of removal:


Rockers cleaned up and waxed - no idea if this will work, but I figure the cleaner and shinier something is, the harder it is for dirt to stick to it:


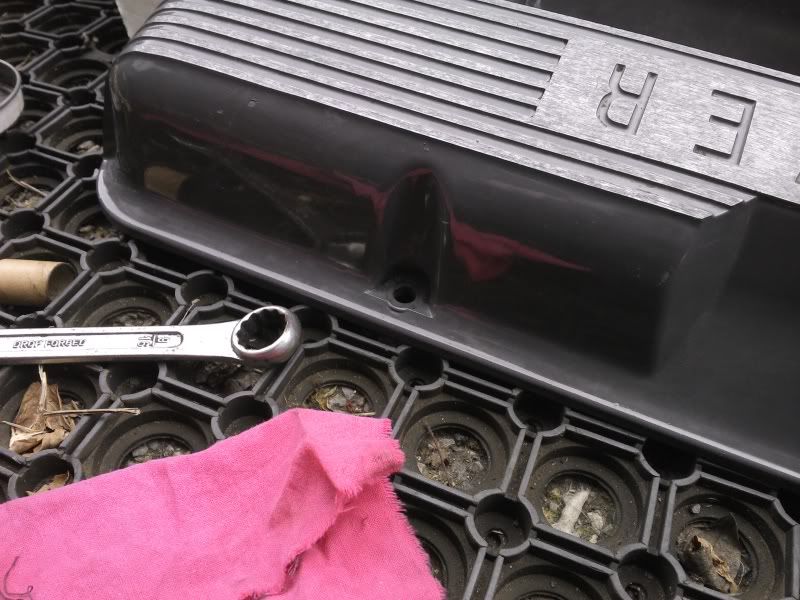
I then glued the cork gasket into the cover with some o2 sensor safe silicon (loctite 5910). This keeps the gasket with the cover if you remove it in the future, and generally makes fitting much easier.


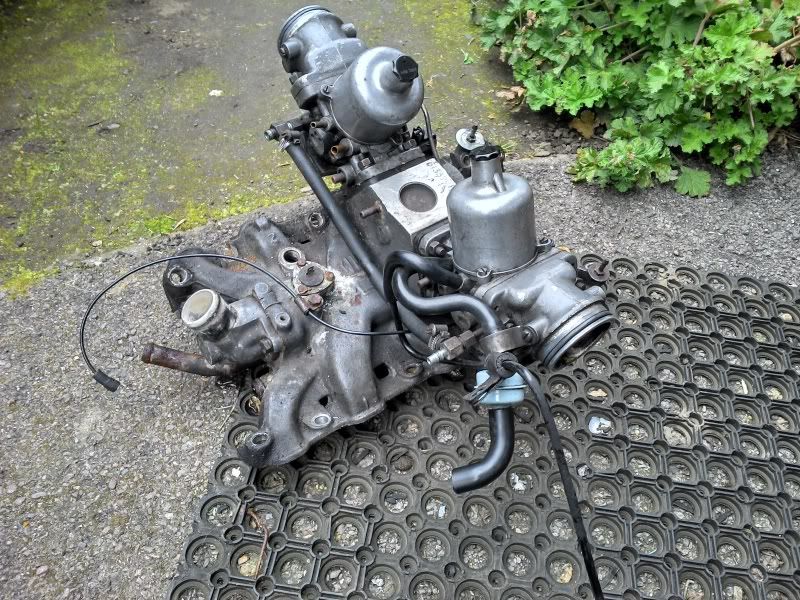
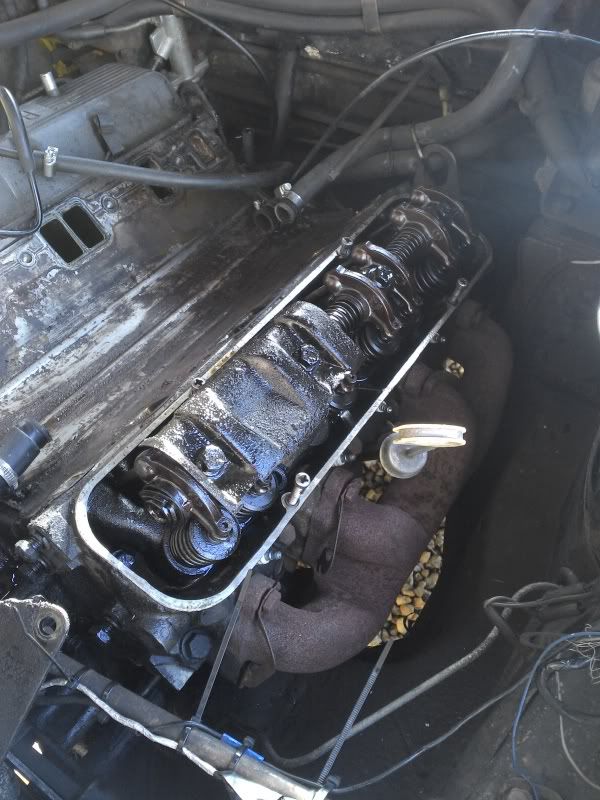
The inlet manifold was degreased and cleaned off. I then fitted the new valley seals, manifold gasket and clamps and fitted the manifold itself:


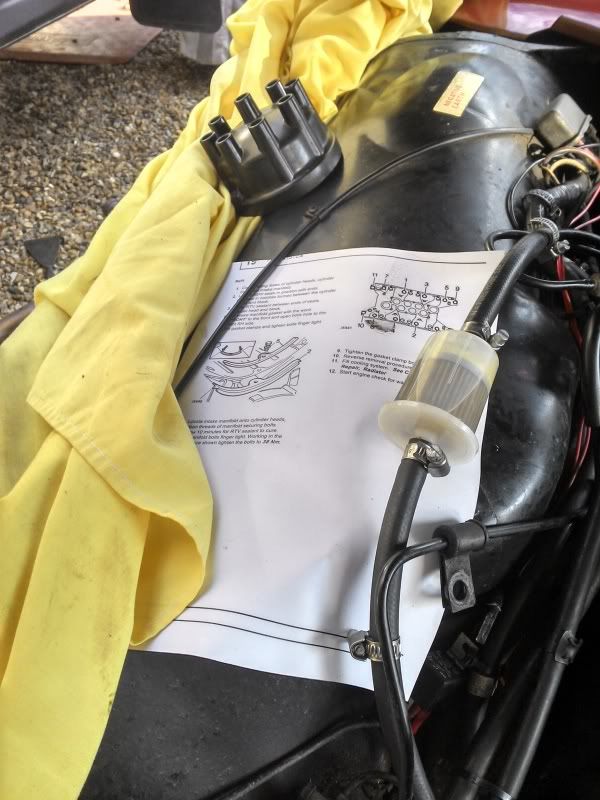
The bonnet release cable makes a handy place to keep paperwork that is being referred to:


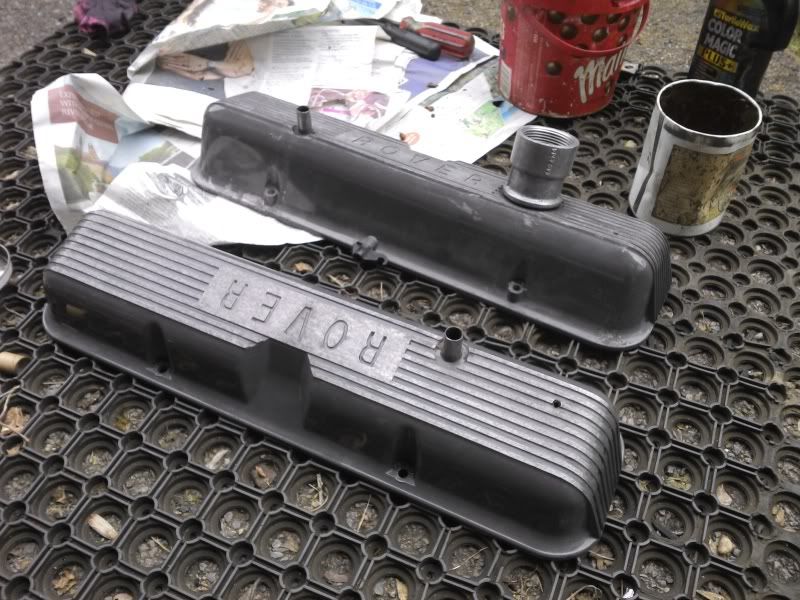
Rocker cover gaskets were then greased and the covers fitted:


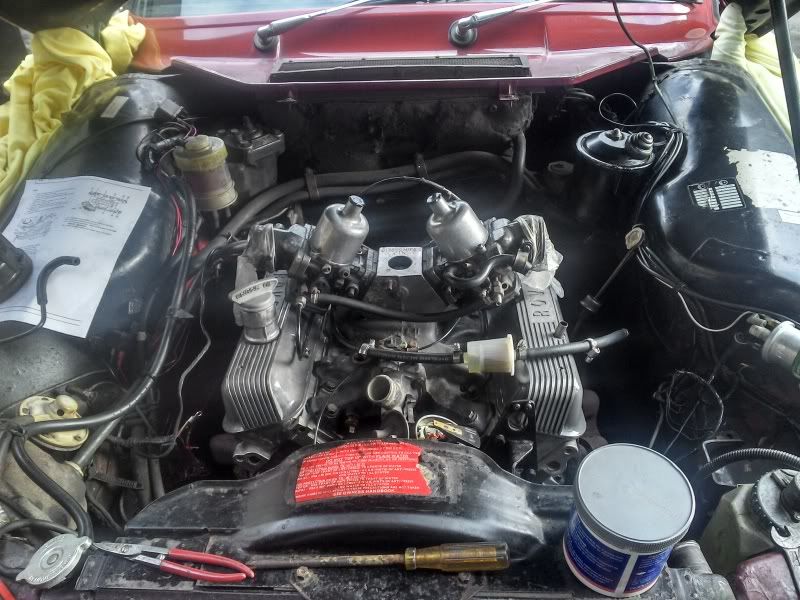
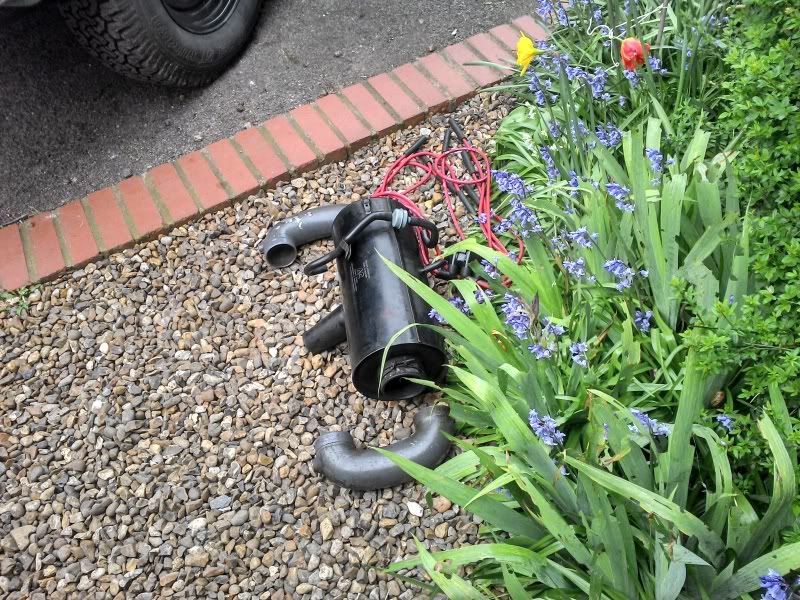
Stopped for dinner and then refitted the fuel lines, controls, , alternator, the dizzy cap and leads, the exhaust and filled it with coolant:


Turned the key and it fired up - success! But then no - the drivers side carb started dumping fuel out the overflow! :evil: :evil: :evil:

Tried giving it a whack with a mallet and block of wood, but no amount of cajoling would get it to unstick. Carb had to come off, in the process and being pretty tired at this point I managed to break the balljoint. Grrrrr! I grabbed a spare balljoint from my old manifold that was fitted to my 90. Luckily I had just popped the top off the joint and the remaining 2/3rds were enough to retain the joint ok.

I took the bottom off the carb and checked it, no visible crud or anything strange so reassembled and fitted.

This time she fired up and purred into life :D I let her idle for a few mins whilst I went round checking for leaks etc, nipping up the odd water hose etc. Also waiting for the oily haze to burn off from where the manifolds have been dripped on, handled with greasy hands etc. Tense times!

All was good, and so at around 11pm I went for a quick test run around Weybridge. My Dad got back from his shift at the perfect moment, and he came with me on the voyage of discovery.

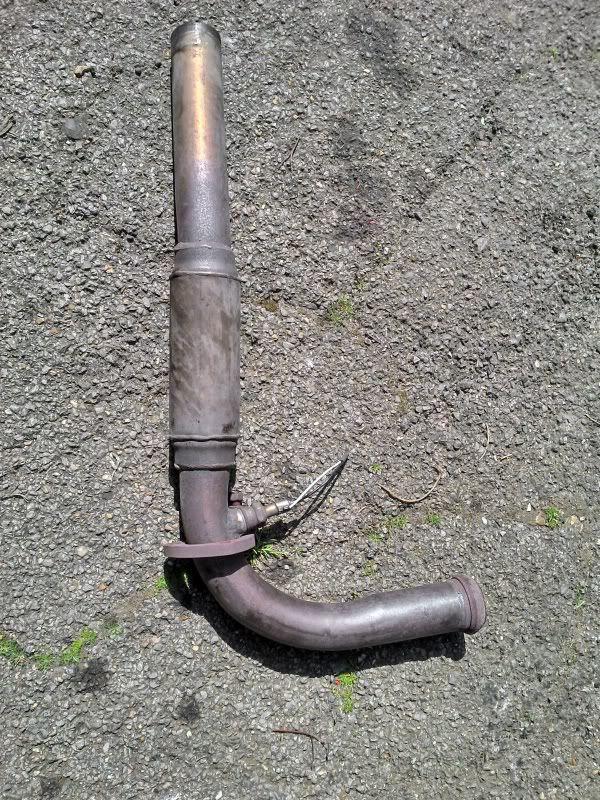
Everything worked more or less perfectly. I have a slight misfire now when you floor it in too high a gear, I expect I will need to adjust the mixture a little now that the top end is breathing slightly differently. There was a slight blow from the slip joint on the passenger side downpipe, but other than that nothing.

I then drove home to Hook (27 miles) and she didn't miss a beat.

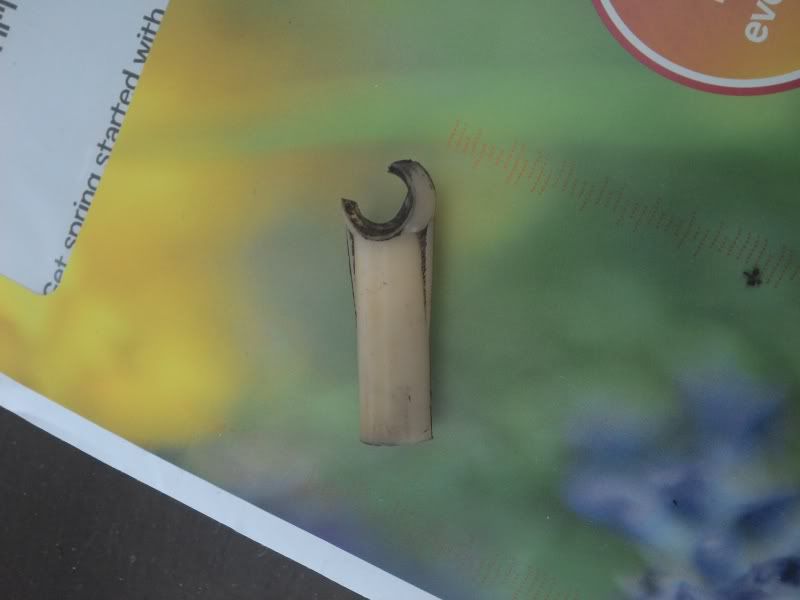
This morning I replaced the broken balljoint, and sorted the leaky exhaust joint. Balljoint below:


All back together again:


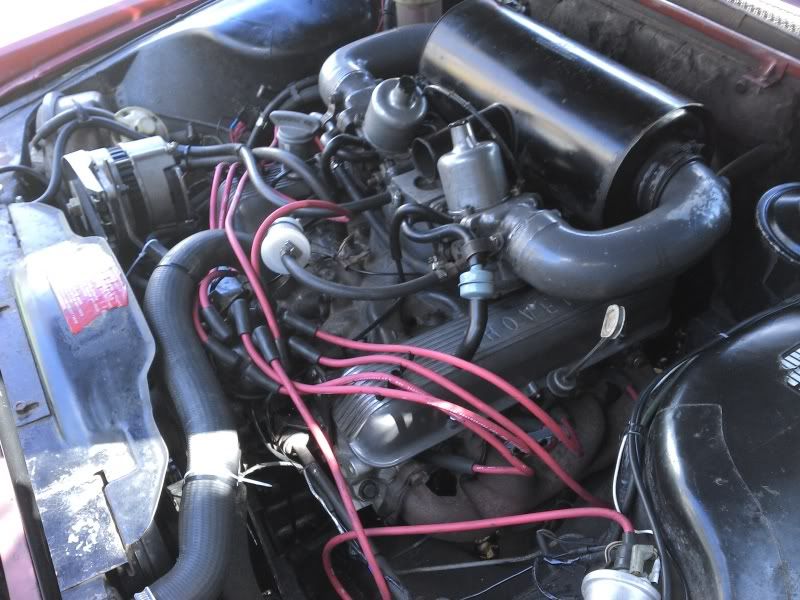
Then the wife and I went out for a very nice drive around and about in the sunshine. The car is running nicely, and seems to pull well, as long as I'm not being lazy and not changing down when I probably should. Will sort the mixture one night this week, ignition is overdue its routine tweak by now anyway so will sort that first.

Only snag I hit with fitting the ten bolt heads is that the bolt holes for ancillaries are two different sizes on the original heads. They obviously worked out in later years that drilling and tapping one size of thread would be easier/cheaper, and so you are left with bolts that are too small, and bracketry with the smaller hole sizes too. I had to source the correct larger size bolts, and drill out one of the holes on the alternator bracket to suit the larger bolt size.

Luckily we have a couple of spare v8's in the garage! :D
 
Hello Quagmire

Nice work and done rally quickly! One advice to anyone who wants to do this job is to check the lifters preload. It is not mentioned in the WSM and therefore maybe not done at the factory in those days but it seems that an incorrect preload influence smooth engine running and power.

Here is a guidance how it should be done.
Regards

Peter

preloadsettingjpeg-1.jpeg
 
Hi Jamie,

Sorry for the delay in replying to your question way up the page re bolt hole sizes on the 10 bolt heads. I see that you found the difference in any case, needing to drill holes through the brackets for alternator and accelerator linkage, so as to accomodate the larger diameter bolts required for the 10 bolt heads.

Very nice work there too. :) The 10 bolt heads are regarded as the best that Rover (actually Land Rover) produced for the V8 in terms of flow capacity and power potential, so once you've changed needles so as to reflect the change, your Rover should feel rather more sprightly.

Ron.
 
Thanks for the replies everyone :D

Did my first commute today and the car is noticeably stronger in the mid-range, for example in 4th going from 60mph, to errr... a bit faster :wink: Should be even better with the right fuelling!

Fuelly results will be the real judge of any gains, I shall drive the car the same as before. Filled up today, so in about 5 days time I should get my first figures...

Peter - Good info, I would definitely advise setting preload on any aftermarket cam, or if you were building the perfect engine.

Ron - No worries on the reply, I must have seen you mention it before so I was kind of alerted to be on the lookout for problems anyway, which was a help :LOL:

In terms of hardware for going Efi I have done the hardest bits I think. Sorting out the fuel system will be the next biggest challenge. :shock:

Am hoping to get it running wasted spark on Ford coil packs first over the next 4-6 weeks. We'll see how that goes.
 
Update- as of this evening the Red Rocket is running distributorless!

What kicked it off was that I set the points over the weekend and could not get it running right! I tried everything, and nothing worked. The car was running nicely, and pulling well but I was getting a misfire at cruise. Dwell meters and feeler gauges be damned, I was fitting Megajolt! It has taken me every evening this week but apart from tidying up some wiring it all works.

I will take some decent pictures tomorrow and do a proper update, but I have just got back from my first drive with the dizzy connected to nothing but fresh air :D

First fire up with old leads still hanging in there ready to swing back into action:


Coilpacks!


At the petrol station:


Pleased as punch :mrgreen:
 
Excellent work there Jamie! Your engine is looking very impressive indeed.

Just covering what you mentioned regarding the misfire. Lateral free play within the distributor shaft, of which the 35D8 distributors are well renown for, results in running problems when points are used. There is no problem early on, but with wear the problem manifests in idle speed irregularities and running problems at cruise speeds. Electonic ignition systems cure the side effects, but removing the distributor altogether as you have removes the problem completely.

Ron.
 
Thanks for the kind words Ron!

Its been a long while since I went distributorless on the Landrover and I had forgotten the difference it makes - going from one to the other in short order really highlights the differences! I now have no misses and no hesitation no matter what I do. I can now be cruising in 4th gear at 20mph and if I put my foot down it just hunkers down and gets on with it, whereas before it would have hesitated. I don't drive like that normally, but for the purposes of testing :D

It also starts much quicker from cold and the choke can come off much earlier. Result!

So here's what I did, you can do the same to any vehicle using Megajolt and the appropriate trigger wheel and EDIS module (EDIS 4, 6 or 8 depending on how many cylinders you have) or you can fit Megasquirt and run igntion only in almost any configuration you can think of, Locked Dizzy, EDIS, Coil on Plug, Coil near plug...:

You need one of these (Ford EDIS 8 Module - from V8 powered Fords built in the 90's and early 2000's - none made it to the UK so this came from US eBay)


The right number of these for your 4 or 8 cylinders(there are specific 6 cylinder ones):


One of these (see autosportlabs.net):


Full and proper details for Megajolt (MJ) installation are here:

http://www.autosportlabs.net/MJLJ_V4_vehicle_installation_guide

In a nutshell the main bullk of the system is the Ford EDIS part.

http://www.autosportlabs.net/Ford_EDIS_technical_information

The VR Sensor detects the teeth on the trigger wheel and this signal is fed into the EDIS module. The trigger wheel has one missing tooth so that the system knows where the engine is in its cycle, and the EDIS module will then fire the coils based on the this signal. The car will run with just the VR sensor, EDIS module and coilpacks wired in, however with no external input from an ECU the EDIS will simply run the ignition at a fixed angle of 10deg BTDC.

The Megajolt is connected to the EDIS module in place of a Ford ECU and it tells the EDIS how much to advance the timing by, based on the timing table you have set up. The Megajolt knows the engine speed via EDIS, and also knows the engine load as an expression of Manifold air pressure as it has a MAP sensor of its own, connected by tubing to the inlet manifold.

Wiring:

I have run the wiring so that the MJ unit is in the boot. It is fed power by an ignition switched relay, and is fused with a 3A fuse. The MJ and EDIS module must be earthed at the same point, so there is an earth wire running back from the engine bay to the boot. There is also the shielded cable that connects the MJ and EDIS modules together and the tubing for the MAP sensor. I also ran a couple of extra cables so that I can eventually have the MJ controlling my electric fan automatically.

The EDIS module is on the wing, near to the original coil, and it and the coilpacks are fed using the original ignition feed.

The EDIS "pigtail" was very short on the module I had, so I extended it:


The coilpacks are mounted on a bit of stainless steel that used to hold a sink on the wall in our bedroom, we got rid of the sink a long time ago, so the bracket was finally put to good use. It is mounted on the bracket for the engine tie-bar:


Coil packs in place, working things out:


I bought all the coilpacks second hand on ebay, they are cheap and plentiful. Getting them with HT leads on means you can disassemble the original leads and make your own to suit:


The only tools you need for this are a knife (for cutting insulation), some silicon spray to help get the boots off, some pliers to tweak the terminals with and I use a set of ratchet crimps for coaxial cable. You can get the HT lead cheap, and the spark plug end terminals are cheap too.

You need to have a takeoff for vacuum from the inlet manifold. I removed the blanking plug on drivers side just to the rear, and fitted a barbed jobby from the injection ram housing I had sitting about, thank goodness Landrover didnt change anything unless they needed to!:


P6 blanking plug in ram housing for safe keeping:


So with the everything connected we have this, Tada!


*edit - forgot a bit, and quite an important bit too :oops:

Once you get the thing running it is essential that you put a timing light on it and check the advance you are getting. With the MJ unplugged and the car running in EDIS standalone/limp mode you should get bang on 10 degrees BTDC. If you are a couple of degrees out you can "trim" the angle out in the MJ software. If it is waaay out you will need to tweak your trigger wheel and try again. I was lucky and mine is pretty much bang on.

If you dont do this step then the advance figure you see on the laptop may have no bearing whatsoever on what the engine is actually seeing and you risk damaging it!

Laptop, showing what is going on, current commanded advance, RPM and manifold air pressure at the bottom, the ignition map at the top:


and a rubbish quality video to show it running with a naked dizzy:


Thats all for now, just need to tidy it up a little :mrgreen:
 
Good point, I had forgotten about that - nope the rev counter is non functional right now as the original coil is totally disconnected.

I will need to either do something with the tach ouput from the EDIS itself or the MJ as it also has one - however I think they both output a 12v square wave so will probably be useless. I will have to do something with the coil grounds and some zener diodes. Or could I use the W+ post on my alternator? Does the group have any ideas?
 
Back
Top