

You are using an out of date browser. It may not display this or other websites correctly.
You should upgrade or use an alternative browser.
You should upgrade or use an alternative browser.
My 3500s project - future daily drive
- Thread starter Quagmire
- Start date
Johnny E said:Crikey Quagmire, I thought mine was close with 27/12/73 but yours is really close to the wire!
Great stuff
I know! When I got the initial email back from my enquiry with that date I literally jumped out of my seat in the middle of the office and shouted "Yes!" people thought I was nuts!
grifterkid said:Nice one...!!!!
How is the beast running at the moment, I haven't been lucky enough to see you burning around the Kingston one-way maze for a while...
Well we just got home from passing its second MOT under my ownership - and I got 25.4mpg on the last tank so its pretty good at the mo!
The bizarre thing with the wheels fouling the wheelarches has not been a problem at all since I swapped the wheels - not sure if that actually sorted it, or just the fact that I had it up in the air with the back end on maximum droop. This might have allowed things to settle back down properly when I dropped it off the stands. Weird...
I've been away for a while with work on this little beauty:
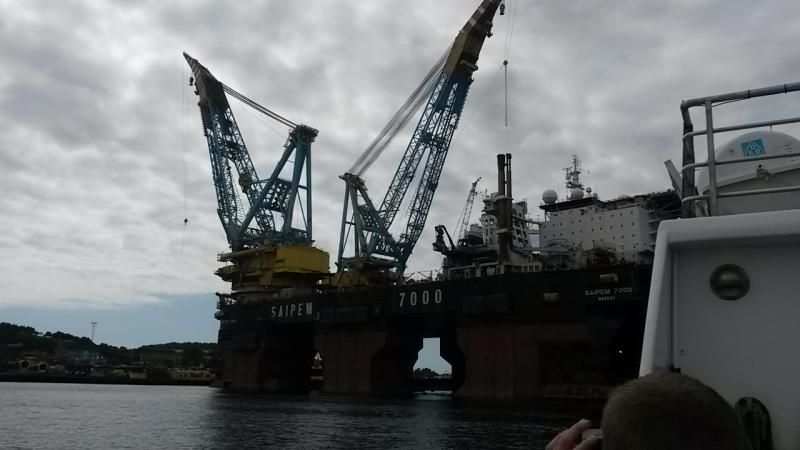
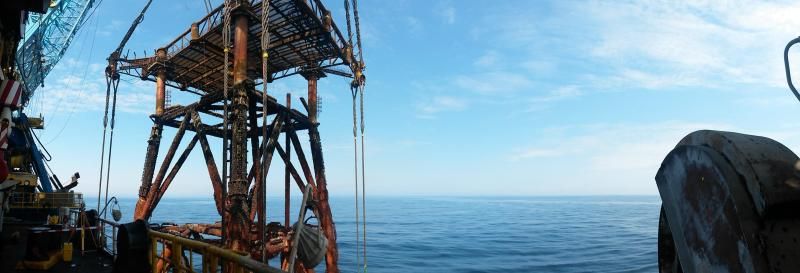
http://en.wikipedia.org/wiki/Saipem_7000
We were out in the North Sea to prepare, lift and remove an old steel Jacket from the Ekofisk field and carry it inshore for scrapping - in one piece (80m water depth, some 7000Te):
Before:
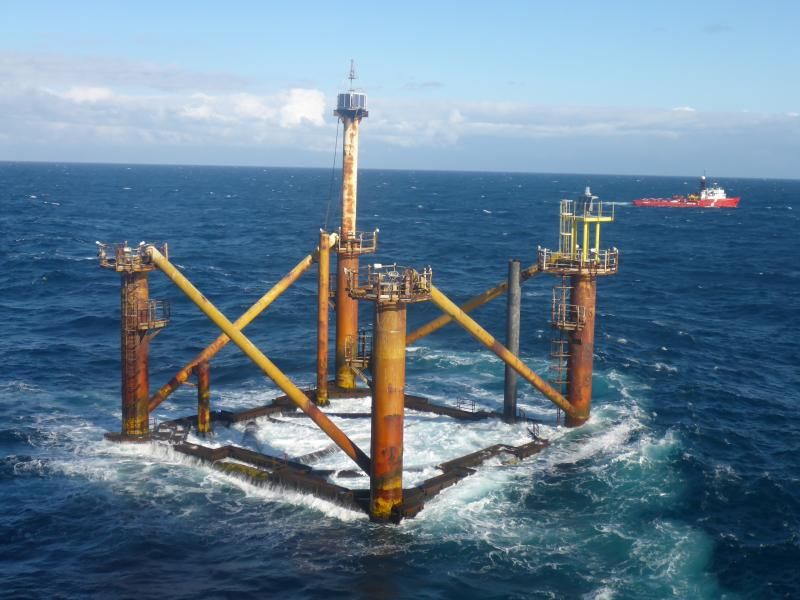
During lift and transit inshore:
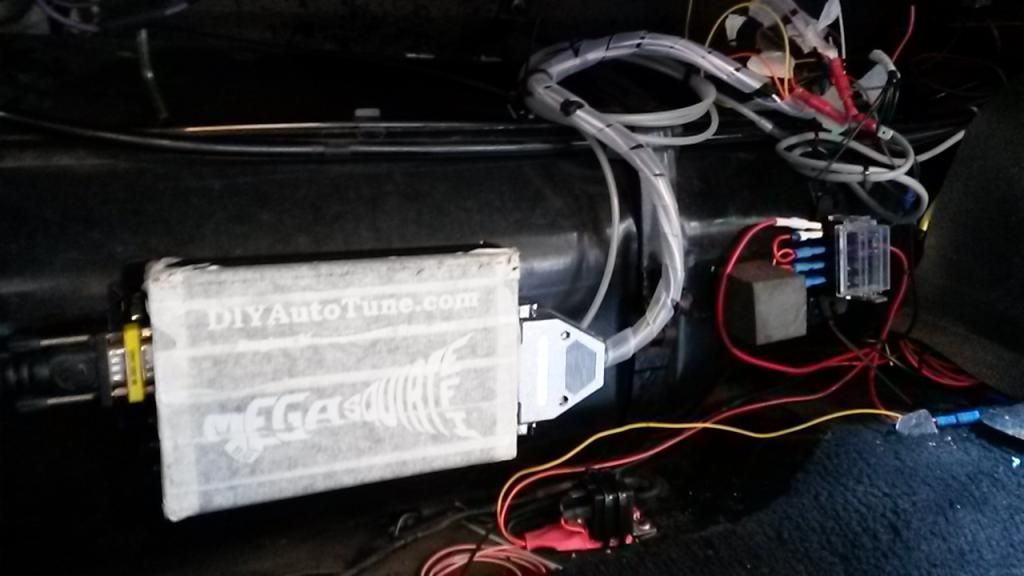
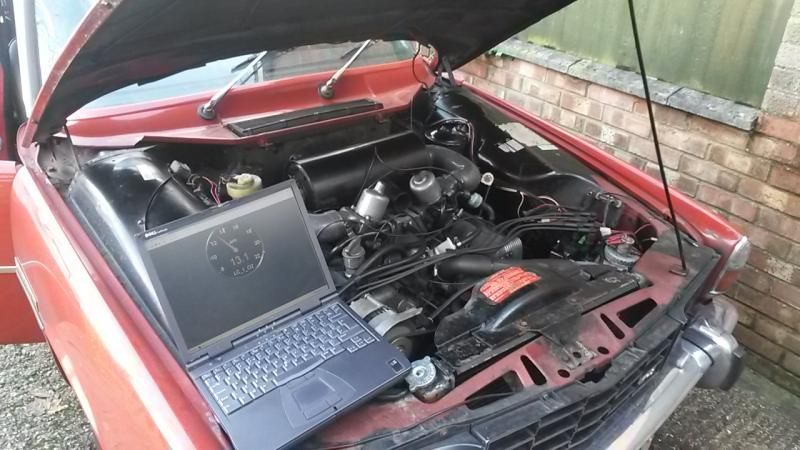
While I was away I ordered a Megasquirt 2 from diyautotune.com, here is how it went together:
Kit:

Solder connectors on:
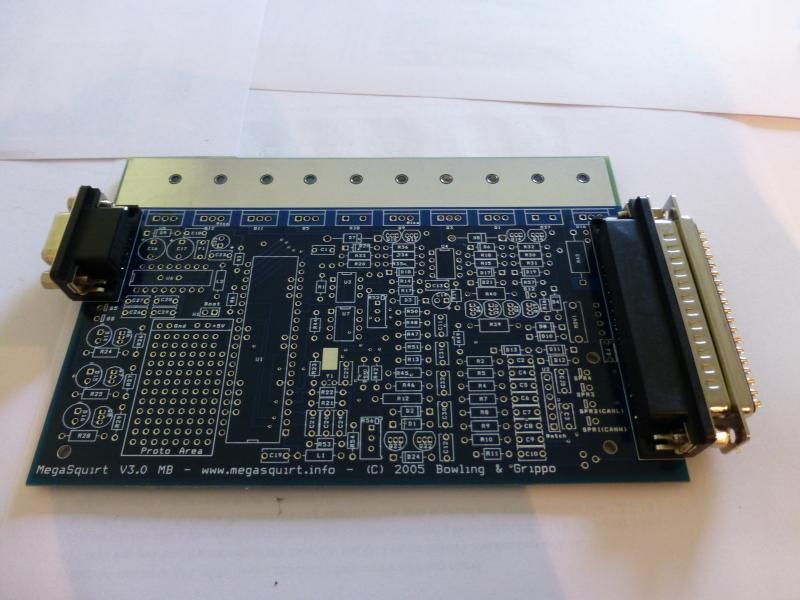
Resistors:
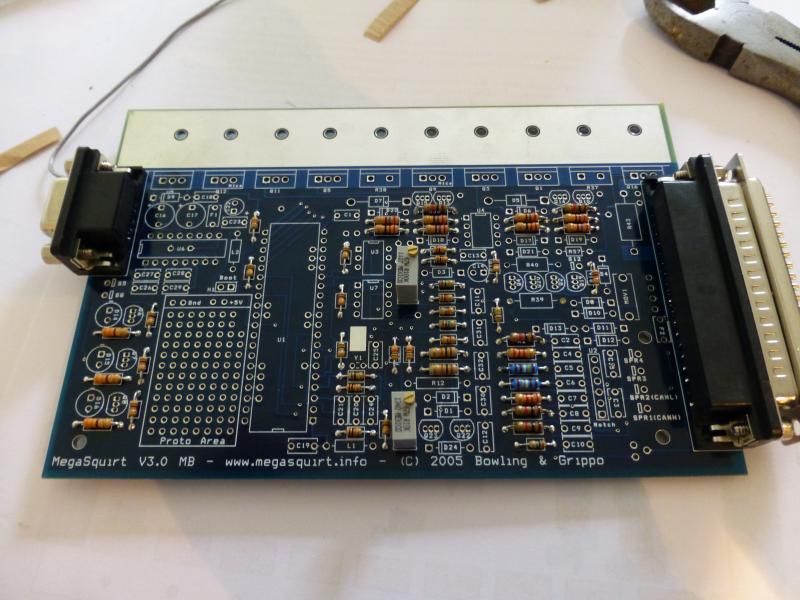
Diodes, Capacitors:
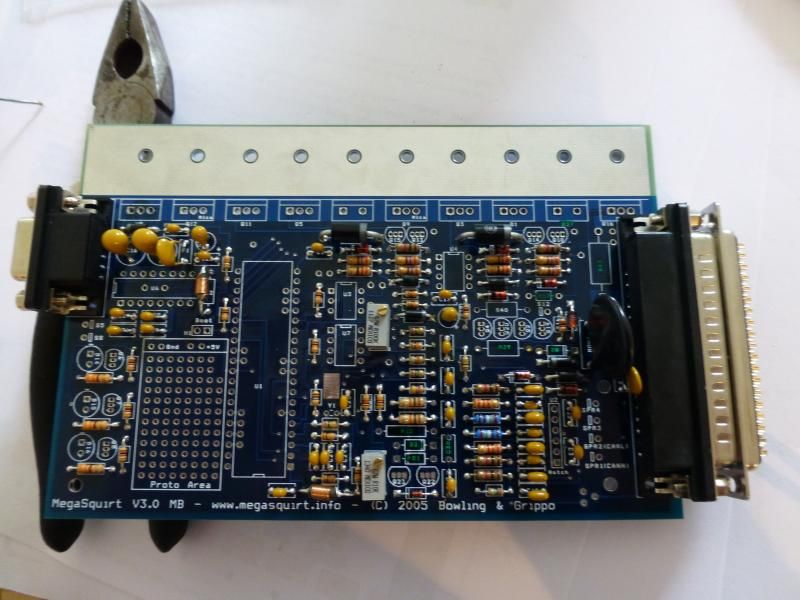
Board 99% finished (had forgotten a couple of transistors and a resistor at this point):
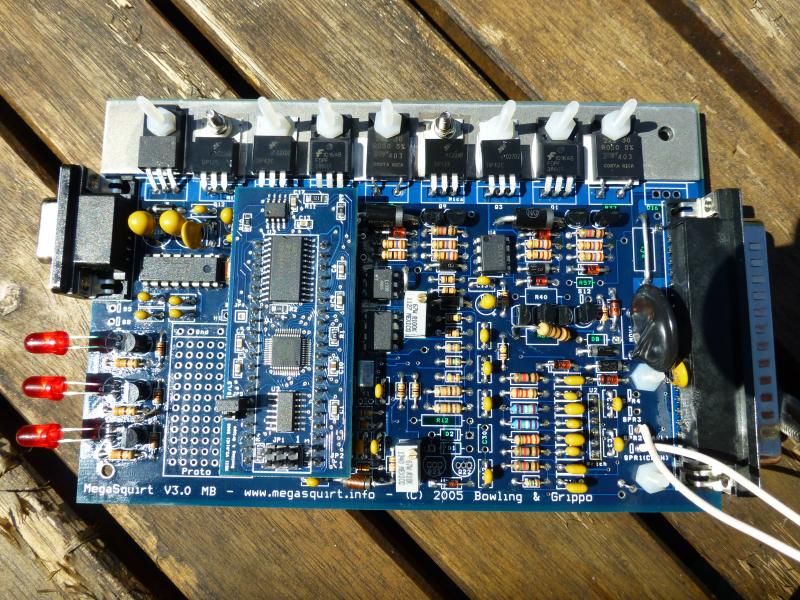
Bench testing:
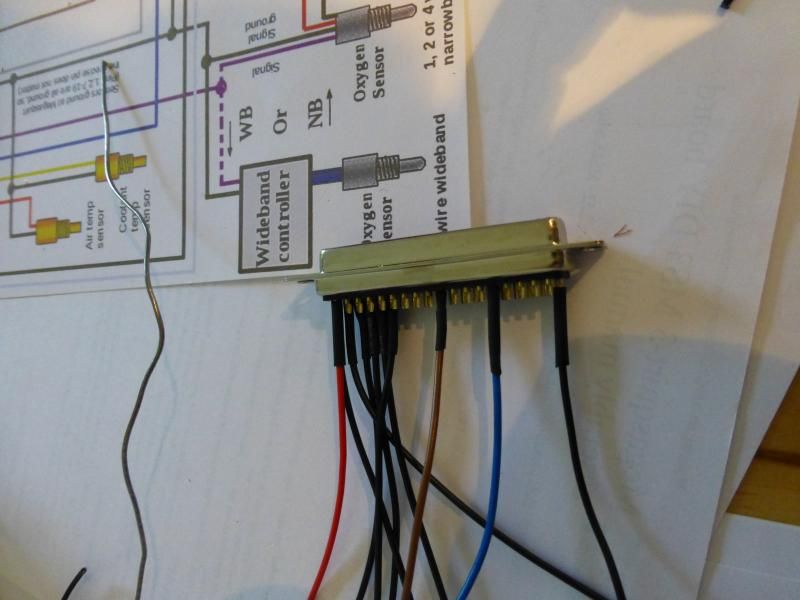
Building up the DB37 connector:
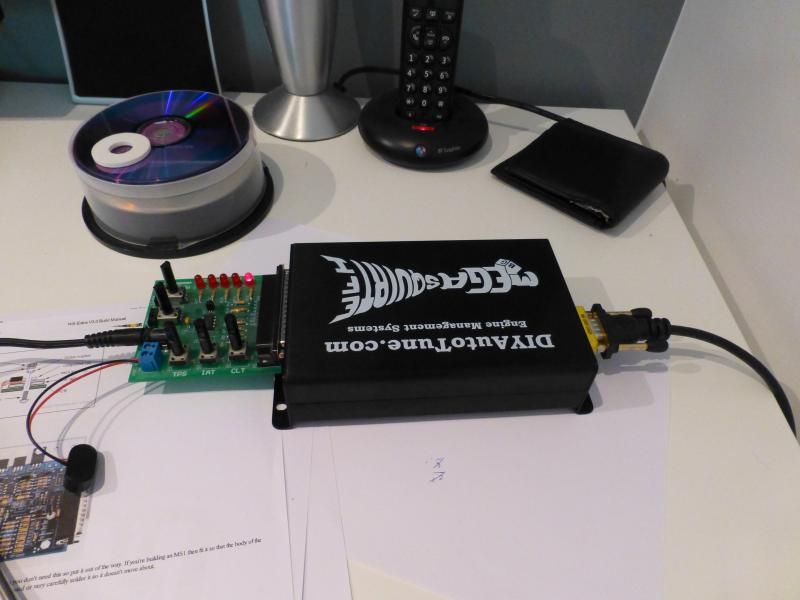
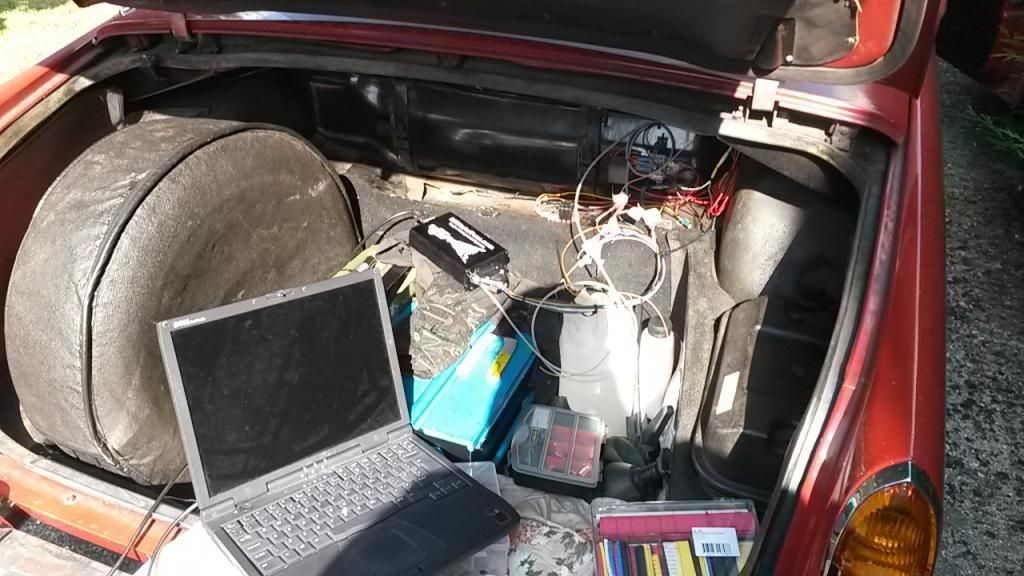
In the car:
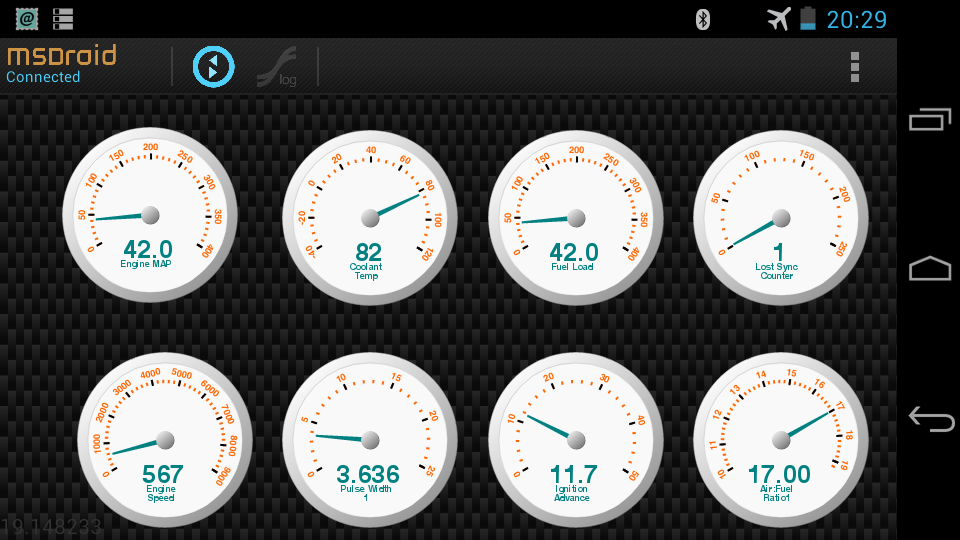
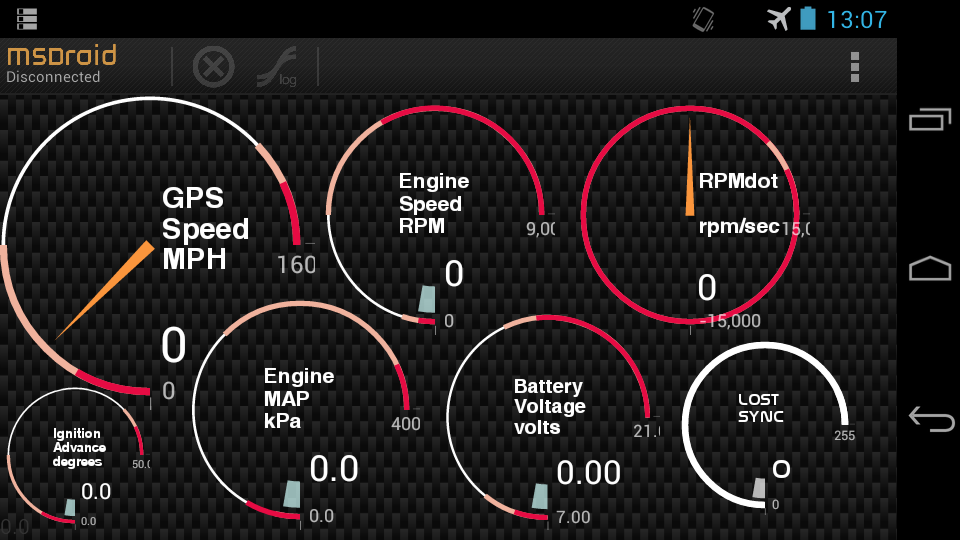
On the phone via bluetooth and msDroid:
Customise the dash to make it look prettier:
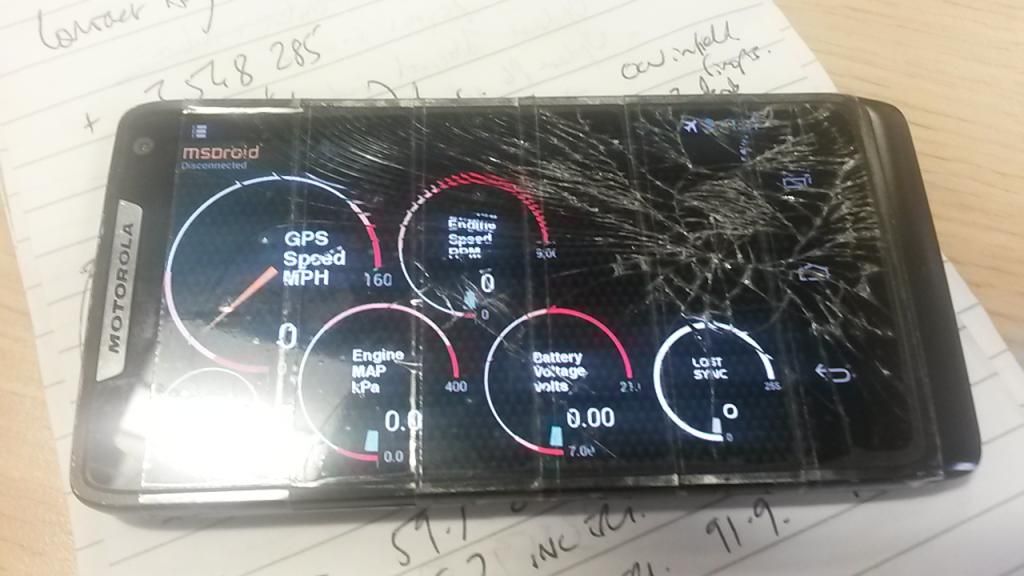
My old smashed phone has a use! :
Building my third MS was relatively straightforward, although I did have a couple of issues getting an rpm for a while.
Seems my Stim is dead, and I may have had a small bridge somewhere, as after cleaning the board again and running a scalpel through all potential bridges it now works, and has been running the ignition for the last couple of weeks.
Big thanksto all the people on the MSExtra and v8forum forums for their assistance!
Next, sort the wideband, then a fuel pump and I'm almost ready to go injection!

http://en.wikipedia.org/wiki/Saipem_7000
We were out in the North Sea to prepare, lift and remove an old steel Jacket from the Ekofisk field and carry it inshore for scrapping - in one piece (80m water depth, some 7000Te):
Before:

During lift and transit inshore:

While I was away I ordered a Megasquirt 2 from diyautotune.com, here is how it went together:
Kit:

Solder connectors on:

Resistors:

Diodes, Capacitors:

Board 99% finished (had forgotten a couple of transistors and a resistor at this point):

Bench testing:

Building up the DB37 connector:

In the car:


On the phone via bluetooth and msDroid:

Customise the dash to make it look prettier:

My old smashed phone has a use! :

Building my third MS was relatively straightforward, although I did have a couple of issues getting an rpm for a while.
Seems my Stim is dead, and I may have had a small bridge somewhere, as after cleaning the board again and running a scalpel through all potential bridges it now works, and has been running the ignition for the last couple of weeks.
Big thanksto all the people on the MSExtra and v8forum forums for their assistance!
Next, sort the wideband, then a fuel pump and I'm almost ready to go injection!
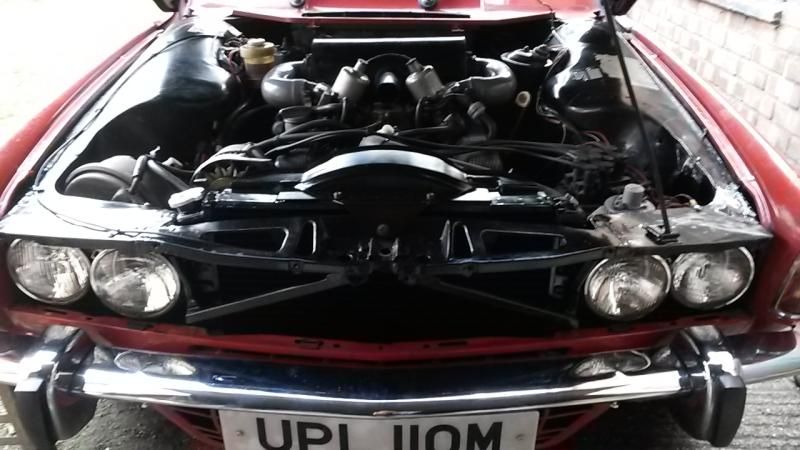
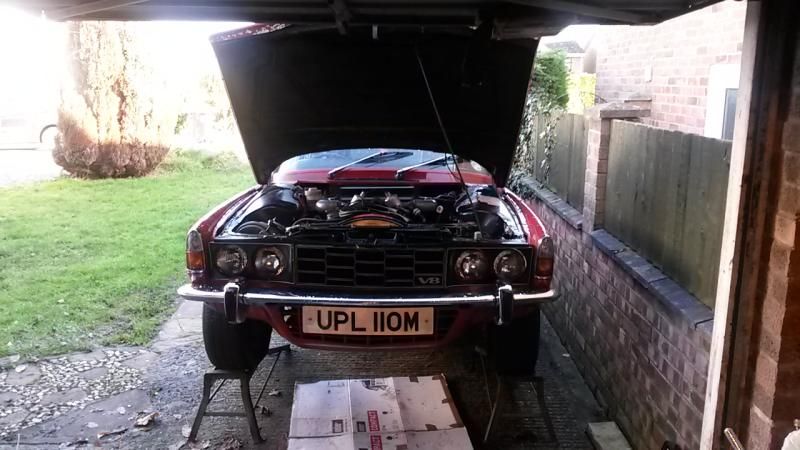
With the Red Rocket about to pass its 20,000th mile in my ownership I thought it was time for an update...
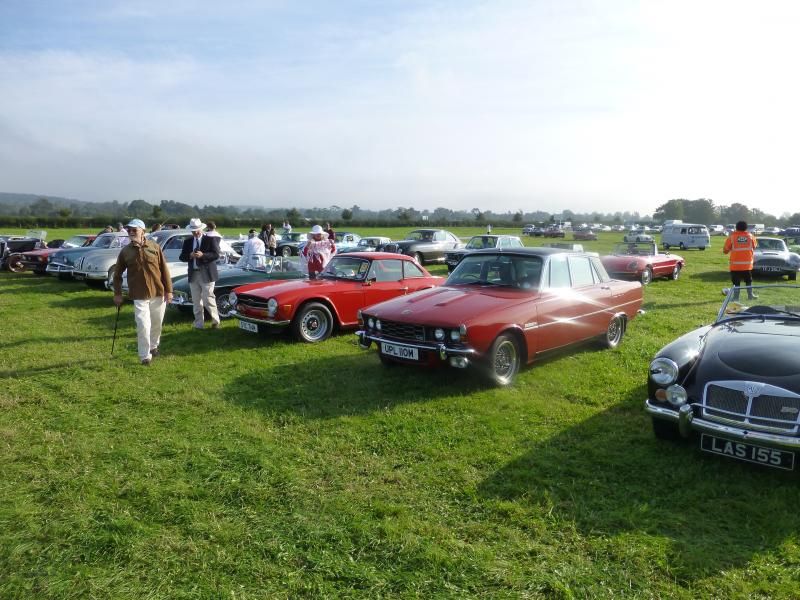
Everything has been pretty smooth sailing, the highlight of the last couple of months was a trip to the Goodwood revival- we were the only P6 I saw:
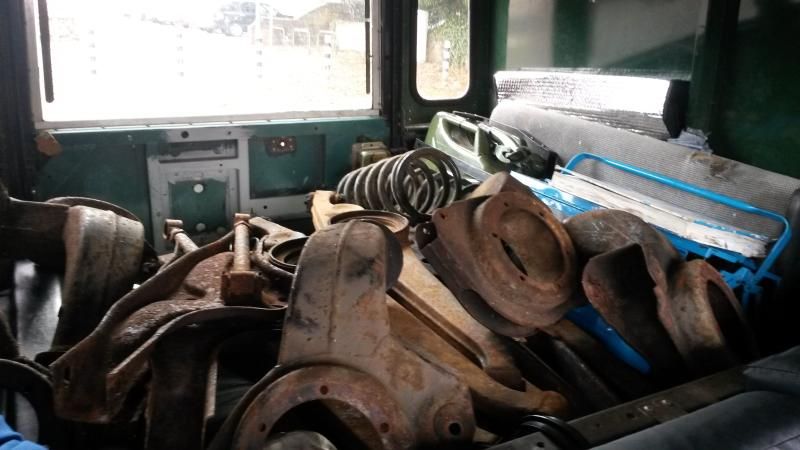
The question of De-Dion elbows has been on my mind for a while now, with that in mind I managed to win a job lot of P6 rear suspension parts on ebay for the princely sum of £50. These will be shotblasted and galvanized when I get some spare time:
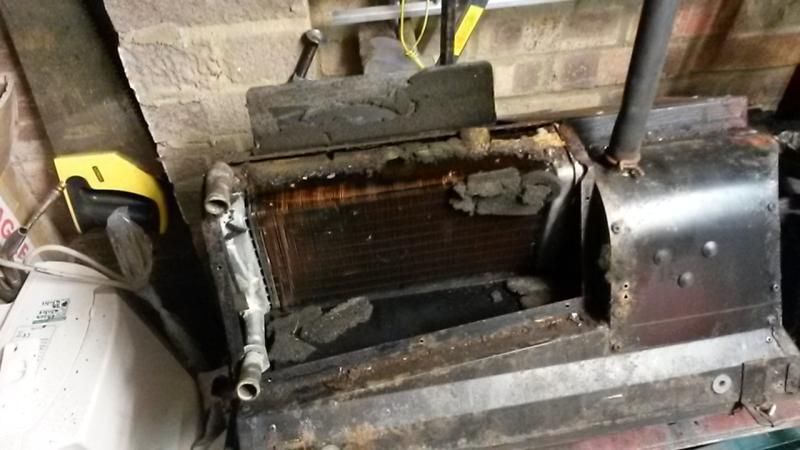
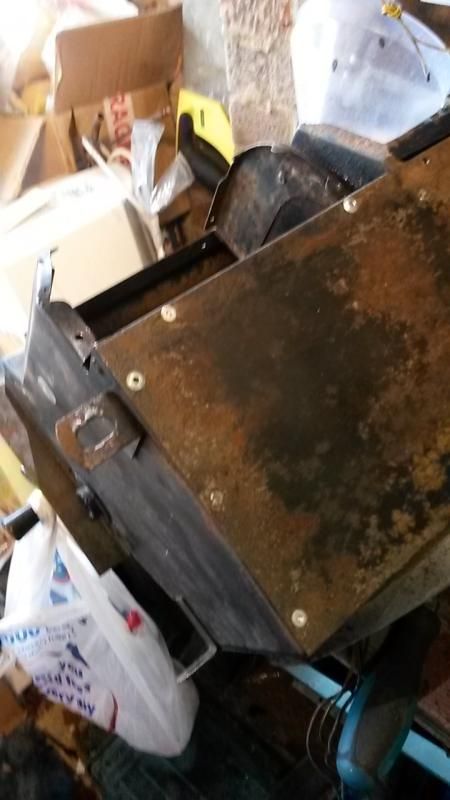
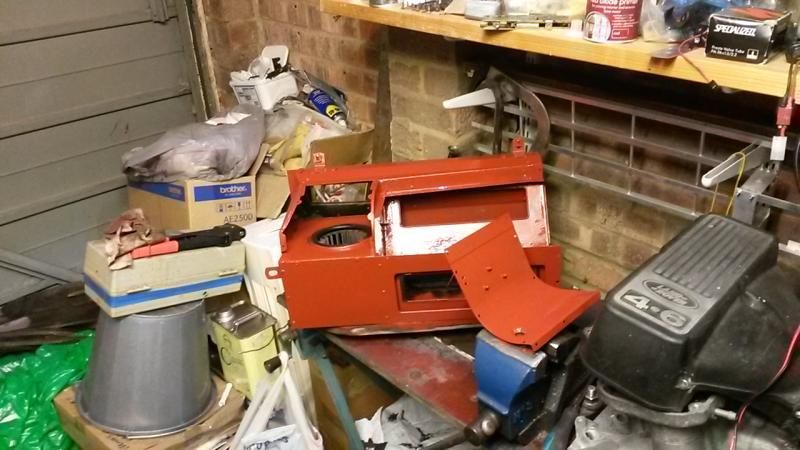
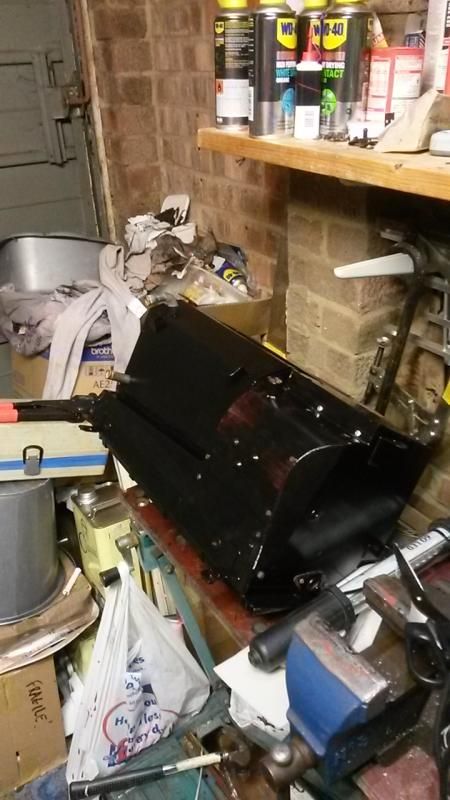
Then the weather started to turn colder, and after surviving last winter with a pretty rubbish heater I thought it was time to bite the bullet and sort it out.
The rubber seals on the box rear were pretty good, as was the seal on the bulkhead. The bulkhead itself was solid and rust free, which was a nice surprise.
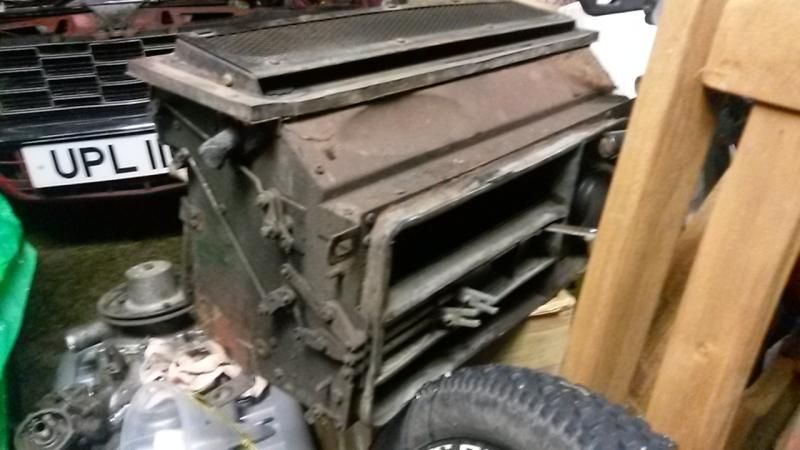
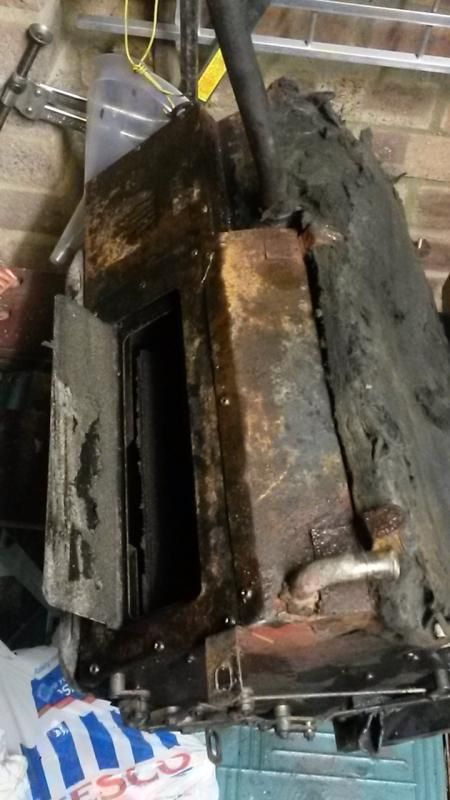
Started disassembling the box, it was a bit crusty in places but still solid overall:
Car was partially reassembled should I need to use it - gaffer taped up the bulkhead openings, joined the heater hoses with some copper pipe, and refitted the scuttle and wipers.
Back in the garage it was found that some of the rivets had corroded away so the remains were punched out:
They were replaced:
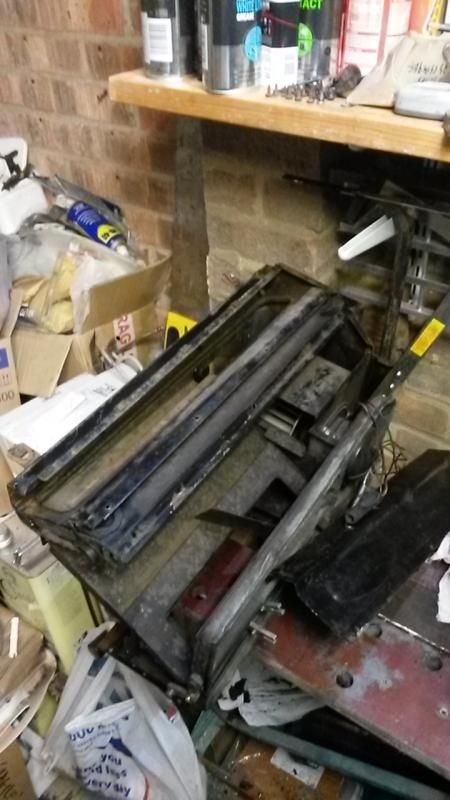
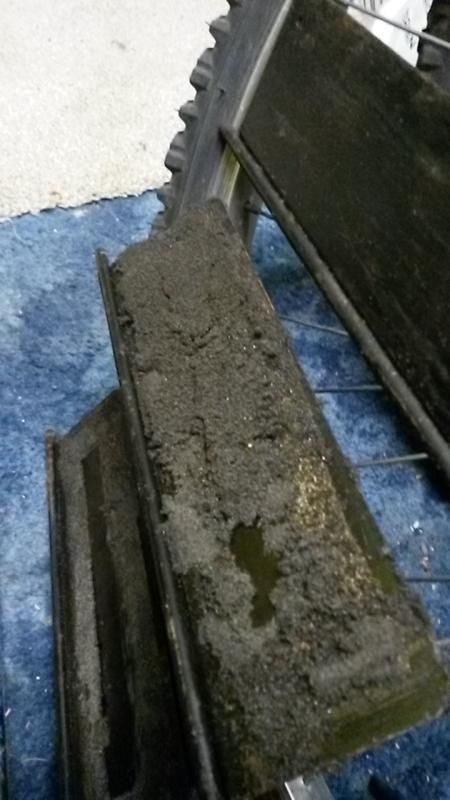
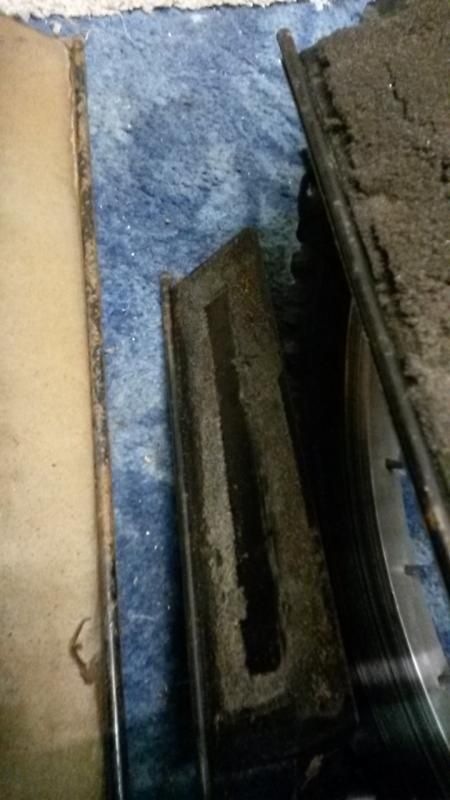
Foam on flaps was knackered! Had gone all gooey and soft, and crumbled away when touched:
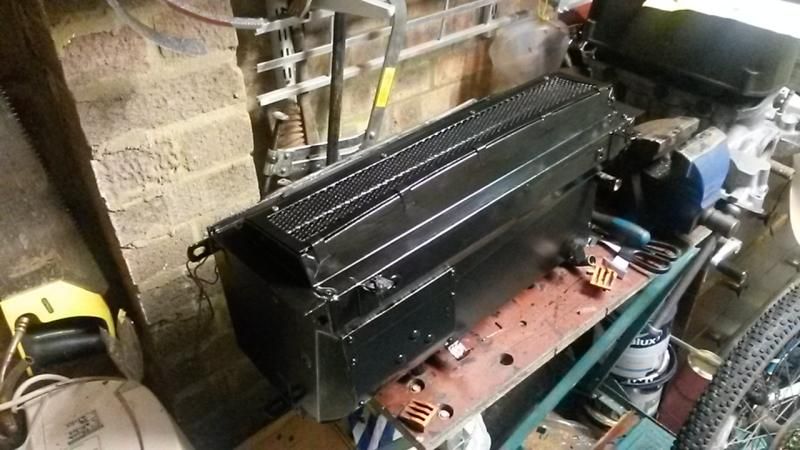
Everything was wire brushed, coated in rust killer where required and then painted in two coats of red oxide:
Before getting a few coats of Satin black paint:
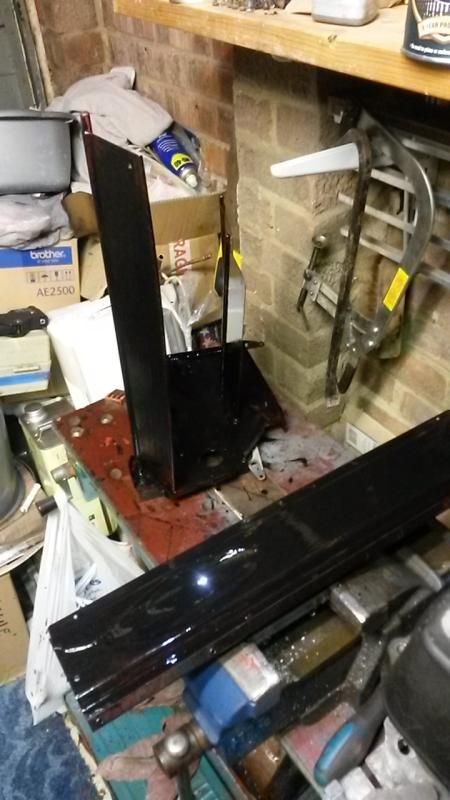
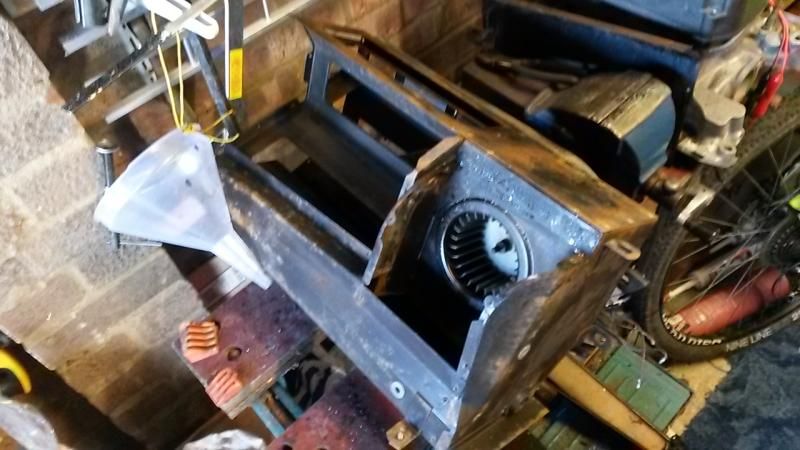
The flaps were refoamed with some grey laminate flooring underlay. I stuck the foam to the flaps with Sikaflex - the data sheet seemed to indicate that it should be ok at the temps seen in the heater box - time will tell! I had some thicker foam to stick around the heater matrix.
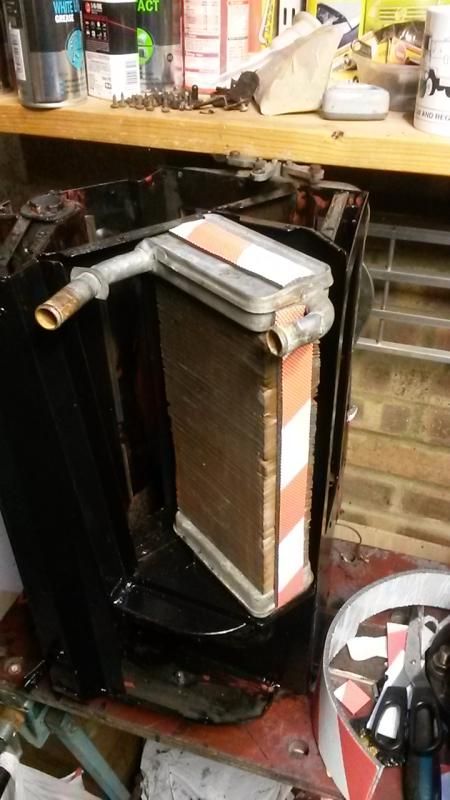
The heater matrix was actually one I won on ebay for £12 ages ago, and looked better than the one that came out.
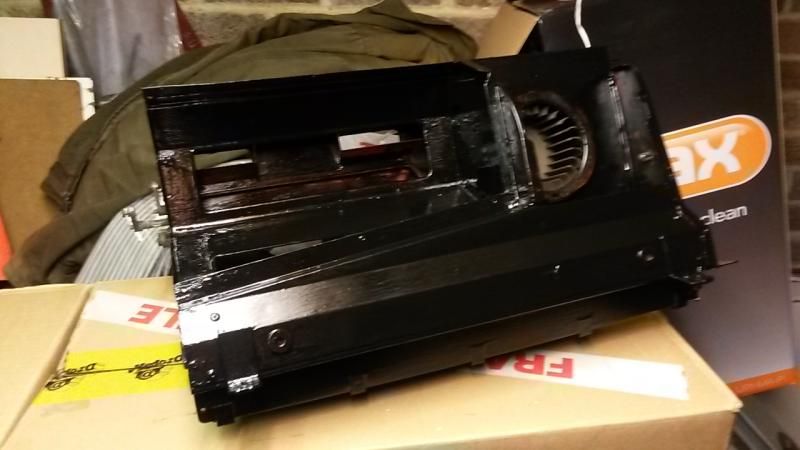
All back together, I cheated and used a very thin bead of sikaflex on the removable panels, just to ensure airtightness:
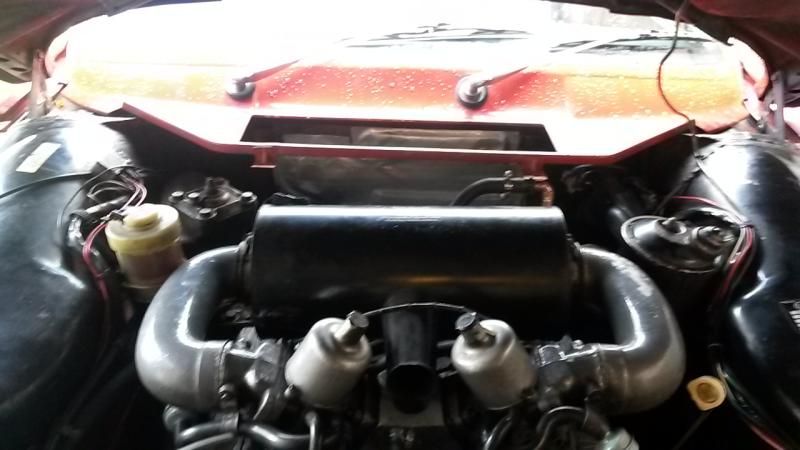
And back in the car:
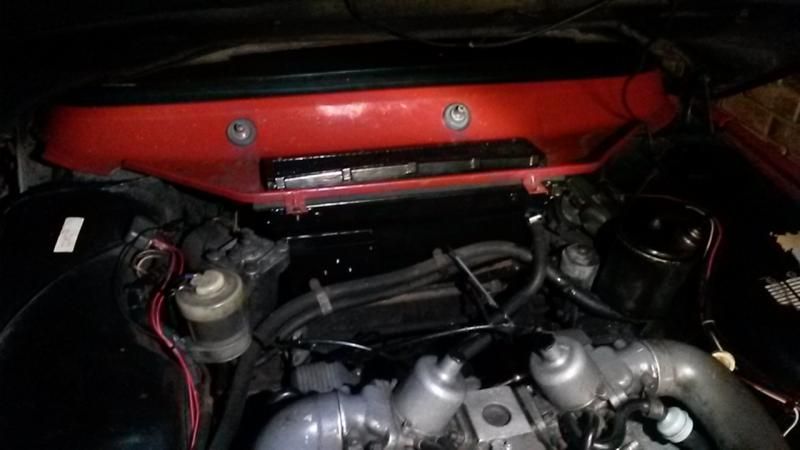
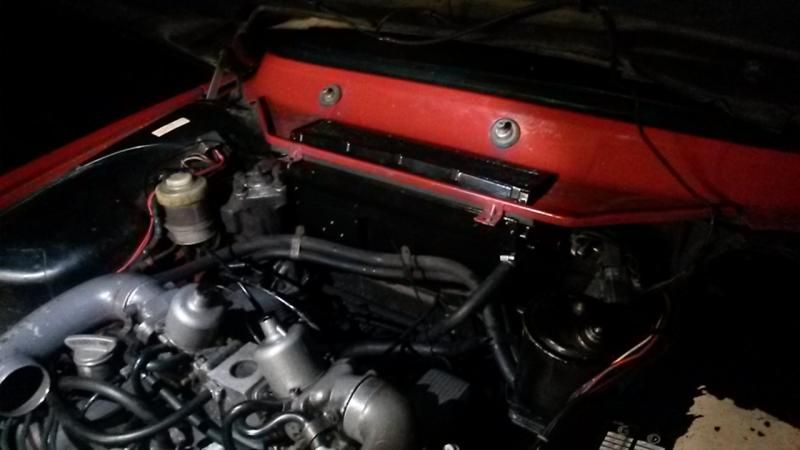
I setup the linkages as per the book, and refitted the glove boxes. The results have been fantastic! I now have heat within a few minutes of setting off, and I actually have to turn the thing down now as it will roast me alive!
Still need to refit the insulation, but I wanted to put it through a few heat cycles to harden off the paint a little more first.
Took me a week and a half from start to finish, most of which was waiting for paint to go off!
Thank you to everyone for their previous posts - they were invaluable in getting this job done.
Everything has been pretty smooth sailing, the highlight of the last couple of months was a trip to the Goodwood revival- we were the only P6 I saw:

The question of De-Dion elbows has been on my mind for a while now, with that in mind I managed to win a job lot of P6 rear suspension parts on ebay for the princely sum of £50. These will be shotblasted and galvanized when I get some spare time:

Then the weather started to turn colder, and after surviving last winter with a pretty rubbish heater I thought it was time to bite the bullet and sort it out.


The rubber seals on the box rear were pretty good, as was the seal on the bulkhead. The bulkhead itself was solid and rust free, which was a nice surprise.

Started disassembling the box, it was a bit crusty in places but still solid overall:


Car was partially reassembled should I need to use it - gaffer taped up the bulkhead openings, joined the heater hoses with some copper pipe, and refitted the scuttle and wipers.

Back in the garage it was found that some of the rivets had corroded away so the remains were punched out:

They were replaced:


Foam on flaps was knackered! Had gone all gooey and soft, and crumbled away when touched:


Everything was wire brushed, coated in rust killer where required and then painted in two coats of red oxide:

Before getting a few coats of Satin black paint:

The flaps were refoamed with some grey laminate flooring underlay. I stuck the foam to the flaps with Sikaflex - the data sheet seemed to indicate that it should be ok at the temps seen in the heater box - time will tell! I had some thicker foam to stick around the heater matrix.

The heater matrix was actually one I won on ebay for £12 ages ago, and looked better than the one that came out.

All back together, I cheated and used a very thin bead of sikaflex on the removable panels, just to ensure airtightness:


And back in the car:


I setup the linkages as per the book, and refitted the glove boxes. The results have been fantastic! I now have heat within a few minutes of setting off, and I actually have to turn the thing down now as it will roast me alive!
Still need to refit the insulation, but I wanted to put it through a few heat cycles to harden off the paint a little more first.
Took me a week and a half from start to finish, most of which was waiting for paint to go off!
Thank you to everyone for their previous posts - they were invaluable in getting this job done.
Funny you should ask, I just won an air filter box from an SD1 for the MS install, so still collecting bits.
In terms of installation I haven't done anything further yet - need to sort out what I am doing for the fuel system still, just need to man up and get on with it really! Also need to re-tap the lambda boss I had welded in a while ago, as a blob of weld has broken through in one place and prevents me screwing the sensor in far enough.
The MS is still running the ignition perfectly, fuel consumption has been pretty good and quite consistent too.
I would like to get the wideband in and do some logging, then I can build a table of target AFRs to match the SU's as a starting point.
Getting it running on EFI before Christmas is my new aim. Have two days off to do some Landrover welding this week, but if that goes well and I finish earlier I might see what I can do on the P6 to move thing along
Datalogging on the original setup does sound like a good idea, I've got most of the parts together for a complete running spare engine I plan to build my loom around, then I can switch it over on the car with minimal effort for testing and tuning. Only playing about with Megajolt so far I really don't know what I've let myself in for yet!
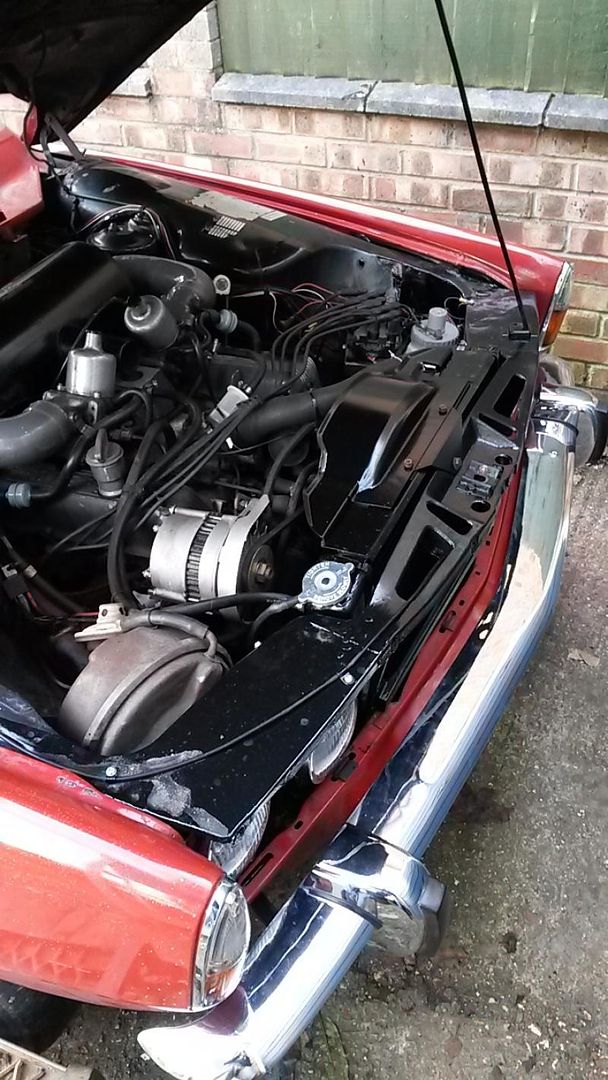
Now at 21,742 miles together, and I have mostly been pottering about with bits here and there trying to move bits along. Apologies for some of the blurry pics!
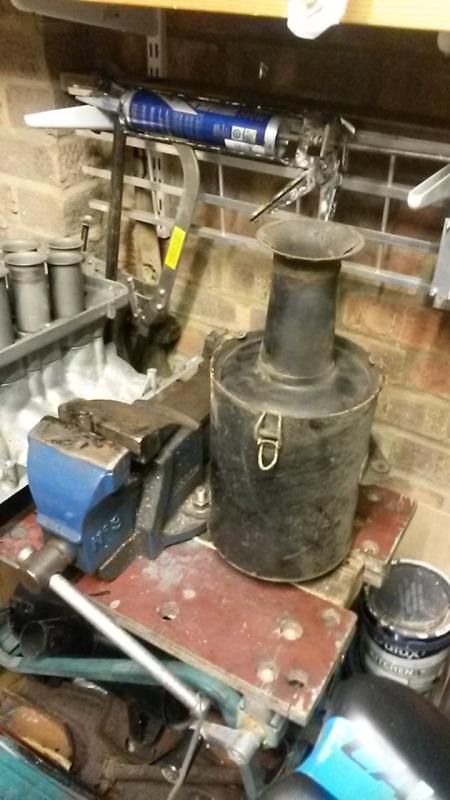
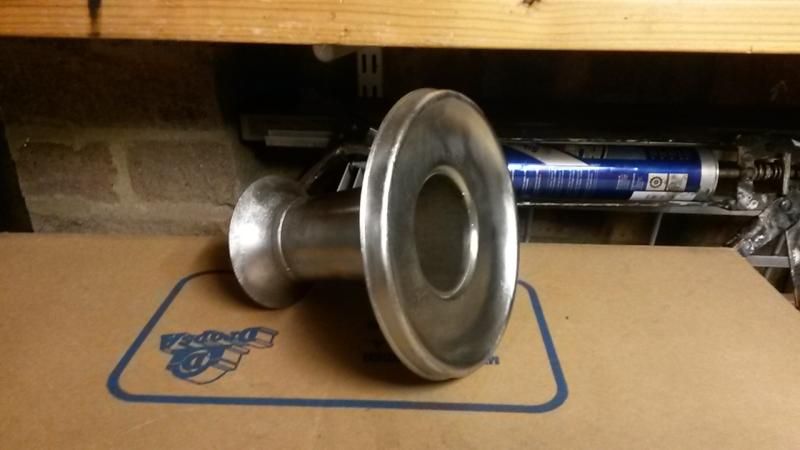
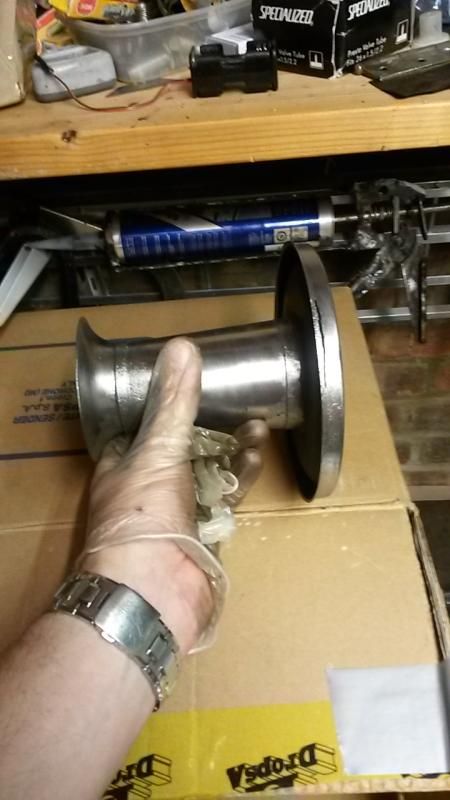
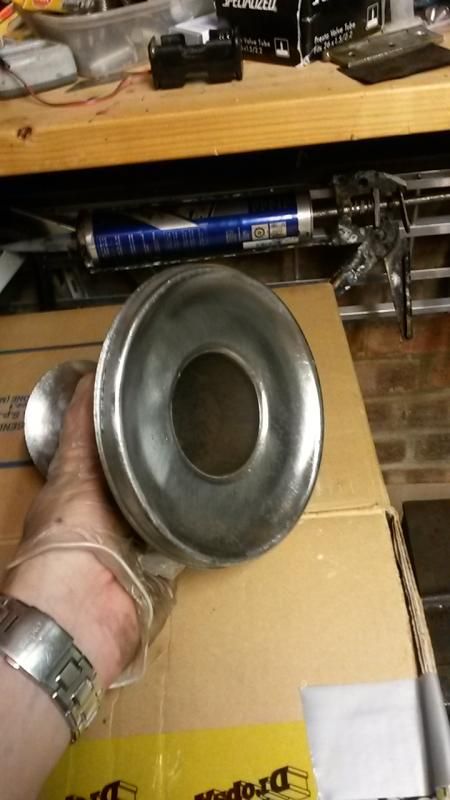
For the EFI conversion I will need a new air filter setup, I won an SD1 can on ebay, and when it arrived it was pretty corroded so I thought I'd try out derusting through electrolysis, there are plenty of guides online. I used sodium carbonate, filtered water, an old oil can as the sacrifical anode, and the power supply for my wifes electric piano (mum's the word on that bit though :wink: )
Take one crusty air filter:
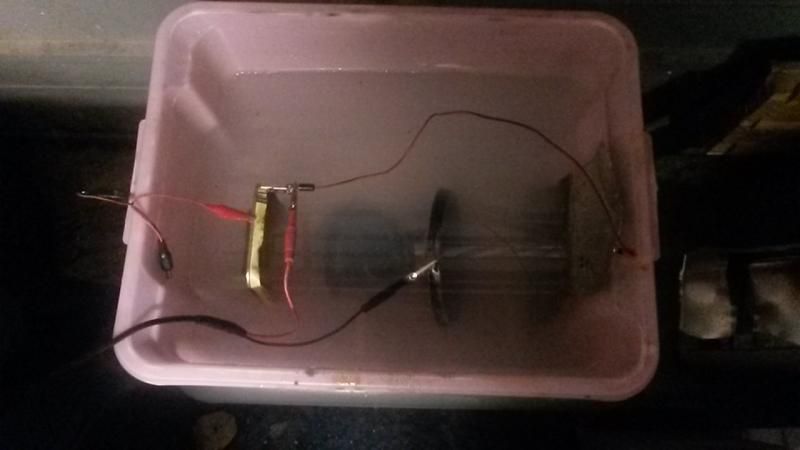
Remove the innards and wire brush off the loose stuff, I chucked the inlet end in first, the water starts off cloudy but ok looking:
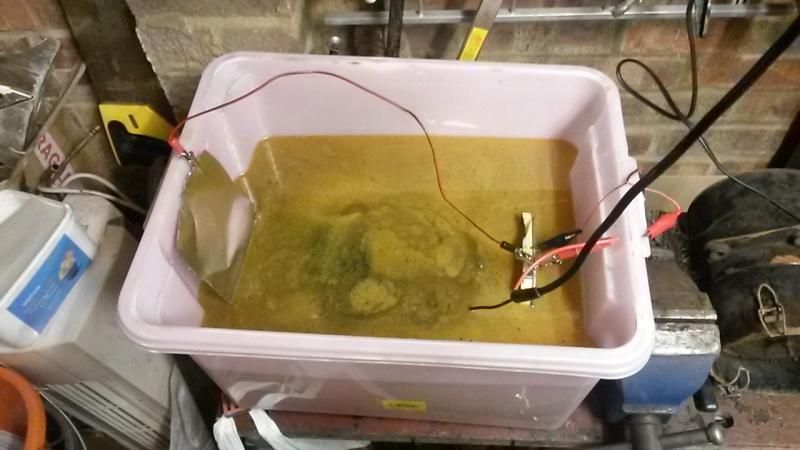
Slowly gets worse:
After a day it looked like this:

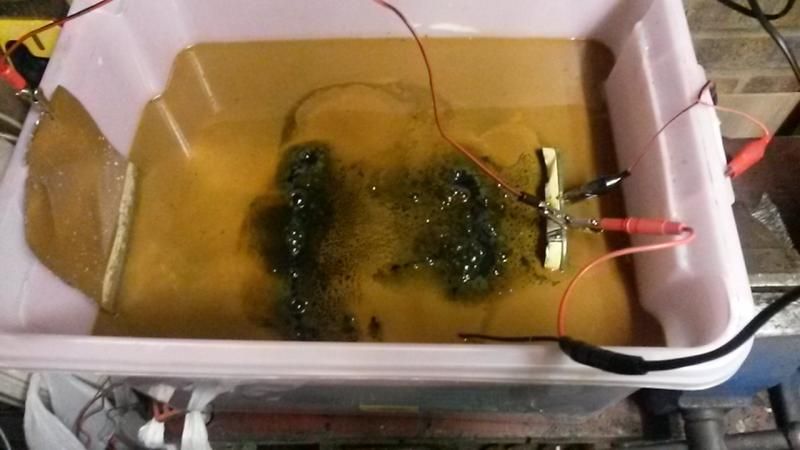
After 4 days, with a light wire brushing it looked like this - I moved the tank outside with just the +12v lead out in the elements, as I was worried about possibly filling the garage with hydrogen:
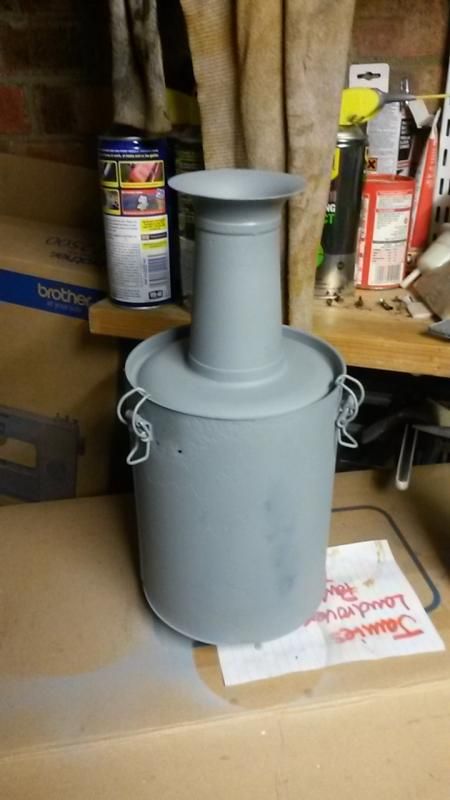
After its been in the tank it still needs wire brushing to bring it up, but not as much as it would have without! The filter has a few holes in it where it has rusted through, but I will solder or weld these up. For now, to stop it rusting again I have blasted it in grey primer:
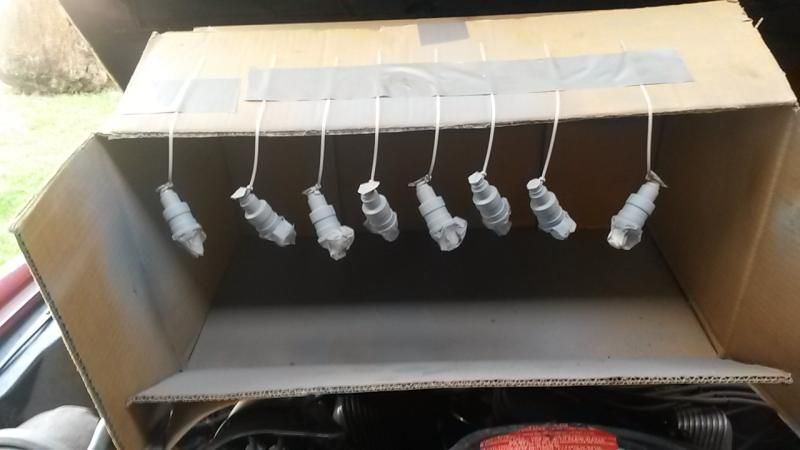
My Dad checked some old injectors we had lying about, putting them on our homebrew PLC driven test rig and gave me a set of 8 that worked ok. They needed smartening up though.- dont panic, the primer shot was just after they had dried and I perched them on the engine, I didn't paint them there... :
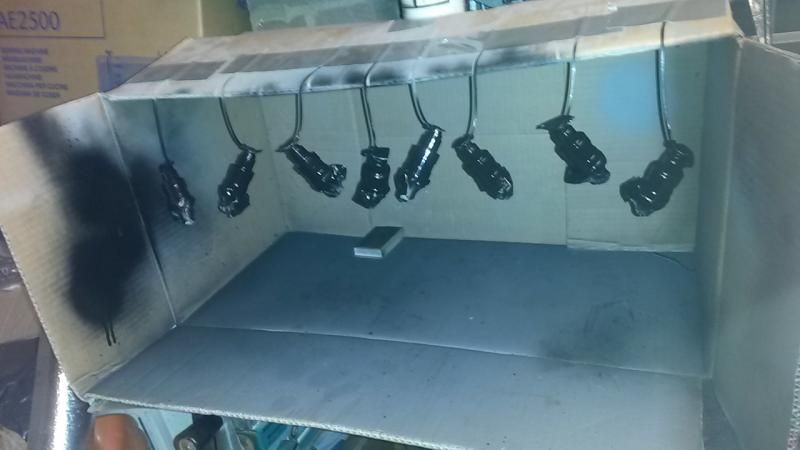
Satin Black:
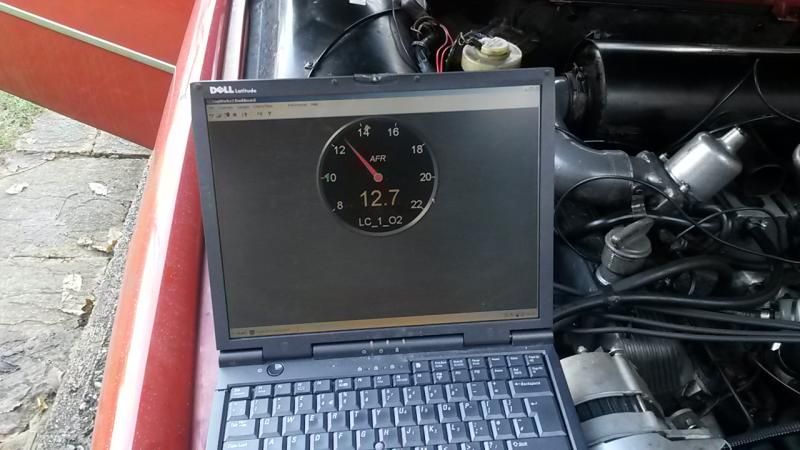
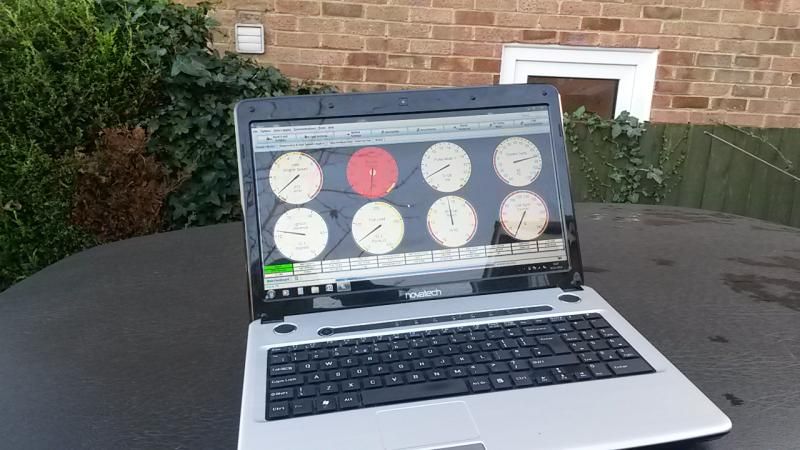
Yesterday I decided to actually get my wideband fitted. I got a boss welded into the passenger side downtube quite a while ago, but a blob of weld had broken through and clogged the thread at one spot - preventing the wideband going in. I have been driving around with a dead narrowband inserted as a bung for a while. Exhaust section was removed, filed out and retapped, sensors now fit!:

Then I just had to wire it up, which took the rest of the afternoon & evening, running wires to and from the boot. It all works now though, MS sees the wideband signal. Happy Days! Just need to check how the AFR reported in Tunerstudio from the MS differs (if at all) from the "true" AFR being reported from the LC1. Any differences will need tweaking out with changing output voltages etc.
Basic view of AFR direct from the LC1, from a cold start (some choke):
Later, warmed up and on Tunerstudio, via Megasquirt:

Other ongoing works include sorting out the wiring loom for the EFI, and thought exercises on converting to cable throttle. I ordered a cable this evening for a LHD EFI Range Rover as it was only £1.75 or something ridiculous! We'll see if it can be used or not...
For the EFI conversion I will need a new air filter setup, I won an SD1 can on ebay, and when it arrived it was pretty corroded so I thought I'd try out derusting through electrolysis, there are plenty of guides online. I used sodium carbonate, filtered water, an old oil can as the sacrifical anode, and the power supply for my wifes electric piano (mum's the word on that bit though :wink: )
Take one crusty air filter:

Remove the innards and wire brush off the loose stuff, I chucked the inlet end in first, the water starts off cloudy but ok looking:

Slowly gets worse:


After a day it looked like this:

After 4 days, with a light wire brushing it looked like this - I moved the tank outside with just the +12v lead out in the elements, as I was worried about possibly filling the garage with hydrogen:


After its been in the tank it still needs wire brushing to bring it up, but not as much as it would have without! The filter has a few holes in it where it has rusted through, but I will solder or weld these up. For now, to stop it rusting again I have blasted it in grey primer:


My Dad checked some old injectors we had lying about, putting them on our homebrew PLC driven test rig and gave me a set of 8 that worked ok. They needed smartening up though.- dont panic, the primer shot was just after they had dried and I perched them on the engine, I didn't paint them there...
:
Satin Black:

Yesterday I decided to actually get my wideband fitted. I got a boss welded into the passenger side downtube quite a while ago, but a blob of weld had broken through and clogged the thread at one spot - preventing the wideband going in. I have been driving around with a dead narrowband inserted as a bung for a while. Exhaust section was removed, filed out and retapped, sensors now fit!:

Then I just had to wire it up, which took the rest of the afternoon & evening, running wires to and from the boot. It all works now though, MS sees the wideband signal. Happy Days! Just need to check how the AFR reported in Tunerstudio from the MS differs (if at all) from the "true" AFR being reported from the LC1. Any differences will need tweaking out with changing output voltages etc.
Basic view of AFR direct from the LC1, from a cold start (some choke):


Later, warmed up and on Tunerstudio, via Megasquirt:


Other ongoing works include sorting out the wiring loom for the EFI, and thought exercises on converting to cable throttle. I ordered a cable this evening for a LHD EFI Range Rover as it was only £1.75 or something ridiculous! We'll see if it can be used or not...
Thanks Johnny, here it is! :
A couple of weeks ago I came home, parked the car and went inside. About 15 mins later I noticed from the kitchen window a damp patch on the tarmac under the Red Rocket, uh oh....
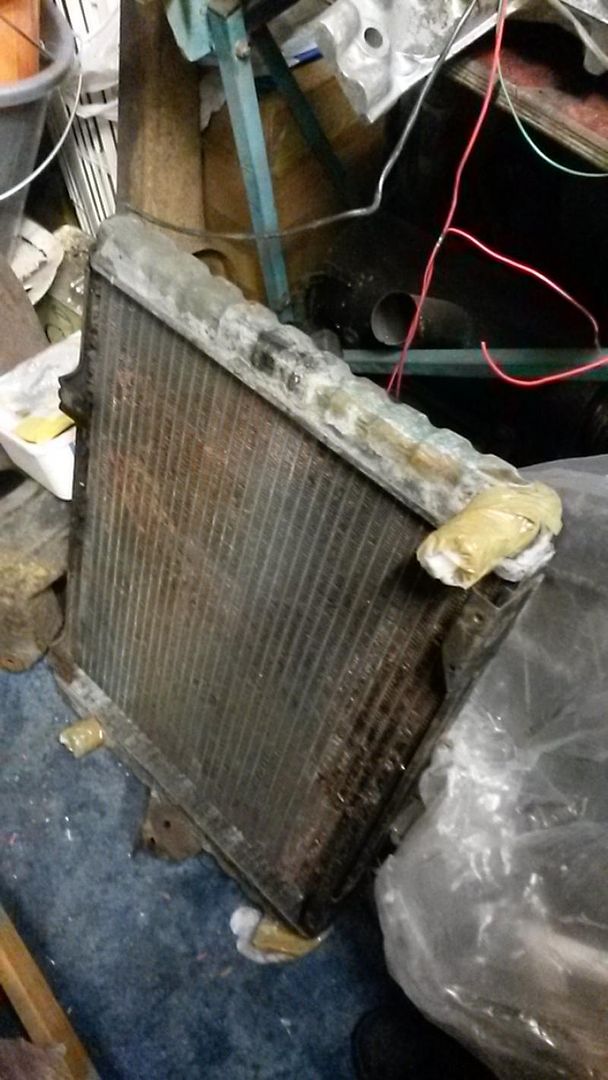
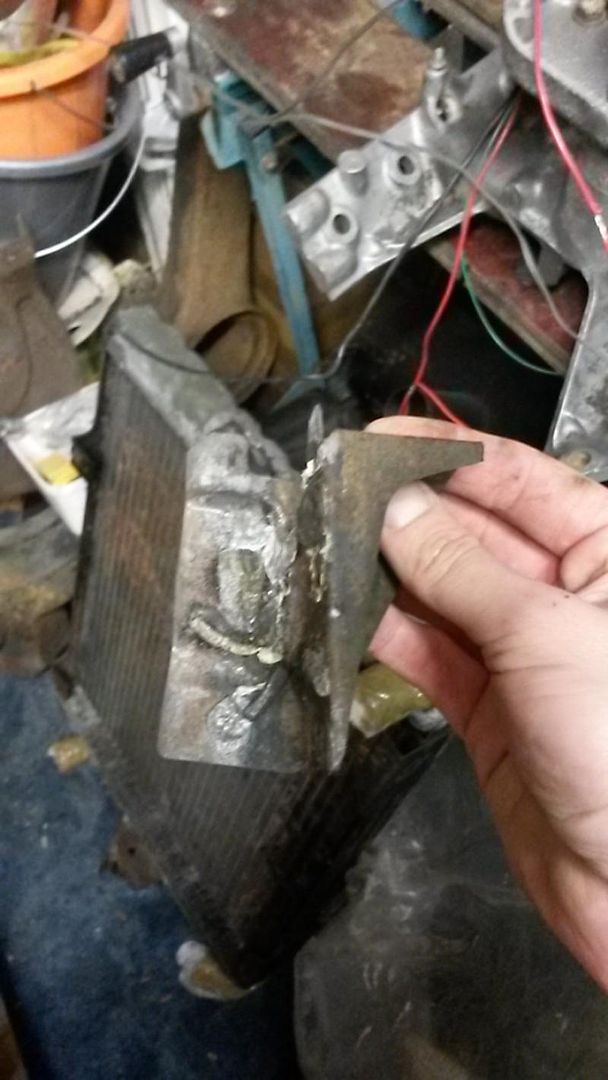
Sure enough the radiator that had been limping along from day one of my ownership had finally waved its white flag and given up!
The following day a call was made to Wadhams, who said they had a 3500s radiator in stock. Result! The one small snag was that as apparently radiators for manual cars are harder to come by, they need you to send in your rad first before they will dispatch the replacement. The car was going to be off the road a few days...
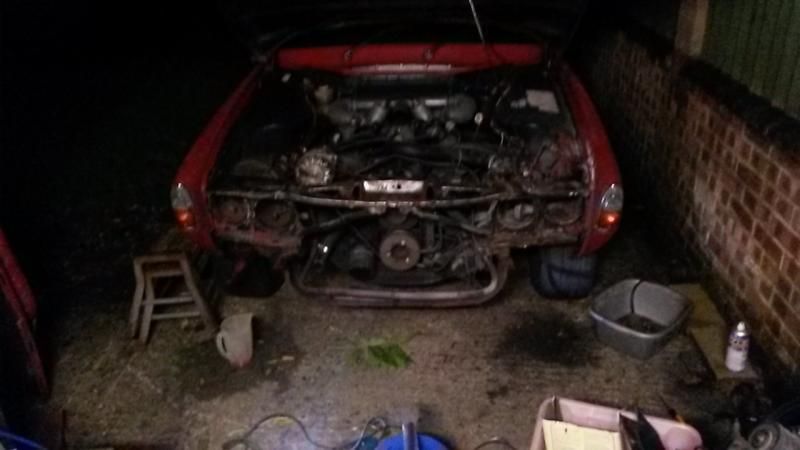
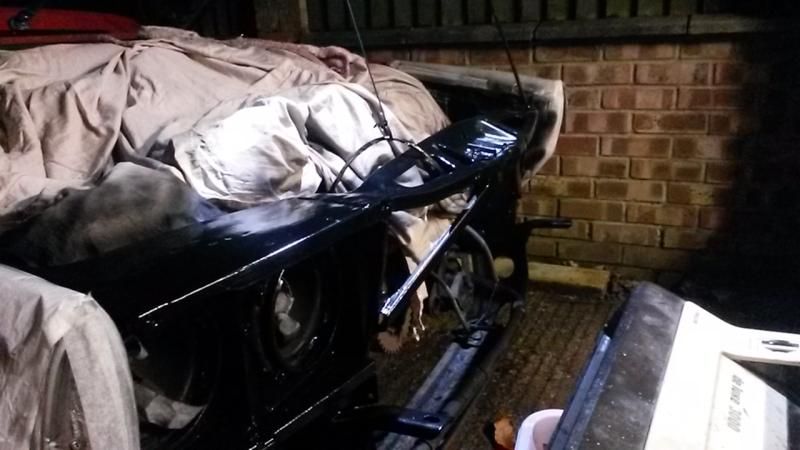
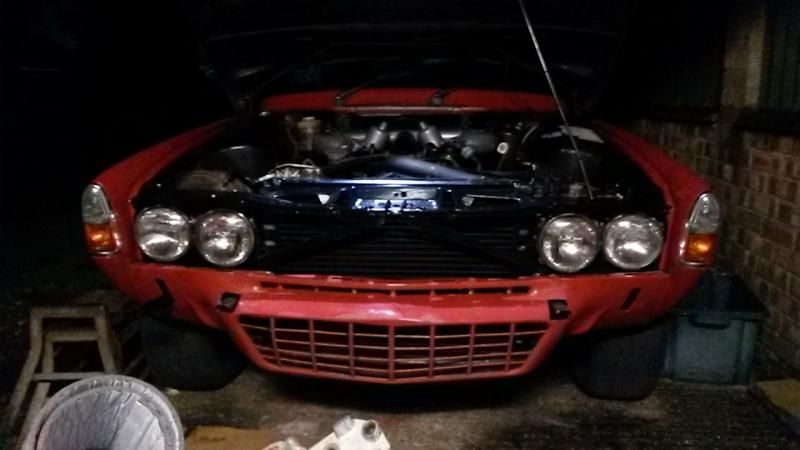
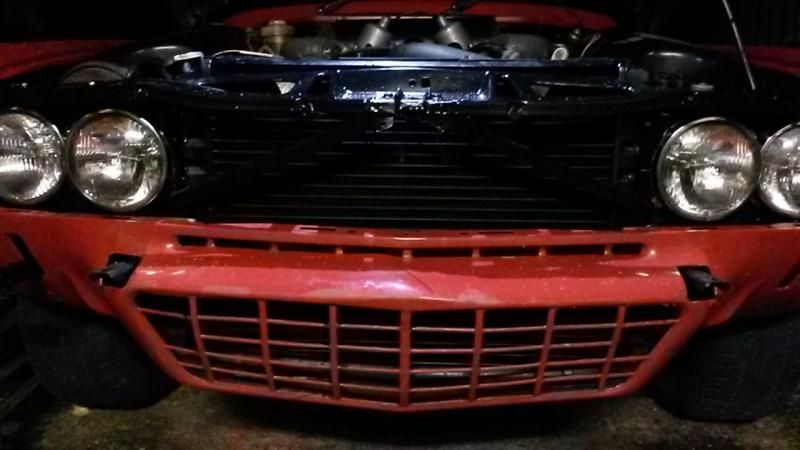
So, I thought while the rad was out I would clean things up at the front a little and get some paint on it - help protect it from the salt that is just starting to be put on the roads in this part of the country.
The passenger side had some filler on it, I was keen to see what was underneath, so out came the wire wheel:
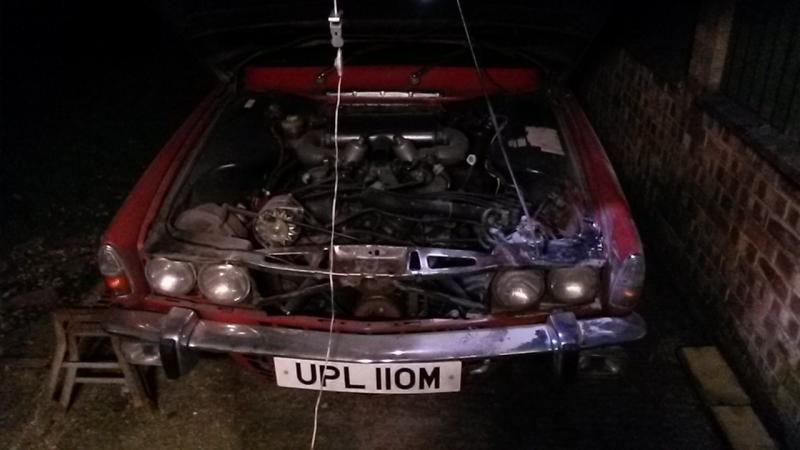
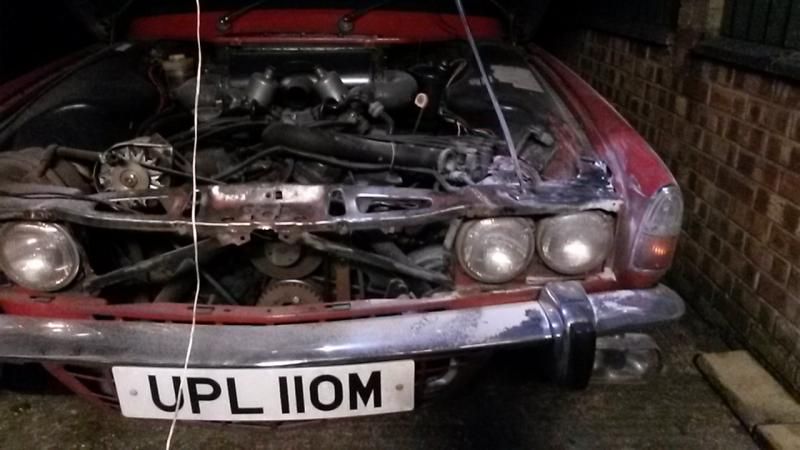
No holes, but a slight ripple - looks like it may have been nerfed into something a fairly slow speed at some point (would also explain the white bonnet, and the fact that the headlamp bowls on this side are not riveted in).
End of night one she looked like this:
Next evening:

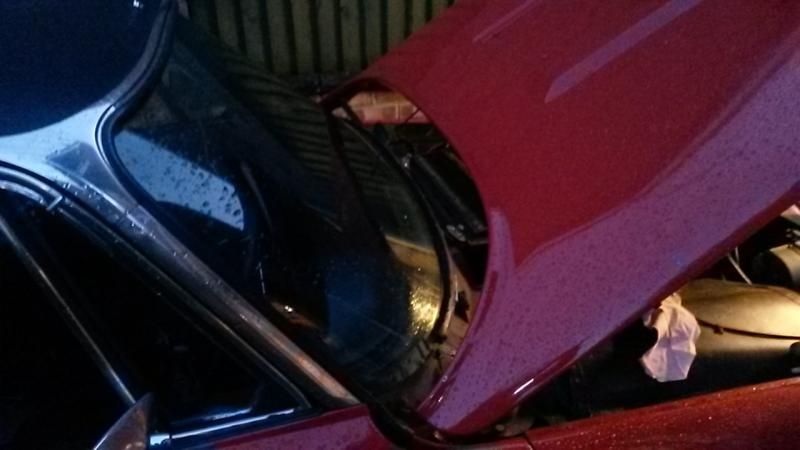
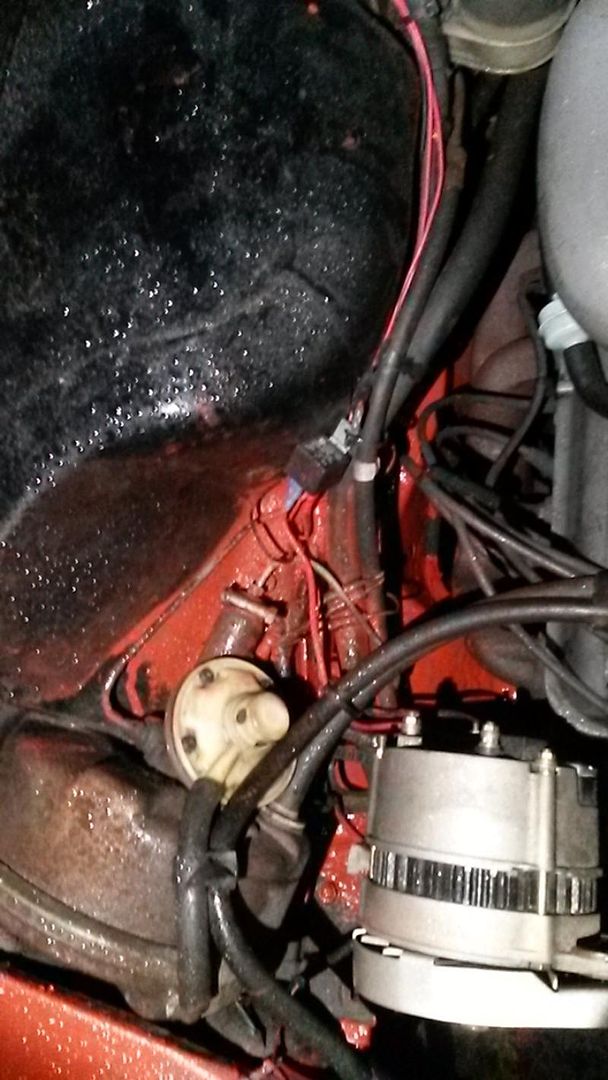
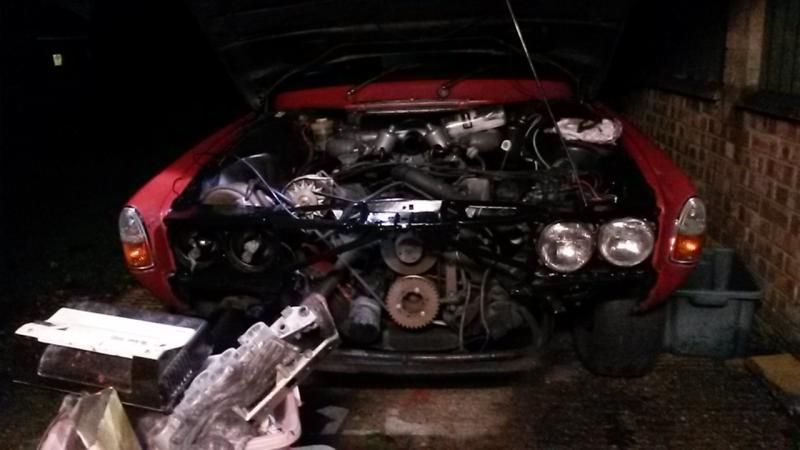
Disaster! I knocked the tin of paint into the engine bay, I wiped up as much as I could:
Shot of trigger wheel and sensor:
Couple of nights later things started to go black again:
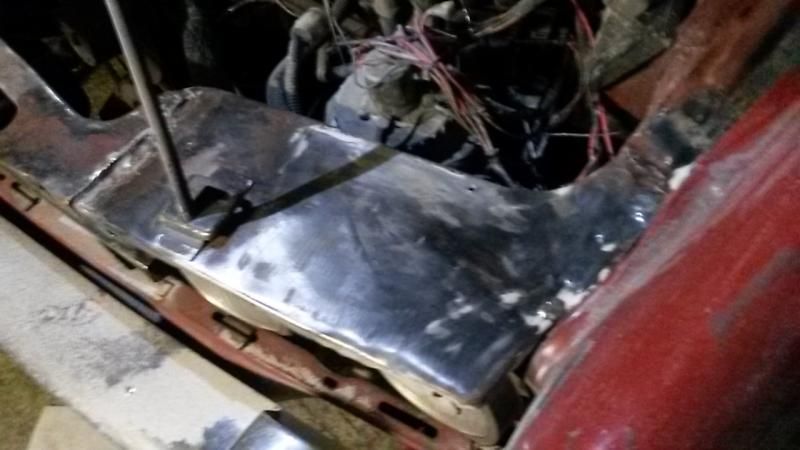
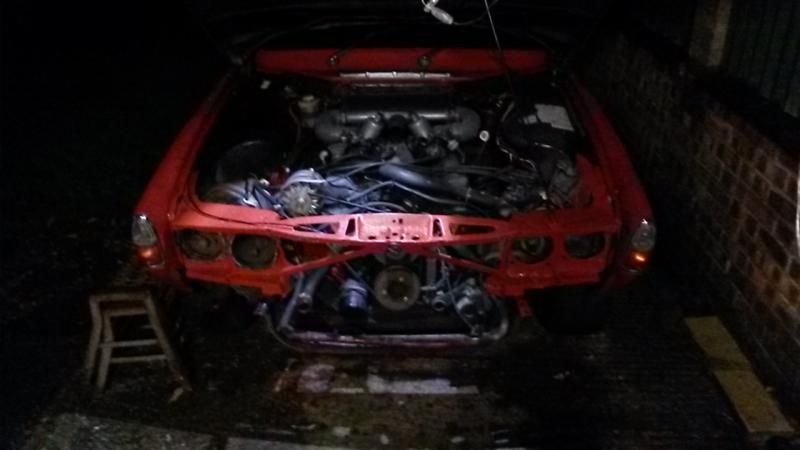
And the inside of the valance was wire wheeled, and painted, as were some other bits:
Start of reassembly:
Valance black inside (not the neatest, but better than it was, with no paint at all!):
Shiny!:
Went to fill her up, when disaster! Water was pouring out straight onto the drive! It seems that the recon radiators are not supplied with a drain plug installed. I had sent my old radiator off with the plug still fitted. Damn!
Rad back out to measure the hole (see my thread in the v8 section), and a call to Wadhams the following morning - they sent me out a new plug and it arrived the very next day - excellent service! Thanks
Fitted the plug last night, reassembled the car and after pretty much 2 weeks of not being run she started right away- lovely.
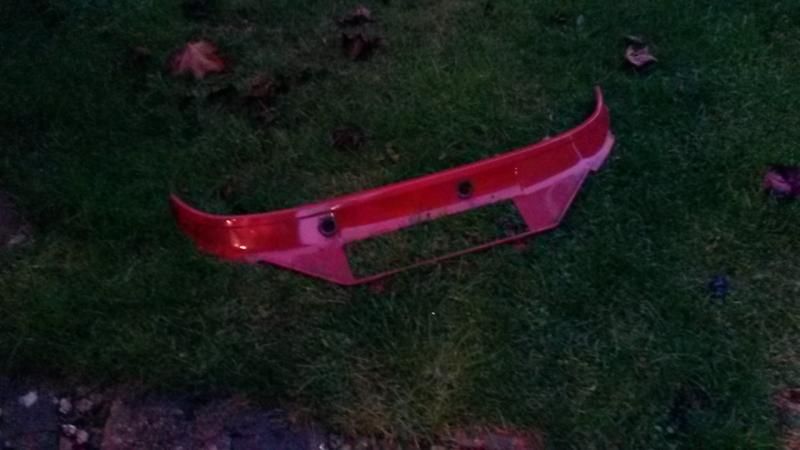
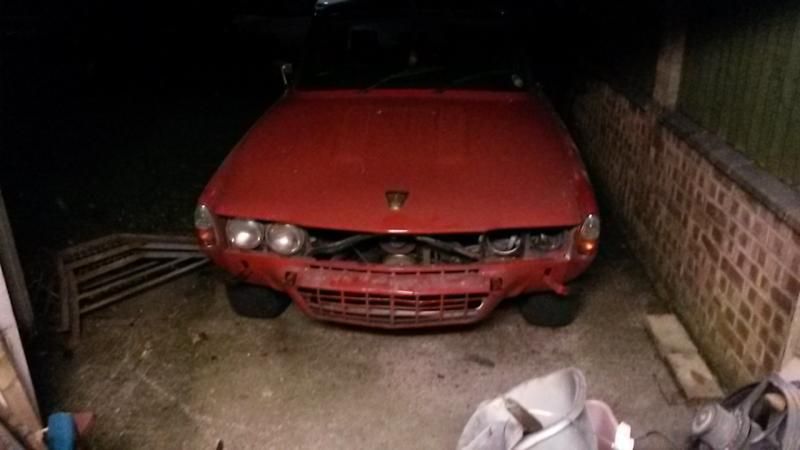
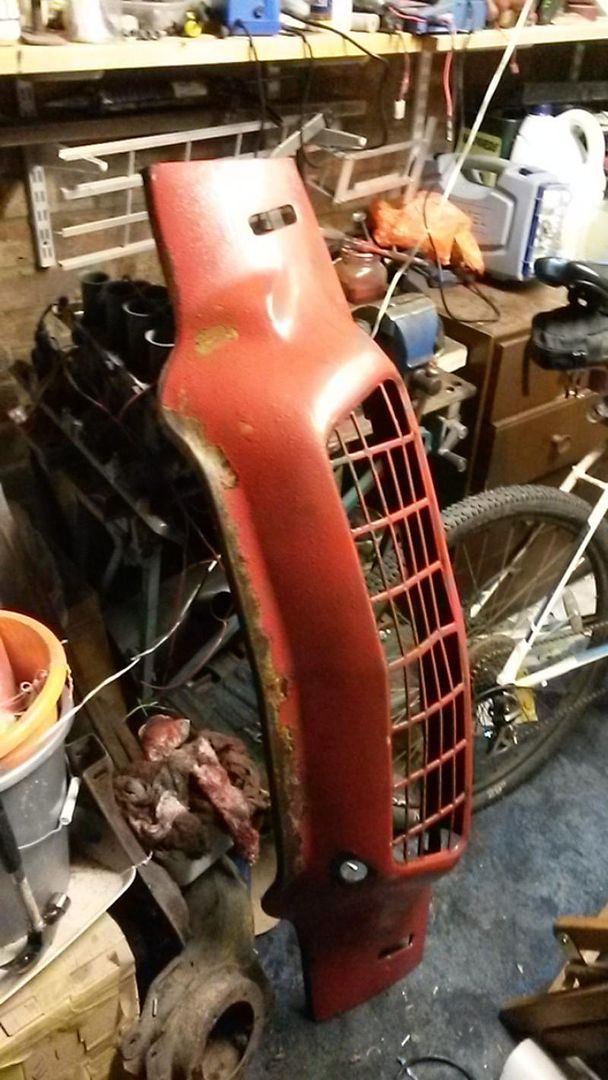
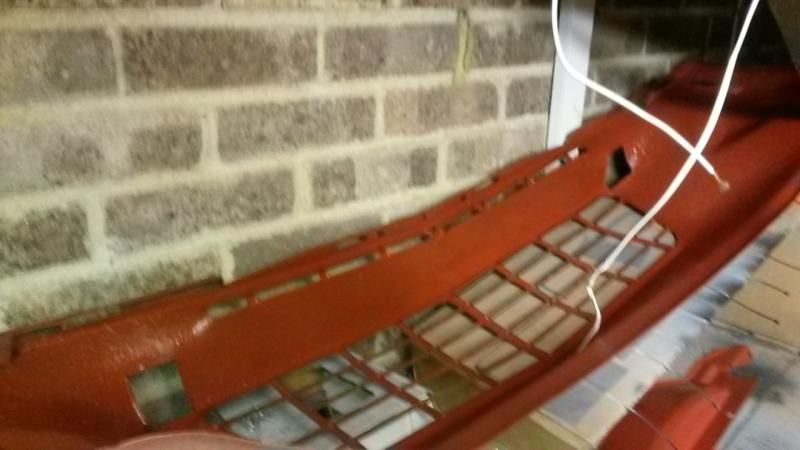
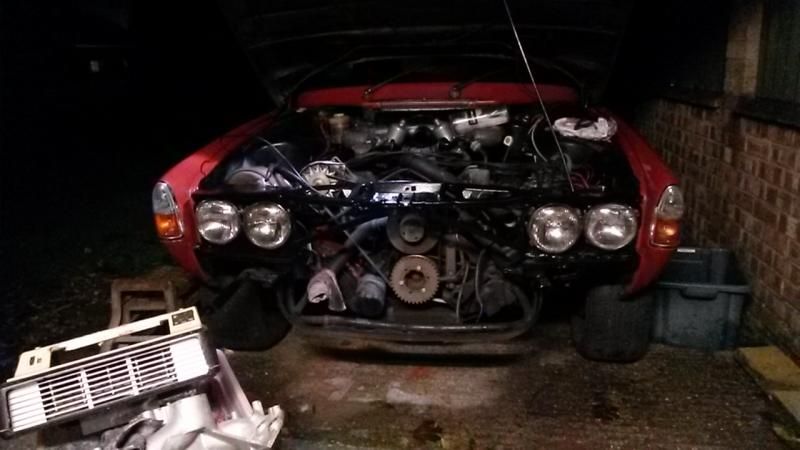
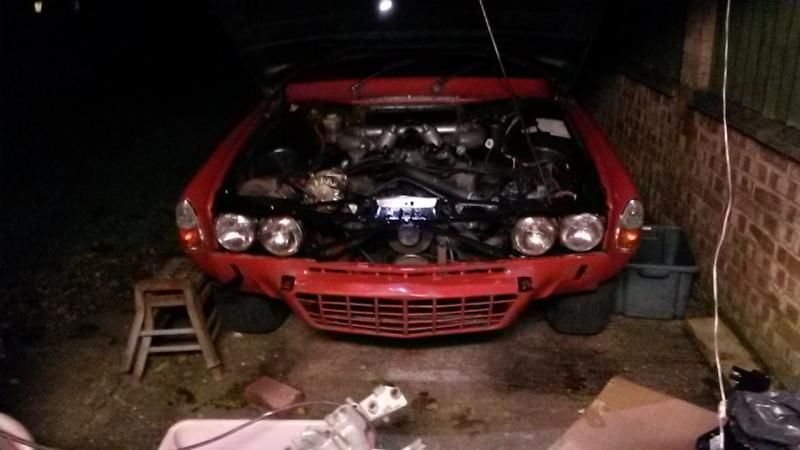
Bumper fitted this morning, just got to fit the spots, headlight surrounds and grille.
Hardest bit of the whole process was removing the bumper iron- they would not shift at all- even after hours of soaking with plusgas, then hours of attacking the nut with a dremel and smashing half of it off the remaining 50% still would not come off! I ended up sawing the end of the bumper iron off- with the valance removed and better access the last portion of the nut quickly yielded. Will weld it back together, paint and refit.
Heres a couple of shots of how it looks this morning - the first time I have seen it in daylight.
A couple of weeks ago I came home, parked the car and went inside. About 15 mins later I noticed from the kitchen window a damp patch on the tarmac under the Red Rocket, uh oh....
Sure enough the radiator that had been limping along from day one of my ownership had finally waved its white flag and given up!
The following day a call was made to Wadhams, who said they had a 3500s radiator in stock. Result! The one small snag was that as apparently radiators for manual cars are harder to come by, they need you to send in your rad first before they will dispatch the replacement. The car was going to be off the road a few days...
So, I thought while the rad was out I would clean things up at the front a little and get some paint on it - help protect it from the salt that is just starting to be put on the roads in this part of the country.


The passenger side had some filler on it, I was keen to see what was underneath, so out came the wire wheel:


No holes, but a slight ripple - looks like it may have been nerfed into something a fairly slow speed at some point (would also explain the white bonnet, and the fact that the headlamp bowls on this side are not riveted in).
End of night one she looked like this:

Next evening:


Disaster! I knocked the tin of paint into the engine bay, I wiped up as much as I could:


Shot of trigger wheel and sensor:

Couple of nights later things started to go black again:


And the inside of the valance was wire wheeled, and painted, as were some other bits:


Start of reassembly:


Valance black inside (not the neatest, but better than it was, with no paint at all!):

Shiny!:


Went to fill her up, when disaster! Water was pouring out straight onto the drive! It seems that the recon radiators are not supplied with a drain plug installed. I had sent my old radiator off with the plug still fitted. Damn!
Rad back out to measure the hole (see my thread in the v8 section), and a call to Wadhams the following morning - they sent me out a new plug and it arrived the very next day - excellent service! Thanks
Fitted the plug last night, reassembled the car and after pretty much 2 weeks of not being run she started right away- lovely.
Bumper fitted this morning, just got to fit the spots, headlight surrounds and grille.
Hardest bit of the whole process was removing the bumper iron- they would not shift at all- even after hours of soaking with plusgas, then hours of attacking the nut with a dremel and smashing half of it off the remaining 50% still would not come off! I ended up sawing the end of the bumper iron off- with the valance removed and better access the last portion of the nut quickly yielded. Will weld it back together, paint and refit.
Heres a couple of shots of how it looks this morning - the first time I have seen it in daylight.


Phil Robson
Well-Known Member
Very nice - congratulate yourself with a suitably smug grin! 8)

rottenlungs
Member
Looks very good indeed. Great to see the hard work pay off with a quality end result.
Where did you get the stickers from? I need the stickers for the pass side inner wing for a late SII v8.
Where did you get the stickers from? I need the stickers for the pass side inner wing for a late SII v8.
joseph wilson
Member
which one is it that your after as I have most of the under bonnet labelsrottenlungs said:Looks very good indeed. Great to see the hard work pay off with a quality end result.
Where did you get the stickers from? I need the stickers for the pass side inner wing for a late SII v8.
Small update:
The exhaust has always been a bit touch and go to get done up properly at the down pipes as the threads are basically knackered. The drivers side is by far the worst, the passenger side is not great and had come loose after I fitted the wideband a few weeks ago. The car sounded horrendous, so today I decided to rectify this...
New studs and nuts (All quoted part numbers are Landrover ones)
Exhaust Stud = 252623
Nut 5/16 Unf = NH605041L
Washer = RTC609

Car onto ramps:
At this point I remembered that the passenger side has only one original stud left - one has been drilled out completely and is held with a bolt, another has a larger diameter stud fitted. I decided to simply fit new spring washers and tighten this side up for now. That meant I would focus solely on the drivers side for today, and leaves me with a couple of questions:
Does anyone have a spare passenger side manifold lying about they are interested in selling on? Are "s" ones the same as auto cars, or different at all?
Manifold off - what a bugger the lower rear-most one is!
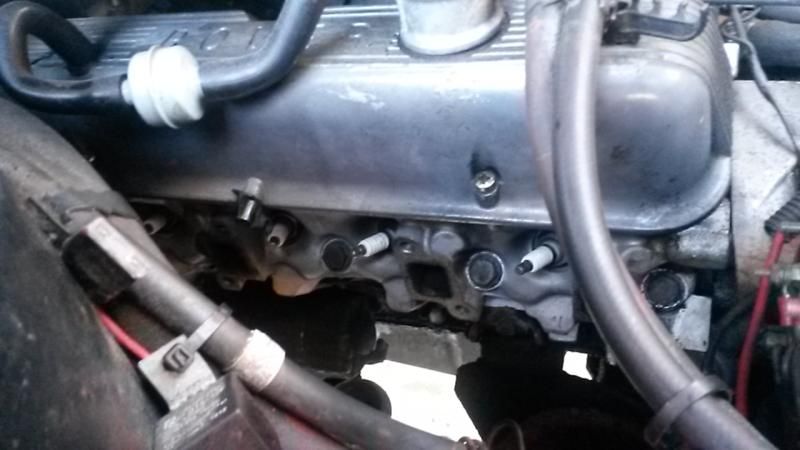
Top two studs in this pic have been replaced at this point, just working on the third and final one:
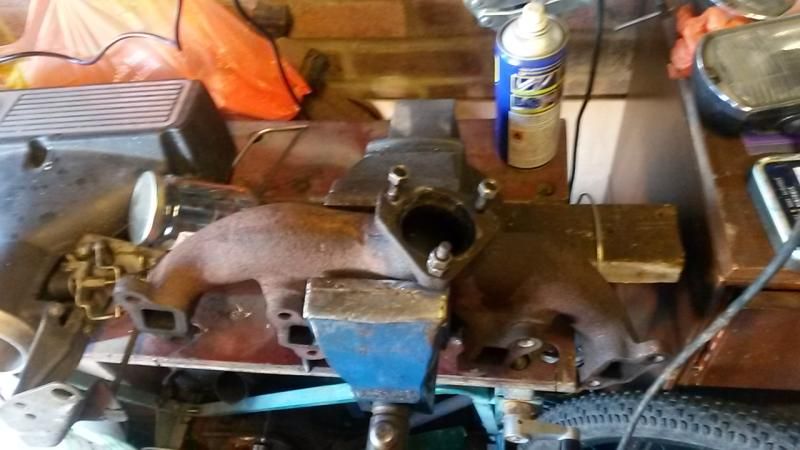
I managed to snap one, which I had to progressively drill out larger and larger until I could remove what was left. The other two I doused with white spirit and managed to clamp the studs in the vice and undo them by rotating the manifold - nice!
Before refitting I cut the manifold so that the lower rear most (cylinder 8) bolt hole was slotted. That way I was able to fit the bolt with washer and spring washer and then simply drop the manifold on. This massively reduced the fiddling about as I didn't need to wind it in from below anywhere near as much.
With that completed I did an engine oil and filter change (Oil filter = RTC3186), air filters (605191) were replaced and then it got a wash - at last!
After that it got a new set of wiper blades:

It looks and sounds much more respectable now, although by the time I had finished it was too dark for photos. :cry:
The exhaust has always been a bit touch and go to get done up properly at the down pipes as the threads are basically knackered. The drivers side is by far the worst, the passenger side is not great and had come loose after I fitted the wideband a few weeks ago. The car sounded horrendous, so today I decided to rectify this...
New studs and nuts (All quoted part numbers are Landrover ones)
Exhaust Stud = 252623
Nut 5/16 Unf = NH605041L
Washer = RTC609

Car onto ramps:

At this point I remembered that the passenger side has only one original stud left - one has been drilled out completely and is held with a bolt, another has a larger diameter stud fitted. I decided to simply fit new spring washers and tighten this side up for now. That meant I would focus solely on the drivers side for today, and leaves me with a couple of questions:
Does anyone have a spare passenger side manifold lying about they are interested in selling on? Are "s" ones the same as auto cars, or different at all?
Manifold off - what a bugger the lower rear-most one is!

Top two studs in this pic have been replaced at this point, just working on the third and final one:

I managed to snap one, which I had to progressively drill out larger and larger until I could remove what was left. The other two I doused with white spirit and managed to clamp the studs in the vice and undo them by rotating the manifold - nice!
Before refitting I cut the manifold so that the lower rear most (cylinder 8) bolt hole was slotted. That way I was able to fit the bolt with washer and spring washer and then simply drop the manifold on. This massively reduced the fiddling about as I didn't need to wind it in from below anywhere near as much.
With that completed I did an engine oil and filter change (Oil filter = RTC3186), air filters (605191) were replaced and then it got a wash - at last!
After that it got a new set of wiper blades:

It looks and sounds much more respectable now, although by the time I had finished it was too dark for photos. :cry:
Quagmire said:Are "s" ones the same as auto cars?
No, they're larger bore.
Try and get some deep brass nuts to use on the downpipe studs, that will avoid having to go through the whole job again next time.