You are using an out of date browser. It may not display this or other websites correctly.
You should upgrade or use an alternative browser.
You should upgrade or use an alternative browser.
Scarab the Rover..
- Thread starter ampwhu
- Start date
Leyland73
New Member
Really like these ramps, no hydraulics to fail or leak, can I ask where you bought them?Forgot to mention, these ramps I purchased last year make getting underneath safe and I can lift it high for plenty of room.
View attachment 24156
i will send you a link via PMReally like these ramps, no hydraulics to fail or leak, can I ask where you bought them?
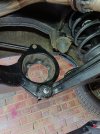
Yesterday I got some help from a mate to fit the crossmember to the car after I'd painted and fitted new bushes to it. I ended up with a couple of scratches to it upon fitting but intend to repaint on the car.
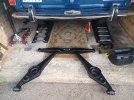
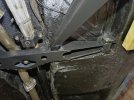
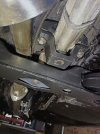
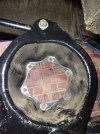
The black 'bracket' with the 3 circle mounts that fits to the diff extension. What is it for? I have fitted new bushes.
So I need to fit springs and shocks next when I've got back from a few days away. All the bolts aren't fully tightened as mentioned above.


The black 'bracket' with the 3 circle mounts that fits to the diff extension. What is it for? I have fitted new bushes.
So I need to fit springs and shocks next when I've got back from a few days away. All the bolts aren't fully tightened as mentioned above.
All back together again. Relatively easy enough to refit the springs and get the bottom arm bolts in.
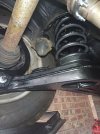
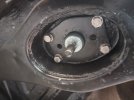
I've used stainless bolts to avoid corrosion. Although I think replacing the front and rear suspension may not need replacing during my custody again!
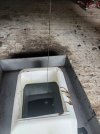
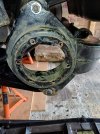
Changed diff oil. Looks like that was overdue.
I've now got the rear driveshafts to service and maybe look at some new rear pads. I think the discs have some life left in them. I'm going to have a break from it for a while as I've a few other jobs to do. So I'm leaving the interior until the spring. Next bright and dry day and it gets to hit the road.


I've used stainless bolts to avoid corrosion. Although I think replacing the front and rear suspension may not need replacing during my custody again!

Changed diff oil. Looks like that was overdue.
I've now got the rear driveshafts to service and maybe look at some new rear pads. I think the discs have some life left in them. I'm going to have a break from it for a while as I've a few other jobs to do. So I'm leaving the interior until the spring. Next bright and dry day and it gets to hit the road.
That's a valid point. I didn't give that a thought. I've used stainless bolts on my other classic in the same situation and have had no issues in the last 5 years. I'd say that if you were looking at a single bolt of that size (5/16 or M8) then maybe but with 4 bolts sharing the 'load' as they say, I think it will be OK.
Incicidently, the crossmember and rear suspension arm bolts that Wins sell are stainless (which I've fitted), and am sure have been fitted to multiple cars out there. The rear long bolt the wheel end is a high tensile bolt which does have an incresed load on it though.
Incicidently, the crossmember and rear suspension arm bolts that Wins sell are stainless (which I've fitted), and am sure have been fitted to multiple cars out there. The rear long bolt the wheel end is a high tensile bolt which does have an incresed load on it though.
Very kind words. I didn't set out to do all of what I have so far. I've spent some time getting to this point. But doing it all once means I should enjoy driving it whilst it's in my ownership.You should be very chuffed with your work. Looks great.
Today I've removed the rear discs and pads. Not sure where the difficulty of this task comes from as I've heard stories over the years from people who wouldn't do this job, saying it was a headache.
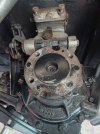
Question I have is rewinding the pistons. I know they need to be turned clockwise and they click on a mechanism. Both move freely and I think I have them fully rewound but how would I know?
The disc thickness when new is apparently 9.65mm. I measured mine and they were 9.5mm so a clean up with a wire drill attachment and a paint of the rusty areas see them good to go again.
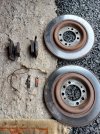
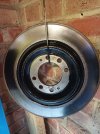
I've also painted the dion tube all over.
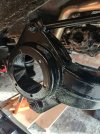
Not a lot else to do for a week or so as the paint may take a few days to dry when it's about 5c here!

Question I have is rewinding the pistons. I know they need to be turned clockwise and they click on a mechanism. Both move freely and I think I have them fully rewound but how would I know?
The disc thickness when new is apparently 9.65mm. I measured mine and they were 9.5mm so a clean up with a wire drill attachment and a paint of the rusty areas see them good to go again.


I've also painted the dion tube all over.

Not a lot else to do for a week or so as the paint may take a few days to dry when it's about 5c here!
You're correct about the pads. Just make sure that you fit the pad slippers and shims correctly. The illustration for how to fit them is incorrect in the WM, but it's correct in the parts book. Note that the notch on the slipper that locates on the mills pin sits at the top.
yesterday was spent crawling around the floor along with my current bad back. Getting older (as we all do) and it takes longer for these things to even out.
I managed to refit the new pads and the "recycled" rear discs. They looked rather good i'd say. Followed Harveys advice and was rather straight forward to fit it all back together. Had to cut the new plugs of the brake pads and attached the old plugs. This happened with the front pads also. None of the new plugs fit the existing bullet connectors on the car's wiring loom. Not sure anyone else has experienced this?
So i climb inside the car (literally) and pump the brake pedal. I hear the rachets clicking and after 5/6 pumps i have a sold pedal with about 2" or so freeplay. Rather good. When applying the handbrake lever, i've done that 1-20 times and it goes it's full travel. With it applied, i check the hubs (large screwdriver across wheel nuts) to see if i can turn the wheel and no i can't so it locks the rear wheels. Release the lever and i can spin the rear hubs by hand.
Question i have is do i need to adjust the handbrake cable a little to stop the lever reaching it's full limit?
Today I tried to sort the handbrake but its more or less beaten me. Crawled underneath again and found some slack in the cable. Both quadrants are on their stops with the brakes off. Those 2 x 9/16 nuts are seized and you all know access isn't easy. Not much I can do to be honest. I will have to find some help from somewhere. After coming this far it's the 1st thing that I can't do.
Finding someone to look at it is not going to be easy.
Finding someone to look at it is not going to be easy.


