Sparky's winter/spring/summer/autumn work

Cheers lads, but it will still be slow work as I cannot use much of my strength through my arms at present.

So my 'to do' list goes like

Fit new splash seal rubbers - next job
Refit headlamp bowls - next job with above

Finish carpets - soon
Rebuild heater - soon
Refit ancillaries in engine bay, PAS, rad, electrics, dizzty, etc - soon
Rebuild front calipers and servo - soon

Rebuild panels (doors, wings seals etc), and fit them - no time soon
Refit front N/S suspension - no time soon :?
Finish underneath, exhaust, prop, tighten up suspension bolts, etc - no time soon :?

Seems a lot easier writing it down LOL

Richard
 
quattro said:
Refit headlamp bowls - next job with above

I don't know if you've removed the ring which holds the sealed beam bulb, but I found that I couldn't get the pop rivet gun in with that in place so I used small screws with nuts and washers instead so that I could preserve the lamp aim.
 
testrider said:
quattro said:
Refit headlamp bowls - next job with above

I don't know if you've removed the ring which holds the sealed beam bulb, but I found that I couldn't get the pop rivet gun in with that in place so I used small screws with nuts and washers instead so that I could preserve the lamp aim.

Hi Paul – I see what you mean. I couldn’t get the rivet gun onto a single fixing, but decided that I wanted them riveted as I had already bought some suitable rivets and an air powered gun 8) I will just have to reset the headlamp aim later :?

101_0611a.jpg


My arms are getting a bit easier to use now, so I have managed to finish the carpeting including the door steps, refitting the rear seats, the centre consul and tunnel cover. Now what did I do with that pesky gearstick?

101_0643a.jpg

101_0644a.jpg

101_0645a.jpg


I collected the boot lid from Annable’s on Tuesday, so though I would fit that :) The number plate plinth is ronnied but luckily I had a spare one.

101_0653a.jpg


Sliding the spacers in between the boot lid and the strengthening brackets for the spare wheel mount took a lot longer than I had hoped and trying to put the bolts in and do them up on your own is almost impossible. Also the spring clip that holds the lock into the boot is a real pig, and I eventually had to leave the new gasket out and seal it with some butyl sealant instead.

Lastly, I got rid of the old number plate which was too small and used a ‘made for the job’ one with proper raised letters for that period look, just a shame that Sparky is just a little too young to have black and silvers. Never mind :(

101_0654a.jpg


Rear valance went on in a few seconds, that was easy, although I have caked the base unit underneath it with Dinitrol for extra rust proofing.

Sparky is starting to look like a P6 again – from certain angles anyway 8)
 
Sparky's coming along nicely now, gettin g some panels on should give your a good boost to keep you going. That grey carpet looks a treat next to the black leather on the seats. The number plate looks more in keeping with the car too.

I too had bought a bag of rivets for the headlamp bowls, but unfortunately I'd already booked the MOT before I figured out that I'd need to disassemble them in order to get the rivet gun in and I didn't have time to reset the beam aim. I might redo them later in the year when I've got more time.
 
Glad to see you're doing so well, both you & Sparky! Love that carpet... It looks great, can't wait to see Sparky with all his panels on.. 8)
 
Nice work Richard - That carpet does look nice, the inside of Sparky is going to be a lovely place to be i'm sure. Just seeing the boot and rear panel on there is a big leap forward in my mind (I am a bit simple like that though), if you can potter around and get a few more light bits done while your strength builds, hopefully the more difficult stuff will only arrive when you're up to it! Besides, if you'd like a hand on anything I'm sure a few of us would be willing to help (myself included of course).
 
The carpets do like great, apart from the fact that I asked for a set for an auto and got a set for a manual :twisted:

Well, you learn your lessons well in life. I ordered the carpets when I wanted to fit them back in January of 2010. The car took a lot longer than I thought and with me being ill as well, it has been a while until I found out the problem.

Now, Terry says he will sell me a new pair of footwell mats for £59.50 plus postage, and refuses to help in any other way.

I wish I knew what service he offered before I bought the underfelt set the other day, which only comprises of the tunnel and footwell pieces btw.

Last time I buy anything in advance.

adamhotrod said:
Besides, if you'd like a hand on anything I'm sure a few of us would be willing to help (myself included of course).

Careful Adam, I may take you up on that - are you any good at altering carpets?

Richard
 
Carpets... not so good, well I can do the cutting bit but my stitching together is a bit ropey :LOL:

Just say the word, if there are a few harder or lower bits that i can help with which allow you to get further on the upper parts then I'd be glad to help.

How is the healing process coming along now?
 
I make no secret about it, I hate riveting. I don’t know why because it isn’t difficult, I just hate it.

Now there are 4 splash seals to fit and it’s not just a case of hold them in place and attack them with a rivet gun. I’ve spent many months ensuring a rust free future for Sparky, and I need to open up painted over holes for the rivets, so care is the order of the day.

First job is to peel the old rubbers off the steel strips and remove old bits of rivet, then onto the bench wire brush and get all the rust and old underseal before treating with rust converter and spraying them up with black enamel.

Prior to fitting the new rubbers, I coated the mating area with a generous coat of Dinitrol, painted Dinitrol into the new rubbers before fitted the metal strips, then riveted them all into place. I then coated the whole area with more Dinitrol, working it well into any gaps and joints.
101_0662a.jpg


Then there are the vertical seals which fit onto the rear wings and all four doors. They all rivet on as well. I managed to get new ones for the front and rear fittings but will need to refit the centre ones as and when I get to them.
101_0661a.jpg


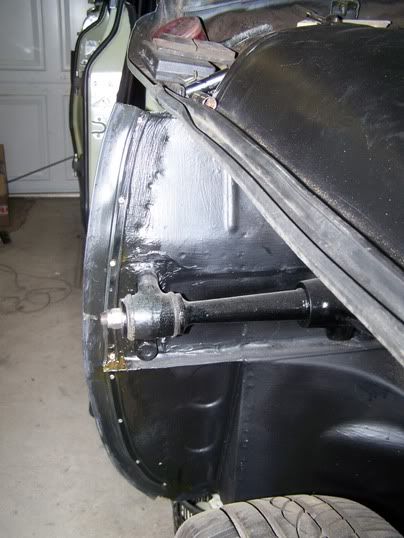
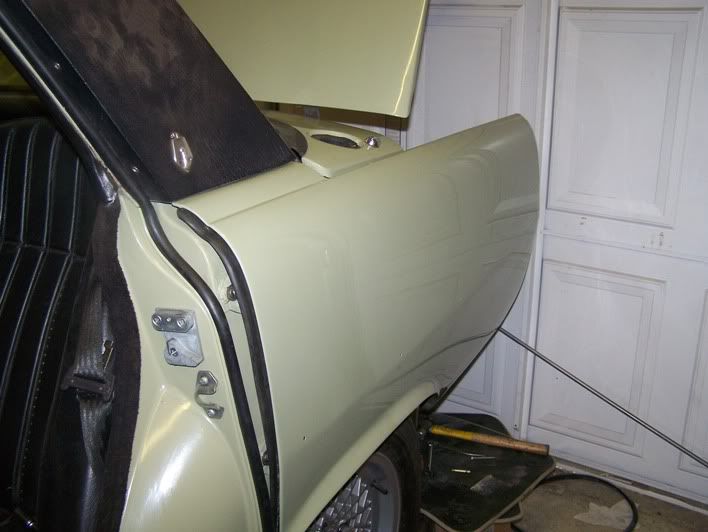
Unlike me I know, but I haven’t taken that many photos this time. The O/S rear wing didn’t fit correctly and whatever I did it sat around 4-5mm too far back. This meant it hit the rear decker panel and the front fixings wouldn’t fit securely. I had used some new fittings at the rear and on close inspection (after taking the wing off three times!) I notice the little tags on it were wider than the original, which stopped them moving around in their slots. Using the bench grinder, I sorted that bit. Also, this was not Sparky’s original wing so I had to open the hole (in the wing, not the body) which the rear fixing went through, into a slot. I did the bottom one as well, and then back on the car. Perfect fit, well perfect for a P6 anyway.

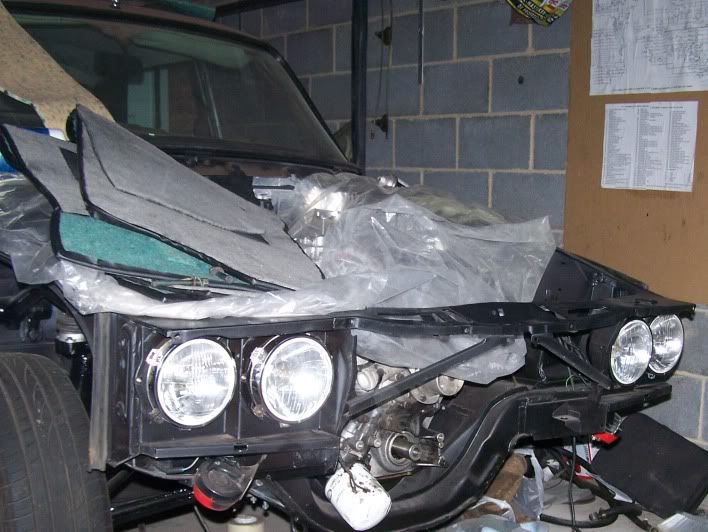
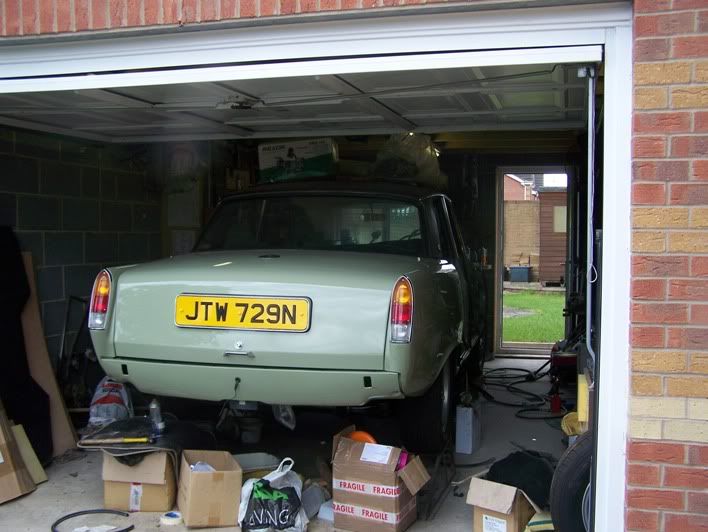
A little while ago, I espied a complete set, all four, side and rear lights complete with lenses, bulbs, gaskets etc, for £50.00 – never been fitted to a car! They were on ebay under ‘Rover 2000 lights’ so I watched them for a while and managed to get them for the £50.00 starting bid :D Here are the rear ones, fitted. They have been covered with a generous coat of the ever relied upon Dinitrol, both before fitting and afterwards to ensure a good corrosion resistance.
101_0667a.jpg


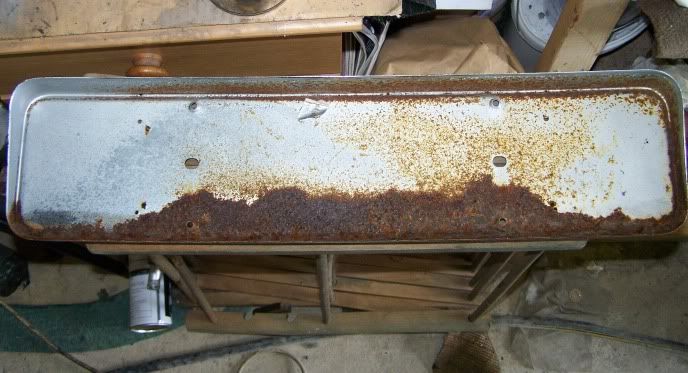
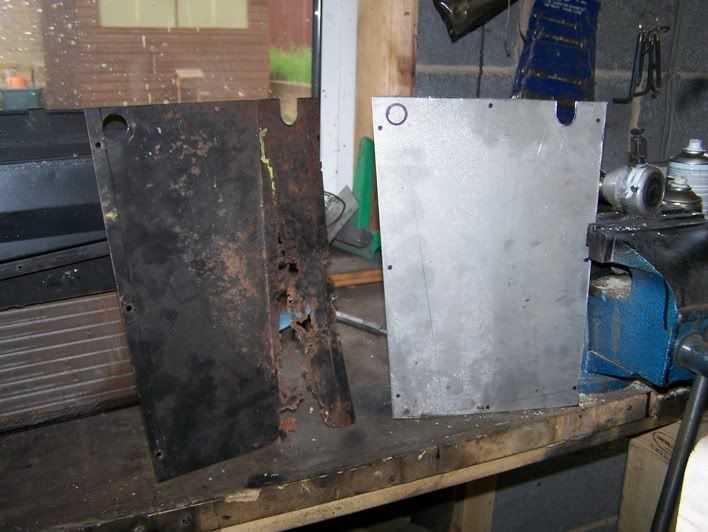
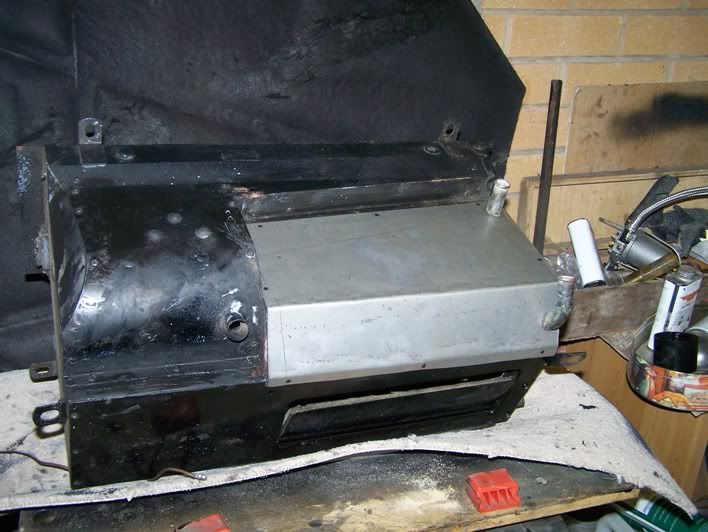
Now I was going to completely rebuild the heater, but there will be other winters and I want to drive my car, so I decided just to replace the lower panel which had rotted away. I cut out a new one from stainless sheet.
101_0656a.jpg

Beat it into shape and trial fitted it – got it right first time :shock:
101_0657a.jpg

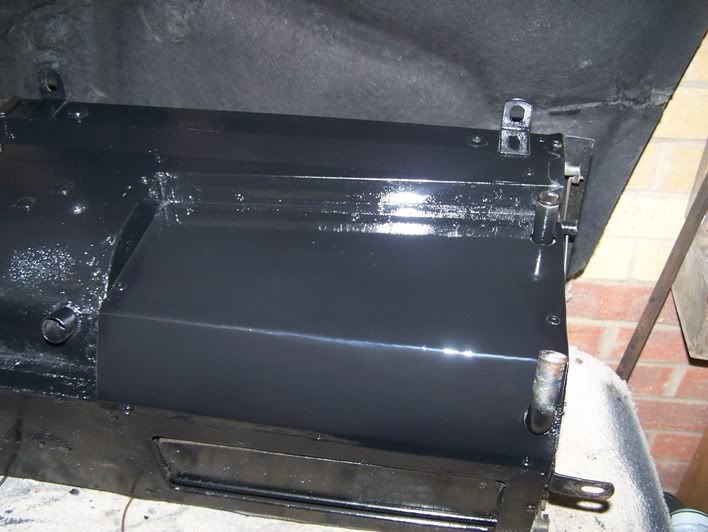
And sprayed it up, then back onto the car.
101_0659a.jpg


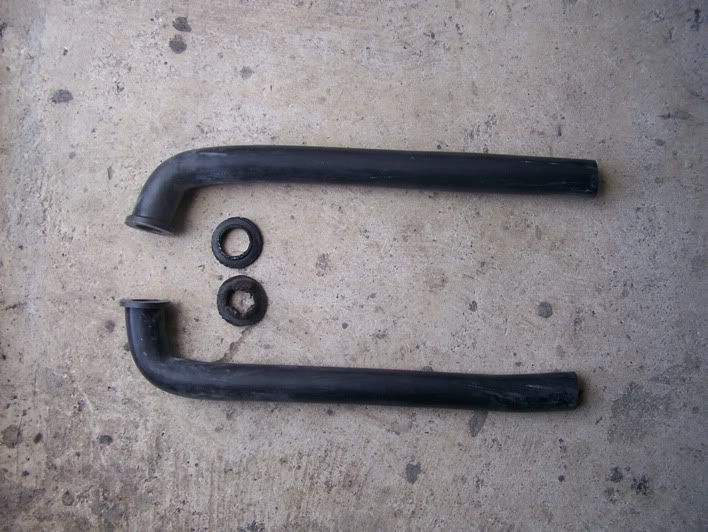
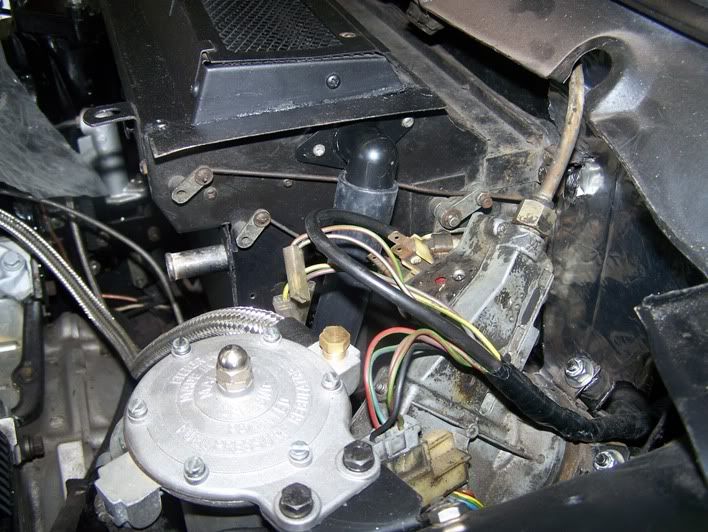
I am not quite sure why it rotted out like that but the possible culprits could be the lower windscreen rubber which has been replaced now, or these pesky drain tubes which have nearly gone altogether.
101_0663a.jpg

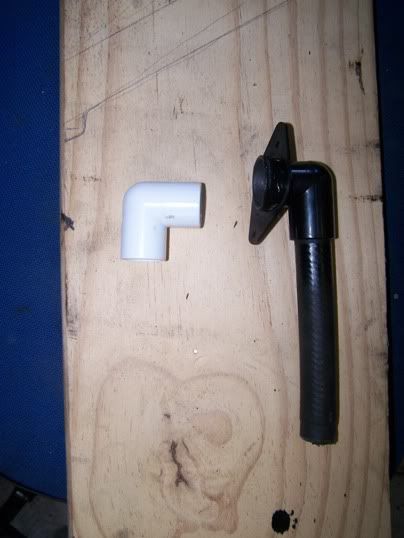
The old ones are in the middle, or rather what ‘s left of them. Now for some reason, I was convinced that these drain tubes were unobtainable, so I was off to B&Q and got a couple of PVC right angle bends with a view to making something fit. I warmed one end up with as hot air gun then opened up the end with a socket bar. Then slid the eye shape fitting over it, warmed it up again and opened it up even more by easing it over a 19mm socket. Quick lick of PVC paint, found a bit of hose to slot into the other end and the job is a good’un. OK the hose isn’t long enough but I can soon get some of that.
101_0664a.jpg

Then I found the new hoses so went to fit them, only to find that the N/S one came out from the heater too far and fouled badly against the windscreen wiper motor. So I cut the angle off and slid it over my concoction – fitted just right.
101_0665a.jpg


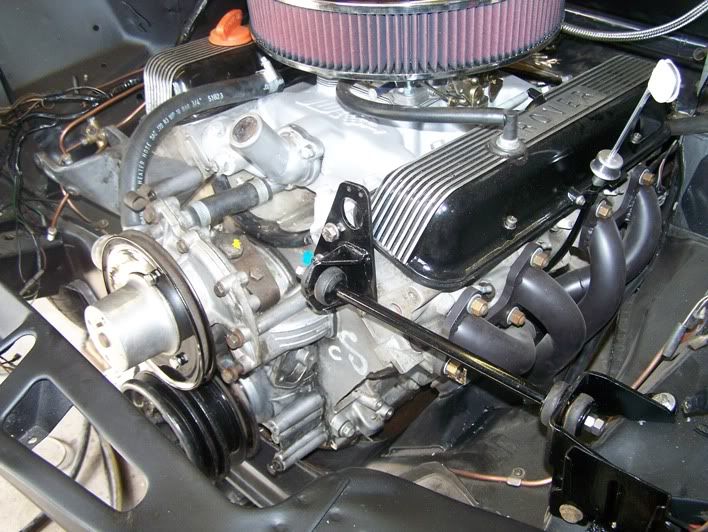
I have done a few other little things, like bolting the coil back into place, as well as the power amp. Cleaning, de-rusting and painting the engine stay bar and its brackets (that was more work than it seems), and a bit of plumbing, including that pesky small hose at the front and the fuel line from tank, to regulator, to carb.

101_0670a.jpg


That’s about it for now – I must update more often

Richard
 
"That's about it for now" :shock: That's fantatstic progress Richard! Just as long as you're taking it in small bites and respecting what the doc has told you! There's a couple of real pearls in there, not least your technique for dealing with that rear wing.

Well done!

Chris
 
Richard,
if this is you taking it easy, you must be like the Duracell Bunny normally :LOL:
Don't push too far too early, if only to stop embarrassing the rest of us :oops: .
John.
 
This is me pottering about 8)

It's actually been 8 weeks since the operation, and out of those 56 days, I have spent 3 at work (2 last week and one the week before - not normal duties, just being there) and 53 sitting on my ass at home trying desperately not to sneeze :shock:

So there are 53 days of wandering around, picking up the coil, polishing it, bolting it on and then going to sit in the garden. It's not like working full time then doing it.

It took me three days to do the heater and the only thing that could be construed as overdoing it was actually placing it back into engine bay. It took me a whole day to fit the N/S wing and two to fit the O/S.

So no, I'm not overdoing it , I just have a lot of time on my hands :D

Richard
 
Recovery boredom is a nightmare. Swmbo followed me around like a clucking hen, It's like being hardwired to a tachograph!
At least I didn't find her checking my life insurance policies. :LOL:
John.
 
Fantastic work, Richard! I'm very envious of how good the car will look once it's done! It's a pity that all restos aren't as thorough as this!
 
quattro said:
Cleaning, de-rusting and painting the engine stay bar and its brackets (that was more work than it seems)

Tell me about it! An afternoon to clean them, then two coats of primer. Wait a day, then two coats of black paint and reasseble only to find that you'd missed a bit dangling from a wire hook with no paint on!

Sparky's coming on a treat now though and I bet you're glad that you can cross the heater box off the list with all those fiddly bolts and levers behind the dash. Are you going to refit the badges and reflectors at the back? I've got a couple of ideas to try out for those.

Don't 'spose you seen my again car at the paint shop recently have you? I like to keep ringing up asking about it, but I'm going to have to go over and have a look this week.
 
Back
Top