Sparky's winter/spring/summer/autumn work

Been having a potter about (or three)

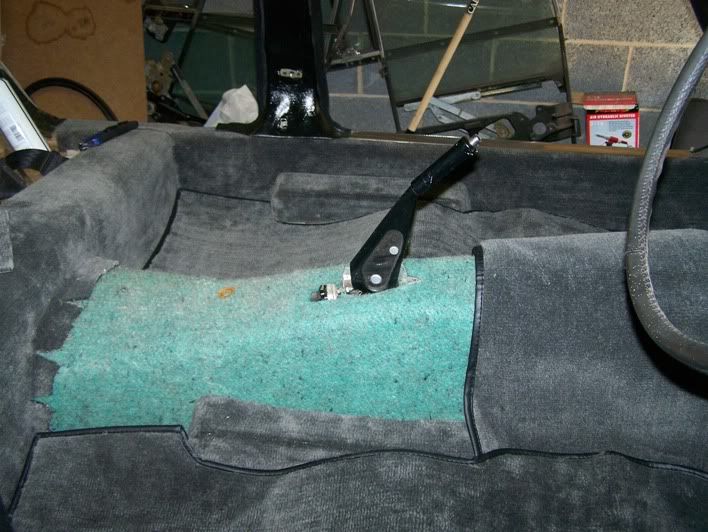
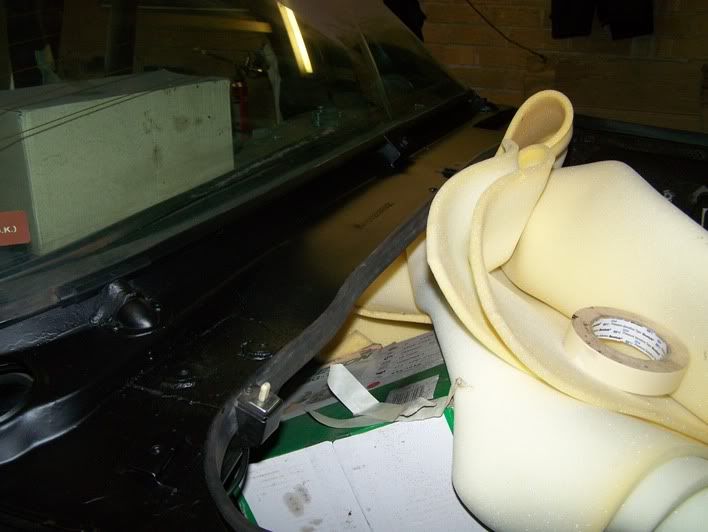
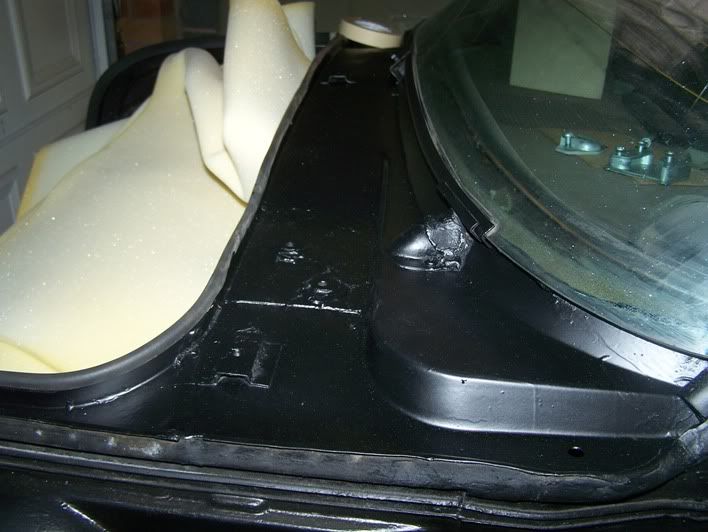
I have cleaned up and painted the black bit behind the rear screen, and managed to glue the boot seal back on – that’s a fun job :shock:

101_0536.jpg


101_0535.jpg


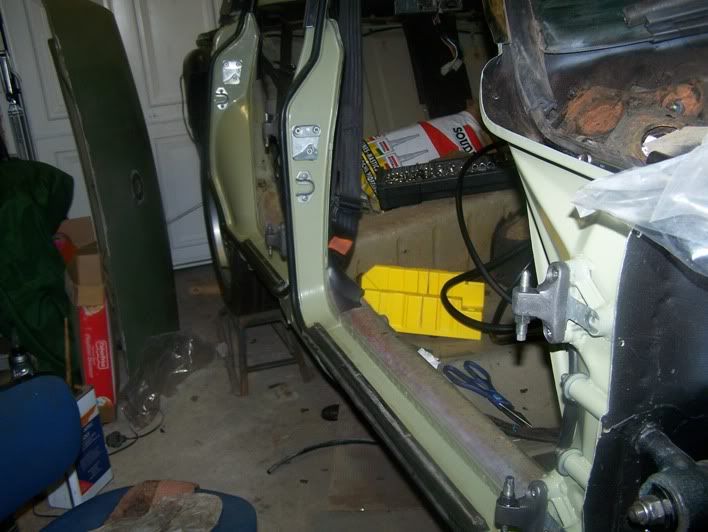
Stripped all of the hinges and catches off the door jambs and rubbed it down.

101_0533.jpg


101_0537.jpg


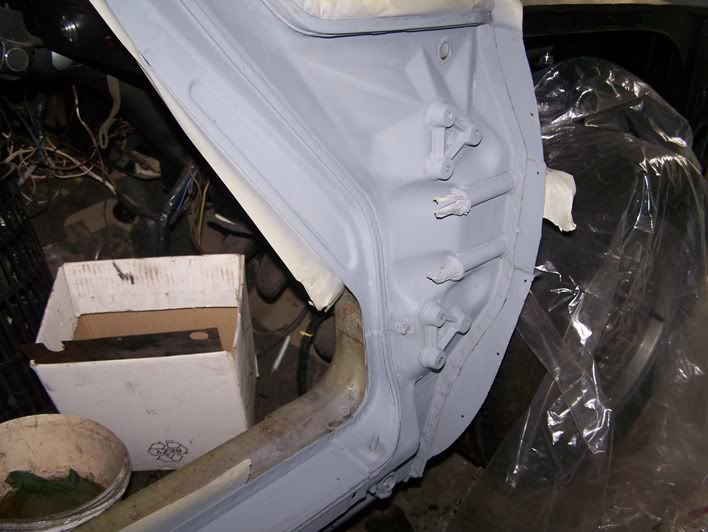
Then paint, clean up and replace hinges etc, reuse the door step seals after washing them off in boiling water (not too successful in getting shape back), and fitting new door seals

101_0557.jpg


101_0556.jpg


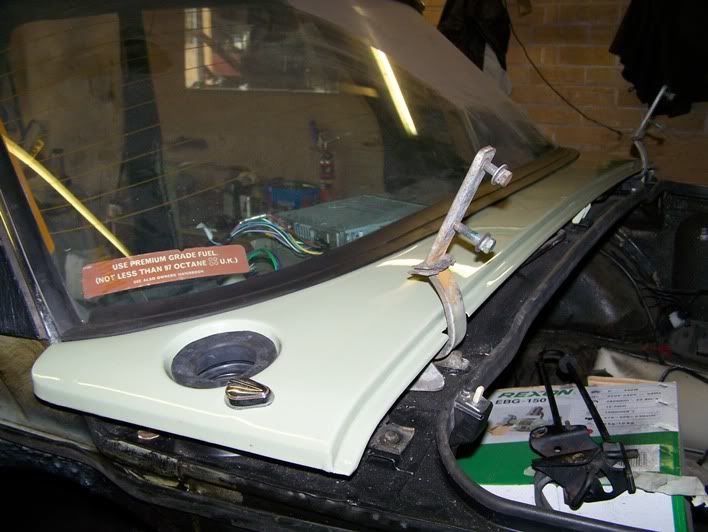
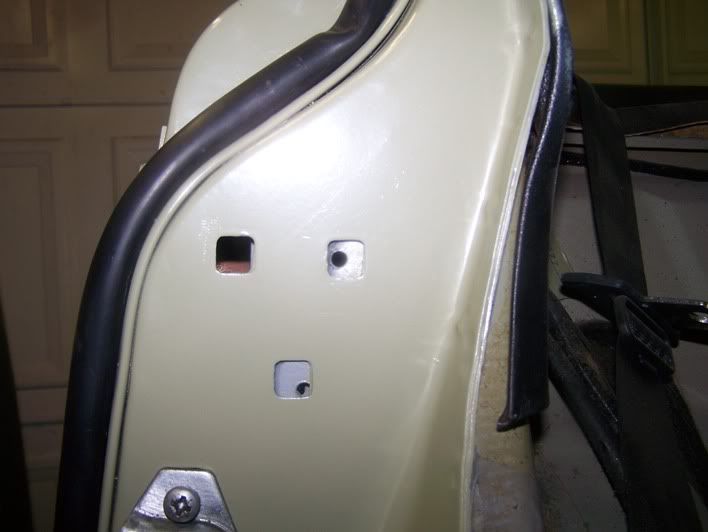
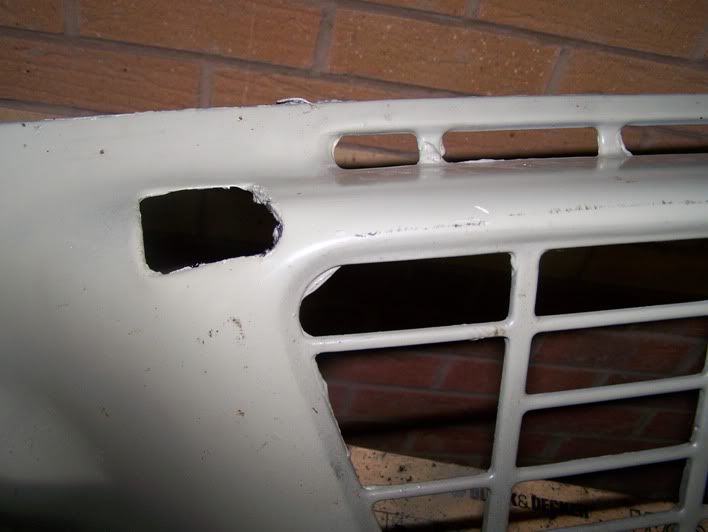
Anyone like to hazard a guess as to what the hell happened to the other fixing? Took me a few minutes as they are all on the same plate!

101_0555.jpg


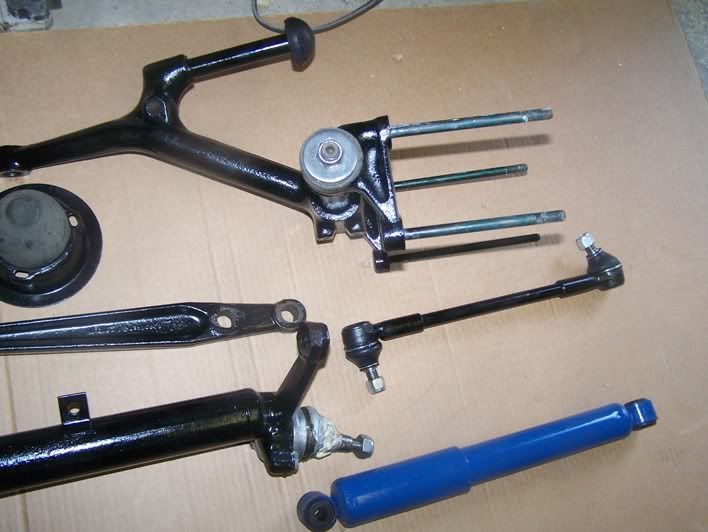
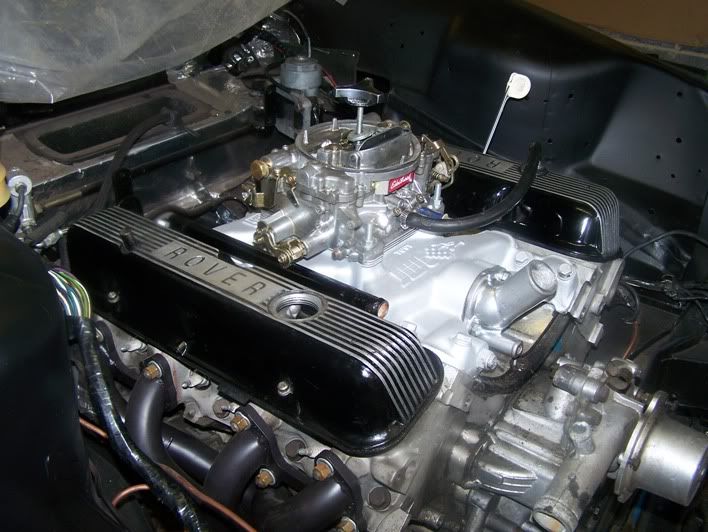
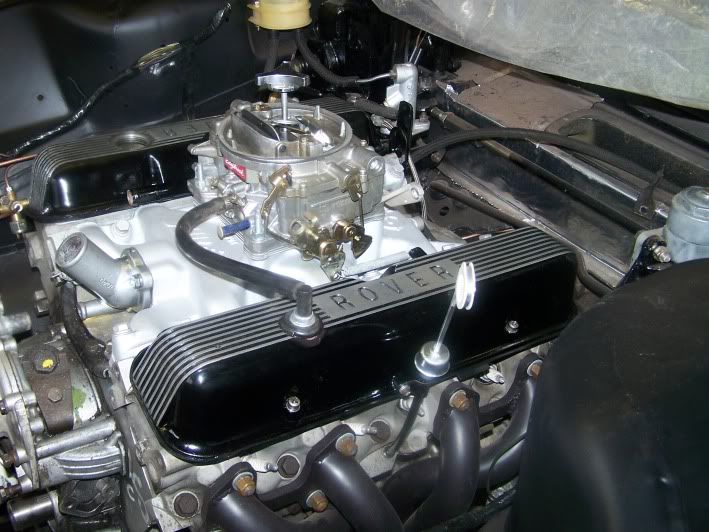
Done a few bits on the motor, including painting the O/S rocker cover, and cleaning and painting small bits like the thermostat housing, dip stick tube, dip stick, and several little fixings. Managed to get the wiring loom back into the engine bay, so can start to wire things back up soon. Oh, and cleaning up the carb and refitting it.

101_0554.jpg


101_0553.jpg


This has actually taken five weeks so still slow progress, but progress all the same.

Richard
 
Crank case ventilation

I note from your pictures you have ventillated your crank case back to the base of the carb, have you had it running with this setup? or is this still a new installation of the Weber.

Graeme
 
I notice from this picture that Sparky is looking very Lunar Grey again! Such a lovely colour, I guess you had second thoughts about Monza Red then?
 
Re: Crank case ventilation

ghce said:
I note from your pictures you have ventillated your crank case back to the base of the carb, have you had it running with this setup? or is this still a new installation of the Weber.

Graeme

Hi Graeme

The Weber was on the car when I bought it but only had some old heater hoses venting gasses to the air filter. This meant that the expelled gasses would be fed into the top of the carb and burnt by the engine.

I have installed a PCV valve into the N/S rocker cover and connected it to the PCV port on the carb. The valve just controls the amount of vacuum. The idea is that the system sucks the gasses out of the engine and keeps the inside cleaner. The other rocker cover is connected by a simple hose with a flame trap, to the air filter box. So air passes through the filter, then into the O/S rocker cover, through the engine, then the PCV valve and into the base of the carb, and is then burnt.

adamhotrod said:
I notice from this picture that Sparky is looking very Lunar Grey again! Such a lovely colour, I guess you had second thoughts about Monza Red then?

I have been hopping from foot to foot for a very long time trying to decide. I even have two aerosols of Monza and two of Lunar because I kept changing my mind! So yes, well spotted, it's going to stay Lunar 8) Anyone want a couple of tins of Monza red?

I was thinking that I haven't done much in five weeks when it occured to me that I had done a lot more than I had thought. (Mind is going :? )

Firstly I have rubbed down the tops of the inner wings (I messed them up a bit putting the engine back in) and repainted them. I then cleaned up the body/front wing rubber (not as easy as it sounds as I had to remove a lot of underseal, rusty metal residue, and paint where someone had painted the wings on the car). they are now bonded back in place.

I have then done some work on the panels.

The front valance I had dipped and ecoated turned out to be rotten so I had to clean up Sparky's original one which has some rot in the corners. The meant removing the underseal/road dirt/engine oil, etc from the inside which is a particularly fiddly job.

101_0514.jpg


Also, the underseal has emerged though most of the holes and been painted over. I really don't like that look so I removed all of it leaving some nice clean lines. The panel is now with Clive Annable for repair as my welding isn't up to that kind of work.

101_0516.jpg


Clive has also done some repair work on the wings where they were very thin and micro holed. He removed the rust traps on the front wings - you can see here that this panel has been dipped and ecoated, but is still rusty.

101_0525.jpg


As I am having trouble working at low level, I have nailed some carpet to the wall and some on the work bench so I can work at standing height. I have done this so I can epoxy the inside of the panels before letting Clive paint them.

101_0524.jpg


I have epoxied both front wings, nearly finished the rear ones, rear valance, both sills, and have also epoxied the rear of the car where I couldn't get to it with the spinner on.

101_0526.jpg


I thought I had done more than previously said 8)

Richard
 
excellent progress Richard,was goin to mention about the fresh coats of lunar grey but Adam beat me to it,it is looking really well and cant wait to see it in the flesh,good colour choice by the way,keep up the good work :wink:
 
Hi Rich, Glad to see you're sticking with the Lunar.. I've been in the horns of the same dilemma... I was going to paint my car Monza too. I've just scored a complete set of doors & wings in nice condition, with virtually unmarked mexico brown paint, so I'm going to leave mine brown for now. I plan on just polishing & bolting the panels straight on, get the car on the road, and then worrying about the final finish on the other good panels slow time.

Sparky is really coming on now, and really is much better than it left the factory new.. can't wait to see him finished! 8)
 
DaveHerns said:
Are the front wings OK and not floppy without the reinforcing piece ?

They are fine Dave.

They are fixed at top and bottom at the rear and also have a locating pin at the same height at the rust traps, so I can't foresee any problems.

Hi Bri, Rich and Tony - I have to say that I am very pleased with the contrast of the new Lunar Grey (ITS GREEN!) with the black of the new doorseals. Should look great with its outer panels on contrasting with the vinyl roof, sills and other black bits.

Getting excited now :D 8)

Richard
 
Coming on nicely now Richard. I can't say I blame you for sticking with Lunar Grey though, I'm so indecisive about this sort of thing (you don't want to get it wrong do you?) it didn't even enter my head to change the colour on mine.

I'm looking forward to getting back onto my project this week after having 4 weekends off it for family stuff and holidays etc, so it good to see some photos of how your's is getting on.
 
Hello Richard,

It really is a credit to you,...looks really great the work you are doing.

Once all is said and done, will Sparky be a fair weather car only?

Ron.
 
SydneyRoverP6B said:
Hello Richard,

It really is a credit to you,...looks really great the work you are doing.

Once all is said and done, will Sparky be a fair weather car only?

Ron.

Hi Ron

Sparky will probably see very little in the way of snow and road salt, (I'll take him off the road in the winter months), but we really don't enough fair weather over here to keep him out of the rain 8)

Winter months will be for working on him, spring summer and autumn is fro driving him around.

Richard
 
quattro said:
Winter months will be for working on him, spring summer and autumn is fro driving him around.

Richard

But Richard...what on earth will you find left to do to Sparky next winter? :)

I take my hat off to those who use their P6 as a daily driver, and when (or if :roll: ) Rebekah is finished she may well become my daily.

As well as driving though, part of the fun and challenge in this hobby (/addiction) for me is tinkering in the garage without too much time pressure. And I'm with Richard and Sparky on this as far as Occie's concerned.
 
vaultsman said:
As well as driving though, part of the fun and challenge in this hobby (/addiction) for me is tinkering in the garage without too much time pressure.

Yes the time pressure is always a factor when working on the daily driver. There's always the chance too that you'll find something else that has to be done in the course of doing the bit you'd like to get done. I've been trying to find the right time to do the carbs on my car for about a year now. I've got all the bits ready but I am always conscious that I will probably only have a weekend to do it in and if anything goes wrong in that time then I need to make other arrangements to get to work on Monday. Although I have done it, I don't particularly like using holiday time to fix the car.

I am also slightly envious of you guys being able to string out these jobs over weeks with no pressures (other than the self-imposed ones :wink: ) to get them finished. Perhaps when I get a 2nd P6 that will help (said that more in hope really :D )

Dave
 
vaultsman said:
But Richard...what on earth will you find left to do to Sparky next winter? :)

ermm.. remove the roof, (it hasn't been touched this year), and de-rust everything underneath it, rear quarter panels have bubbled with rust and need removing, de-rusting and re-vinyl, Roof has two small holes in the vinyl and what looks like stretch marks on the back, need to restore the wheels although they are ok at the moment they are nothing like as good as some I saw on here yesterday, seats will just be put back in this year and will need some work next winter, chrome is a little pitted in certain areas, gearbox is ok at the moment but did have some filings in it when I changed the oil, so that could do with a good rebuild, aaaaaand anything else I can find or goes wrong this year :D simples

Dave3066 said:
I don't particularly like using holiday time to fix the car.

:?: What are holidays for then? 8)

Richard
 
The front valance, back from Annable’s with the lower corners replaced and ready to paint. This is Sparky's original valance, taken back to bare metal and primed ready for top coat.

000_0109.jpg


And my bit on the inside, I have a feeling that that was the last bit of epoxy that I need to paint on the car. :)

101_0561.jpg


Rear wing fully epoxied, that really is a fiddly job getting all up inside of the thing. Check out the anti roll bar :shock:

101_0562.jpg


N/S front suspension nearly ready, including setting the right angle on the top link.

101_0564.jpg


This bit of kit came in very handy when removing it and pushing it back on. It's a bearing puller rigged up to a 10 tonne hydraulic ram. Still made me sweat a little though :?

000_0110a.jpg


All bits cleaned up and painted – except for the spring, but that will happen soon. I found the end of the side rod had a loose joint, no play in it, but you can swizzle the joint around between thumb and forefinger, so on its way out. Got a new one from Ian

101_0567.jpg


And that’s about it for now.

Richard
 
Well, I have been doing a few small bits and pieces (light duties only - 8) )

Firstly, just peeling the old carpet on the little feet which the seats sit on, and re-carpeting them. Then buying an underfelt set from ebay to find that it only consisted of the centre tunnel and two main floor sections - i.e. no rear cross member or sills. So I have peeled the old stuff off the old carpets and used that instead. I have managed to refit the carpet to the crossmember and one of the sills, pulled the old furry bits off the furflex and dyed them black - not as easy as it sounds, and lastly discovered that the centre tunnel carpet is plenty big enough to cover the auto tunnel, but the two main floor sections are far too big - obviously designed for the manual car :shock: :twisted:

As I bought the carpet about two years ago and can't even remember where I got it from, I am a little stuffed here :? My only options, failing remembering where it came from, are to put up with it or trim it myself and restitch the binding by hand :shock:

The centre tunnel piece actually finishes off with a nice binding so I have altered it slightly as the original tucks under the underfelt.

300411a.jpg


The panels are done and some have arrived back with me. This one has been quite a bit of work as the rubber was damaged. I couldn’t find a new one so I got hold of a spare decker panel with a reasonable rubber on it. I did have to rub it down and treat it with a trim dye/restorer. Fitted it on, then took it off again the fit the boot lid hinges. I must say, that Mr Annable has done a first class job of it and it does really have a superb finish. Now where is the bootlid?

300411b.jpg
 
It's starting to come together now Richard. I bet you're pleased to be able to get back into the garage again aren't you?

I saw some of your panels at Annables that other day when I dropped my car off. The front wings were done and looking shiny and the bonnet and boot lid ready for primer. It's Clive's attention to detail that makes it all worthwhile and it was a great to see the various stages of the prep work.
 
Back
Top