Sparky's winter/spring/summer/autumn work

Getting towards the twelvemonth mark on this thread of yours, Richard...and what a great read it's been. An inspiration to, no doubt, many people (me included! :) )

Must be a great feeling to be bolting everything back together onto good metal...bet you're smiling while you're spannering away now!

Hats off to you for sticking at it through this year...and keeping us all entertained and educated!
 
Cheers Stan, I must say that I would not have got this far without this forum. It has given me the inspiration to do it. Seeing what others have done and are still doing has given me the incentive to get up and get at it.

No Adam, there is no such figure 8)

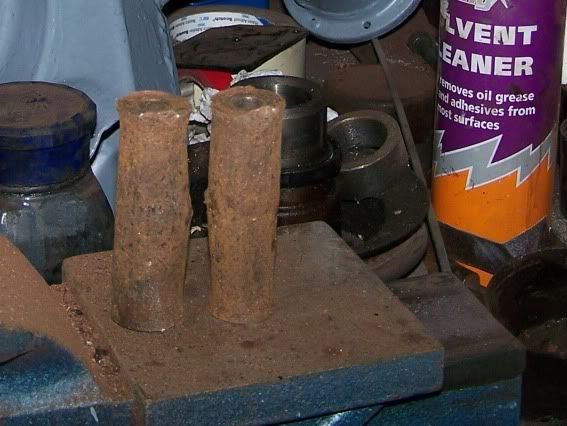
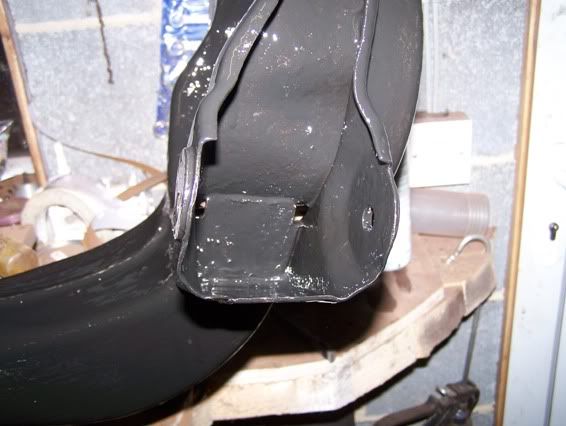
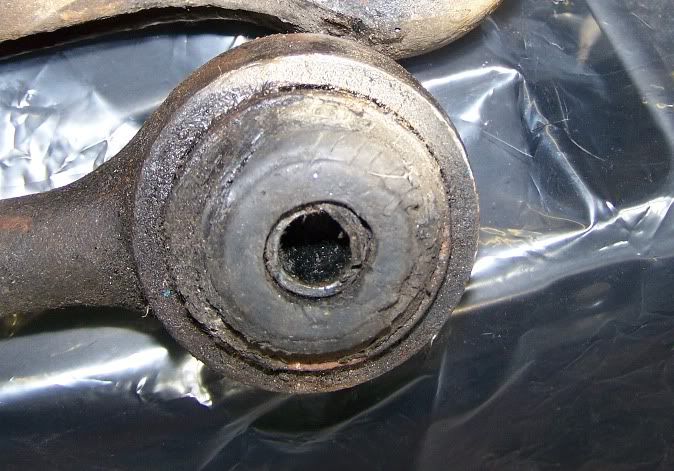
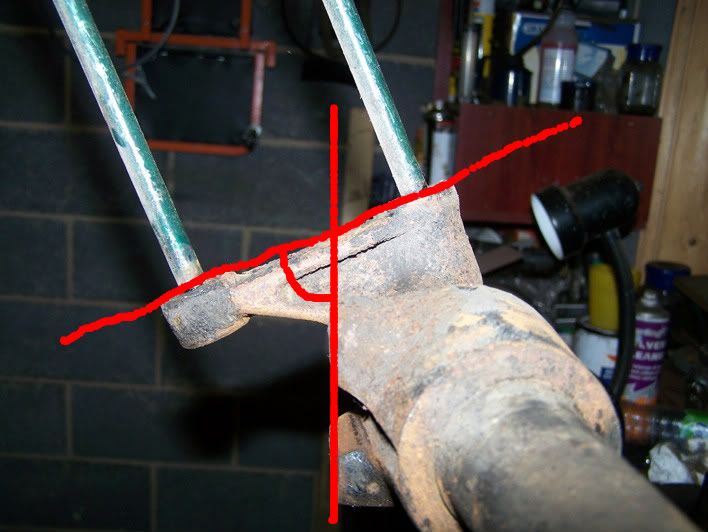
This is what is left of the original rear trailing arms bushes. That’s a fair bit of rot there.
a101_0424pins.jpg

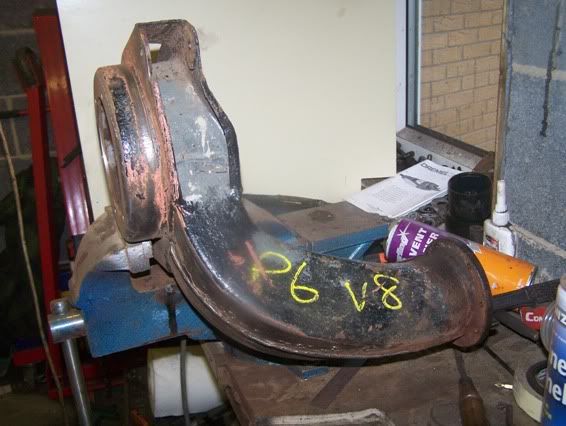
A little while ago I attacked Sparky’s elbows with a wire brush and they unfortunately lost the battle and rust holes appeared. I had a spare set but they were even worse, so I managed to find another pair in a local scrap yard.
c101_0387.jpg

As these are getting a bit rare and I don’t want to be taking the rear suspension apart again, I thought I would spend some time on them and make sure they 1/. Are in good condition under all of that paint, and 2/. Will last a long time.
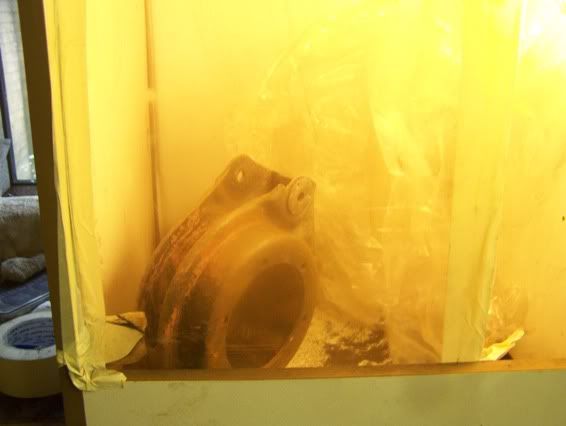
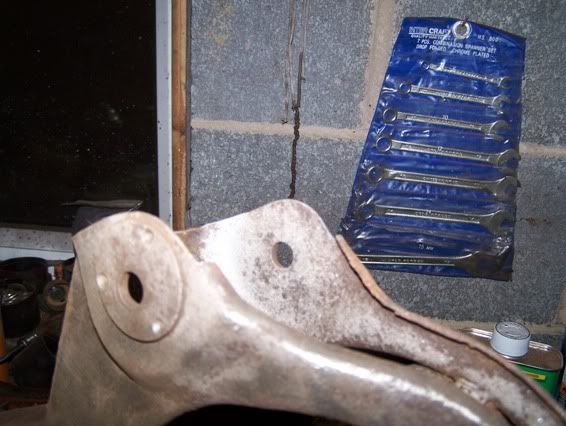
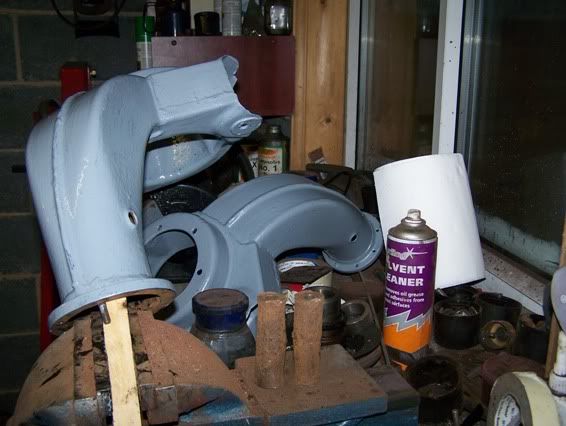
It took an age to get the paint off but with the aid of an angle grinder with a cup brush, a bench grinder, a tin of paint stripper , a hot air gun, a selection of chisels and scrapers, sand paper, and a home made sand blast cabinet, I managed to get most of it off.
c101_0386.jpg

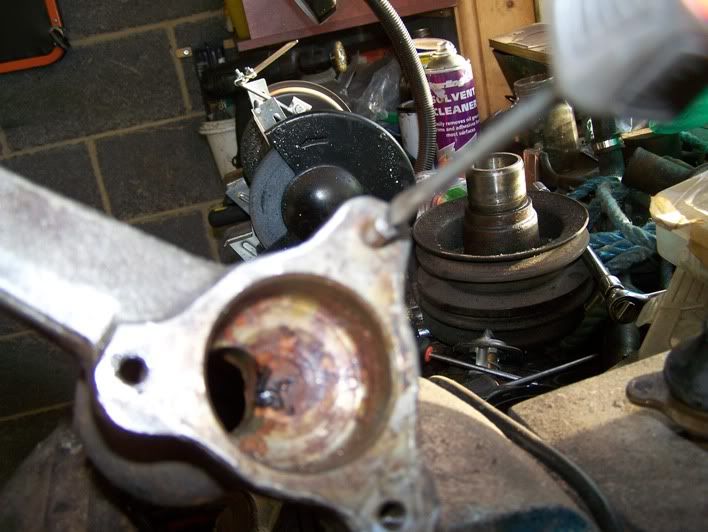
I used the sand blaster on the lower lugs where the trailing arms fits to ensure that I had a good surface for the epoxy.
c101_0389.jpg

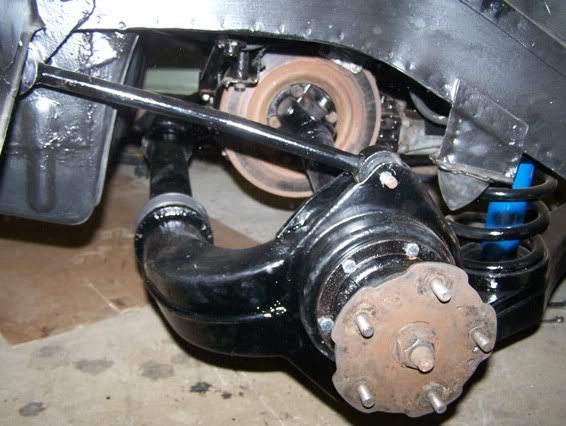
Then I used the same epoxy coating that I painted the underside with and worked it well into the elbows, all the little crevices and corners.
c101_0391.jpg

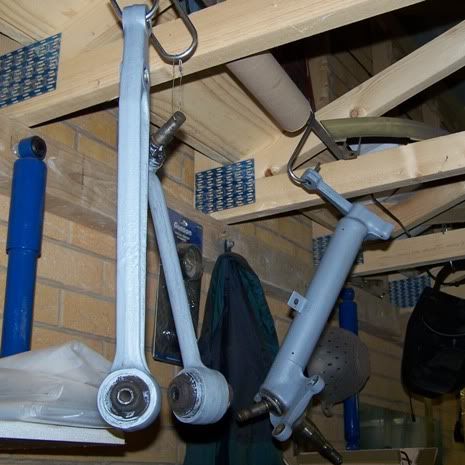
This took three days to cure because of the temperature, so everything is a little slow. I then gave them a good coating of Zinc primer for good measure.
c101_0424.jpg

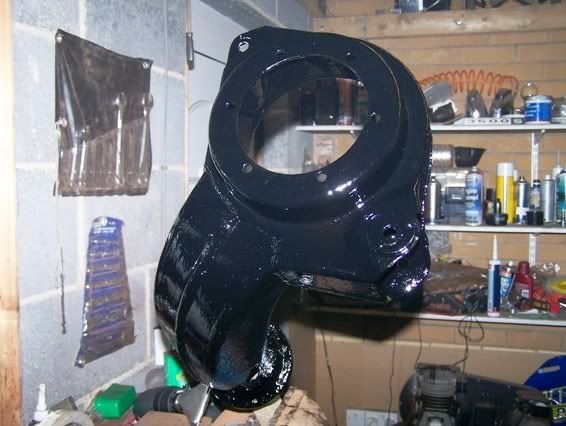
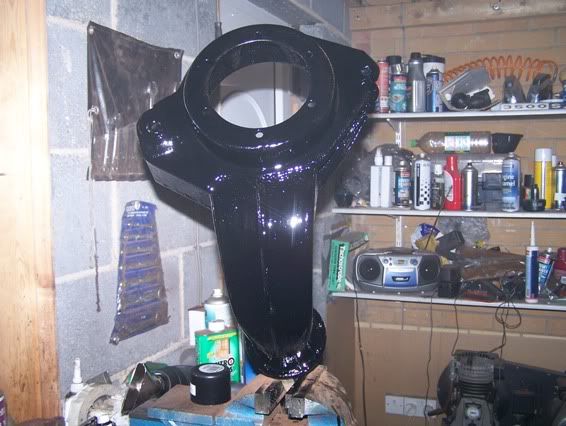
Two more days for the paint to dry then rub down and two coats of enamel.
d101_0429.jpg

d101_0431.jpg

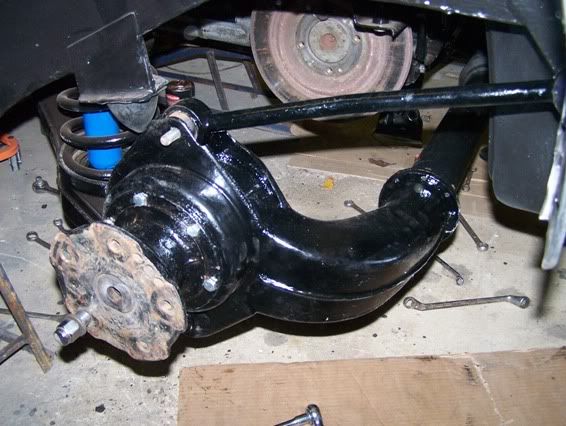
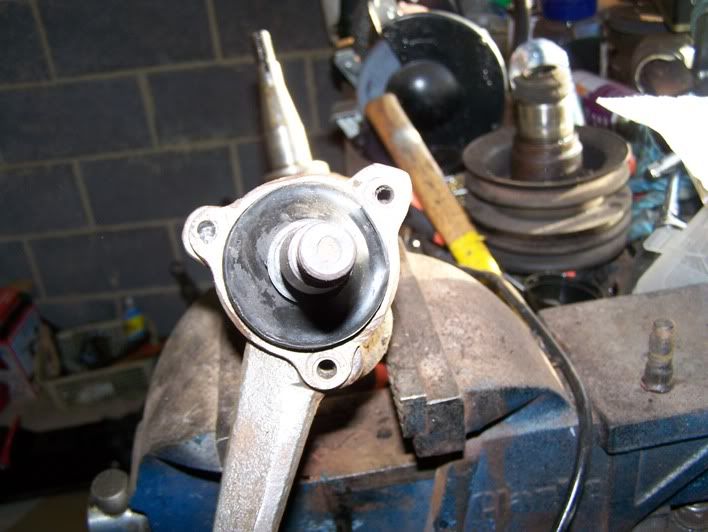
I then cleaned up the drive shafts and painted them ready for fitting when dry. When cleaning up the hubs, by clamping the driveshaft in the vice, turning it slowly and wire brushing it, I noticed that one of the rear wheels bearings was smooth and had a slight resistance to turning, whilst the other one had no resistance, then a lot then none again and was also rough. So far, the back end of the car has suffered from rust in the wheel arches – small amount but in lots of places, rear top link bush broken up, both rear trailing arms bushes totally ronnied, both elbows holed through rust, and now a rear wheel bearing :shock:

Now, I bought the elbows with the hubs attached, so it was just a matter of taking one of these off and using that instead. Easy :D – or is it?

I couldn’t get the correct length bolts in HIghTensile, so had to get some 1 ½” ones and chop them off to fit.

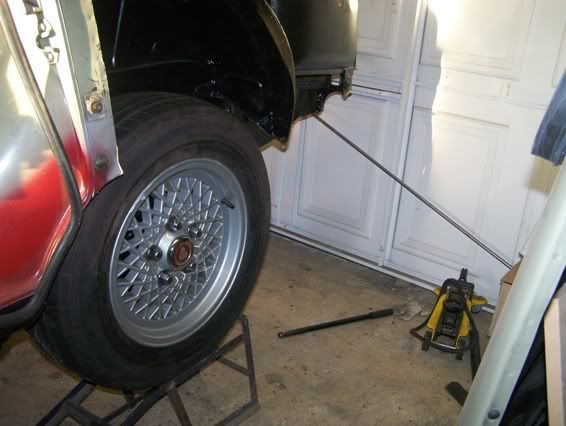
I found that fitting the drive shaft with it still in the hub was a pain in the heart,
d000_0098.jpg

gawd that was fiddly, trying to get the washers on the bolts that is, so on the side with the bearing gone, I fitted the spare hub straight to the elbow, thinking I could slot the shaft in from the rear.
d000_0094.jpg

I took a break here and had a look at the manual for torque wrench figures. Now according to the manual I have to clamp the hub in a vice and get a spring balance and tighten the yolk nut until it reads between 5 and 10 pounds ?

Anyone know if I can just torque it up? Or is this something that I just have to do? I’ll have to buy a spring balance and get a big spanner :shock:
 
As far as I remember nowhere in the book will you find any explanation of refitting a driveshaft into a hub, other than when replacing the bearings, and setting up the collapsable spacer to set the preload, so if that were the case the outer driveshaft u/j would have to be replaced while the hub was still attached to the end of the shaft. :? In the real world you can assume that if the preload on the hub bearings was set correctly before it all came apart, then you can tighten the nut up again to the point at which it is in no danger of coming loose, but not so tight that it increases the preload on the bearings. That won't be a specific torque, more a question of "feel". Had you thought before you dismantled it, you could have checked for excess end float in the same way as you would a front bearing, and if that was OK, and the bearing wasn't tight, then you could have marked the relative position of the hub and nut, and then counted the exact number of turns to get the nut off, then refit to the same position. If you felt the need you could then check the hub with a spring balance, but that's not a particularly accurate method in itself.
 
Cheers Harvey

I didn't think to count the turns of the nut as it was a different hub I was putting back so didn't think it would relate.

I'll put it in tomorrow and tighten it to where I think it should be :shock:

The manual has two ways of doing it btw, 1/. for existing bearings but mentions the new collapsible spacer, and 2/. for new bearings which deosn't. Bit confusing for me who has never delved in to such things before. Section 64.15.07 paragraphs 18, 19 & 20.

Also, I undid the nut and the hub just slid off with no sign of any sealant on the splines. Is there supposed to be Loctite AVV on there, or just grease?

Richard
 
I am thinking that maybe it is not such a good idea to skimp on rear wheel bearings, especially since you get into the trouble to do everything properly.
The old bearings are just that, old bearings, that may feel OK now, but only left with a little useful life.
I have changed them in my car last summer, both sides, even if only one seemed rough, and they made the rear end considerably more quiet.
Setting the preload (for new collapsible) spacers with a thin rope and spring balance is much more easier that it sounds, but i had the complete driveshaft and hub out of the car, in a vice.
 
Hi Demetris

This was never meant as a full rebuild, more of a 'whip the panels off and get them painted while I tidy up the base unit.' :)

I am of the school of 'If it ain't broke, don't fix it,' so have replaced the bushes which were no good, replaced the odd shock absorbers (I had a thin red one and thick blue one), replaced the failed wheel bearing, replaced dodgy looking cracked rear brake pipes, refurbished and replaced both elbows, and repaired the base unit.

Much more than I had anticipated, but I won't be replacing serviceable items. There are many more winters to be doing that sort of thing if I want to.

Richard
 
Easier to visit the problem now than to revisit it at a later date, or worse have a wheel bearing collapse on you as happened to me once leaving my MKIV Zodiak marrooned as it couldnt be easily shifted when the shattered bearing seized up the rear axle. :LOL:


graeme
 
Fair enough Richard,

what you say makes sense, but i tend to think differently. Probably because i decided to rely upon my 2 classics for transport and work, so i don't like unscheduled maintenance. :LOL:

Your case is obviously different though...
 
ghce said:
Easier to visit the problem now than to revisit it at a later date,

True enough, but I don't have a problem. The wheel bearing I have left one there is pefect, so where do you stop?

I could replace every bearing, every bush, every rubber seal, every ball joint, etc only to find that the new ones are of worse quality and will wear out very quickly, posssibly not even lasting as long as the original ones.

I fitted a new top ball joint for the MOT last year and although there is no play in it, it is certainly freer than the original on the other side.

Richard
 
Yep, i think it has been discussed before in here, some new parts are a disgrace.
I found out myself on a steering side rod that i replaced last year. One year later, and it is knocking. :?

But with bearings, at least the more common sizes, there is a hope that you can look around for higher quality.
 
We have a similar problem with 800 bottom balljoints, the factory ones can last 15 years, but the replacements are lucky to last 2 years, shocking really, it's not like you have the option to buy higher quality items either.
 
Not much to report, only it's one of those milestone moments I so love 8)

Yes, the rear suspension and axle is finished. I have torqued up the drive shafts, hub to elbow, topped up the diff (I emptied it and put a litre of fresh EP90 in it when I had it in the bench), tightened up the driveshaft to hub bolt to where I thought it should be, put the wheel on, took the wheel off again and redid it until there was no more play in the wheel :? , then dropped it onto some ramps.

a101_0436.jpg


Phew - what next? probably have a good tidy up, I can't move in here :oops:

Richard
 
The chap who is spraying my panels phoned yesterday and said they were ready, so I threw the front suspension back in and with his help have fitted them today. They are not back on properly yet, but I was impatient to see what they would look like.

a000_0099.jpg


I like it 8)
 
:LOL: sorry everyone - I tell fibs :oops:

It will be great when Sparky actually does look like that.

Nice to see you again Adam and thanks for dropping by with Jinx.

I can't believe how similar Jinx looks to what Sparky will eventually look, apart from the sunroof and black and silver plates that is.

Just hearing Jinx burble away has given me some renewed vigour to get on with it now

Richard
 
Good to see you too Richard,

I'm glad we have helped spur you on! You've done all the hard stuff, it's just a bit of spit and polish to get Sparky back together again now. :wink:
 
I second that, seeing all your progress updates sure gives me the insperation to get mine done! especially as your car is also red!.

Mine is now on axel stands on the rear, will be dropping the complete rear suspension/diff unit down, new disc, pads, all bushes replaced with poly & all cleaned & stonechipped/hammerited....oh and um some minor..ish tin worm to cut out & repair on the good old d-post! found lots of Isopon fibre glass paste filler :(
 
I haven’t managed to get the front suspension and engine back in as I wanted to over the 12 day christmas break as I have not been fit enough :evil:

I have however, been out today and stripped the offside front suspension down with a view of getting it back in this week. First thing I noticed was the link strut bush had come away from the inner tube, possibly because of a petrol leak from the pressure regulator. When I first got Sparky, there was a smell of petrol from the regulator which sat behind the servo. On closer inspection, the petrol had run down the inner wing and had soaked the underseal on the chassis rail, removing most of it and leaving the rest a soggy smelly mess. This bush was sat in the middle of that mess.

linkstrut.jpg


I then noticed to my dismay that one of the bolts on the top ball joint was loose. I caught hold of it with my hand, and the bolt head came away, leaving the bolt in the leg. It looks like the head had been glued on there.

brokenbolt.jpg


I wasn’t going to remove the top balljoint as it was in good condition, bit I did not want to leave it like that (not that it would make much difference) so out it came, leaving a very small stub which I could net get hold of. I came up with the idea of cutting a slot in the end of it with a dremel and unscrewing it with a screwdriver, knowing full well that this was the height of optimism. I cut the slot, warmed it up with a hot air gun and doused it in WD40. It then unscrewed with no fuss or drama :shock: I couldn’t believe my luck.

unscrewed.jpg


I cleaned the rest up with a variety of wire brushes and slapped on some zinc primer ready for painting later.

painted.jpg


I haven’t done the top link yet as I am sure that there is something amiss with it.

rightangle.jpg


Isn’t there supposed to be a right angle here somewhere?

That’s about it for now.

Oh I forgot

090111.jpg

:)
 
That engine and engine bay look fantastic... I'd say you're a lucky man but it's entirely earnt through hard work!

Rich
 
Back
Top