
You need to work out the order of doing things. I'd suggest leaving the sump on to support the engine under that while doing the sideplates, which as the mounting brackets will be off, fit the new mounts, then once all that's back on, sump off and do the shells, and do the chains from the front.

You are using an out of date browser. It may not display this or other websites correctly.
You should upgrade or use an alternative browser.
You should upgrade or use an alternative browser.
Lady Charlotte - 1966 2000SC
- Thread starter Dave3066
- Start date
Dave3066
Well-Known Member
I was planning on doing the side plates first as I reckon they hold the greatest chance of causing grief so tackle them first. Rest seems very sensible thanks for the tip 
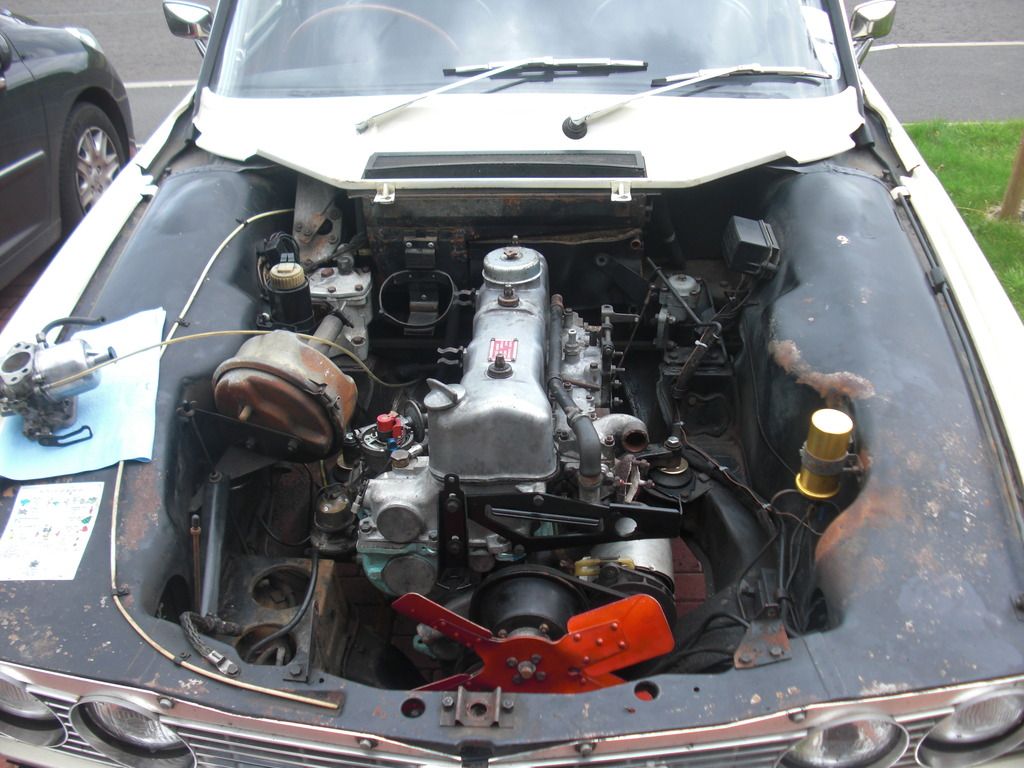
Having looked around the engine bay again there's quite a bit of room. Especially at the front with the radiator out.
Dave
Having looked around the engine bay again there's quite a bit of room. Especially at the front with the radiator out.
Dave
You'll have to remove the auxilliary drive housing (oil pump and filter housing) to do the chains, so removing that first would make doing that sideplate easier, but you have to balance the benefits of that against the downside, which is that with that out you won't be able to turn the engine over to do the shells because the chains will be too slack putting the valves at risk of touching the pistons. Swings and roundabouts.....
arthuy
Well-Known Member
I have done the side plates with engine on the floor and insitu. To be honest there wasnt much difference.
I would leave the oil pump on and just use long spanners to get the bolts off.
The engine mount bracket bolts are a pig to remove, I used a big stilson wrench and that did the trick with minimal cutting in to the thread.
Colin
I would leave the oil pump on and just use long spanners to get the bolts off.
The engine mount bracket bolts are a pig to remove, I used a big stilson wrench and that did the trick with minimal cutting in to the thread.
Colin
arthuy said:I would leave the oil pump on and just use long spanners to get the bolts off.
It's going to have to come off sometime.
Dave3066
Well-Known Member
harveyp6 said:You'll have to remove the auxilliary drive housing (oil pump and filter housing).
Will the aux drive housing and oil pump come off as a single unit or does (as the books says) the oil pump have to come off first?
Dave
Dave3066 said:Will the aux drive housing and oil pump come off as a single unit or does (as the books says) the oil pump have to come off first?
As far as I remember it's a case of disconnecting the 2 large and one small oil pipes, the bolts that hold it to the block, and the bolt through the intermediate chainwheel and the whole thing moves backwards and out.
Demetris
Well-Known Member
Given the amount of time you will have to spend working around the engine, if i had an engine hoist, i would be tempted to just pull the engine-gearbox out and then simply work comfortably with the engine in the stand. :wink:
Bending for hours in the engine bay is not that fun, nor lying on your back changing the bearings. There is just no comparison in working conditions. Plus with the engine - gearbox out you can easily refurbish the engine bay, paint the engine, sort throttle and gearchange linkage etc. Granted, there will be more work to do in the given time, but the results will be more satisfactory.
I have replaced an engine - gearbox in my TC in a day working alone. I had to remove the bonnet completely, but other than that it was not difficult.
Dave3066
Well-Known Member
I was hoping you'd comment Demetris
I do have an engine hoist and the option of having the engine on a stand and the flexibility that allows in terms of working height and the ability to turn the engine upside down to do the bottom end is quite appealing.
My back will probably thank me too.
The engine bay could also do with a tidy so I'm still contemplating pulling both out....hmmmm. I'll see how I feel on the day and if the mood takes me the engine and box will come out.
Thanks
Dave
I do have an engine hoist and the option of having the engine on a stand and the flexibility that allows in terms of working height and the ability to turn the engine upside down to do the bottom end is quite appealing.
Demetris said:Bending for hours in the engine bay is not that fun
My back will probably thank me too.
The engine bay could also do with a tidy so I'm still contemplating pulling both out....hmmmm. I'll see how I feel on the day and if the mood takes me the engine and box will come out.
Thanks
Dave
sdibbers
Well-Known Member
I'd have to agree with Demitrius's advice. You can do all the jobs with the engine in situ but it is much easier to get it all done out of the car. To your question on the lower timing chain tensioner, yes you can access it with the sump dropped, it's a bit of a fiddle getting the plug in on the new one though. When my tensioner failed last month it sounded like a bad bearing on the alternator. But if the spring has gone or the old plug has fallen out that could cause rattles.
I found the side plates much easier to replace with engine out, but I may be clumsy and need the extra room. Also with the VW mounts you may have to increase the size of the hole in the base unit by about 1.00mm for the new mounts to fit. Having good access for a sanding drum on and electric drill will certainly help you. Although I see you have an SC not a TC so space may not be such a premium on your car. That and I have twin servos which cover the right hand mount.
I found the side plates much easier to replace with engine out, but I may be clumsy and need the extra room. Also with the VW mounts you may have to increase the size of the hole in the base unit by about 1.00mm for the new mounts to fit. Having good access for a sanding drum on and electric drill will certainly help you. Although I see you have an SC not a TC so space may not be such a premium on your car. That and I have twin servos which cover the right hand mount.
Dave3066
Well-Known Member
So... I took 3 days off work last week and gave myself 5 whole days to do three main jobs on Lady C's engine:
1. Replace the side plates
2. Replace the timing chains and tensioners
3. Replace the mains and big end bearings
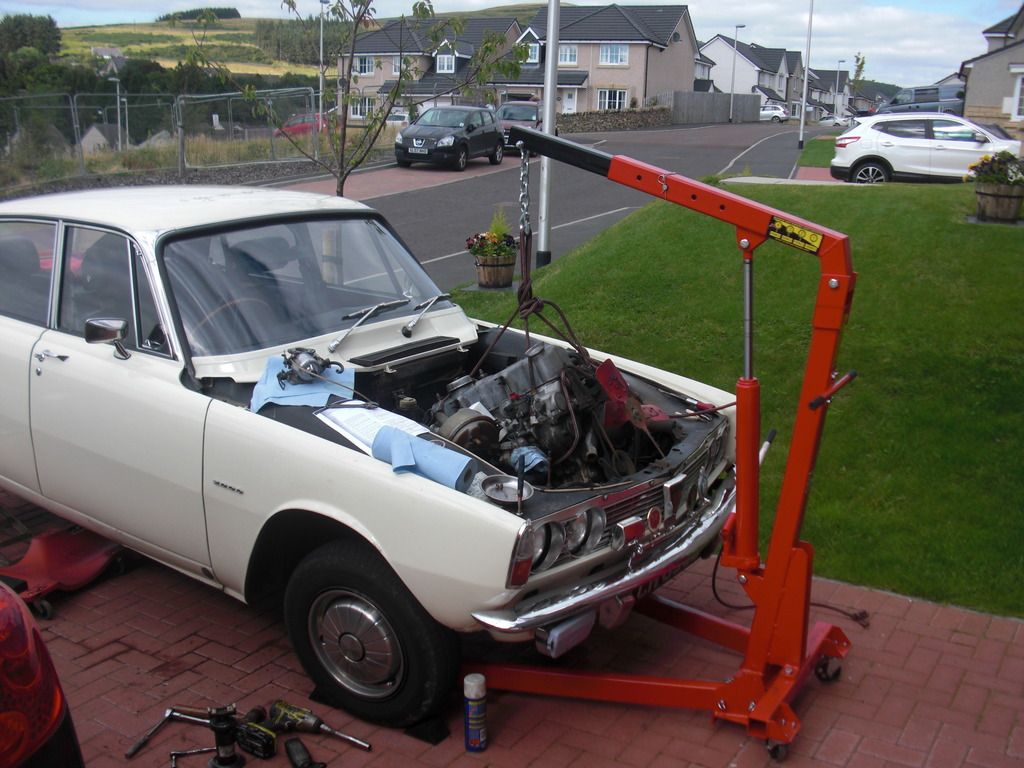
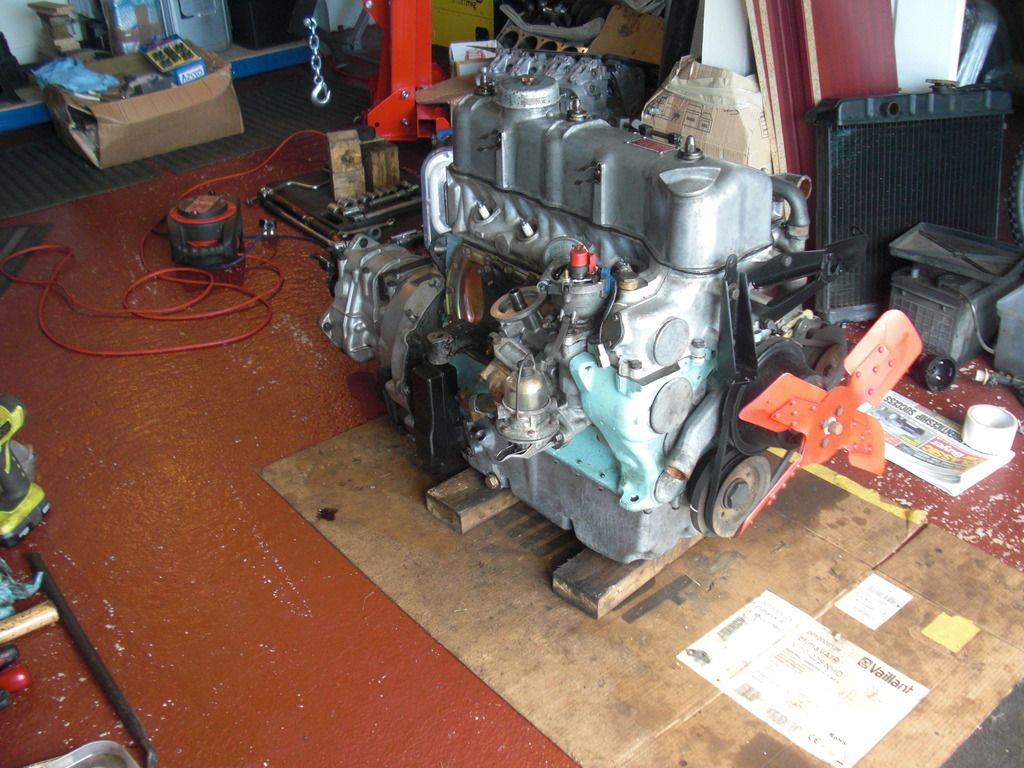
I'd decided the engine and gearbox would come out so I could get nice and comfy(ish) in the garage to do all this work. As well as those main jobs I also wanted to fix a few oil leaks and replace the engine mounts with new VW ones. So I started on Wednesday morning with the car on the drive, the back end up on ramps, the bonnet removed.
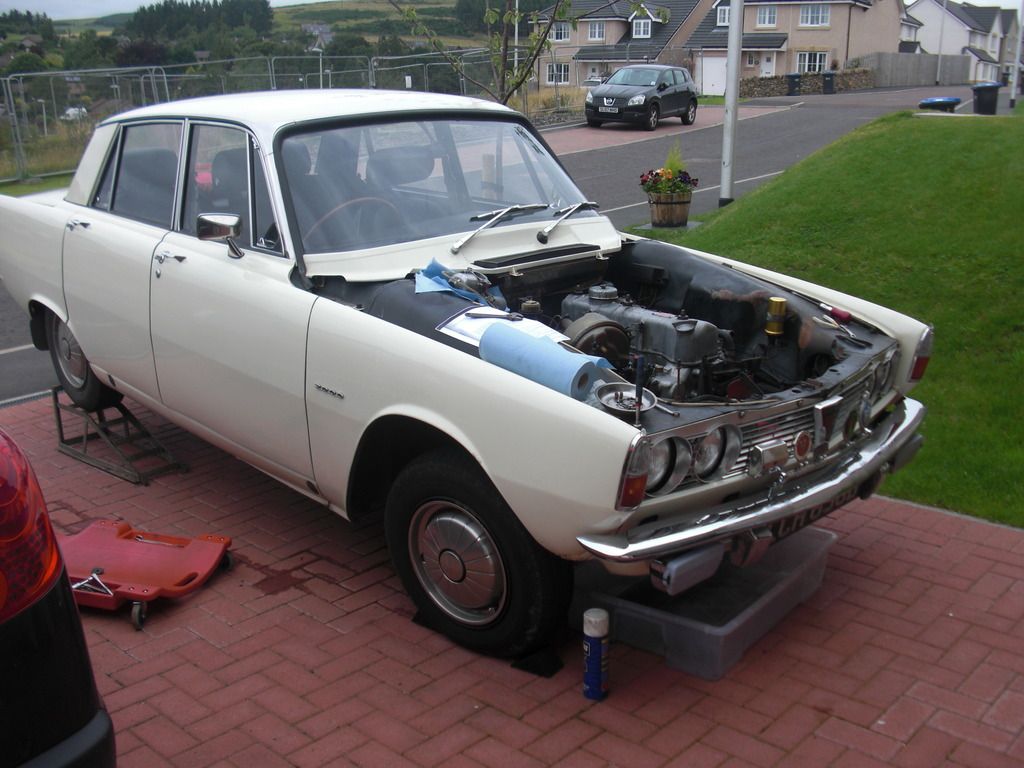
The weather stayed dry for the whole day, which made life a whole more comfortable. I photocopied the relevant pages from the workshop manual to keep the manual clean and kept the pages in the order I wanted to work in. Once the coolant and oil were drained out of the engine and gearbox, and everything was disconnected the engine was ready to come out.
Note the "sharp angle" as the manual describes it, that the assembly has to achieve to clear the slam panel. The rope sling I used here is a tad too long and even at full height the rear gearbox mount just failed to clear it. I ended up standing in the engine bay and lifting the back end up and over the slam panel whilst also trying to push the hoist away.
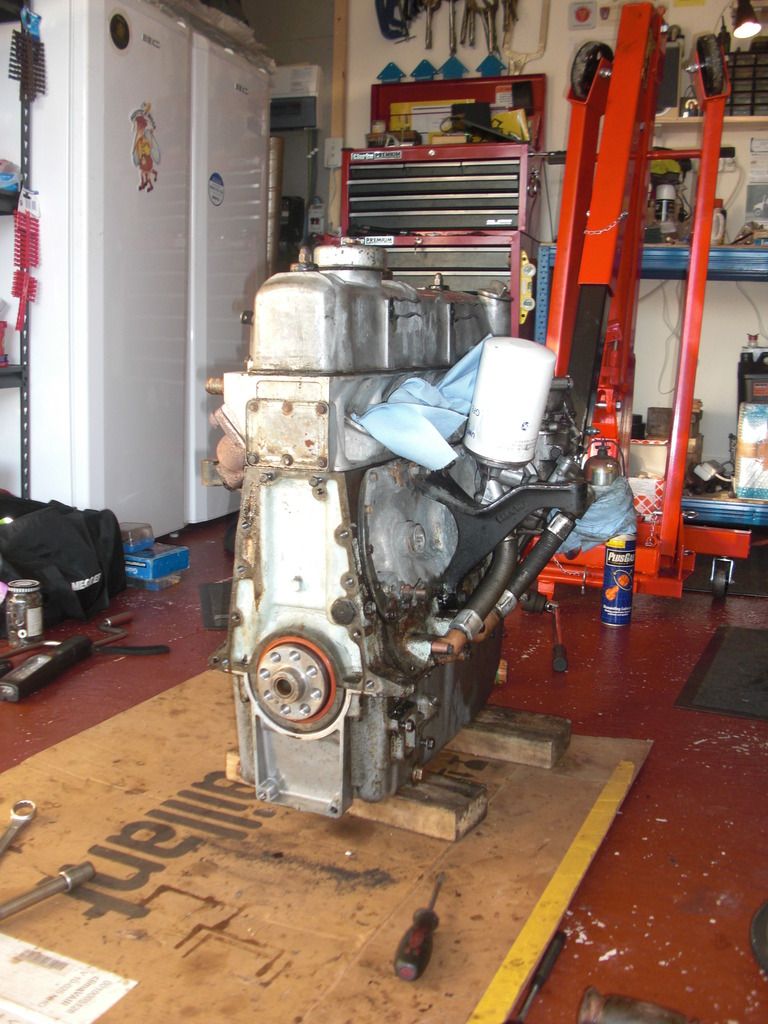
Assembly out and resting on blocks on the garage floor.
Things you don't realise will hinder you until you experience it
1. Block paving on a drive is not the easiest to pull/push a heavily laden engine hoist
2. The garage door sealant strip along the bottom of the entrance represents a significant bump for the same :roll:
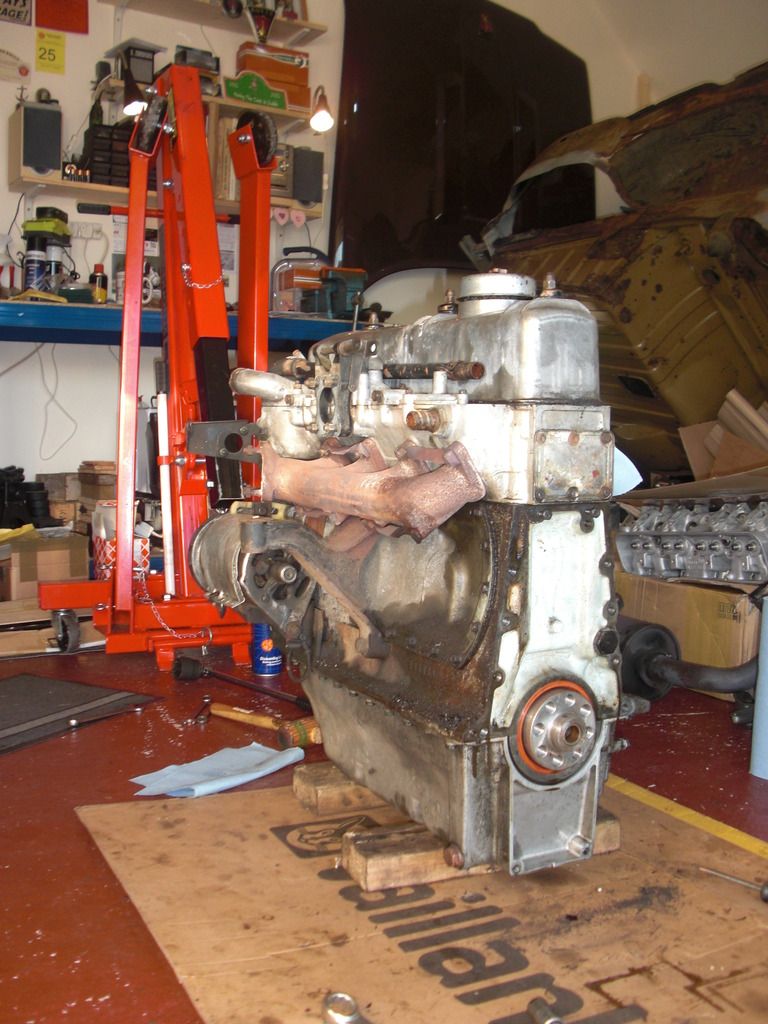
We live and learn I guess. Now my plan had been to split the engine and box, remove the clutch and flywheel and mount the engine on a stand. Except the mounting plate on the stand I have wouldn't fit this engine. No matter how I tried to configure it, it just wouldn't fit. So I was resigned to working on the floor with the engine on blocks.
You can see the source of one oil leak here at the rear main crank seal. This would be replaced.
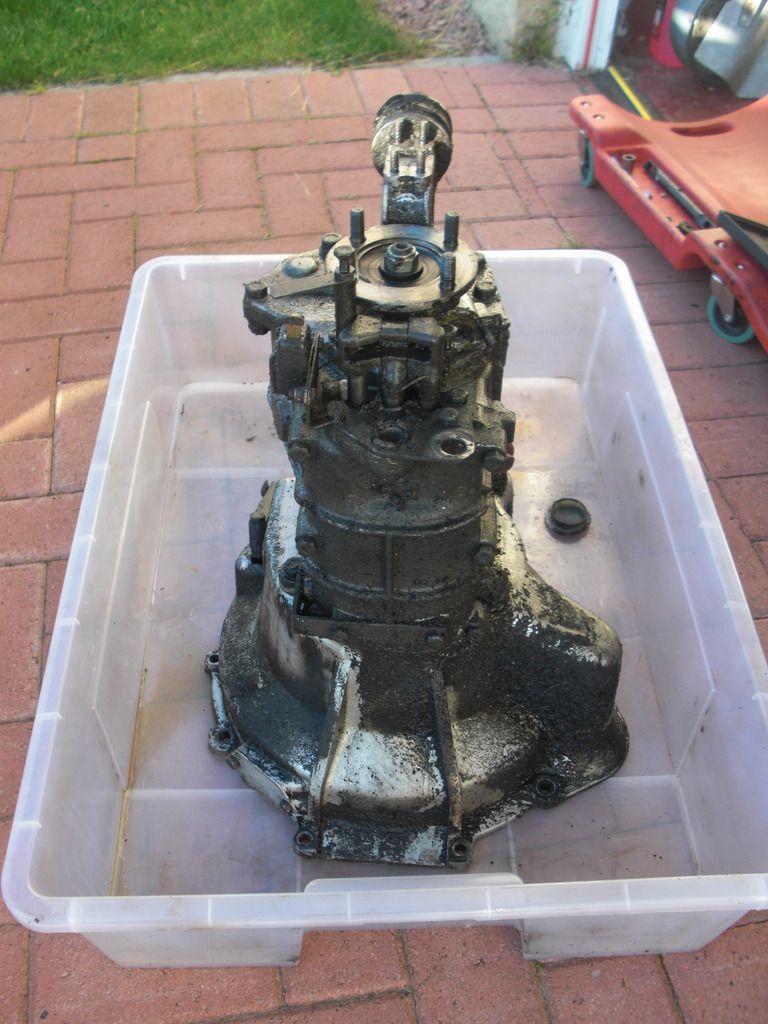
...and the gearbox needs a good clean!
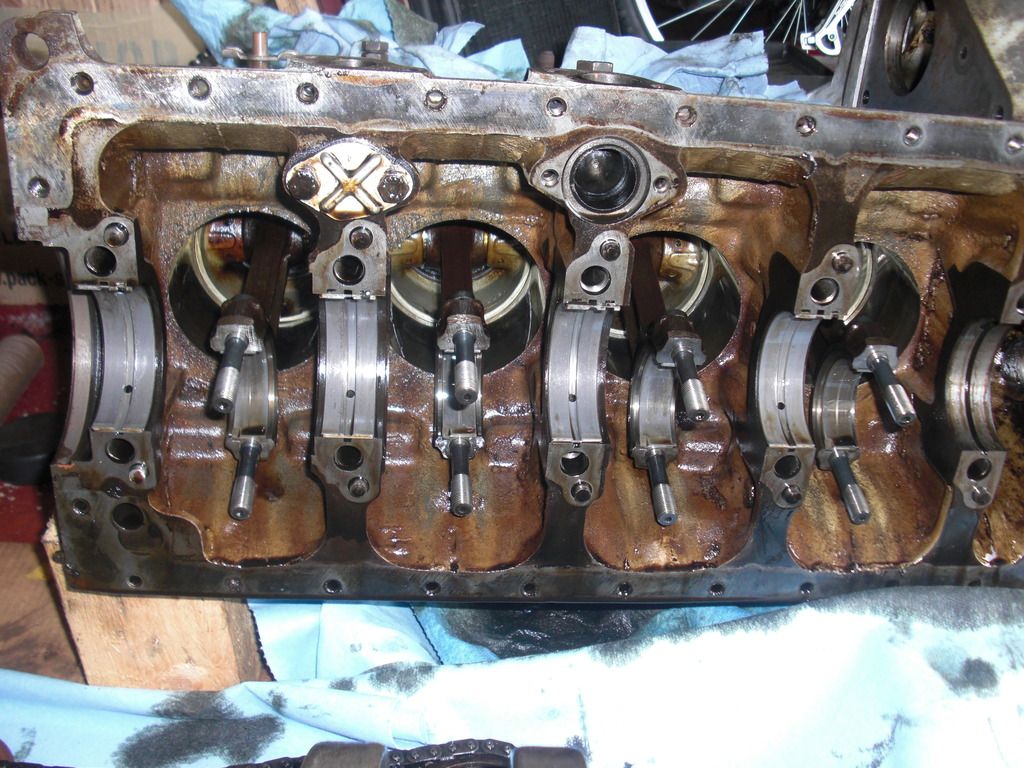
Once all ancillaries were removed (dynamo, starter, exhaust manifold, oil pump, auxiliary drive housing etc) I was able to get the side plates off. Most of the bolts came out very easily...
...yes even those ones. I had to lock a couple of nuts onto one to get it out, but no major dramas. With the side plates off you could see the level of sludge in the water jacket.
Left hand side (exhaust manifold)
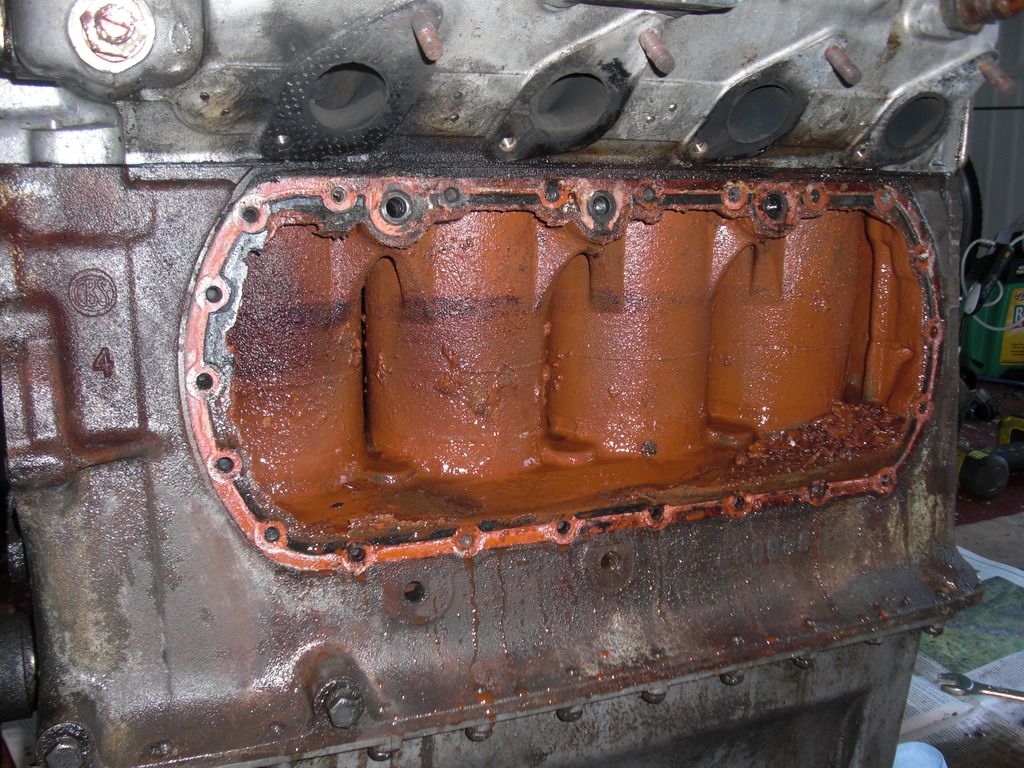
Right hand side
That's about an inch of solid sludge at the bottom. I took advantage of the nice weather to get the engine onto the creeper and get it out into the sun. Covered the top with polythene and plugged up any apertures before scraping out what I could and blasting the rest with the pressure washer.
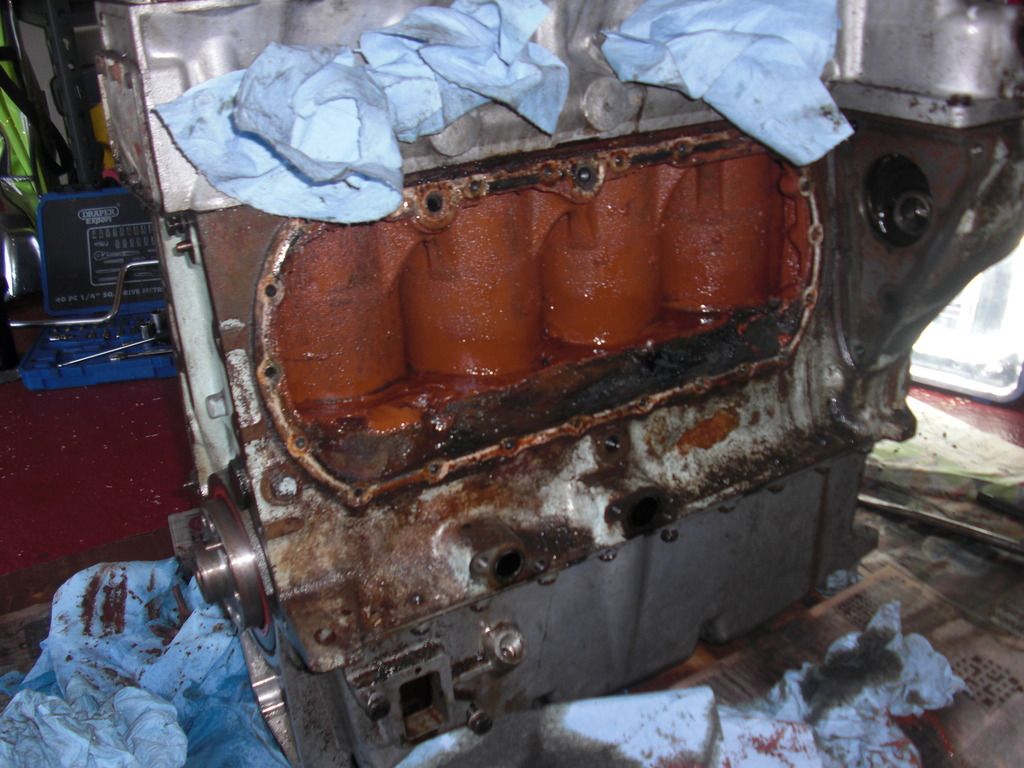
Then back into the garage and new side plates fitted. I used Hylomar Blue on the gaskets, drain plug and the big plug in the right hand side plate (more on that later). That was enough for one day and as Thursday dawned wet and miserable I was glad I was able to work in the garage all day. I started by lowering the engine down onto one side and removing the sump.

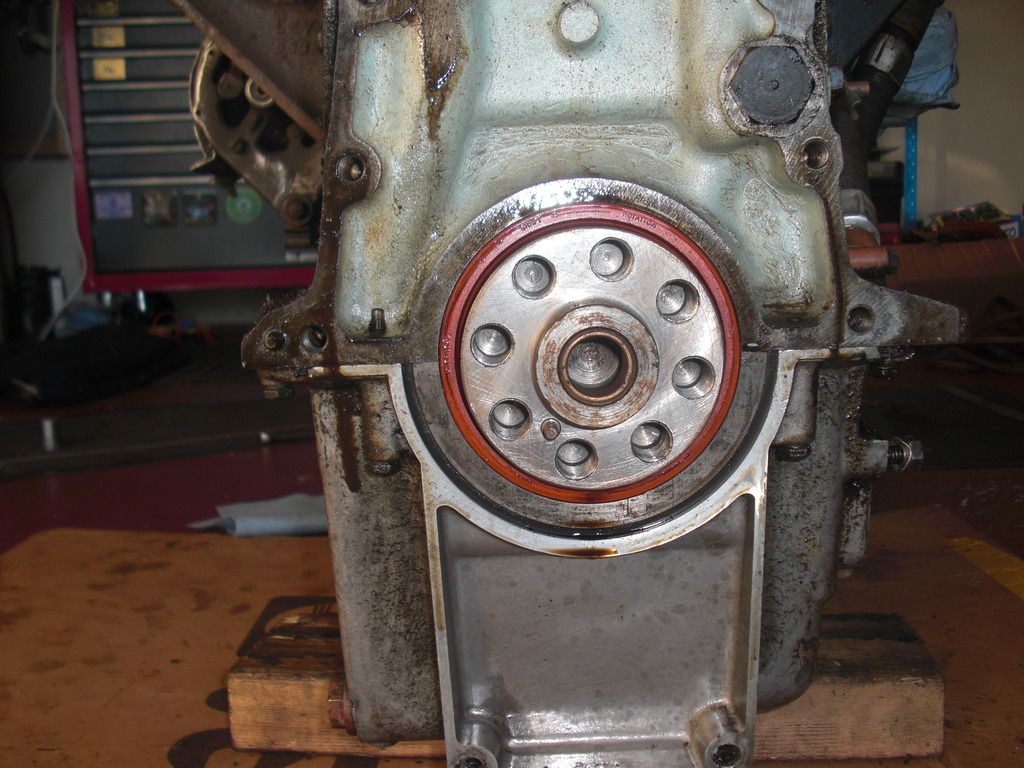
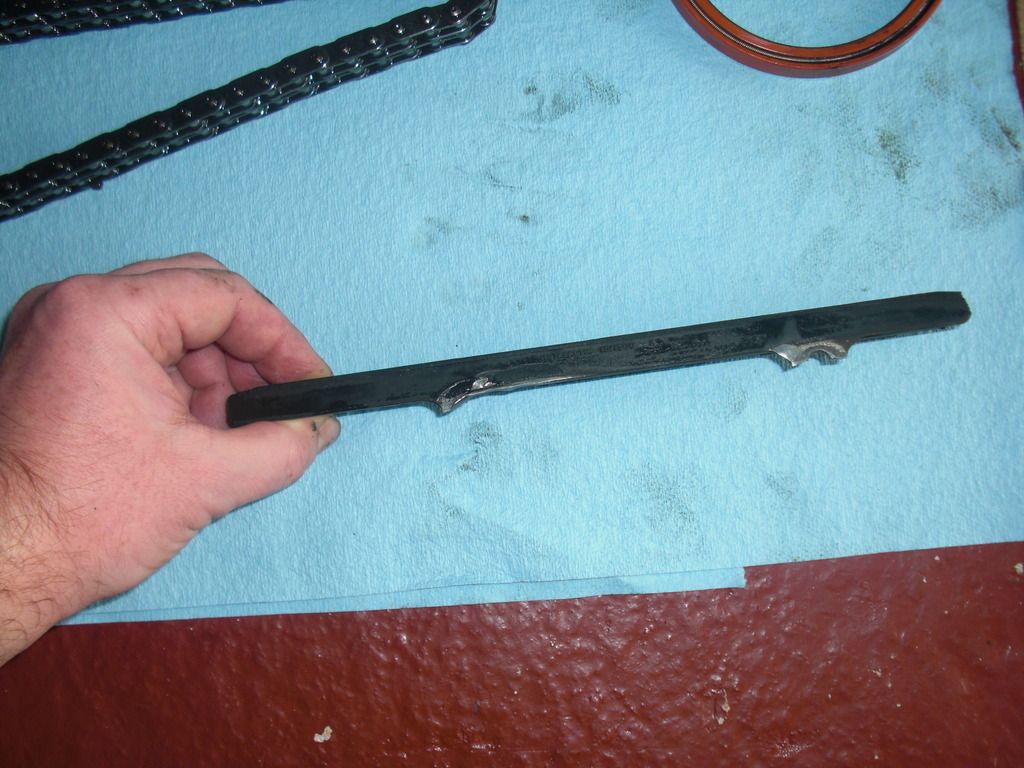
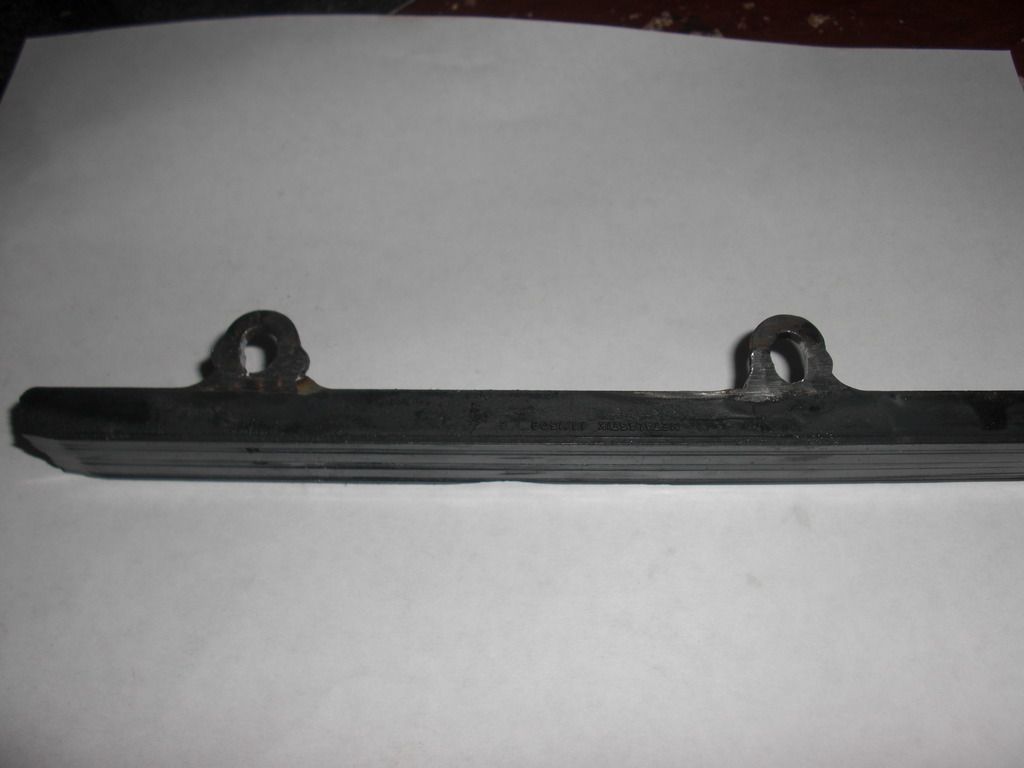
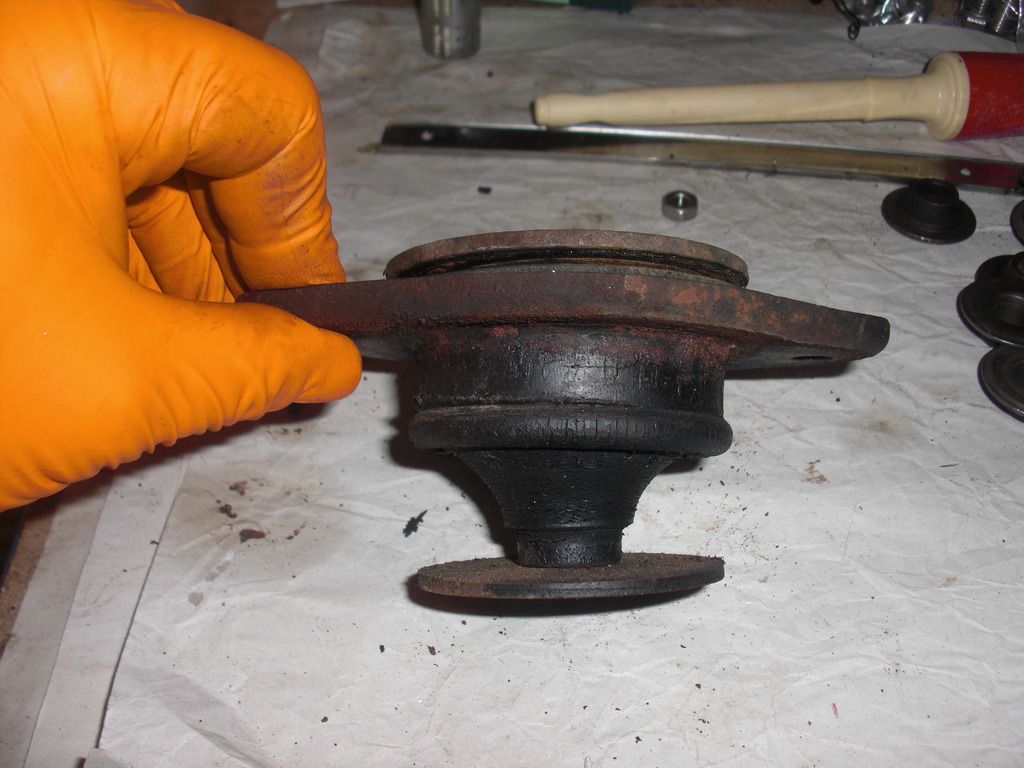
I painted lots of alignment marks on various bits to check during reassembly...this one on the front pulley with the crank locked at EP. Once the sump was off I discovered the source of the rattle coming from the bottom timing chain...
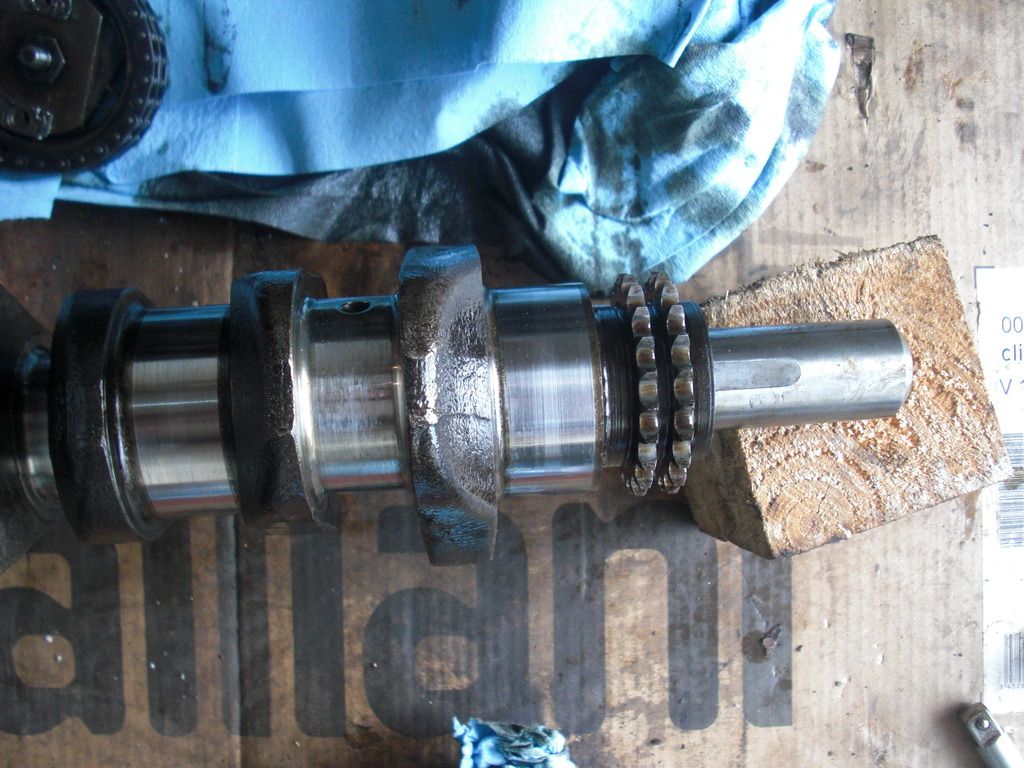
The fixing lugs on the vibration damper had sheared completely and it was resting against the block. The chain had clearly struck the damper at some stage as there was a big witness mark on the underside. I called a couple of suppliers but no-one had a spare. This was around 4:30pm on Thursday so panic was starting to set in at this stage. A plea on Facebook resulted in a message from a fellow forum member to say he had one and could post it to me special delivery to arrive on Saturday. I was saved (more on this later too)! So I carried on removing the crankshaft and bottom end bearings. That probably takes me into Friday, which was another nice sunny day
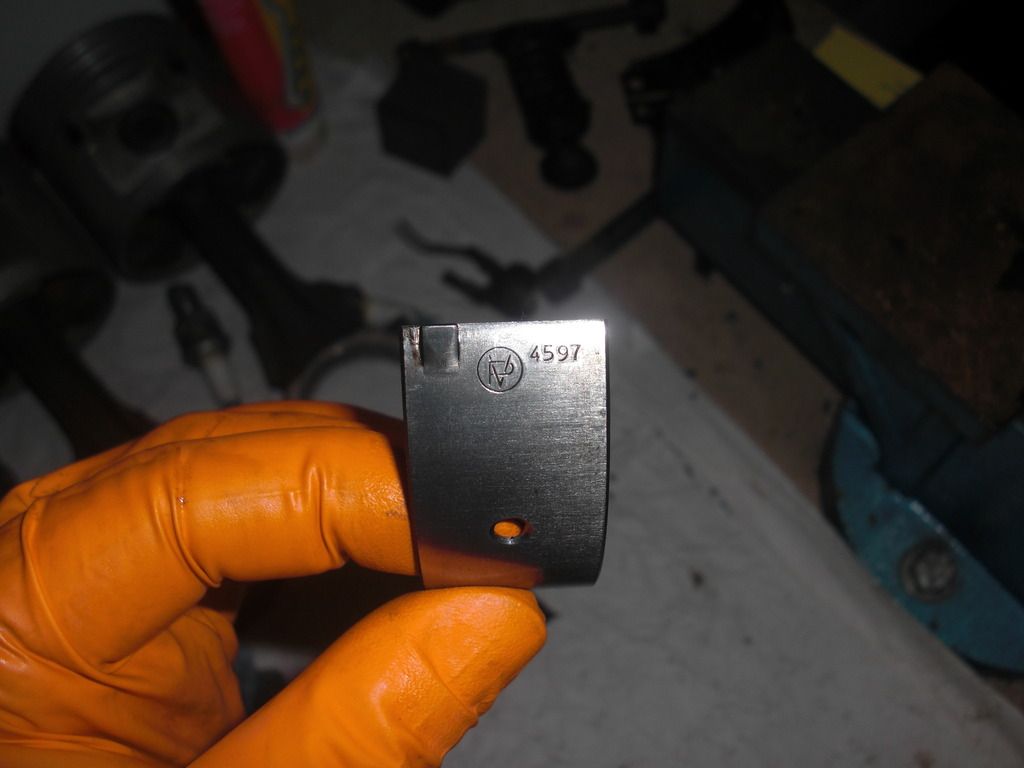
With the crank removed I had my first look at the top bearing shells
and the crank journals

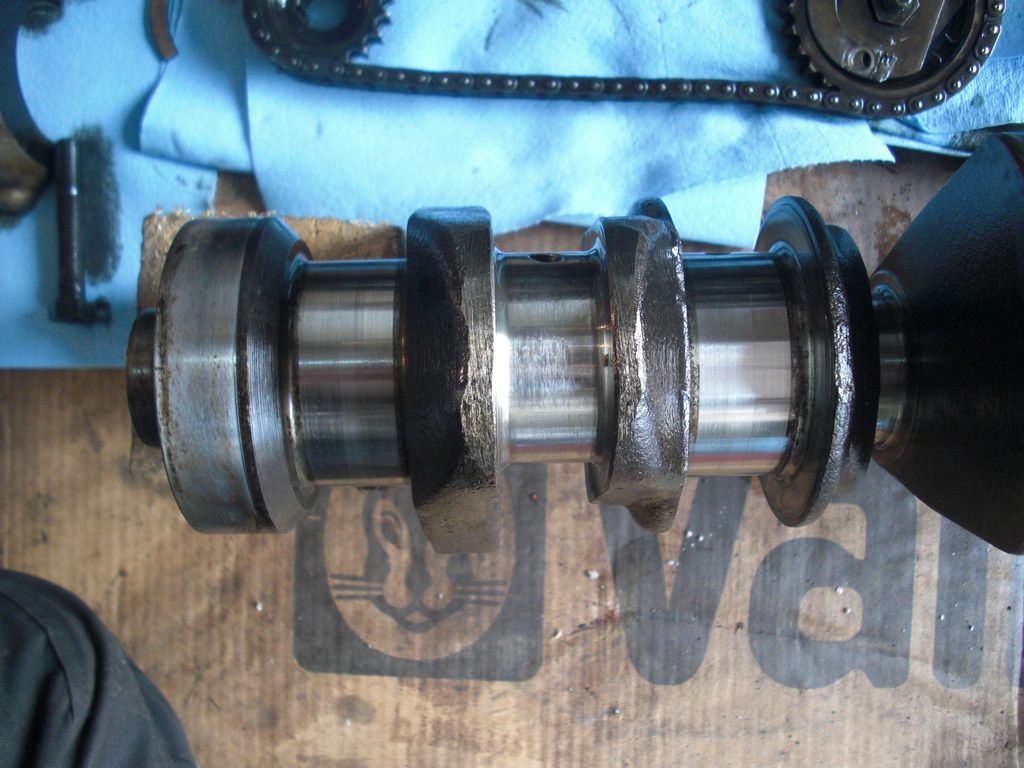
They look pretty good.
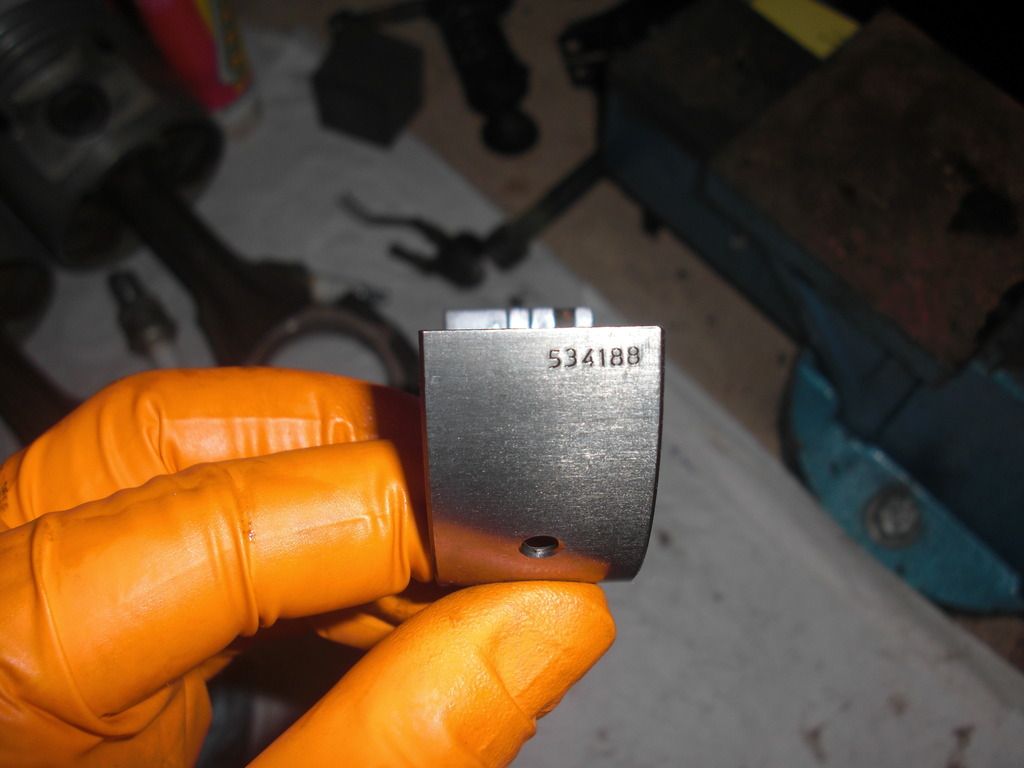
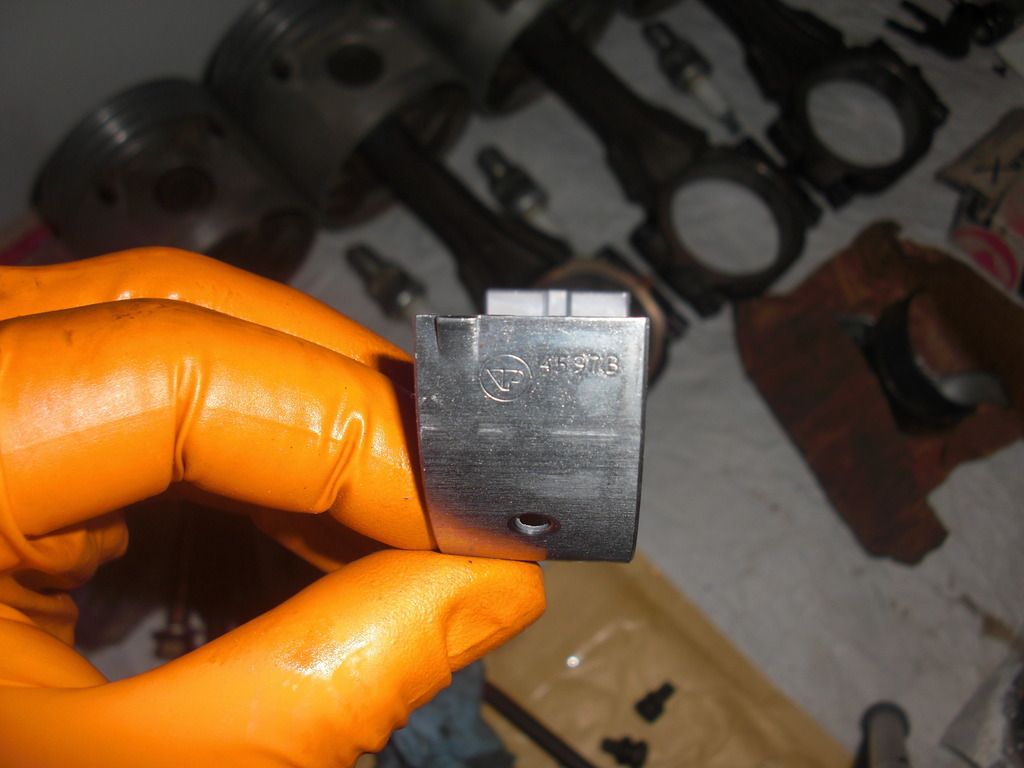
Main shells out for a closer look

Apart from a deep score in the bottom shell of number 4 main (which I knew about) the rest looked in fairly good condition for 90k miles
Some numbers for you
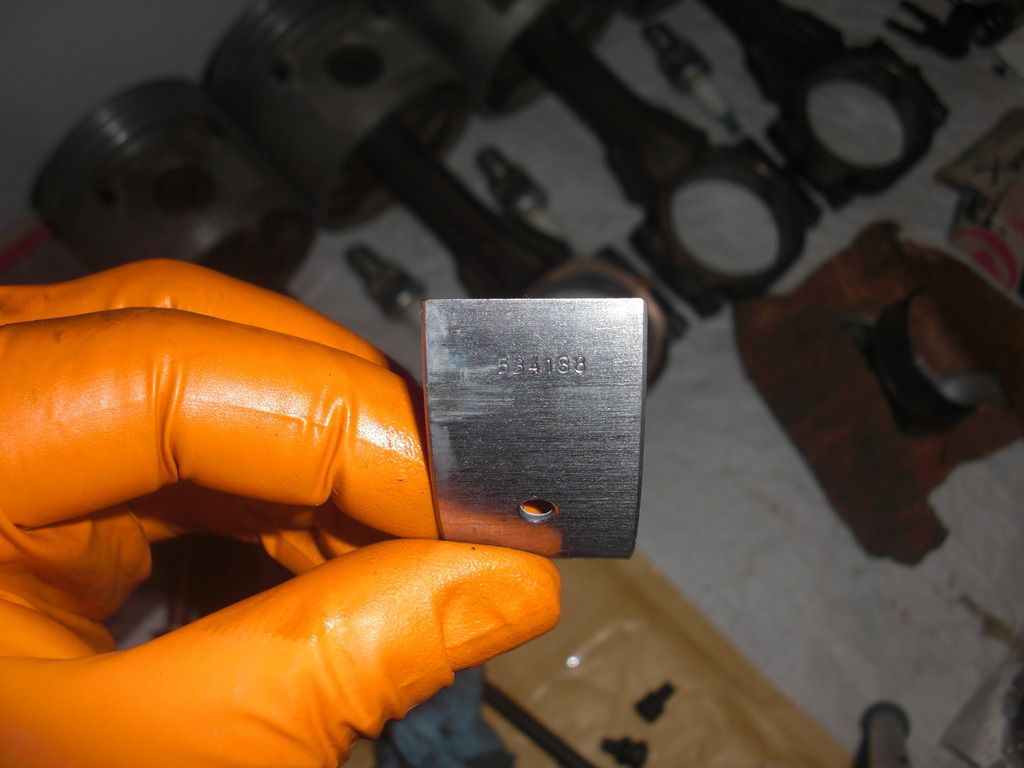
Big end shells out for a closer look
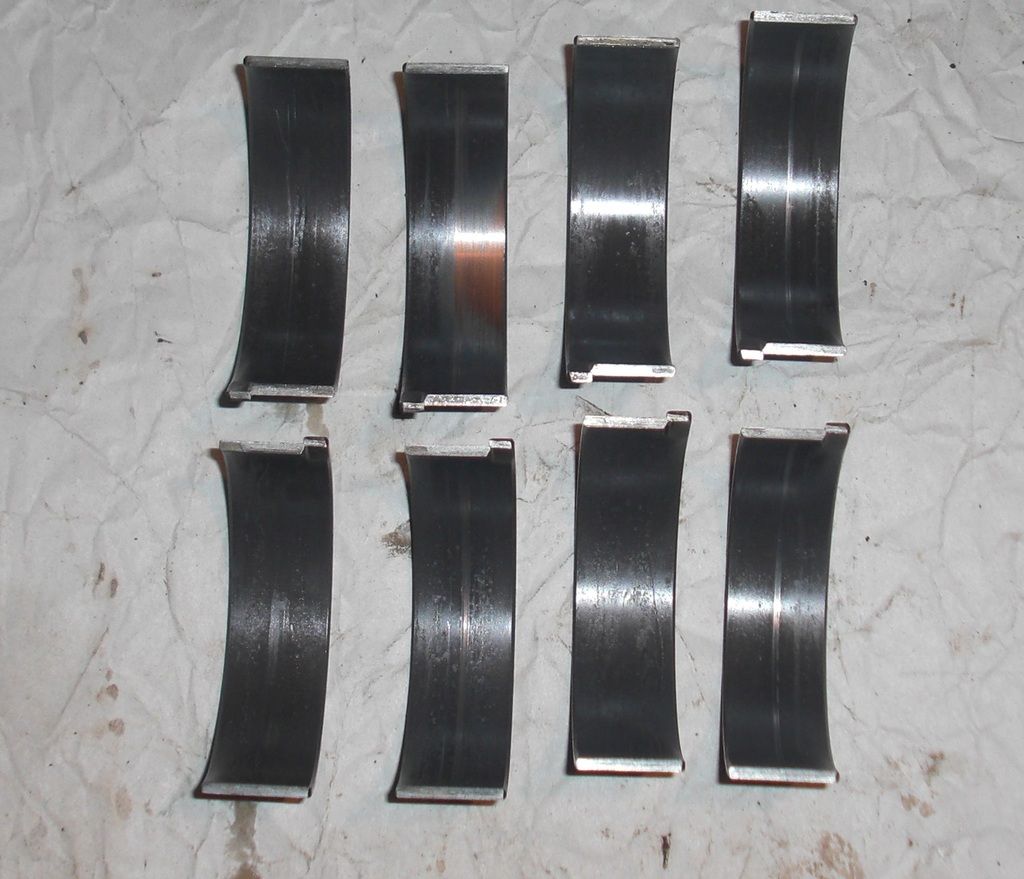
Top shell on number 3 piston shows most wear. More numbers:
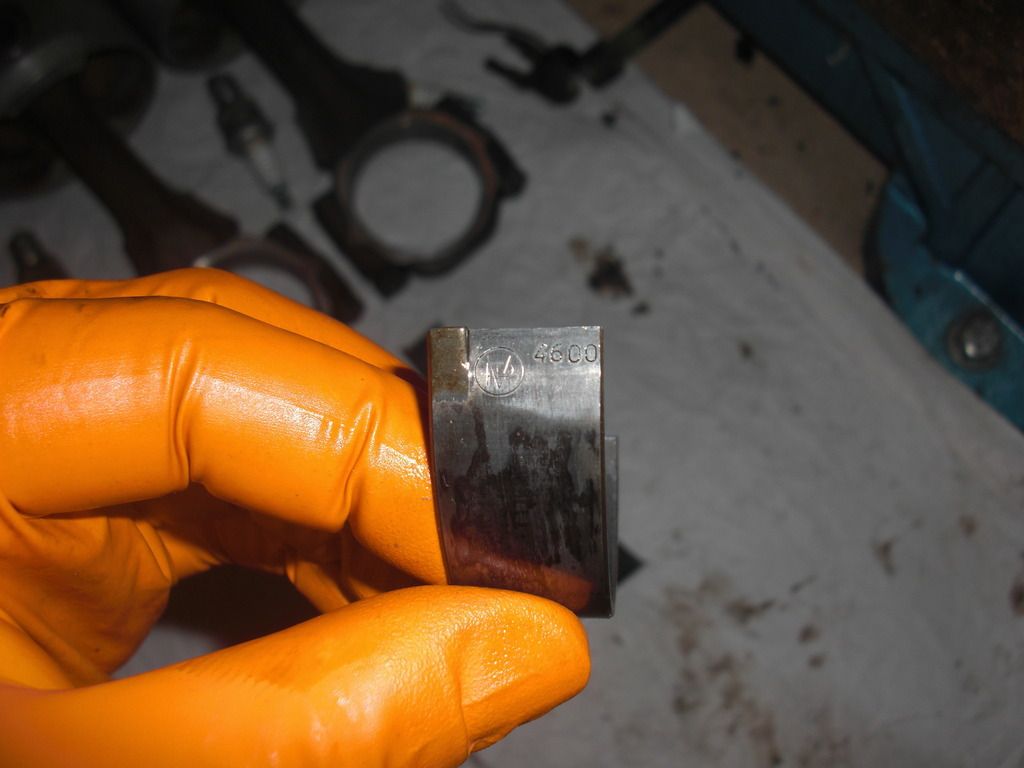
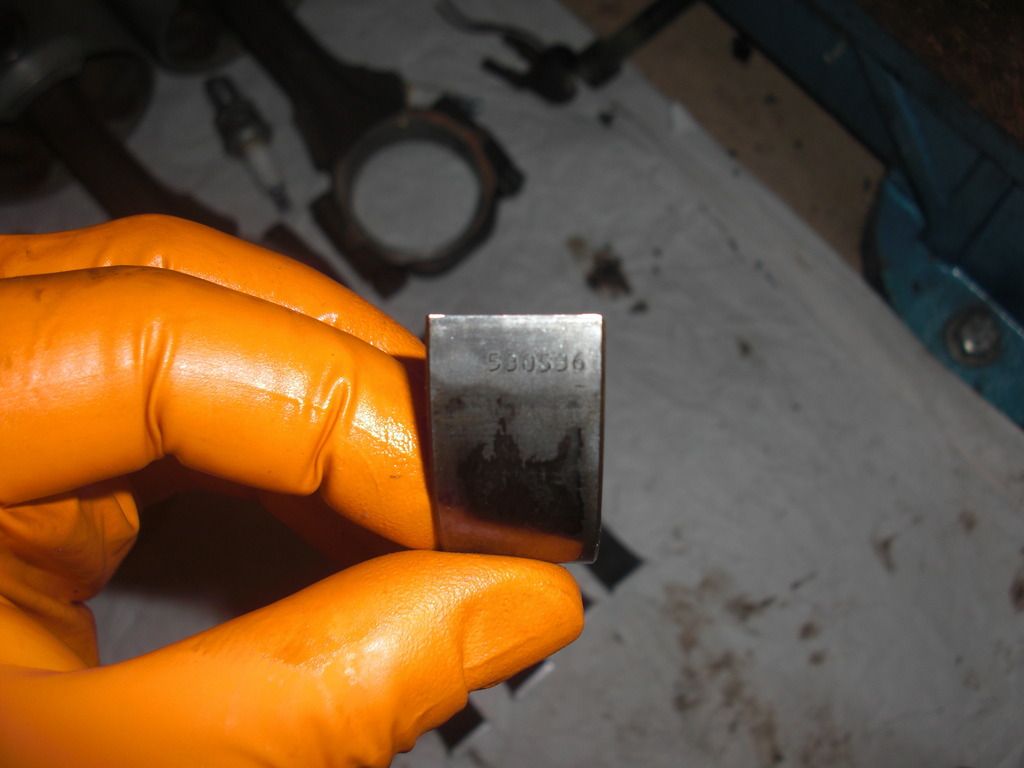
Numbers on the new big end shells

...and the mains
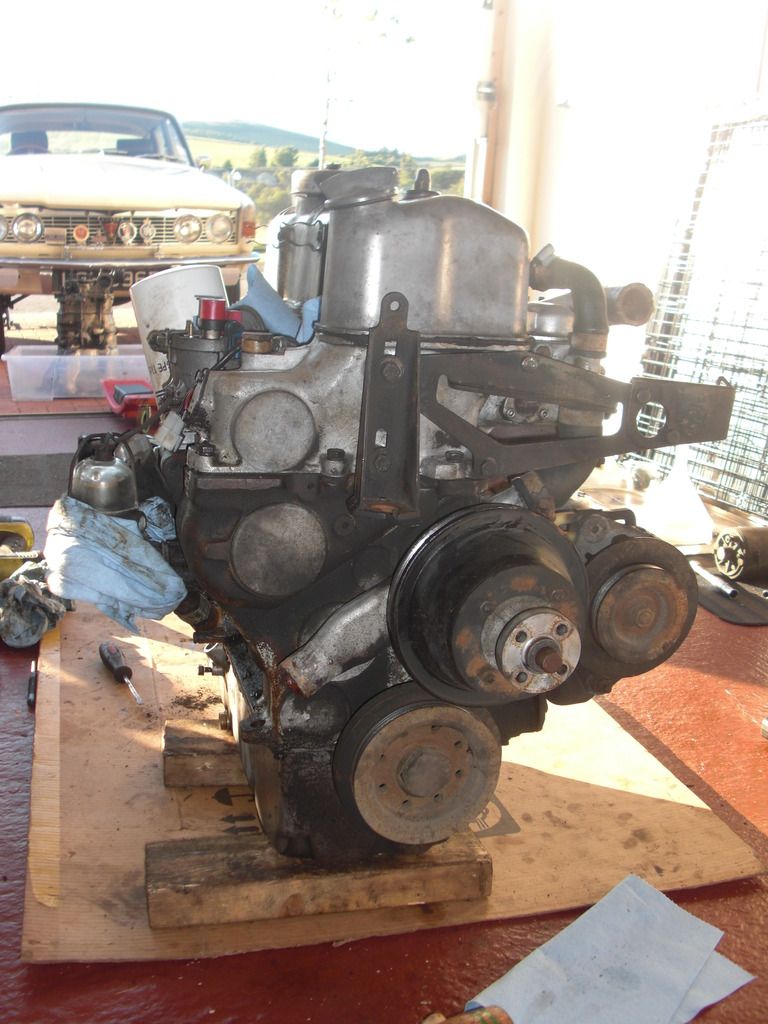
The manual gives a specific method of checking the mains' caps for wear and for selective fitment of the new shells. After checking with the feeler gauges it didn't matter how the shells were selected, the clearance was much the same across all caps give or take 0.001". All big ends and mains were fitted after smearing with Graphogen and checking for free rotation of the crank as I progressed. Once that was done I started on the timing chains. A bit tricky with the engine on its side, but I managed to get the aux housing drive dog through both intermediate sprockets. Next came the oil pump and pipes. I soaked the oil pump in fresh engine oil, replaced all rubber seals and coated all mating surfaces with Stagg Wellseal. That was it for Friday.
1. Replace the side plates
2. Replace the timing chains and tensioners
3. Replace the mains and big end bearings
I'd decided the engine and gearbox would come out so I could get nice and comfy(ish) in the garage to do all this work. As well as those main jobs I also wanted to fix a few oil leaks and replace the engine mounts with new VW ones. So I started on Wednesday morning with the car on the drive, the back end up on ramps, the bonnet removed.

The weather stayed dry for the whole day, which made life a whole more comfortable. I photocopied the relevant pages from the workshop manual to keep the manual clean and kept the pages in the order I wanted to work in. Once the coolant and oil were drained out of the engine and gearbox, and everything was disconnected the engine was ready to come out.

Note the "sharp angle" as the manual describes it, that the assembly has to achieve to clear the slam panel. The rope sling I used here is a tad too long and even at full height the rear gearbox mount just failed to clear it. I ended up standing in the engine bay and lifting the back end up and over the slam panel whilst also trying to push the hoist away.
Assembly out and resting on blocks on the garage floor.


Things you don't realise will hinder you until you experience it
1. Block paving on a drive is not the easiest to pull/push a heavily laden engine hoist
2. The garage door sealant strip along the bottom of the entrance represents a significant bump for the same :roll:
We live and learn I guess. Now my plan had been to split the engine and box, remove the clutch and flywheel and mount the engine on a stand. Except the mounting plate on the stand I have wouldn't fit this engine. No matter how I tried to configure it, it just wouldn't fit. So I was resigned to working on the floor with the engine on blocks.


You can see the source of one oil leak here at the rear main crank seal. This would be replaced.

...and the gearbox needs a good clean!

Once all ancillaries were removed (dynamo, starter, exhaust manifold, oil pump, auxiliary drive housing etc) I was able to get the side plates off. Most of the bolts came out very easily...
arthuy said:The engine mount bracket bolts are a pig to remove, I used a big stilson wrench and that did the trick with minimal cutting in to the thread.
...yes even those ones. I had to lock a couple of nuts onto one to get it out, but no major dramas. With the side plates off you could see the level of sludge in the water jacket.
Left hand side (exhaust manifold)

Right hand side

That's about an inch of solid sludge at the bottom. I took advantage of the nice weather to get the engine onto the creeper and get it out into the sun. Covered the top with polythene and plugged up any apertures before scraping out what I could and blasting the rest with the pressure washer.

Then back into the garage and new side plates fitted. I used Hylomar Blue on the gaskets, drain plug and the big plug in the right hand side plate (more on that later). That was enough for one day and as Thursday dawned wet and miserable I was glad I was able to work in the garage all day. I started by lowering the engine down onto one side and removing the sump.

I painted lots of alignment marks on various bits to check during reassembly...this one on the front pulley with the crank locked at EP. Once the sump was off I discovered the source of the rattle coming from the bottom timing chain...

The fixing lugs on the vibration damper had sheared completely and it was resting against the block. The chain had clearly struck the damper at some stage as there was a big witness mark on the underside. I called a couple of suppliers but no-one had a spare. This was around 4:30pm on Thursday so panic was starting to set in at this stage. A plea on Facebook resulted in a message from a fellow forum member to say he had one and could post it to me special delivery to arrive on Saturday. I was saved (more on this later too)! So I carried on removing the crankshaft and bottom end bearings. That probably takes me into Friday, which was another nice sunny day
With the crank removed I had my first look at the top bearing shells

and the crank journals


They look pretty good.
Main shells out for a closer look

Apart from a deep score in the bottom shell of number 4 main (which I knew about) the rest looked in fairly good condition for 90k miles
Some numbers for you


Big end shells out for a closer look

Top shell on number 3 piston shows most wear. More numbers:


Numbers on the new big end shells

...and the mains


The manual gives a specific method of checking the mains' caps for wear and for selective fitment of the new shells. After checking with the feeler gauges it didn't matter how the shells were selected, the clearance was much the same across all caps give or take 0.001". All big ends and mains were fitted after smearing with Graphogen and checking for free rotation of the crank as I progressed. Once that was done I started on the timing chains. A bit tricky with the engine on its side, but I managed to get the aux housing drive dog through both intermediate sprockets. Next came the oil pump and pipes. I soaked the oil pump in fresh engine oil, replaced all rubber seals and coated all mating surfaces with Stagg Wellseal. That was it for Friday.
Dave3066
Well-Known Member
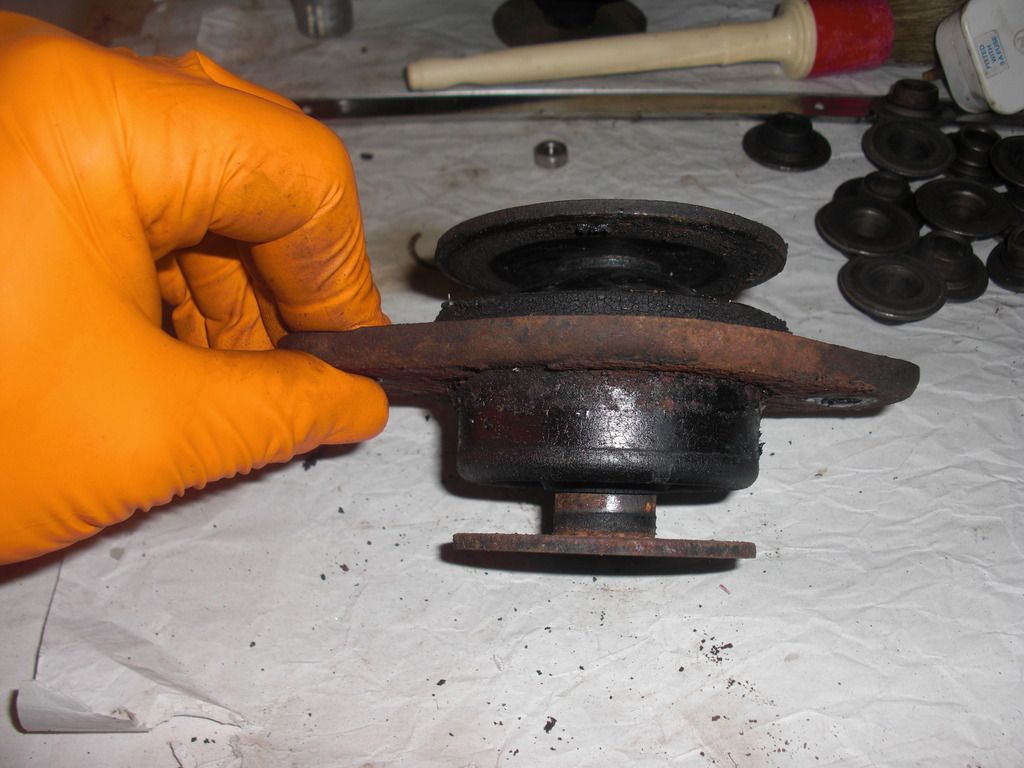
Saturday dawned another lovely day (2 consecutive sunny days in Scotland is rare ). I still had the top chain vibration damper to fit. It was at this stage that I realised it can't be fitted with the bottom chain in place. No matter how many angles I tried it just wouldn't fit between the bottom chain and the block. So off came the aux drive and timing chains again :roll: With the top vibration damper fitted I was just waiting for Royal Mail to deliver the bottom damper. As the time approached noon, I realised it wasn't coming. I checked the RM website to see where it was and it had apparently not been delivered because they couldn't read the address...it was 12 miles away in Peebles, but it might just as well have been across the other side of the world.
At this stage I'd like to offer a personal thanks to hermione149 aka Kev Watkiss of this forum for going to all the effort of packaging and posting it to me. Unfortunately Royal Mail let us both down and the item is being returned to sender. Thanks Kev.
During fitment of the new timing chains I discovered that the vibration damper fixing lugs were still attached to the bolts that were still fitted to the block. So all was not lost. Out came the welder and clamps and I managed to weld the lugs back onto the damper.
All that fuss for nothing really.
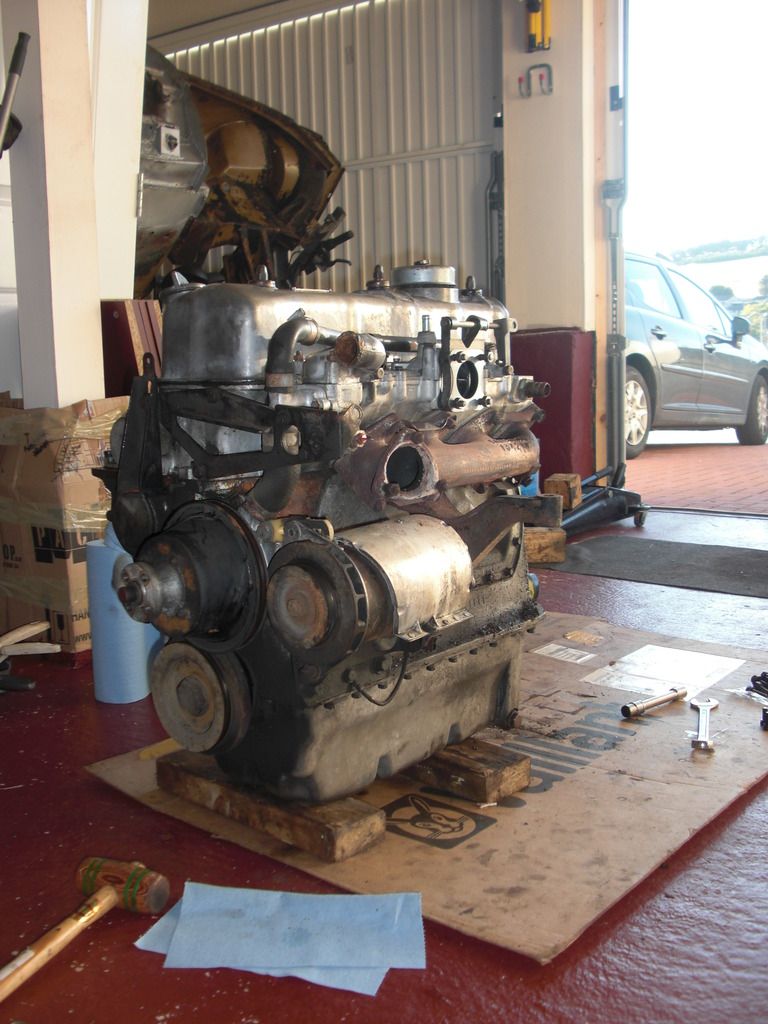
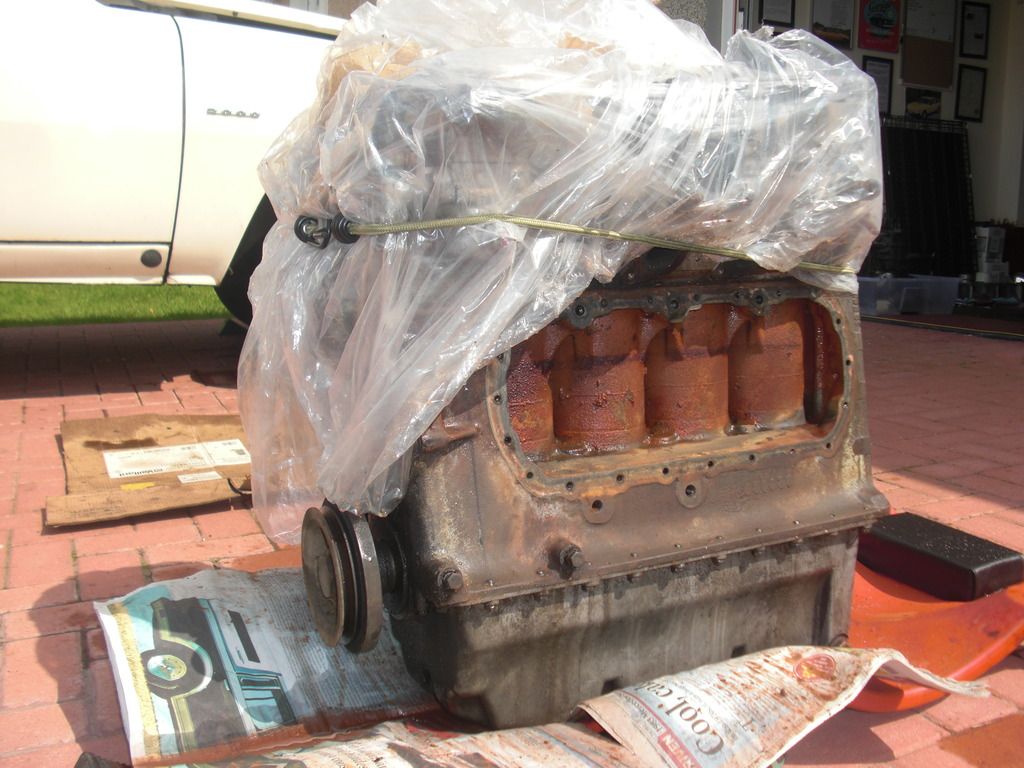
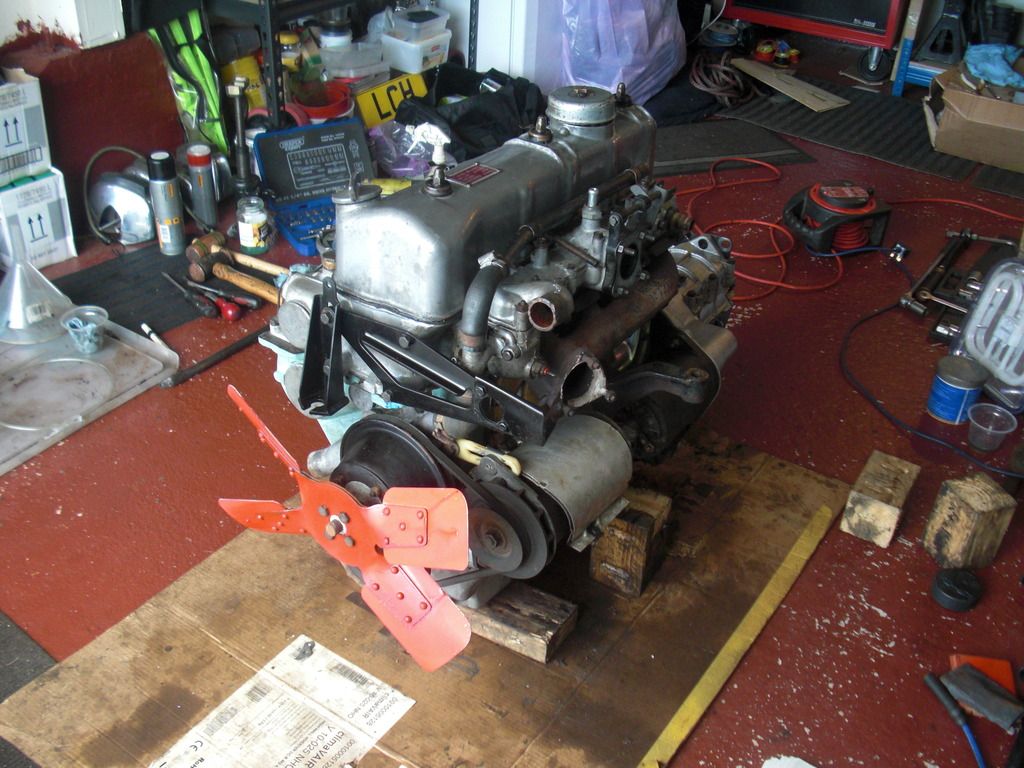
So it was full steam ahead on the rebuild as I wanted to be in a position to start putting the engine back on Sunday morning. New tensioners fitted, new rear and front seals fitted and sump back on to get the engine upright again. I had the usual faff fitting the cam sprocket to the camshaft. Adjusting the inner wheel by one tooth at a time whilst trying to maintain tension on the top chain to align the holes. I checked to make sure everything was tight before aligning the camshaft and crankshaft to fit the distributor. The book says to align the crank to the 4 degree mark, lock the cam with number one cylinder firing and fit the distributor so the rotor arm points towards number 1 HT lead. Once done it was a matter of fitting the remaining ancillaries, exhaust manifold with new gaskets (much easier doing this with the engine on the floor), the clutch was already back on so the gearbox, after being cleaned, was refitted too. I cleaned everything in a paraffin bath and actually managed to get a coat of paint on the block too. Here it is ready to go back in:
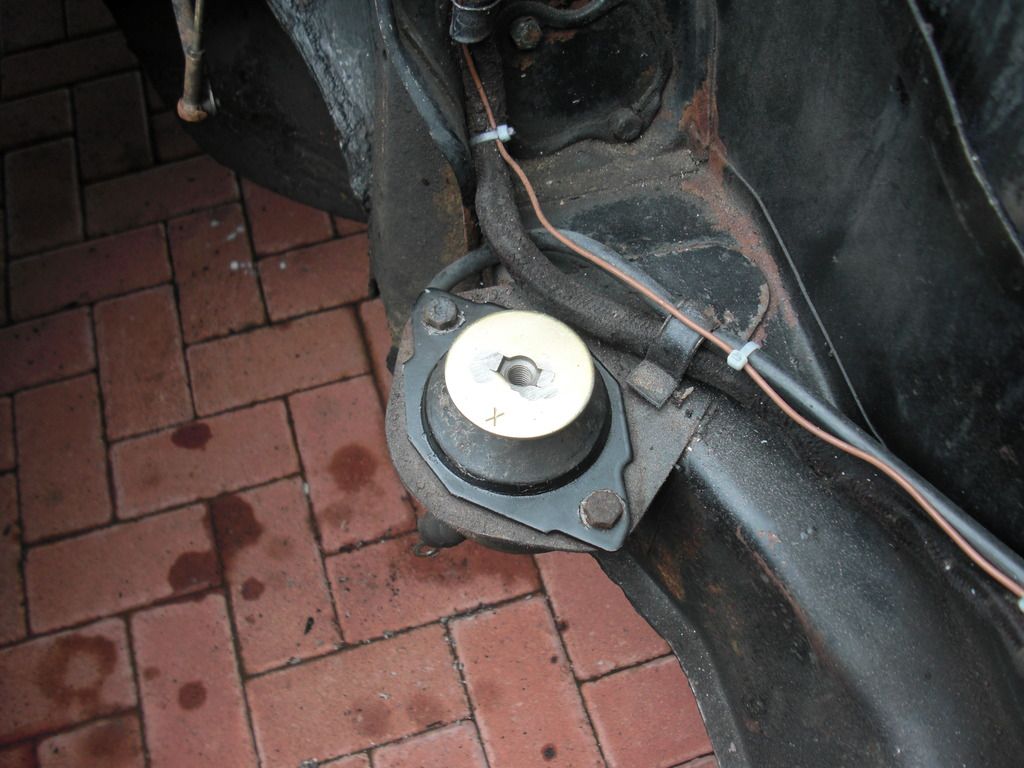
The only thing I hadn't managed to do was replace the engine mounts, so that was the first job for Sunday. The old mounts looked very tired
New mounts fitted with the requisite fettling of the aperture required
Engine and gearbox now ready to go back in. On my first attempt I didn't manage to achieve a sharp enough angle to clear the slam panel and get the engine aligned, so the whole thing went back onto the blocks for another attempt. This time the rope was kept as short as possible and I attached a guide rope to the back of the gearbox to give me longitudinal control. A trolley jack under the gearbox allows the engine to level off as it goes in, but it was slowly does it to ensure I didn't catch anything on the brake servo.
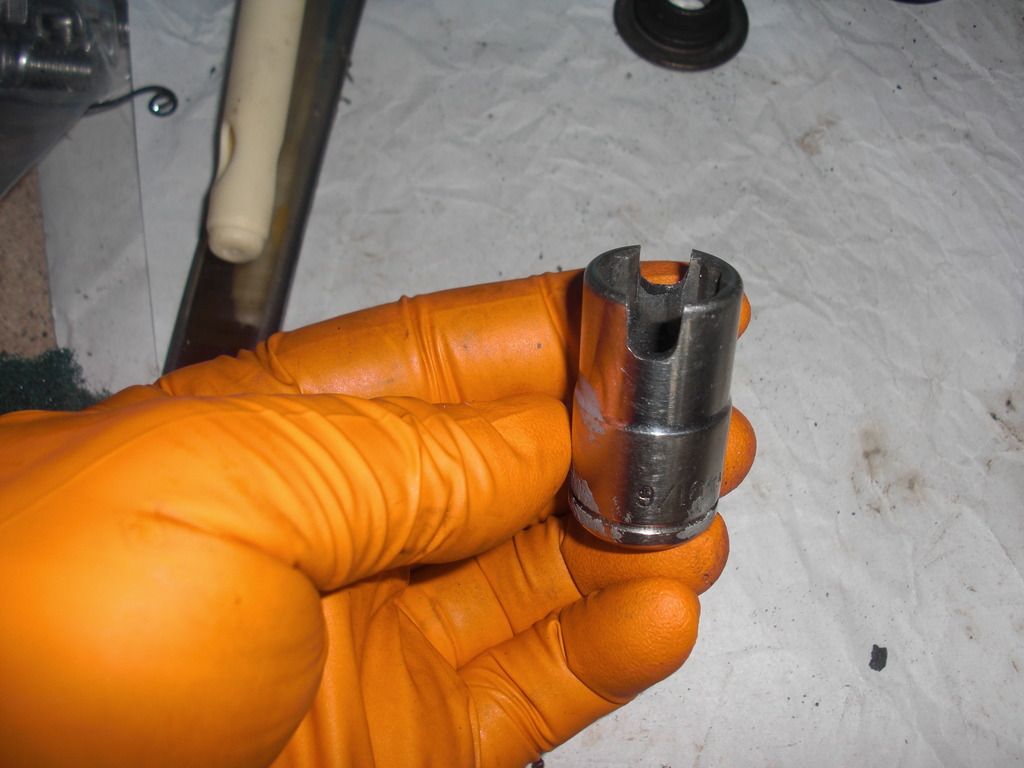
I didn't have time to tidy up the engine bay and it took me most of the day to reconnect everything ready to fill up with oil and coolant. Oil went in no problems. Fresh coolant of 50% rain water and 50% blue went in...then I spotted the steady drip, drip from the big plug in the right hand side plate (remember I said I'd come back to that). I fashioned a tool from a 9/16" socket to try to nip it up
but it wouldn't stop. I wondered if a bit of heat would help cure the sealant so I cranked the engine over with the low tension lead off the coil to build up the oil pressure first. Then connected everything up, gave her a bit of choke and turned the key. Hmmm, timing must be off a bit she seemed to be fighting against herself. So off with the distributor cap and check everything again. The rotor arm wasn't quite at number 1 HT lead so I turned the distributor body to line it up and refitted the cap. This time she burst into life with the turn of the key . Success! Heat didn't have any effect on the leaky plug so there was nothing for it but to remove it and try a different sealant. I cleaned off all the Hylomar blue and brought out the big guns...Water Weld epoxy putty. Designed to withstand 900psi of pressure and 300 degrees C of heat. Sealant applied and plug refitted. Wait an hour, fill with coolant and check for leaks....success! This was 10pm on Sunday night.
So the drive to work on Monday morning was a joy. The engine runs so smoothly now, with no rattles. It starts on the button and idles well. I had to nip up a couple of bolts to stop small leaks but that's about it. I now have, for the first time, a leak free engine
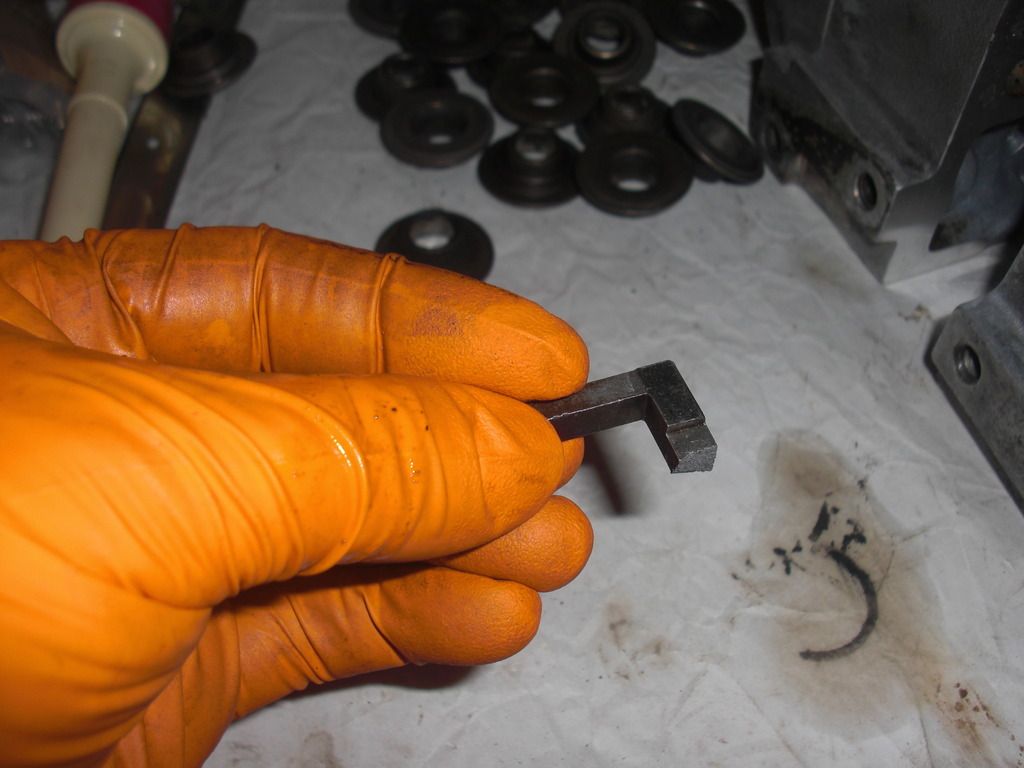
A final point to the saga. The camshaft lock is not strong enough to hold it in place whilst trying to undo the bolt holding the intermediate timing chain wheels
If anyone has a spare one knocking around I'd be grateful
Hopefully that'll do another 90k miles.
Dave
). I still had the top chain vibration damper to fit. It was at this stage that I realised it can't be fitted with the bottom chain in place. No matter how many angles I tried it just wouldn't fit between the bottom chain and the block. So off came the aux drive and timing chains again :roll: With the top vibration damper fitted I was just waiting for Royal Mail to deliver the bottom damper. As the time approached noon, I realised it wasn't coming. I checked the RM website to see where it was and it had apparently not been delivered because they couldn't read the address...it was 12 miles away in Peebles, but it might just as well have been across the other side of the world.At this stage I'd like to offer a personal thanks to hermione149 aka Kev Watkiss of this forum for going to all the effort of packaging and posting it to me. Unfortunately Royal Mail let us both down and the item is being returned to sender. Thanks Kev.
During fitment of the new timing chains I discovered that the vibration damper fixing lugs were still attached to the bolts that were still fitted to the block. So all was not lost. Out came the welder and clamps and I managed to weld the lugs back onto the damper.

All that fuss for nothing really.
So it was full steam ahead on the rebuild as I wanted to be in a position to start putting the engine back on Sunday morning. New tensioners fitted, new rear and front seals fitted and sump back on to get the engine upright again. I had the usual faff fitting the cam sprocket to the camshaft. Adjusting the inner wheel by one tooth at a time whilst trying to maintain tension on the top chain to align the holes. I checked to make sure everything was tight before aligning the camshaft and crankshaft to fit the distributor. The book says to align the crank to the 4 degree mark, lock the cam with number one cylinder firing and fit the distributor so the rotor arm points towards number 1 HT lead. Once done it was a matter of fitting the remaining ancillaries, exhaust manifold with new gaskets (much easier doing this with the engine on the floor), the clutch was already back on so the gearbox, after being cleaned, was refitted too. I cleaned everything in a paraffin bath and actually managed to get a coat of paint on the block too. Here it is ready to go back in:


The only thing I hadn't managed to do was replace the engine mounts, so that was the first job for Sunday. The old mounts looked very tired


New mounts fitted with the requisite fettling of the aperture required

Engine and gearbox now ready to go back in. On my first attempt I didn't manage to achieve a sharp enough angle to clear the slam panel and get the engine aligned, so the whole thing went back onto the blocks for another attempt. This time the rope was kept as short as possible and I attached a guide rope to the back of the gearbox to give me longitudinal control. A trolley jack under the gearbox allows the engine to level off as it goes in, but it was slowly does it to ensure I didn't catch anything on the brake servo.

I didn't have time to tidy up the engine bay and it took me most of the day to reconnect everything ready to fill up with oil and coolant. Oil went in no problems. Fresh coolant of 50% rain water and 50% blue went in...then I spotted the steady drip, drip from the big plug in the right hand side plate (remember I said I'd come back to that). I fashioned a tool from a 9/16" socket to try to nip it up

but it wouldn't stop. I wondered if a bit of heat would help cure the sealant so I cranked the engine over with the low tension lead off the coil to build up the oil pressure first. Then connected everything up, gave her a bit of choke and turned the key. Hmmm, timing must be off a bit she seemed to be fighting against herself. So off with the distributor cap and check everything again. The rotor arm wasn't quite at number 1 HT lead so I turned the distributor body to line it up and refitted the cap. This time she burst into life with the turn of the key
. Success! Heat didn't have any effect on the leaky plug so there was nothing for it but to remove it and try a different sealant. I cleaned off all the Hylomar blue and brought out the big guns...Water Weld epoxy putty. Designed to withstand 900psi of pressure and 300 degrees C of heat. Sealant applied and plug refitted. Wait an hour, fill with coolant and check for leaks....success! This was 10pm on Sunday night.So the drive to work on Monday morning was a joy. The engine runs so smoothly now, with no rattles. It starts on the button and idles well. I had to nip up a couple of bolts to stop small leaks but that's about it. I now have, for the first time, a leak free engine
A final point to the saga. The camshaft lock is not strong enough to hold it in place whilst trying to undo the bolt holding the intermediate timing chain wheels

If anyone has a spare one knocking around I'd be grateful
Hopefully that'll do another 90k miles.
Dave
Dave3066
Well-Known Member
Thanks Steve
That was 5 days working 12 hours each day. I was knackered by the end of day 3 and still haven't stopped aching. I was taking my time to make sure everything was right. Checking and double checking where required. It really has transformed the engine back to the smooth power plant it should be. I'm taking it easy for the next 500 miles or so (which for me is 2 weeks) then I'll change the oil and filter again.
The only slight downside is that the engine is so quiet I can now hear all the other creaks and moans from the rest of the car . That's not a bad situation to be in though.
Dave
That was 5 days working 12 hours each day. I was knackered by the end of day 3 and still haven't stopped aching. I was taking my time to make sure everything was right. Checking and double checking where required. It really has transformed the engine back to the smooth power plant it should be. I'm taking it easy for the next 500 miles or so (which for me is 2 weeks) then I'll change the oil and filter again.
The only slight downside is that the engine is so quiet I can now hear all the other creaks and moans from the rest of the car
. That's not a bad situation to be in though.Dave
Demetris
Well-Known Member
First of all it's a good thing that the operation was successfull. I can also feel the heat and agony of those five days.
Pity that you didn't had enough time to work a little on the engine bay, but i know how it is to work on a tight schedule to have the car ready for the road on time.
I see that the bearing shells survived very well despite the rumours of frequent replacement requirements. This is what i experience in my TC too, with about 110K now on the replacement engine, that still goes strong. It shows that if you avoid bad and / or clumsy use (not hard use) the 4 cyls are hard wearing.
Dave3066
Well-Known Member
Demetris said:I see that the bearing shells survived very well despite the rumours of frequent replacement requirements. This is what i experience in my TC too, with about 110K now on the replacement engine, that still goes strong. It shows that if you avoid bad and / or clumsy use (not hard use) the 4 cyls are hard wearing.
I reckon that regular oil and filter changes goes a long way to helping keep the bearings in good order too.
I will get round to doing some tidying in the engine bay before winter sets in again. Now that the engine is clean and looks to be leak free, the engine bay deserves a bit of a spruce up.
Dave
Dave3066
Well-Known Member
Lady C has just broke the 100,000 mile mark! I did try to get a picture but there wasn't anywhere nearby to stop.
Dave
...and about 1500 miles later she's burnt the exhaust valve on No 4 cylinder. Ho hum! There's a separate thread in the 4 pot section describing the problem.
http://www.classicroverforum.net/index.php?threads/39794/
So more work to do. I also discovered that the battery 12V cable t the starter motor had chaffed right through the insulation and was shorting against the base unit.

I thought the starter motor had seized during compression testing, but thankfully it was just the cable shorting. A couple of layers of heatshrink and a slightly different routing should prevent that happening again.
Dave