You are using an out of date browser. It may not display this or other websites correctly.
You should upgrade or use an alternative browser.
You should upgrade or use an alternative browser.
My mean green hornet
- Thread starter corazon
- Start date
corazon
Well-Known Member
Thank you Chris. I've had no doubt in my mind of how good it will look completed :wink:
I've just got hold of a spare bonnet to start work on the cowl induction scoop (which ideally for me has never had badge holes drilled!), along with a nice solid wing to replace the worst panel on the car currently.
I'll get the wing bare metalled and into primer and store it away until I come to paint.
Playing around with some cardboard I've made some very crude approximations of how the bonnet might look.
Originally I was planning just a smooth flat across the top scoop, but after trying a few things and getting my head around it, my favourite idea involves following the original pressed lines into the scoop forming two ridges heading toward the windscreen. These will go a little further than my photos show, as will the whole scoop which will probably extend just over the rear lip.


Jim
DaveHerns said:Is the Rover system of 3 small bolts holding the steering wheel to the hub really adequate ? I mention this as presumably your billet spacer will use the same fixings
If they're fitted and tightened correctly do you really think it would be possible to break them? (Even on a manual steer car). I'd be surprised if that were to happen, and there have been plenty of those wheels put on manual steer P6's and I've never heard of a problem.
Your mock up of the scoop is not a million miles from the factory scoop on the series 2 NADA 3500S (Lucas Injection) aka the 3500EI. I've put copies of what photos exist up before and they're not very good so won't repeat here.
Are you planning on the air intake being at the front or the back?
Chris
Are you planning on the air intake being at the front or the back?
Chris
corazon
Well-Known Member
It will be a reverse scoop aka chevy's original superscoop cowl design, i think we've discussed it before..
Pros:
No ram effect at different speeds;
Cooler therefore denser air from the high pressure area at the lower windscreen;
Heat can escape readily at idle/small throttle openings;
Tough looking
I can't really think of any cons other than in perhaps the coldest weather, which I might make a flap to seal it off.
What I'd love to do is link the kickdown cable to a flap which opens simultaneously letting in the denser air 8)
I'll do a search for those photos, I cant remember if I've seen them
Jim
If they're fitted and tightened correctly do you really think it would be possible to break them? (Even on a manual steer car
Maybe it's because I only paid £1 for my leather rim wheel and I don't have PAS .I felt that the bolts weren't a very tight fit in their threads .I have to admit that with a good squirt of Loctite they haven't come loose
corazon
Well-Known Member
Just a little polished parts update for those who like that sort of thing!
Alternator finally got some attention today, not final finish but not too shabby. I'll post fully finished reassembled pics in a couple of days.


Spent most of today replacing the belt in my drill press, not as easy as one originally thought
All working now so I can get re-drilling my steering wheel adaptor asap 8)
Jim
Your alternator drive end bracket Jim certainly came up shiny 8)
I am pretty sure that I have asked you this before, but how are you going to keep all the polished parts to stay that way? Given that they are not anodised, unless polished on a frequent basis, they'll tarnish and revert quite quickly.
Ron.
I am pretty sure that I have asked you this before, but how are you going to keep all the polished parts to stay that way? Given that they are not anodised, unless polished on a frequent basis, they'll tarnish and revert quite quickly.
Ron.
roverp5Bcoupe
Active Member
Ron,
Like Jim i also like polished aluminum. This is the RV8 in my MGB. It was finished approx 6 years ago and i polish 1 or 2 times a year and it remains shiny. As long as you don't drive in salty enviroments, the aluminum remains shiny.
[URL=http://s226.photobucket.com/us...dd310/petervdvelde/2008_0126_000240.jpg[/img][/url]
And here is the RV8 for my P5B coupe that i am currently restoring.
[URL=http://s226.photobucket.com/us.../albums/dd310/petervdvelde/DSCF3898.jpg[/img][/url]
Nice work Jim!
Regards
Peter
corazon
Well-Known Member
Nice work yourself Peter
My inlet manifold is next!
The polish I use (Belgom Alu) has a wax in Ron which helps protect and form a barrier which isn't aluminium oxide, maintaining the reflection.
My car currently lives outside in one of the dampest environments around, lots of underground water.
The polished parts in the engine bay were done a few years ago now, like Peter I only touch them up once or twice a year.
The thing is, polished components are much easier to keep clean, dirt/oil wipes off very easily etc.
If I had the disposable funds I might consider getting things chrome anodised etc, but that's not an option for me.
Here is one of the elbows I did a couple of years ago, major work needed to get to this from the terrible original casting!

Jim
corazon
Well-Known Member
haha tempting, it will get a coat of paint thoughtestrider said:Cool! Don't spend too long polishing it though Jim. 8)
Hi Peter,
Wow, that is a seriously shiny, and very clean engine bay, looks great
Hi Jim,
That sounds like the way to go as far as the polish is concerned.
I have a sneaky suspicion that the bell housing off the HP24 is too large by a long way to fit in the available space within the P6B, certainly without major structural surgery. Run the bigger internals by all means running the 22 torque converter with it's bell housing maybe the way to go. I also have a gut feeling that the 24 is a longer box than the 22, meaning far mod body, drivetrain mods would need doing.
I guess you'll know soon enough. :wink:
Ron.
corazon
Well-Known Member
This morning I woke up to find a nicely wrapped 22 box on a pallet outside, awaiting the 24 in a couple more days.
I've also just ordered the B&M shifter I've been coveting for months, it's a switchable 3/4 speed console quicksilver ratchet.
Apart from the obvious perks of the manual ratchet shifting and aesthetics, it should hopefully be an easier install than the factory P6 lever having the full 123DNRP detents.
http://bmracing.com/?wpsc-product=console-quicksilver
I got it cheaper than that by the way!
Jim
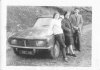
I've been meaning to put this photo up for a while. I thought it might give you an idea as to how to finish off your new grille....
The picture number does give the game away a bit, but who knows what the differences to a P6 are? It's more than just the engine... And you're extremely unlikely to guess the engine....
The grille treatment re-emerged as one of the proposed schemes for the P6B.
Chris
The picture number does give the game away a bit, but who knows what the differences to a P6 are? It's more than just the engine... And you're extremely unlikely to guess the engine....
The grille treatment re-emerged as one of the proposed schemes for the P6B.
Chris