My Rover

Hi Dave,

Thanks very much indeed,... :D

I wanted to run the mechanical pump on my 4.6 right from day one, and given that the engine when used in a Range Rover always had electric fuel delivery, it was a bit of an unknown. The pump has not found itself wanting thus far, mind you I don't drive all that hard, but if it were to struggle or when the temperature makes life for it just too much to bear, I always have my electrical pump ready and waiting to be switched on in order to assist with the delivery.

Ron.
 
Exemplary work (& pictures) refurbishing the fuel pump; what are the available options for intended replacement? I am currently costing up a Facet red top electric system for my P5B as I have leaks and crusty fuel lines too...
 
Spinakerr wrote,...
Exemplary work (& pictures) refurbishing the fuel pump; what are the available options for intended replacement?

Hi Spinakerr,

Thanks very much indeed,... :D

The available options at the moment,...to keep the exisiting pump running, there are diaphragm kits available in the U.K. I do have a spare top chamber which is not distorted (actually found this in a box of second hand Rover items yesterday), so that can be put to use when the time comes. My Rover runs a Facet electric fuel pump in series with the mechanical which I fitted in 1990. It is only used if and when required, but can be switched on at any time to provide assistance. I could remove the mechanical altogether, fit a blanking plate and just use the electrical as the means are already in place. I would however prefer to keep the mechanical running for as long as possible, indeed mechanical delivery has fuelled my Rover for just on 274,000 Miles (441,000km) to date, so I would like that to continue.

Ron.
 
Ah I see - good to have a back up.

I actually wondered which Buick/AC pumps you were looking at for the mechanical side, given the large engine size?
 
Spinakerr wrote,...
I actually wondered which Buick/AC pumps you were looking at for the mechanical side, given the large engine size?

The OEM AC pump as fitted originally to the 3.5 litre P6B engine so far has not been found wanting when it comes to meeting the fuel delivery requirements of the 4.6. Going back to 1987, I purchased two Australian made Goss mechanical fuel pumps which were the factory fitted pump for the 4.4 litre V8 engine that powered the Leyland P76. Mechanically they were nearly identical to the AC. The fuel chamber had small valves like many of the AC pumps (no large valve model was offered unlike the AC) and the actuation arm was slightly longer necessitating the use of a thick fibre spacer block. I don't know the rated fuel delivery pressure of the Goss, but the AC is within the range of 3.5 to 5psi. The difference I suspect being down to the size of the valves that were fitted, either small or large.

As far as a Buick alternative, I haven't gone that far as yet.

Ron.
 
DaveHerns wrote,...
Is the pump body distorted beyond saving by refacing and countersinking the screw holes ?

Hello Dave,

In the case of the existing pump on the engine, only the suction chamber (top section) exhibited warping between the screw holes, and this is directly attributable to the tension that the screws impart, not helped by the constant heat cycles. Refacing might be possible although the degree of success would be dependent upon the amount of material that you need to remove. Too much and the possiblity of cracking increases.
Although the screw holes in the suction chamber are threaded so as to allow retention with the valve chamber, the screws actually mount from underneath, so countersinking the screw holes is not necessary.

I do have a spare suction chamber that I am going to modify by drilling out the screw holes, except for the one in the blind hole where distortion does not appear to be a problem. Then my intention is to use little bolts complete with nyloc nuts and suitable washers so that when the two halves are joined, the tension imposed is carried solely by the bolts rather than distributed within the suction chamber flange. The two halves are squeezed together by the bolts so hopefully that will prevent any further distortion.

Ron.
 
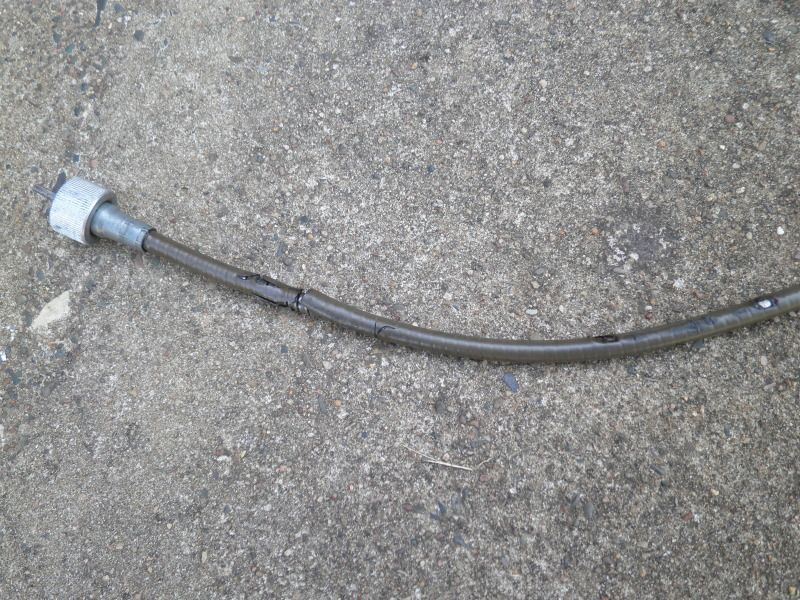
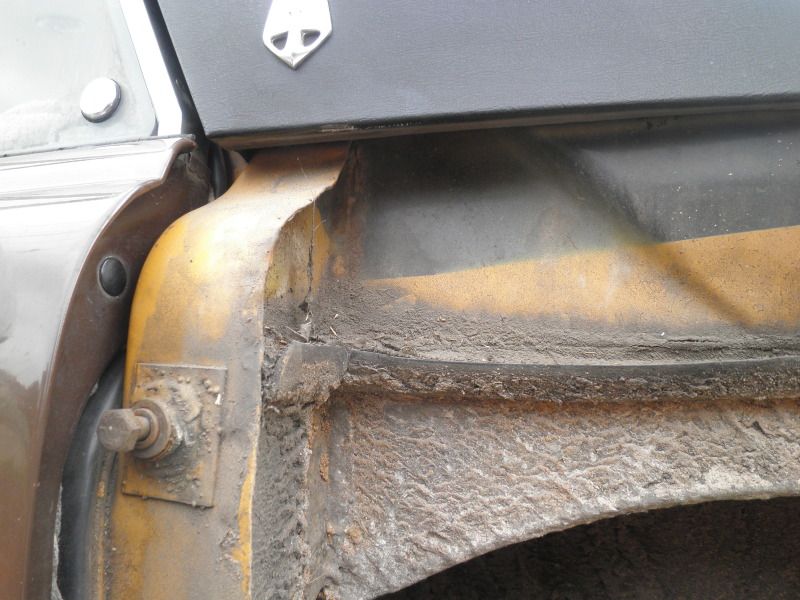
The day had arrived for the original 1974 factory fitted Speedo cable and casing to be replaced in its entirety. The casing was noticeably damaged in a number of places between the right angle drive at the transmission and where it entered the tunnel.

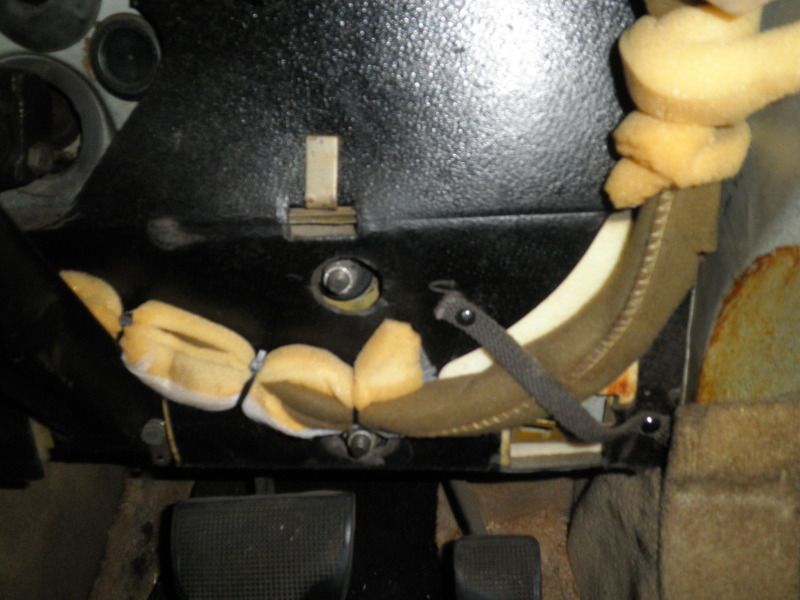
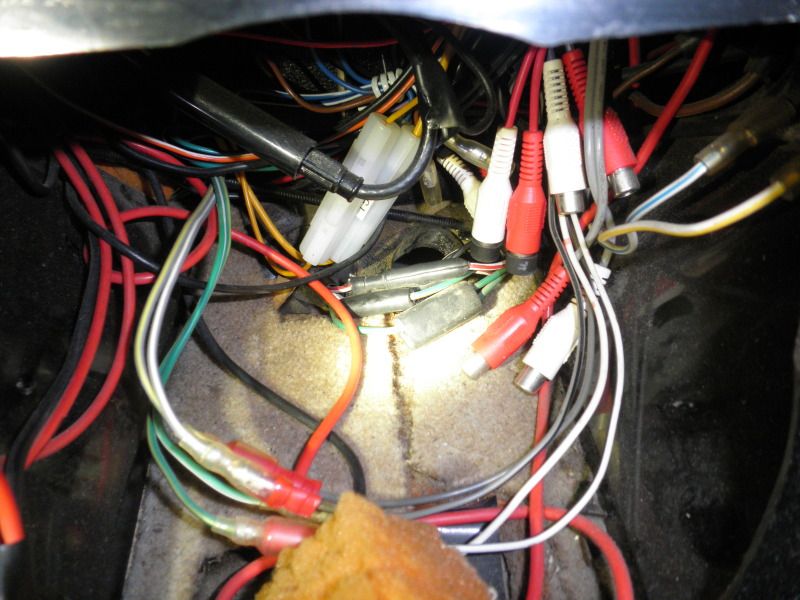
So I started by removing the speaker panel, although a speaker no longer resides within.

PB240097.jpg

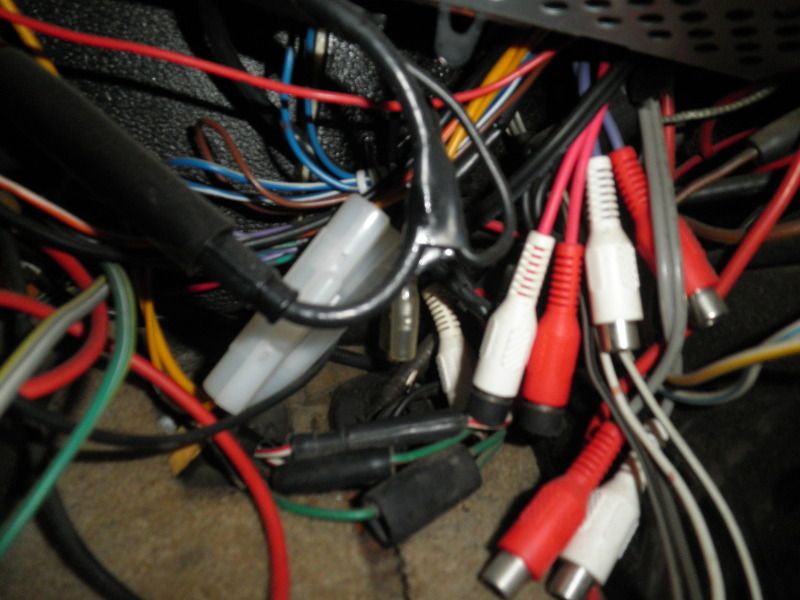
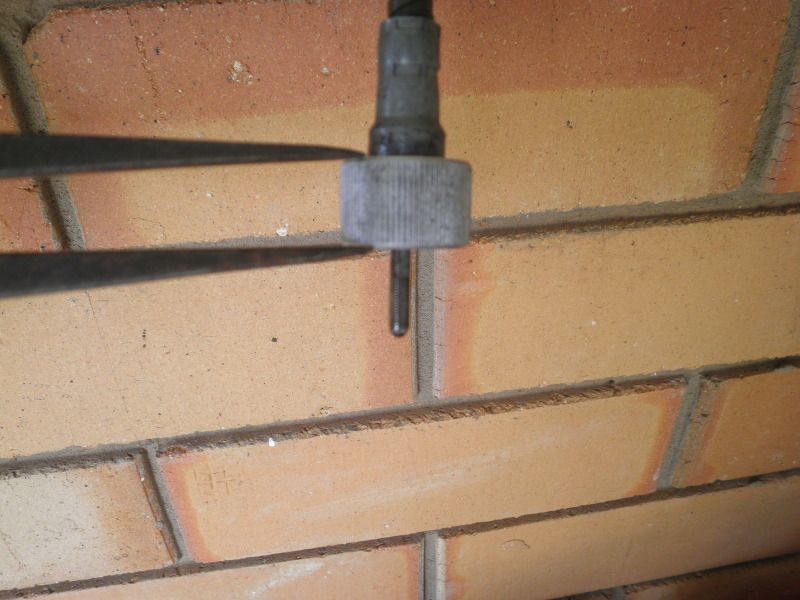
The original cable can be seen passing through a rather tired grommet.

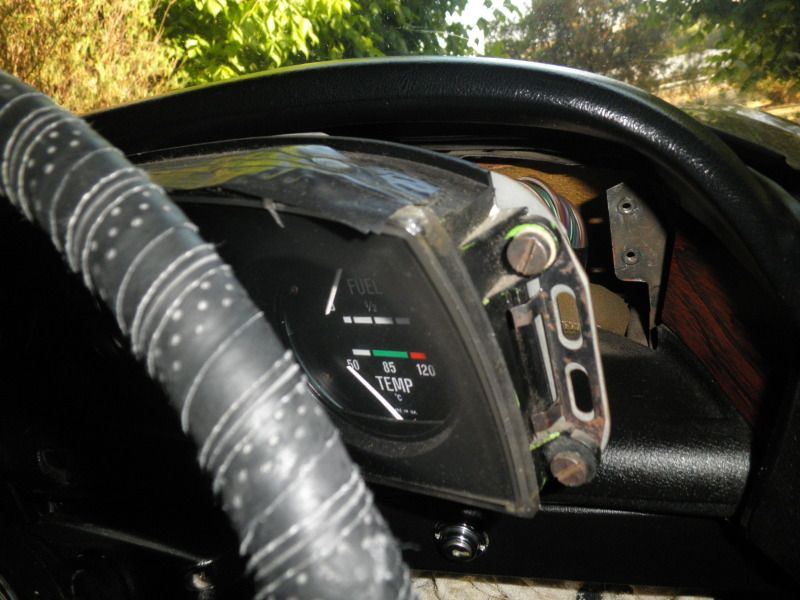
I moved the instrument panel forward and angled to the side so as to allow removal of the casing from the Speedo’s right angle drive. I also removed the glove box as it provides easier access for both removal and refitting.
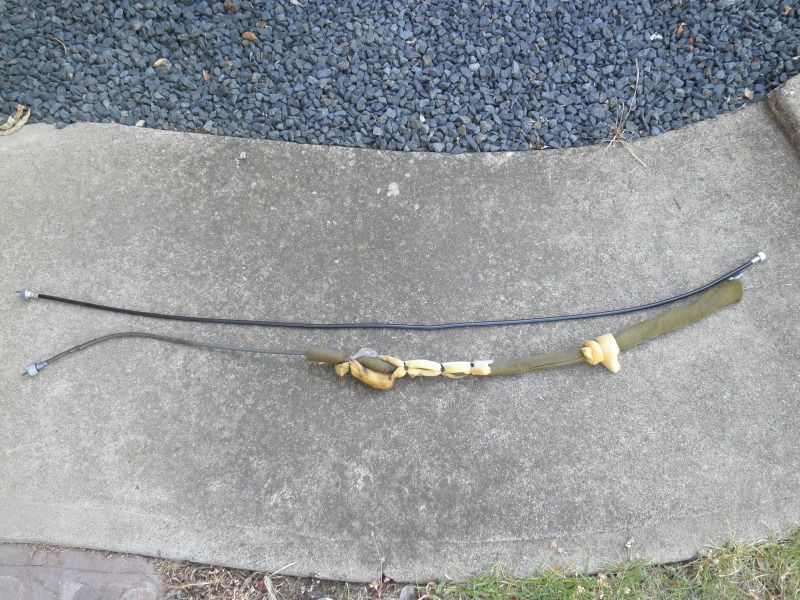
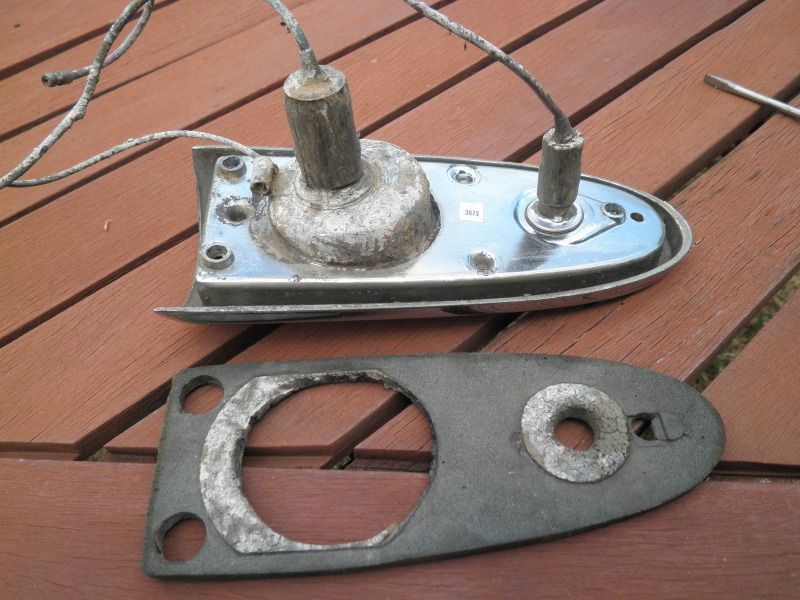
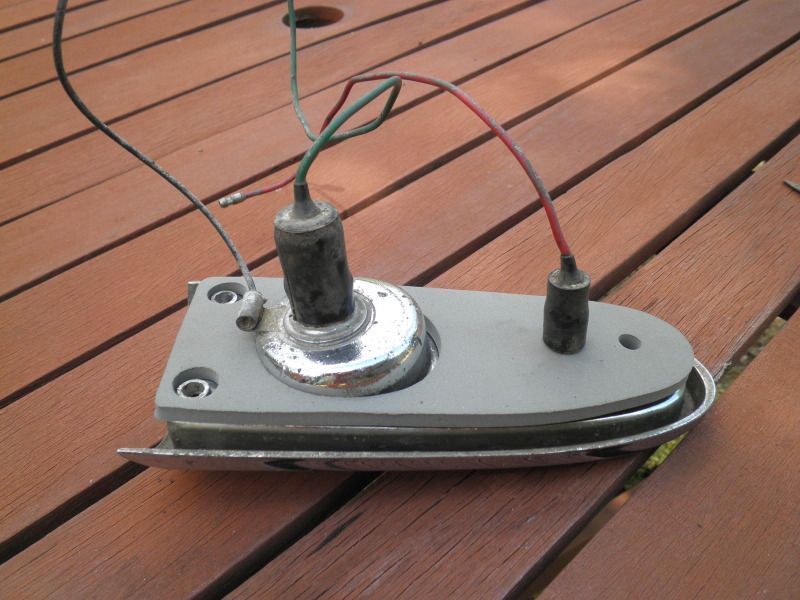
PB240090.jpg


PB240092.jpg

Old cable.

PB240099.jpg

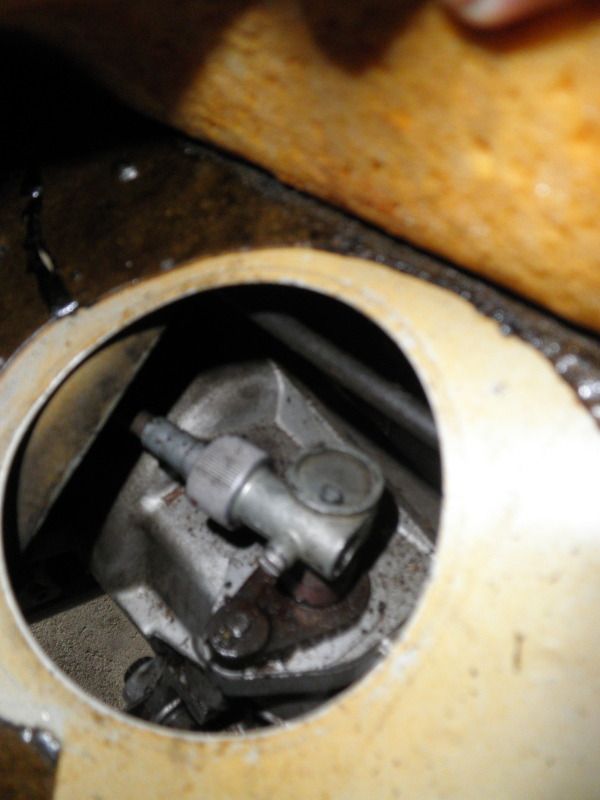
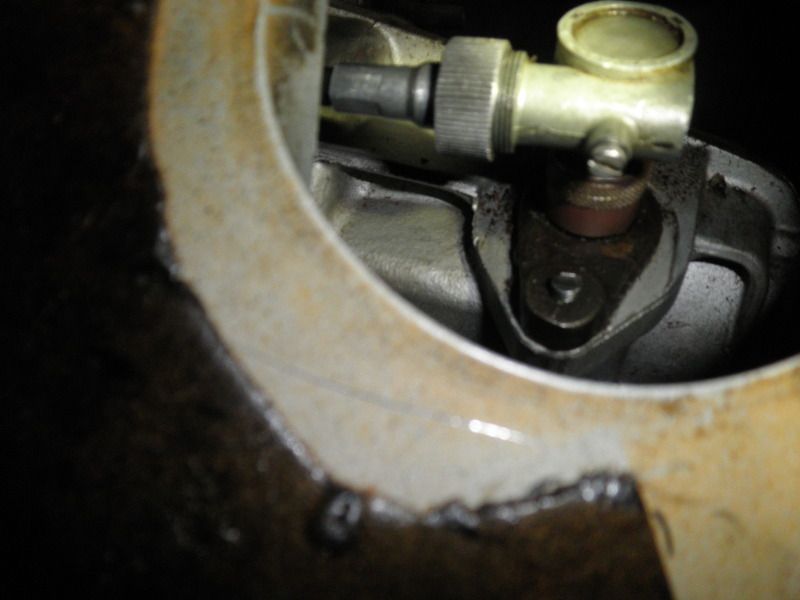
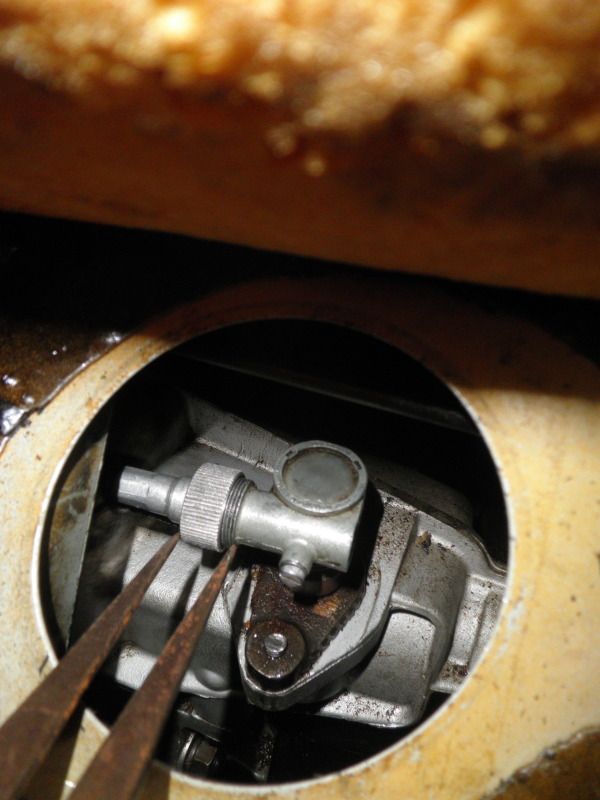
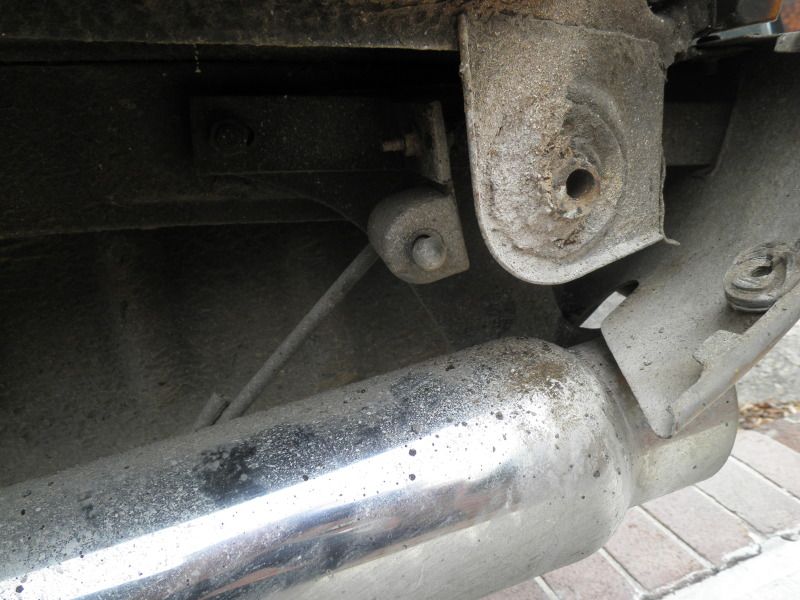
The original casing attached to the right angle drive on the transmission.

With the casing disconnected at both ends, I withdrew it through the tunnel bringing it inside.

PB240109.jpg

The grommet needs to be replaced. As I didn’t have a spare, I packed around the new casing with a suitable length of foam rubber.

PB240106.jpg


PB240107.jpg

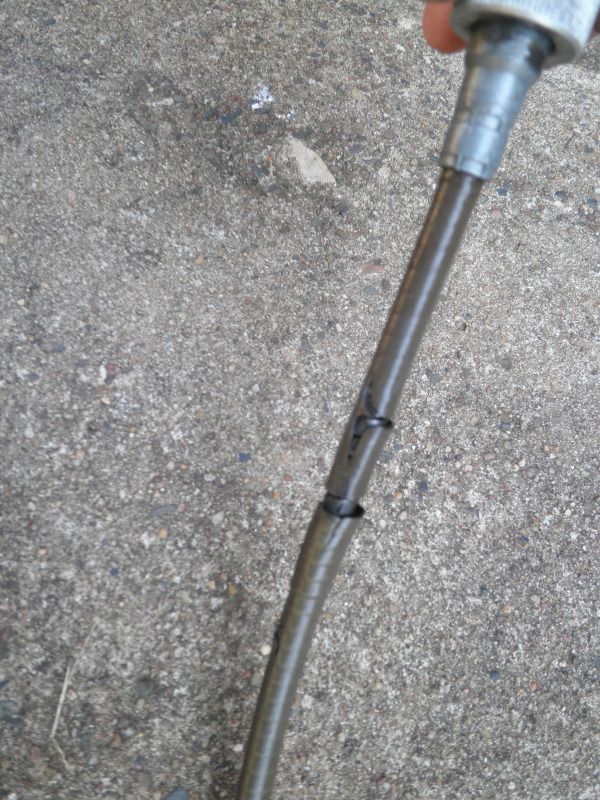
The casing noticeably damaged.

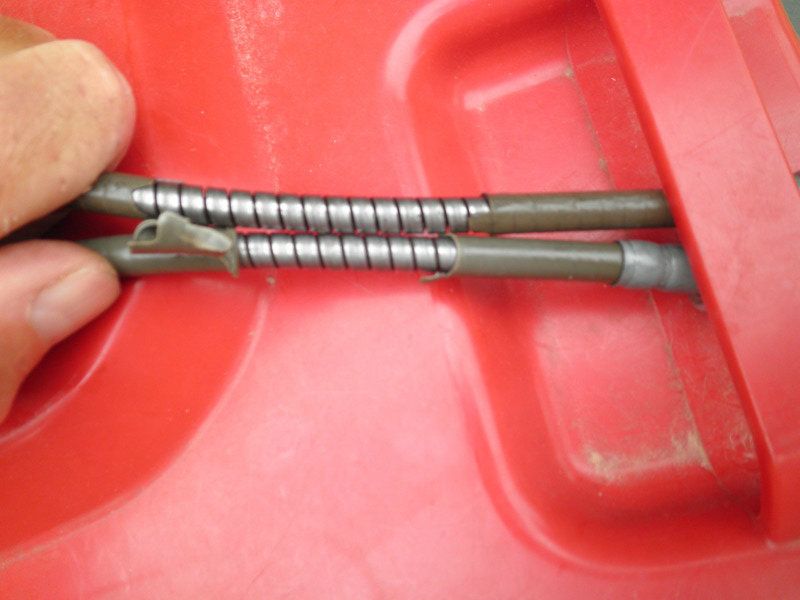
With new and old together, the latter I had purchased some years ago from S & G.Walker was a little longer overall.

PB240110.jpg

New along side old.

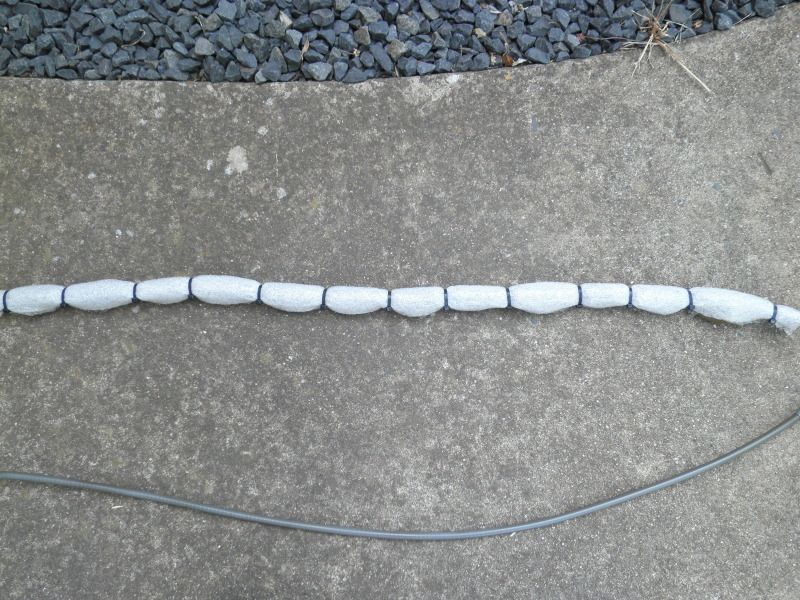
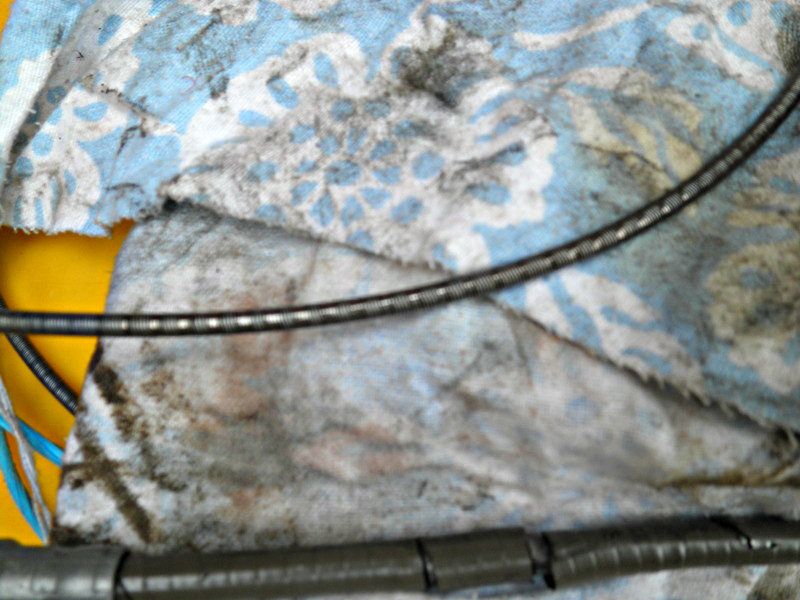
The original foam sleeve was also becoming quite fragile, so rather than removing it altogether I covered it with a layer of bubble wrap that had its own plastic backing.

PB240111.jpg

Wrapped nicely

This I hoped would provide insulation from any unwanted noise along with protection of the casing against possible damage from scuffing.

PB240112.jpg

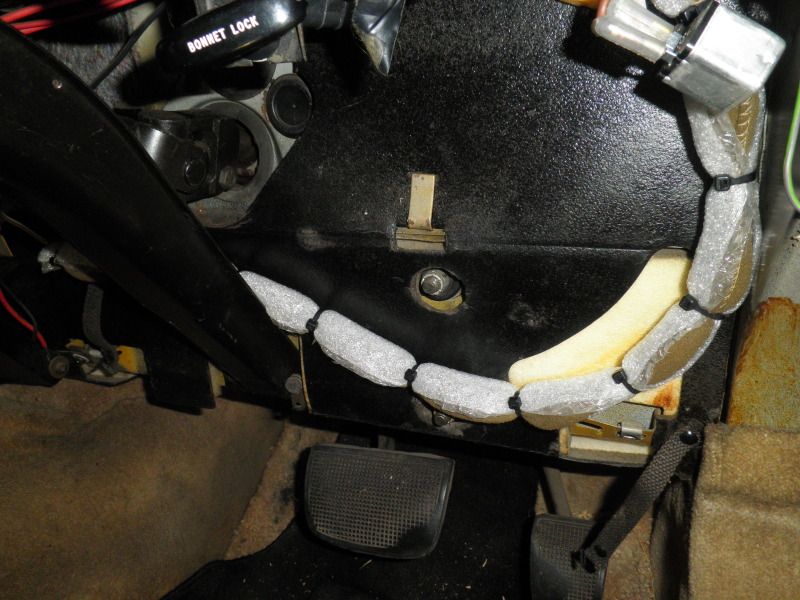
New casing in place.

With the casing in place and attached to the right angle drive on the transmission, the cable was fed through at the Speedo end, lubricated with Castrol EPL-2 as it went. I chose this grease for its high temperature resistant characteristics.

I noted that the new casing’s attachment nut didn’t appear to go on as far or indeed had not gone on as far as it should, at the transmission’s right angle drive. There was no float in the casing, but to be sure I measured the width of both new and old.

PB240113.jpg

New casing in place

PB240118.jpg

Attachment nut on original casing, width noted.

PB240119.jpg

The attachment nut on the new casing is not as wide.

I observed that the old casing, once left hanging up prior to disposal, had been dripping a little transmission fluid. I had always used grease on the cable, so I am not able to say with certainty how this fluid had managed to enter the casing.

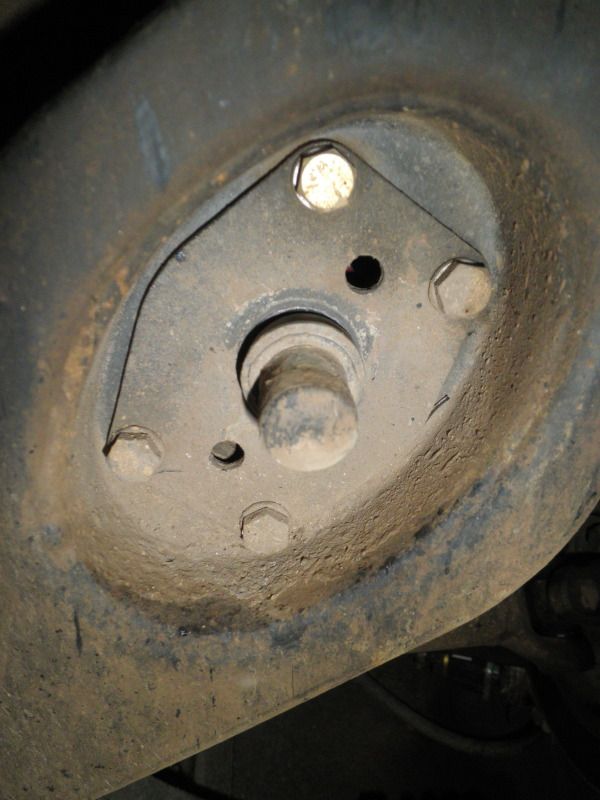
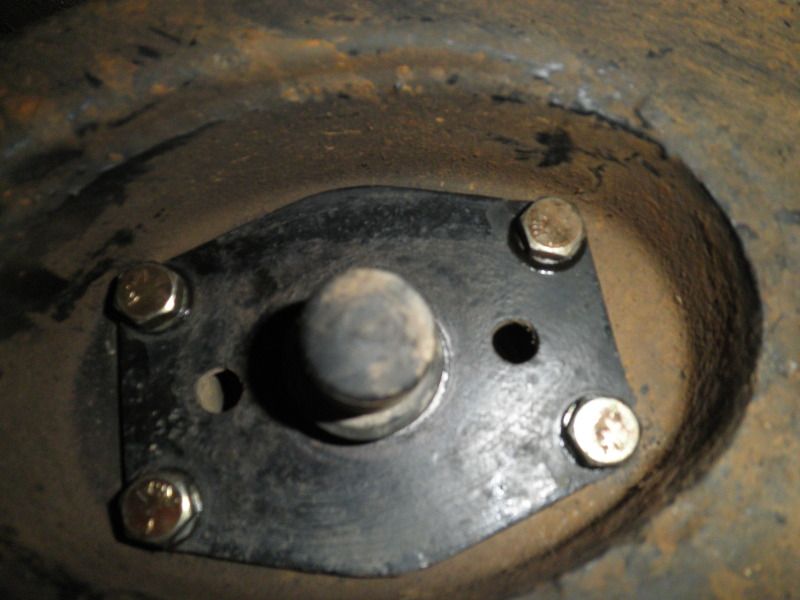
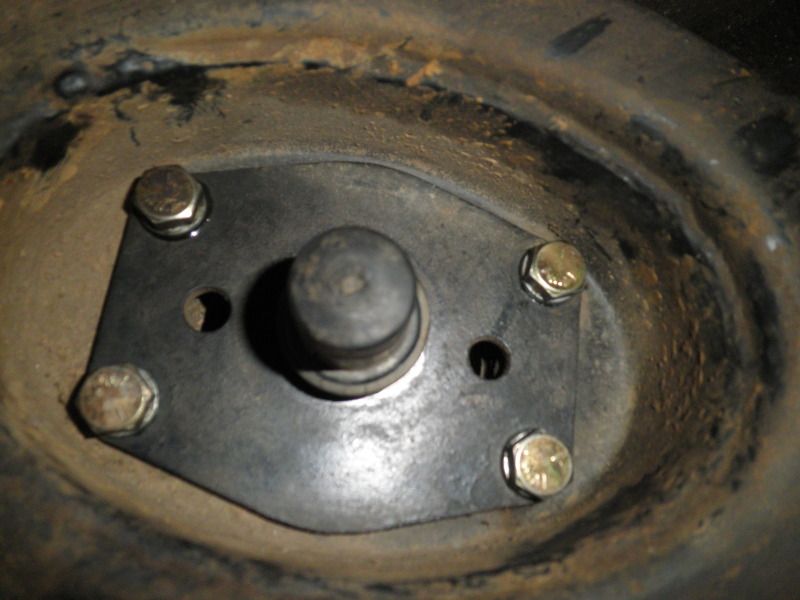
I am not entirely certain, but the lower section of the right angle drive on the transmission appears to have been changed, and this, had it taken place, would have occurred at the last rebuild in 2009. I could see no evidence of transmission fluid leaking from it, so where the little drop that sits on the bolt that secures the drive to the transmission originates from, I cannot say.

Road testing revealed a beautifully quiet operation in addition to a very still Speedo needle function. With the old cable and casing, the Speedo needle wandered at least 5mph (8kph) about the desired speed, so this was a marvellous improvement.

Ron.
 
My p6 is also suffering from needle wobble at the moment. When I had the dashtop out I removed the right angle drive which looked to be packed with black Moly but it felt very gummy and had quite a bit of resistance to twist, lubricated it with sewing machine grade oil and worked it in, great improvement. On reasembly still had needle woble but reduced by a good 60% or more, put a little oil down the cable too but only a few drops. Looks like I may have to remove the bottom right angle too though I cannot see how that will reduce the wobble as it is the cable that induces the varaiable rate twist to the speedo. Maybe a new cable is in my future too.

Graeme
 
DaveHerns wrote,...
A good result

Indeed it is Dave,.. :)

ghce wrote,...
Maybe a new cable is in my future too.

Hi Graeme,

It really is amazing the difference that the new cable has made to reducing Speedo needle fluctuations. Even trickling along in top gear at little more than 600rpm sees the needle almost completely still and only just above the stop. I'll remove the old cable from the casing, clean it up and see what I can see.

Ron.
 
Providing that the cable casing is in good condition - which in Ron's case it wasn't - then simply lubricating the inner should prove adequate. To do this, get the end of the cable supported vertical. Then make a "funnel" around its end by building up layers of insulating tape or similar. Fill the funnel with your chosen lubricant and leave overnight to soak down.

Chris
 
I mentioned above to Graeme that I would take a closer look at the old cable and casing and see what I could see.

I stripped back the plastic coating in two places, firstly along a section that was close to the right angle drive on the transmission, the second being similarly close the right angle drive on the back of the Speedo.
The spirals were tightly woven at the Speedo end with flexing not providing a means of seeing within. This was the opposite to the transmission end where the spirals were much more open, flexing allowing the light to pass through so you could see within. I don't imagine that Smiths made the casing in this manner, so either the gaps are due to that section of the casing being damaged or the gaps are entirely due to wear.

The cable itself displayed noticable wear, indeed there were peaks and troughs which could be clearly felt right along the section above the transmission, and although this type of wear also appeared within the section behind the glove box and up to the Speedo, it was much less common and covered only a few short lengths. When the cable was placed back within the casing, turning one end displayed a level of resistance to rotation, indeed the cable would stick and then move before repeating, you could say in a form of periodic motion. This resistance to rotation was likely responsible for the wavering of the Speedo needle.

PB260124-1a.jpg

The gaps in the spirals that form the casing can be seen in the top section, whilst those below remain tightly woven.

PB260122a.jpg

The shiny sections along the cable are the troughs which have been worn down over 273,958 Miles (441,072km) of use.

Ron.
 
I had noticed a slight feeling of what I would describe as looseness in the rear suspension over the last couple of days. I suspected that it may well have been the shock absorber bushes, so an inspection this morning confirmed by thoughts.

Upon removal, the top rubbers were rather chewed whilst those at the bottom end were even more so, including a split in one of them. The bushes were fitted during April 2008 and had seen just over 61,000 Miles (98,200km) of service.

PC020154.jpg

Prior to removal

PC020157.jpg

Tired top bushes

PC020155a.jpg

Very tired bottom bushes including one with a split.

PC020156.jpg

Rather chewed bottom bushes.

There was no corrosion anywhere to speak of, only a layer of dust which when removed left a 25 year old Koni looking just like new.

PC020160a.jpg

Clean and with new bushes fitted

I opened the shock absorber and then offered it up, placing one bolt in to hold the plate whilst I fitted the top rubber along with the two nuts. Then back down underneath, clean the threads of each bolt in turn, apply some graphite grease and then fit. The first bolt used to locate the plate was also removed, cleaned and the threads greased prior to the final fitting.

PC020161.jpg


PC020162.jpg

All done.

Road testing revealed once again a nice taught rear end, just as it should be... :wink:

Ron.
 
I made the trip back into Sydney last week as my Saffron panels were ready for collection. Prior to leaving I cleaned up my front light assembly, fitting new gaskets in the process. The one behind was the 1974 original and given its 38 years, wasn’t in too bad a condition. The rear light received similar treatment.

PB290132.jpg

Not too bad after 38 years

PB290134.jpg

New rear gasket in place

PC010153.jpg

Awaiting the side light lens

This exercise marked an excellent opportunity to fine tune the alignment of the panels. The hinge pins, location of the hinge shims and the rear door striker plate were all attended to.

PC060181.jpg

Guards

PC060180.jpg

Doors

PC070190.jpg

Brown guards removed

PC070182.jpg

Dusty, but otherwise looking good.

PC070185.jpg

Same story here, so that’s good.

PC070191.jpg

Saffron guards fitted

PC070195.jpg

Saffron doors fitted too.

PC070196.jpg

Looks pretty nice I recon. :) The duco on the other panels is the original acrylic lacquer, now 38 years old.

I was staying at a friend’s house in Sydney, and he too owns a 1974 Rover. Like Brenten’s, it wears British Racing Green. It is going to be fully restored, with most of it hopefully taking place next year, much to the annoyance of Rob’s girlfriend.

PC070197.jpg


I removed my Saffron doors and the Brown doors were refitted for the return journey.
Over the coming weeks, I’ll refit my Saffron doors, thence the frames, windows etc.

Ron.
 
Panel alignment looks great Ron!
I've always liked saffron but freshly painted just looks awesome, good colour match for the 40 year old paint
It's photos like this that re establish my desire to make a pillarless P6, having just the stainless trim around the windscreen/roof gutter and frameless windows 8)
Look forward to seeing it all back together
Jim
 
Looking superb Ron 8) But I have noticed that on some resprays the sill line at the bottom of the front wings are horizontal, instead of curving slightly upward while following the line of the top of the sill, as David Bache intended. Silly little nit-pick, but it makes a huge difference to me on a P6.
 
Ron
Love that saffron - very almondesque . My next colour choice . Bright like our southern skies .
Have you blacked out the grill or is it the angle ?
Black B/pillar chrome maybe ?
Ive got two complete honey comb grills , Im thinking of blacking a set out and having a play with my mood swings
Go for it , its all looking great
Gerald
 
Back
Top