

You are using an out of date browser. It may not display this or other websites correctly.
You should upgrade or use an alternative browser.
You should upgrade or use an alternative browser.
My Rover
- Thread starter SydneyRoverP6B
- Start date
corazon wrote,...
Thanks Jim,... I am really pleased with how the panels lined up. The fellow who fitted the new skins did an excellent job.
lukewilliam_75 wrote,...
Thanks Luke. With a keen eye, you can see that the doors don't have the holes drilled. All panels when purchased (in my case, just the door skins) come without holes, so all these have to be marked out and then drilled. That way they suit both series 1 and series 2 cars. We used a string line from guard to guard and marked out the holes according the same spacing on the Brown doors, as the workshop manual did not provide this detail. The distance between the holes are equal, but the distance from the first and last hole from the edge of the panel is different. Well that is certainly the case with the factory drillings on the Brown doors.
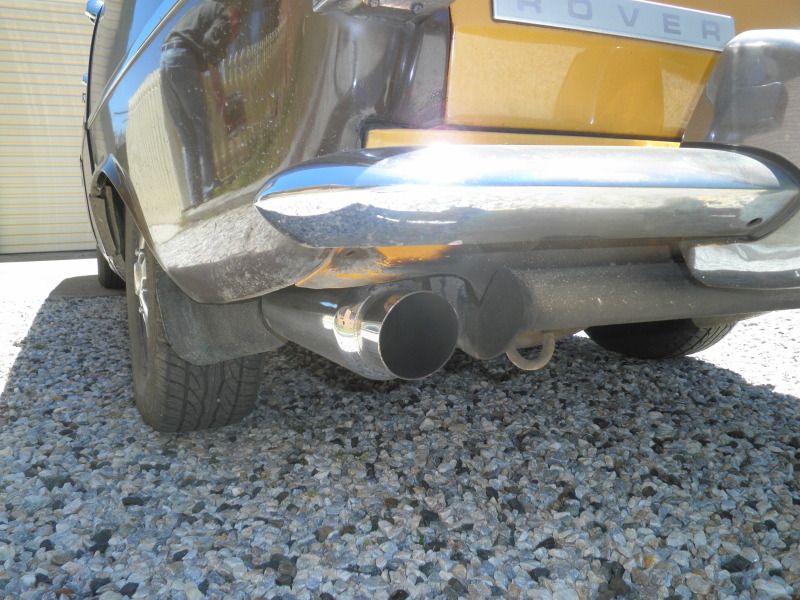
I will indeed post pics covering the rebuilding of the doors and the refitting of the strips. My resonator was nice and shiny, but seems to attract dirt like iron filings to a magnet. Here is a photo of it nice and clean that I took a couple of weeks earlier whilst visiting my brother.
LeeEFI wrote,...
Thanks Lee. The black on the guards was always straight in my Rover's case. I can't recall ever noticing one that was curved slightly.
Ron.
Panel alignment looks great Ron!
I've always liked saffron but freshly painted just looks awesome, good colour match for the 40 year old paint
It's photos like this that re establish my desire to make a pillarless P6, having just the stainless trim around the windscreen/roof gutter and frameless windows
Look forward to seeing it all back together
Thanks Jim,...
I am really pleased with how the panels lined up. The fellow who fitted the new skins did an excellent job. lukewilliam_75 wrote,...
Looking good Ron, Looking good, please post pics when you put all the chrome work back on! Also that rear exhaust could do with a polish!
Thanks Luke. With a keen eye, you can see that the doors don't have the holes drilled. All panels when purchased (in my case, just the door skins) come without holes, so all these have to be marked out and then drilled. That way they suit both series 1 and series 2 cars. We used a string line from guard to guard and marked out the holes according the same spacing on the Brown doors, as the workshop manual did not provide this detail. The distance between the holes are equal, but the distance from the first and last hole from the edge of the panel is different. Well that is certainly the case with the factory drillings on the Brown doors.
I will indeed post pics covering the rebuilding of the doors and the refitting of the strips. My resonator was nice and shiny, but seems to attract dirt like iron filings to a magnet. Here is a photo of it nice and clean that I took a couple of weeks earlier whilst visiting my brother.
LeeEFI wrote,...
Looking superb Ron 8) But I have noticed that on some resprays the sill line at the bottom of the front wings are horizontal, instead of curving slightly upward while following the line of the top of the sill, as David Bache intended. Silly little nit-pick, but it makes a huge difference to me on a P6.
Thanks Lee. The black on the guards was always straight in my Rover's case. I can't recall ever noticing one that was curved slightly.
Ron.
GRTV8 wrote,...
Hi Gerald,
I love the Saffron too, it's very distinctive, even more so these days when the majority of cars are either silver or white. It is actually a Triumph colour as the plant in New Zealand was assembling the Rovers alongside Triumphs.
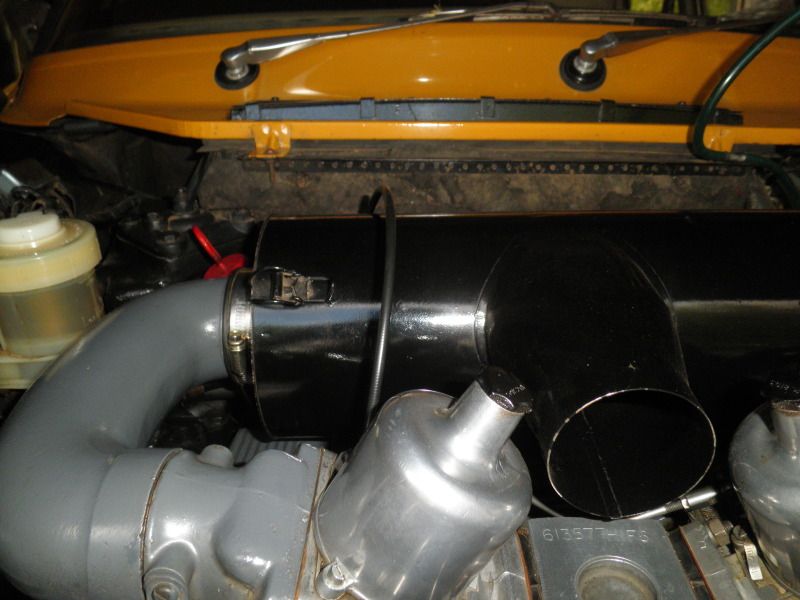
The grille has fly screen over it to stop bugs from lodging in the radiator and my oil coolers, so that blackens it out somewhat more. I haven't done anything to the stainless steel moulding on the B/pillar.

My collection of moths and bugs.
billoddie wrote,...
Thanks Brenten,... I am really pleased with how things are going thus far.
Ron.
Ron
Love that saffron - very almondesque . My next colour choice . Bright like our southern skies .
Have you blacked out the grill or is it the angle ?
Black B/pillar chrome maybe ?
Ive got two complete honey comb grills , Im thinking of blacking a set out and having a play with my mood swings
Go for it , its all looking great
Hi Gerald,
I love the Saffron too, it's very distinctive, even more so these days when the majority of cars are either silver or white. It is actually a Triumph colour as the plant in New Zealand was assembling the Rovers alongside Triumphs.
The grille has fly screen over it to stop bugs from lodging in the radiator and my oil coolers, so that blackens it out somewhat more. I haven't done anything to the stainless steel moulding on the B/pillar.
My collection of moths and bugs.
billoddie wrote,...
Looking good Ron!
Thanks Brenten,...
I am really pleased with how things are going thus far.Ron.
SydneyRoverP6B said:I am really pleased with how things are going thus far.
A result of your careful planning and attention to detail, as we are all aware of.
Are you not going to have the side trim Ron?
billoddie wrote,...
Hi Brenten,
I must say that it does look pretty good without them, much better than I imagined it would. They will be refitted, the new door skins were marked out and then drilled off the car the following day. I'll fit the new clips and then refit the original strips on this side as they are in really nice condition.
Ron.
Are you not going to have the side trim Ron?
Hi Brenten,
I must say that it does look pretty good without them, much better than I imagined it would. They will be refitted, the new door skins were marked out and then drilled off the car the following day. I'll fit the new clips and then refit the original strips on this side as they are in really nice condition.
Ron.
Last weekend having received some very helpful hits from Al, John and Jim (thanks gents) I ventured to replace my original choke casing. With the cable disconnected from the carburettor and pulled out of the casing, the casing would then follow suit. Pulled through the grommet until within the interior I then cut the casing with a pair of Park cable and casing cutters. An excellent tool that I use when building bikes for myself or for other people. They cut straight through, no fraying of cables or damaged casings.
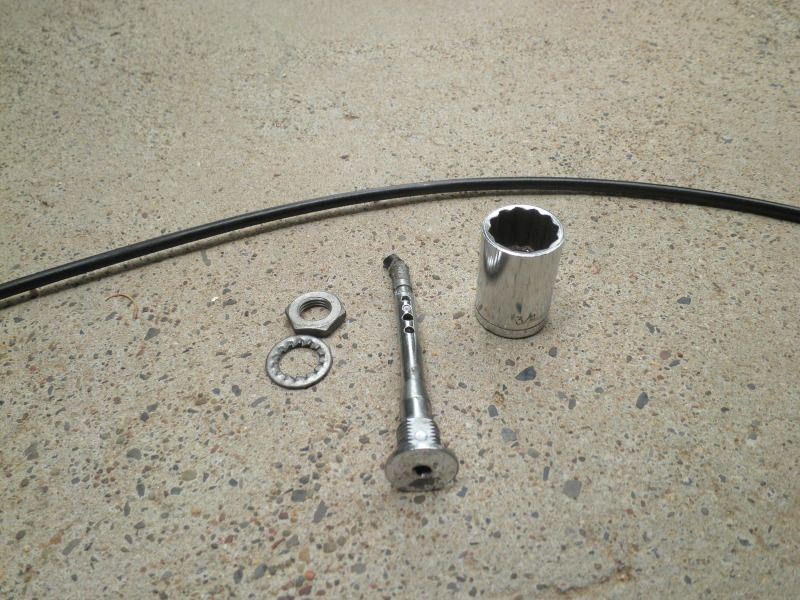
All out
As luck would have it or not as the case may be, the nut on my choke cable and indeed on the OEM replacement was ¾ of an inch. I tried the spark plug socket initially, but that proved to be much too big. Fortunately, I was able to undo the nut by turning the socket with my fingers, so that was lucky.
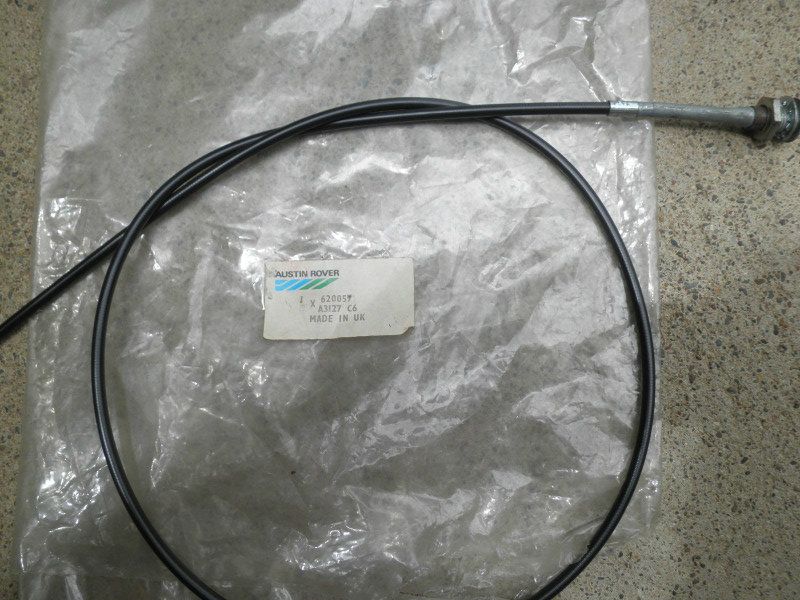
OEM casing
With the new casing fitted a problem now arose as the cable having been already used had a kink where it had been retained at the carburettor. I straightened it the best that I could, but it refused to slide through more than an inch or so before coming to a halt. The only thing for it was to cut the offending piece out of the cable, but then of course it was going to be too short for the casing,..typical!! So I reduced the length of the casing, the cable cutters earning their keep perfectly. The only snag was that I lost the ferrule on the end, but I was able to remove and reuse the original one, so it all worked out nicely in the end.
With the cable now shortened appropriately, I soldered the end to prevent runs or snags and it passed straight through the casing and into place.
All done
Ron.
All out
As luck would have it or not as the case may be, the nut on my choke cable and indeed on the OEM replacement was ¾ of an inch. I tried the spark plug socket initially, but that proved to be much too big. Fortunately, I was able to undo the nut by turning the socket with my fingers, so that was lucky.
OEM casing
With the new casing fitted a problem now arose as the cable having been already used had a kink where it had been retained at the carburettor. I straightened it the best that I could, but it refused to slide through more than an inch or so before coming to a halt. The only thing for it was to cut the offending piece out of the cable, but then of course it was going to be too short for the casing,..typical!! So I reduced the length of the casing, the cable cutters earning their keep perfectly. The only snag was that I lost the ferrule on the end, but I was able to remove and reuse the original one, so it all worked out nicely in the end.
With the cable now shortened appropriately, I soldered the end to prevent runs or snags and it passed straight through the casing and into place.
All done
Ron.
Last weekend I also changed the bushes in my Rover’s engine tie rod. The inner bushes were the original 1974 fitment, whilst the outer bushes had been last replaced in April 2007 with Range Rover steering damper bushes. During July the 4.6 went in, so they have had their work cut out for them over the following 76,000 Miles (122,000km).
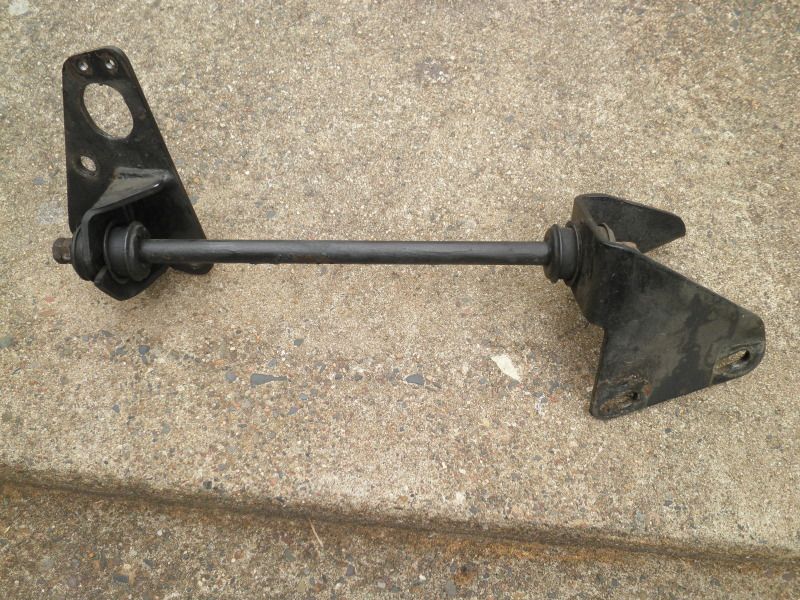
All out.
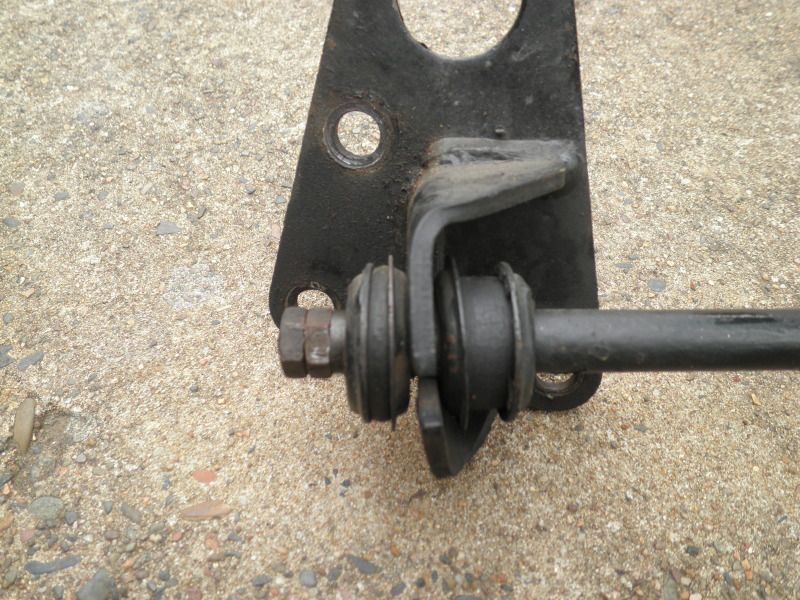
A rather squashed outer bush.
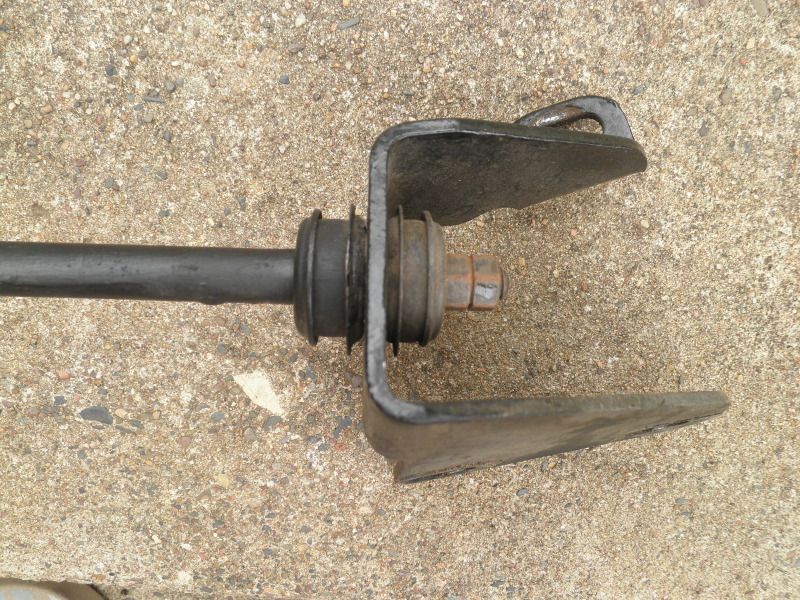
The body end, not too far behind.
I had two genuine NOS bushes left, but I also have some genuine NOS Rover 2000 rear shock absorber bushes, and by look and feel they are identical.
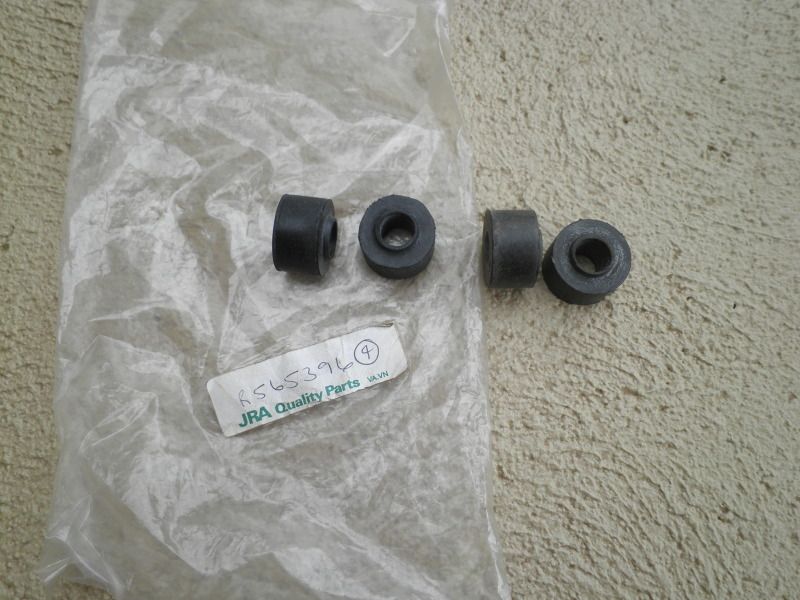
Genuine on their packet, Rover 2000 to their right on the concrete.
Using my Dremel fitted with a garnet paper type sanding wheel the paint was stripped off in no time at all, back to bright shiny metal underneath. Washed down with Turps and allowed to dry I then sprayed the parts with Kill Rust gloss black enamel. No primer is required and the finish looks great.
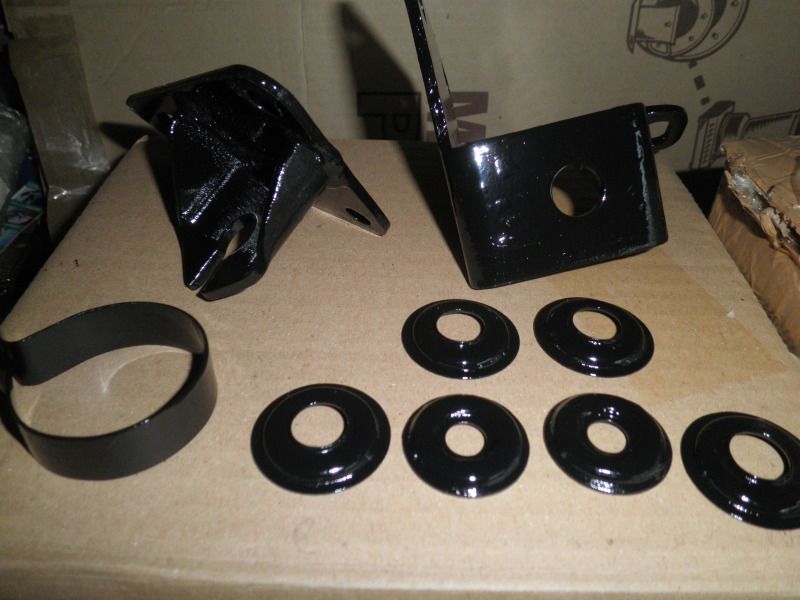
Rust free and enamelled.
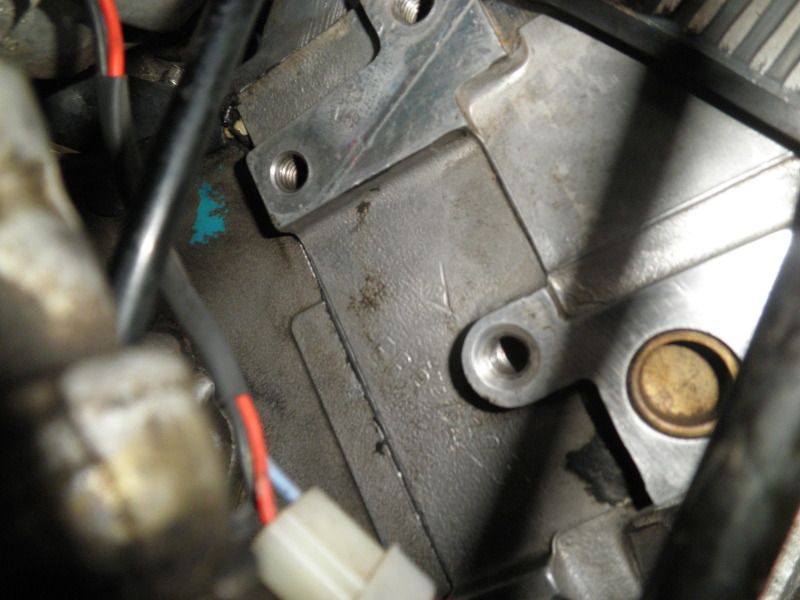
The 4.6 cylinder heads as they are known have four bolt holes at each end, and the bracket occupies three of them.
I replaced the original high tensile grade 5 nuts and bolts with new grade 5 items along with new zinc plated flat and spring washers. There were different size nuts originally fitted to the tie rod, mine had two slim ones at the engine end along with a short distance piece, and two standard width nuts at the body end. I replaced all with standard width items and left out the short distance piece.
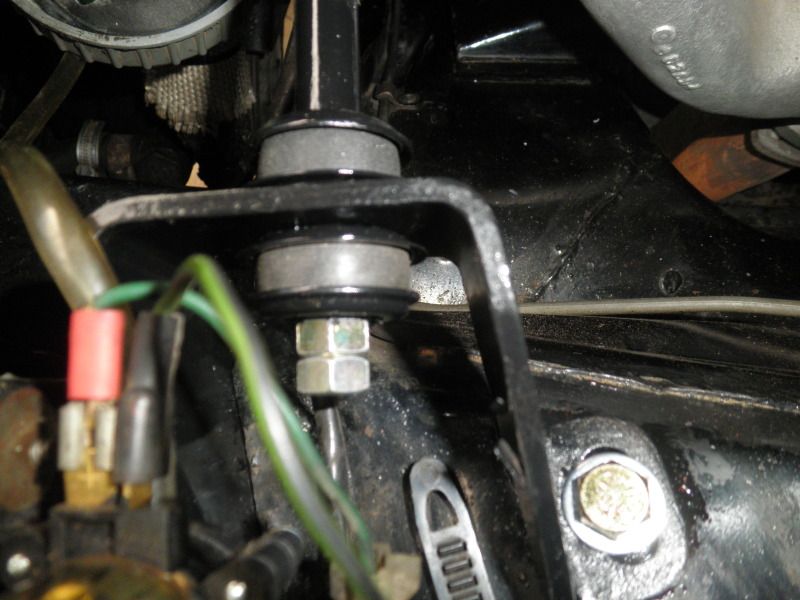
All fitted at the body end.
I used anti seize lubricant on the cylinder head bracket retention bolts.
The whole arrangement feels very secure, not that it didn’t before, but it just feels better now.
Ron.
All out.
A rather squashed outer bush.
The body end, not too far behind.
I had two genuine NOS bushes left, but I also have some genuine NOS Rover 2000 rear shock absorber bushes, and by look and feel they are identical.
Genuine on their packet, Rover 2000 to their right on the concrete.
Using my Dremel fitted with a garnet paper type sanding wheel the paint was stripped off in no time at all, back to bright shiny metal underneath. Washed down with Turps and allowed to dry I then sprayed the parts with Kill Rust gloss black enamel. No primer is required and the finish looks great.
Rust free and enamelled.
The 4.6 cylinder heads as they are known have four bolt holes at each end, and the bracket occupies three of them.
I replaced the original high tensile grade 5 nuts and bolts with new grade 5 items along with new zinc plated flat and spring washers. There were different size nuts originally fitted to the tie rod, mine had two slim ones at the engine end along with a short distance piece, and two standard width nuts at the body end. I replaced all with standard width items and left out the short distance piece.
All fitted at the body end.
I used anti seize lubricant on the cylinder head bracket retention bolts.
The whole arrangement feels very secure, not that it didn’t before, but it just feels better now.
Ron.
ewokracing
Active Member
Hi Ron
when you raise the rear of the car, where you do you jack the car up from? I remember you describing a certain way of having the rear of the car up in the air, but I can't find it.
when you raise the rear of the car, where you do you jack the car up from? I remember you describing a certain way of having the rear of the car up in the air, but I can't find it.
Hi Geoff,
If you have a trolley jack, then you can use the dedicated point centrally located beneath the boot, just behind where the toe bar would be. If you wish to raise the rear in order to replace the shock absorbers, then you'll need to use ramps otherwise the shocks will be open and the rubbers under considerable compression. Another option would be to use axle stands in the rear jacking points or in a similar location, then raise each trailing arm in turn with a jack placed beneath the rear attachment point until such time as the bottom shock rubbers are no longer under compression.
Ron.
Last Thursday my mechanical fuel pump decided it was time to start leaking petrol while the engine was running, a constant stream onto the road. To say that I was not amused would be a serious understatement. :evil: Fortunately, the flow diminished as the engine came up to temperature and there were no drips when the engine was switched off.
Such behaviour to me suggested that the problem lay at the interface of the suction and valve chambers. Given the degree of warping that the suction chamber exhibited where the diaphragm attached, I am not surprised that this actually happened. Still, it is rather annoying.
Since I refitted the pump back on November 17, 2012 with a new diaphragm and oil seal, just short of 3600 Miles (5760km) has been covered.
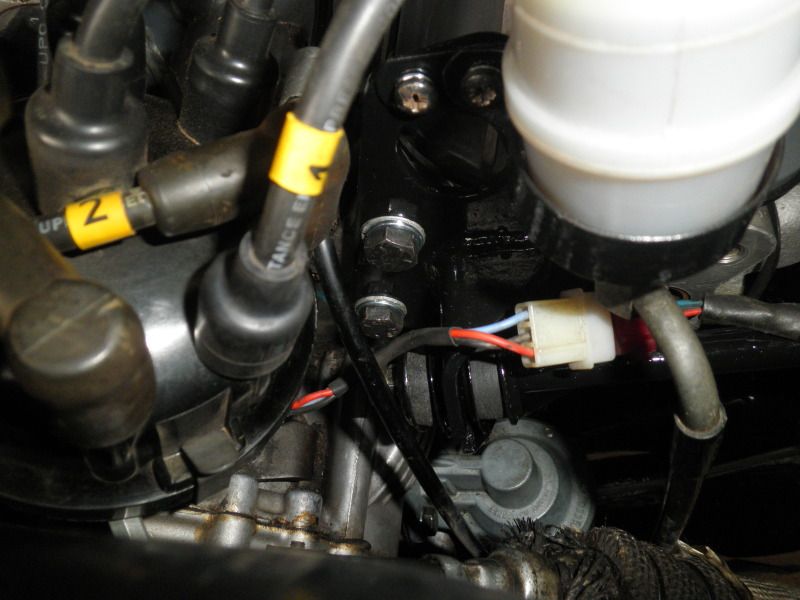
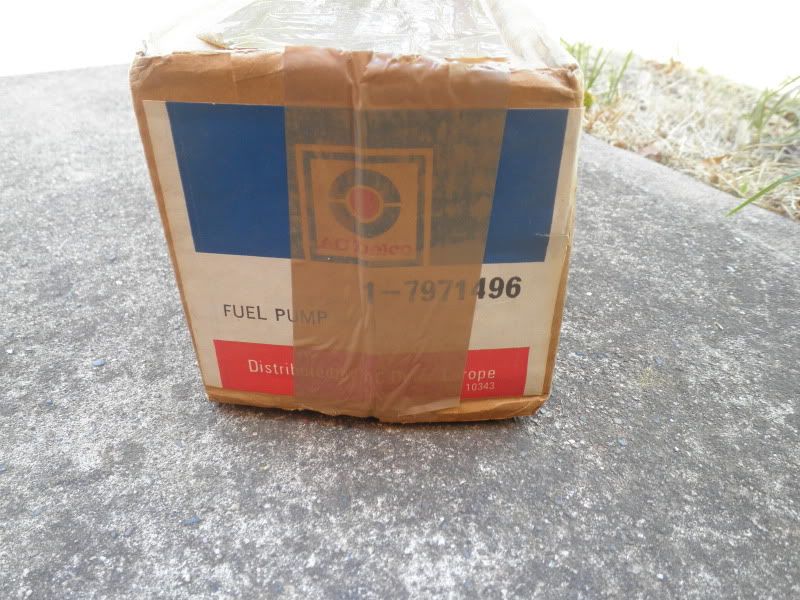
Fortunately, I recently obtained a genuine NOS AC Delco mechanical fuel pump for the Rover V8, a friend having obtained two, one of which I purchased from him.
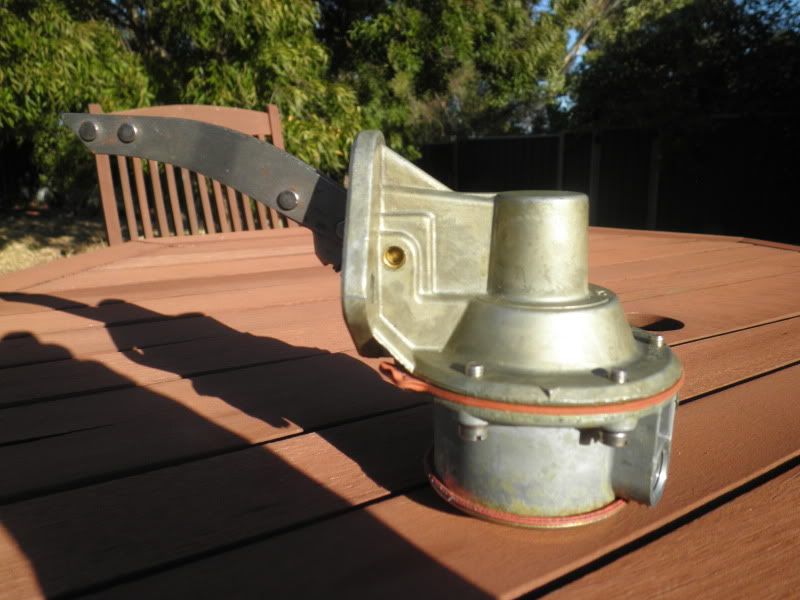
The main diaphragm is of a triple layer design rather than the usual single layer. My Rover’s original 1974 pump also featured the multi layer diaphragm.
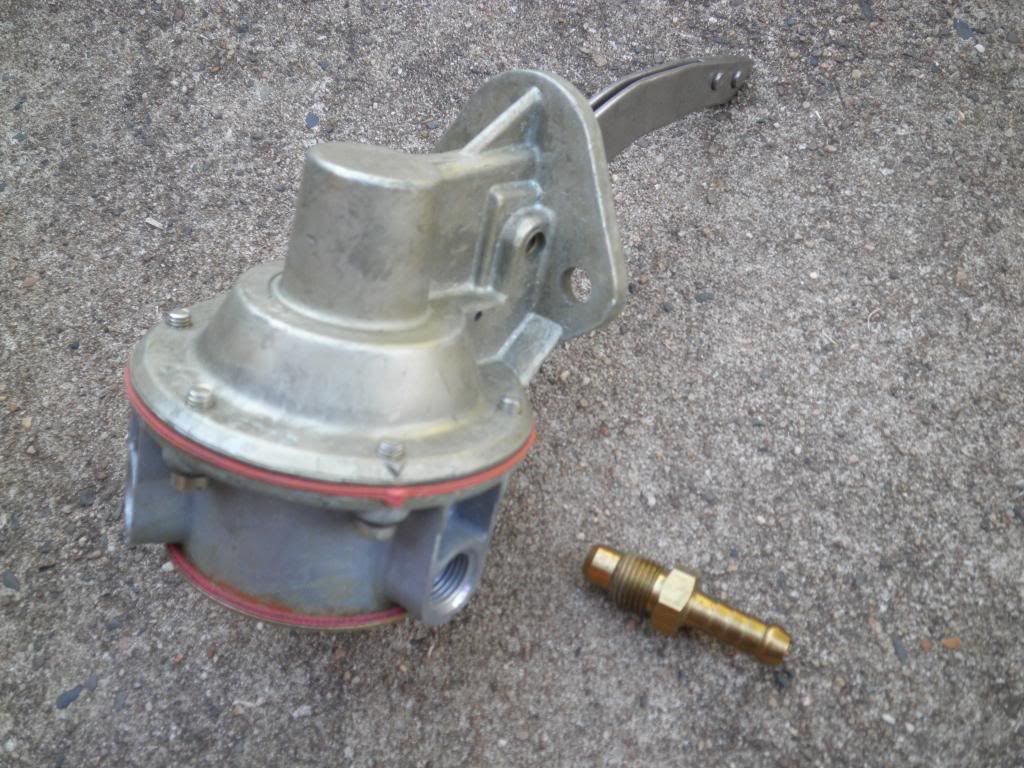
Pump with brass NPSM fitting. The seal is made at the flange, not by the threads.
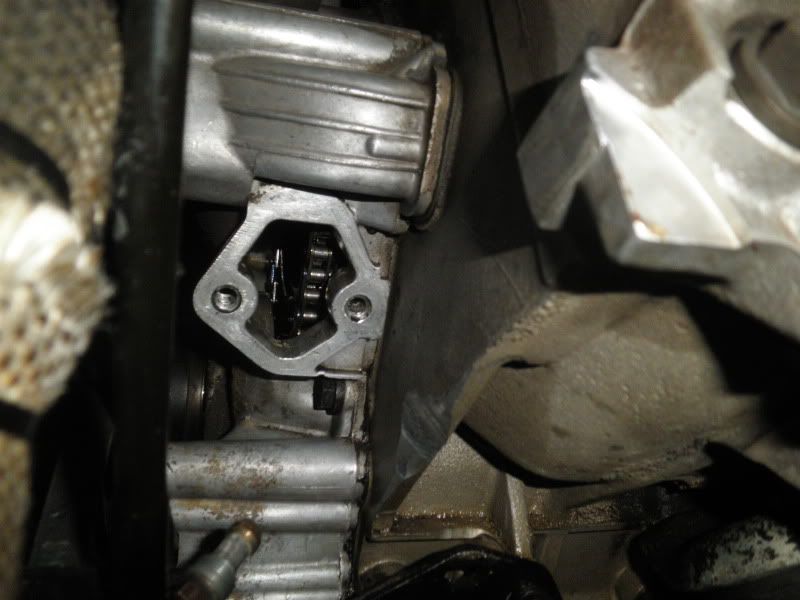
Awaiting the new pump
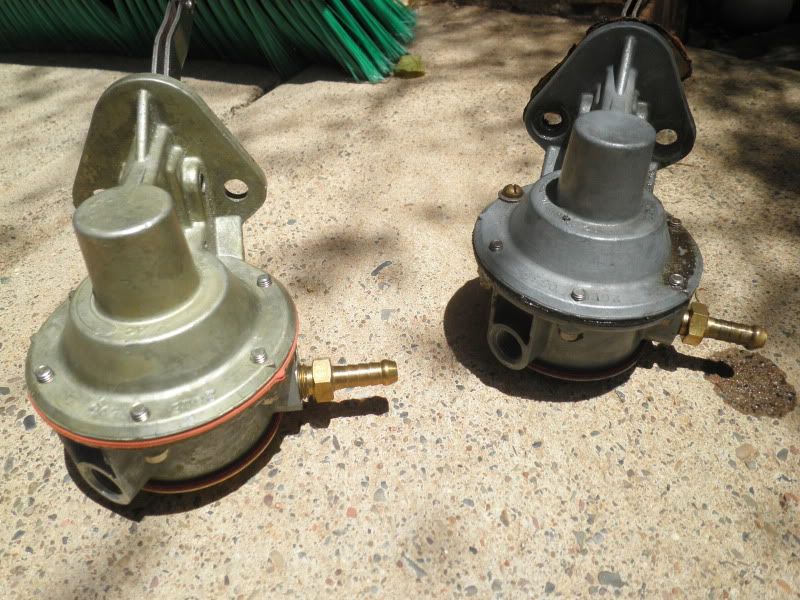
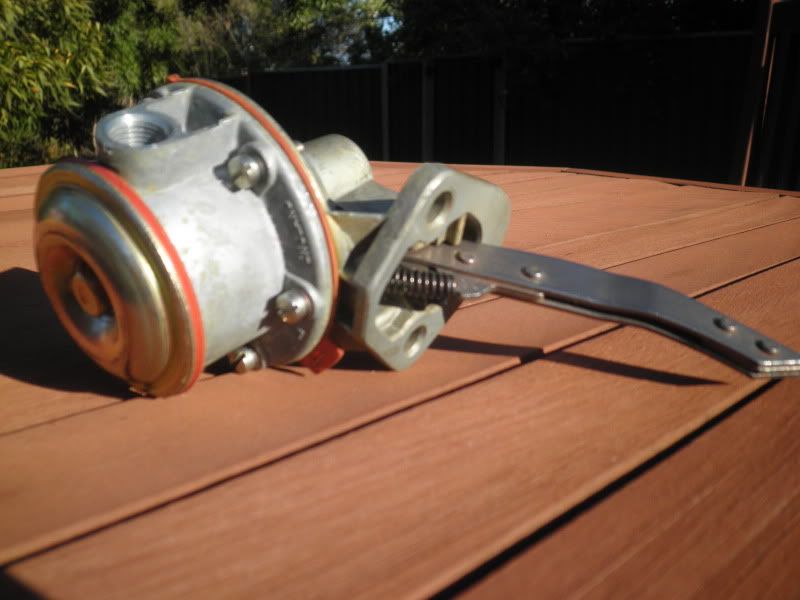
New and old together.
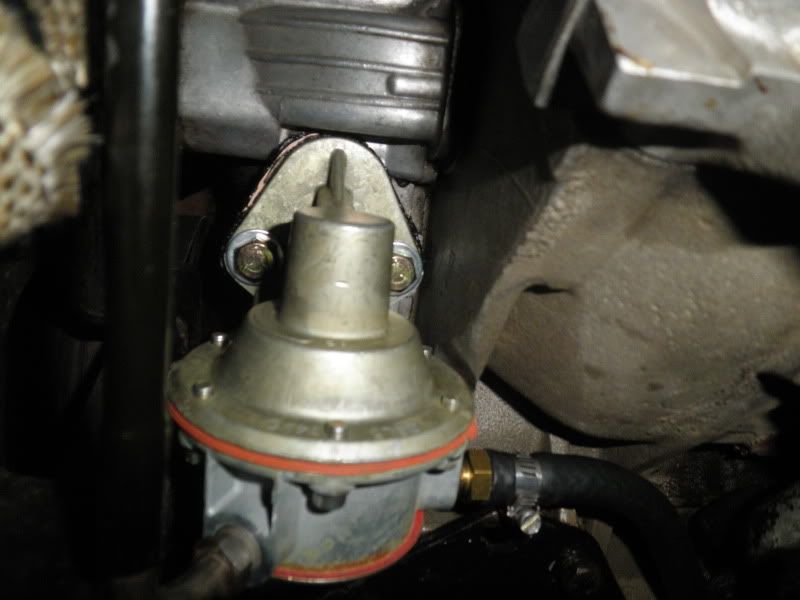
All fitted and ready to go.
I noted in the parts book that the washers to use were not spring washers, but rather flat washers, so I fitted a pair beneath with some new high tensile bolts.
I was loath to modify the NOS pump at this time, the details of which I have covered previously. I shall however rebuild another pump to keep as a spare, with those modifications made.
Ron.
Such behaviour to me suggested that the problem lay at the interface of the suction and valve chambers. Given the degree of warping that the suction chamber exhibited where the diaphragm attached, I am not surprised that this actually happened. Still, it is rather annoying.
Since I refitted the pump back on November 17, 2012 with a new diaphragm and oil seal, just short of 3600 Miles (5760km) has been covered.
Fortunately, I recently obtained a genuine NOS AC Delco mechanical fuel pump for the Rover V8, a friend having obtained two, one of which I purchased from him.
The main diaphragm is of a triple layer design rather than the usual single layer. My Rover’s original 1974 pump also featured the multi layer diaphragm.
Pump with brass NPSM fitting. The seal is made at the flange, not by the threads.
Awaiting the new pump
New and old together.
All fitted and ready to go.
I noted in the parts book that the washers to use were not spring washers, but rather flat washers, so I fitted a pair beneath with some new high tensile bolts.
I was loath to modify the NOS pump at this time, the details of which I have covered previously. I shall however rebuild another pump to keep as a spare, with those modifications made.
Ron.
My fingers are firmly crossed Steve. Even as far back as 1987 the AC pumps were next to impossible to obtain. I never imagined that I would ever see one to buy, so now that it has been fitted, I am really hoping that it will provide many years of trouble free running.
Eventually they suffer from the repeated heat cycles with the suction chamber warping, both at the interface with the valve chamber and at the interface with the timing cover. Does take many miles and many years though, so lets see how we go.
Ron.
Eventually they suffer from the repeated heat cycles with the suction chamber warping, both at the interface with the valve chamber and at the interface with the timing cover. Does take many miles and many years though, so lets see how we go.
Ron.
SydneyRoverP6B said:Fortunately, I recently obtained a genuine NOS AC Delco mechanical fuel pump for the Rover V8, a friend having obtained two, one of which I purchased from him.
I'm sure the genuine NOS AC Delco pump will go the distance Ron. I'm presuming your previous fuel pump was one of those spurious types from China or somewhere like that? I have made the mistake of trying out after-market parts for my Rover, and it is just a false economy. I will always try to stick with genuine OE parts nowadays
LeeEFI wrote,...
Hi Lee,
The pump that I removed on Saturday to make way for the genuine NOS AC was also a genuine AC. The only non AC pumps that I have used were Australian made Goss pumps which original equipment for the Leyland P76, and sold my Rover parts people during the late 1980s as a replacement for the AC. Genuine AC overhaul kits at that time were also NLA from Rover and parts specialists.
The factory fitted AC pump from 1974 ran for just on 152,000 Miles (243,000km). It had been rebuilt a couple of times during that time, but the suction chamber had to be finally retired due to considerable warping, both at the interface with the valve chamber, and at the interface with the timing cover. The valve chamber on the other hand appeared to have no problems, so has been used further with a replacement AC suction chamber that I obtained second hand. It was this second pairing that started leaking last Thusday and saw removal on Saturday. I have yet to dismantle it, but I expect to see the same problem.
The Goss pumps were also retired, initially their suction chambers were the problem but their valve chambers unlike the AC also gave problems. The Goss pumps only run small valves and their design differs in terms of how they are connected to the fuel delivery line.
I'll post up a separate thread on pumps in the engine section in due course which will look at how the AC and Goss pumps fare over time.
Ron.
I'm sure the genuine NOS AC Delco pump will go the distance Ron. I'm presuming your previous fuel pump was one of those spurious types from China or somewhere like that?
Hi Lee,
The pump that I removed on Saturday to make way for the genuine NOS AC was also a genuine AC. The only non AC pumps that I have used were Australian made Goss pumps which original equipment for the Leyland P76, and sold my Rover parts people during the late 1980s as a replacement for the AC. Genuine AC overhaul kits at that time were also NLA from Rover and parts specialists.
The factory fitted AC pump from 1974 ran for just on 152,000 Miles (243,000km). It had been rebuilt a couple of times during that time, but the suction chamber had to be finally retired due to considerable warping, both at the interface with the valve chamber, and at the interface with the timing cover. The valve chamber on the other hand appeared to have no problems, so has been used further with a replacement AC suction chamber that I obtained second hand. It was this second pairing that started leaking last Thusday and saw removal on Saturday. I have yet to dismantle it, but I expect to see the same problem.
The Goss pumps were also retired, initially their suction chambers were the problem but their valve chambers unlike the AC also gave problems. The Goss pumps only run small valves and their design differs in terms of how they are connected to the fuel delivery line.
I'll post up a separate thread on pumps in the engine section in due course which will look at how the AC and Goss pumps fare over time.
Ron.
Last Friday I purchased a pair of Hella H4 inserts along with a pair of Xenon Halogen 60/55W bulbs and some relays. The factory fitted Lucas outer lights were sealed 37.5/50W units, so I was hopeful that these would be a noticeable improvement.
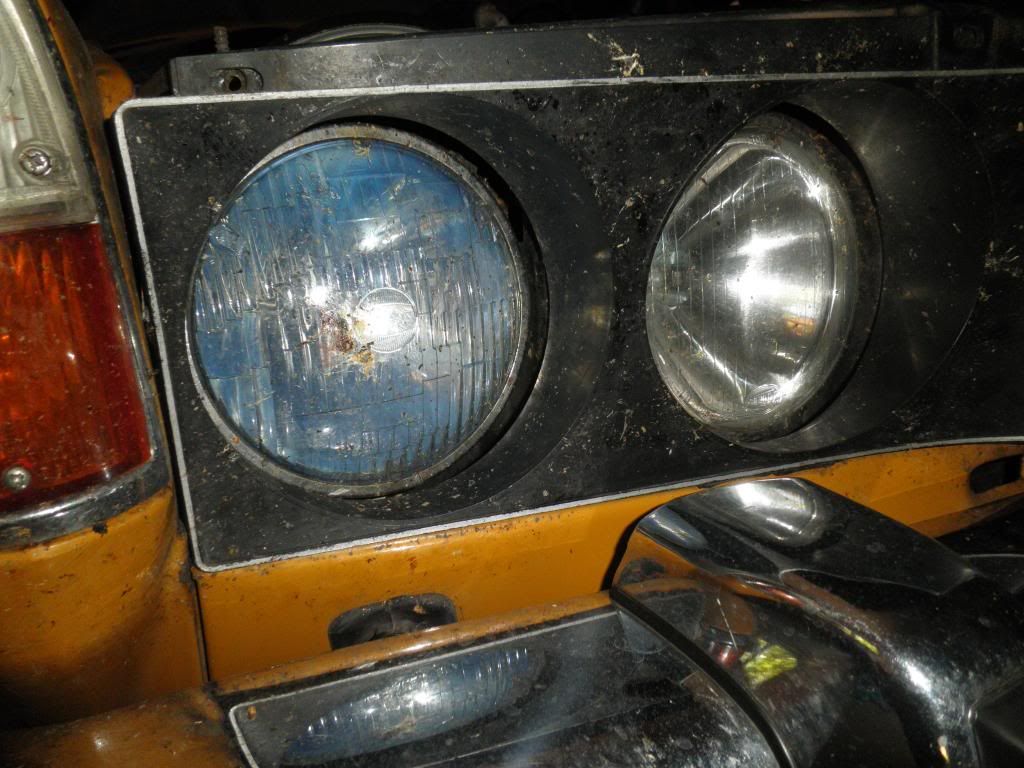
Although the 50W element was still active when using high beam, the 37.5W low beam element had failed, giving the light a milky appearance.
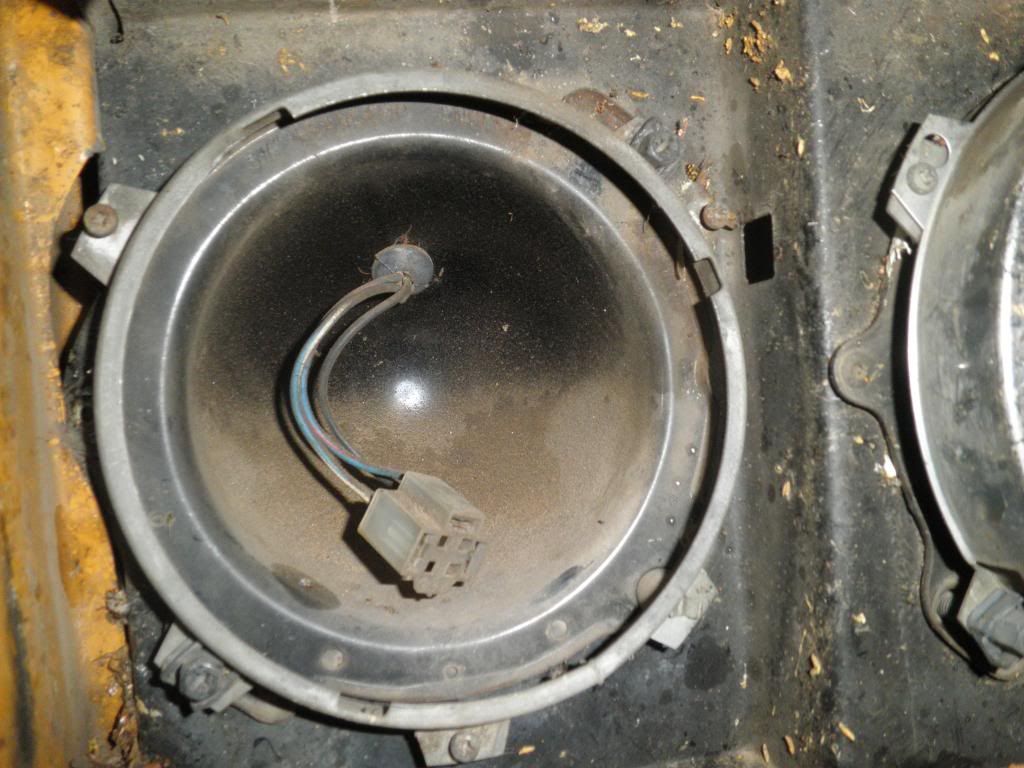
Headlight removed. In case you're wondering, all the marks are from dead bugs.
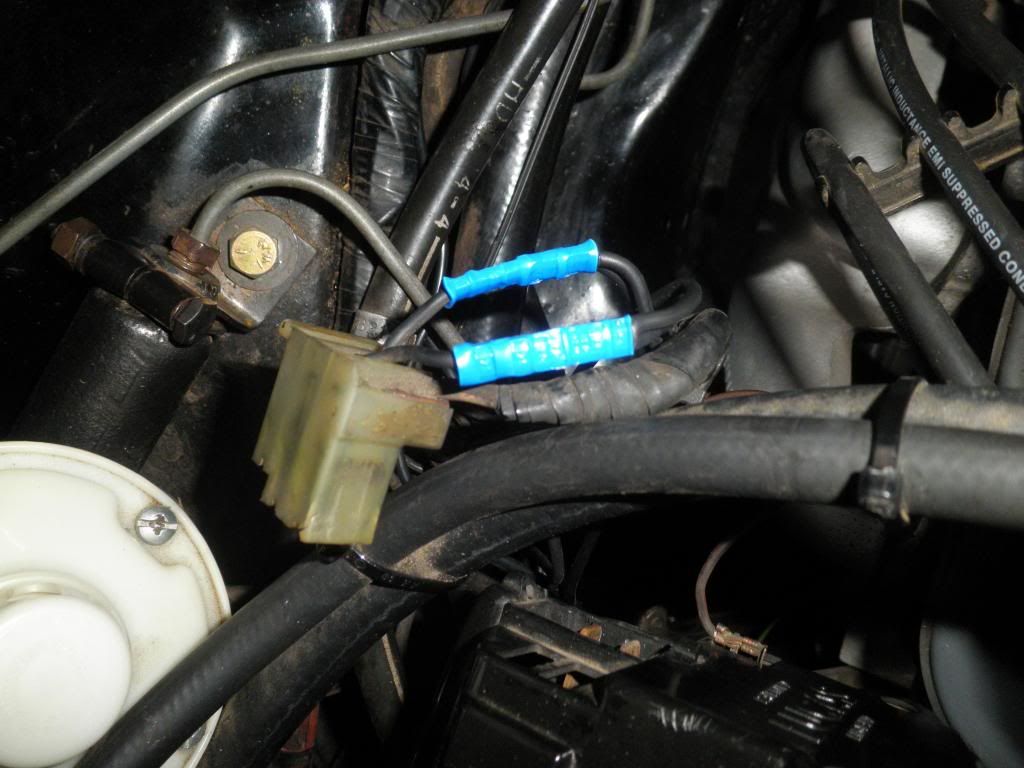
The power source for the lights was taken directly from the alternator.
A friend and fellow P6B owner is an electronics technician, so he very kindly gave me a hand in the installation.
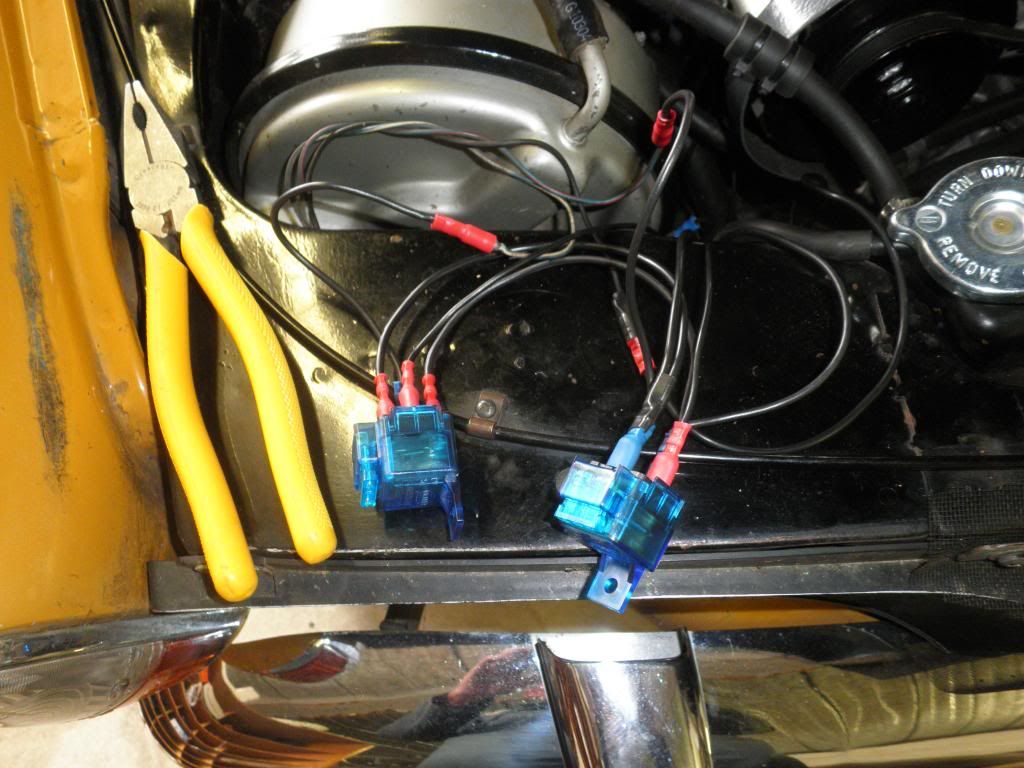
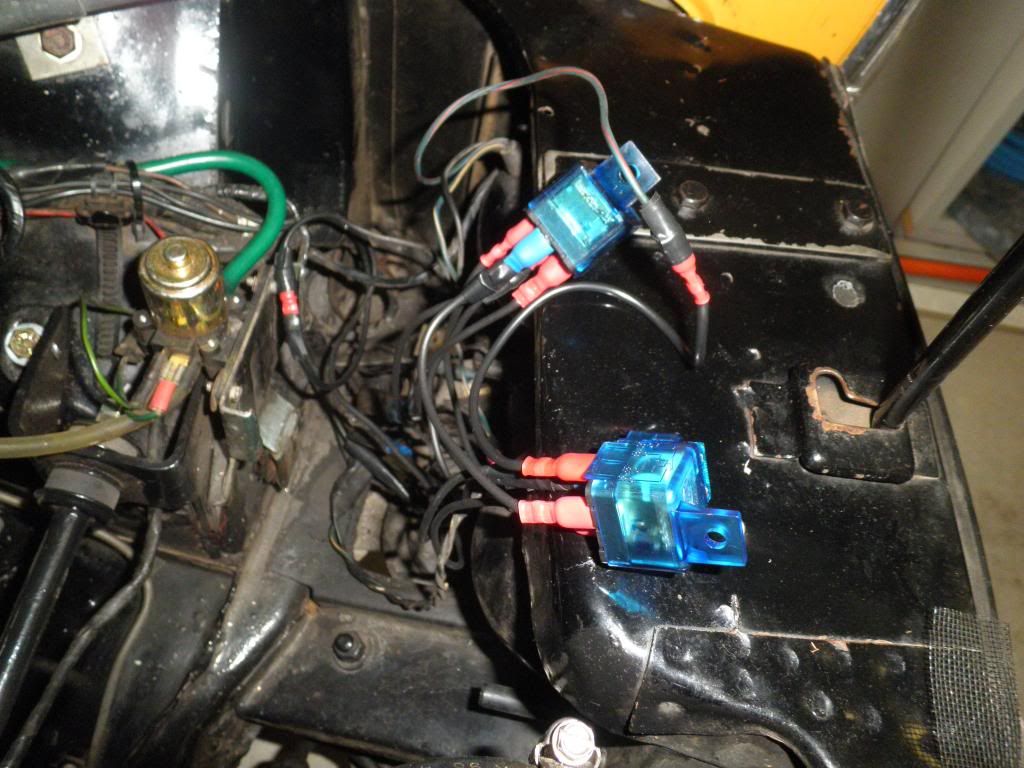
Four relays were fitted, one pair for each outer headlight. As purchased, each relay came with a 25A fuse, but these were swapped for 15A units.

All finished.
Road testing at night revealed the lights to be significantly brighter than the originals, so needless to say, I am very pleased indeed. I’ll take some nighttime photos and post them within the next few days.
Ron.
Although the 50W element was still active when using high beam, the 37.5W low beam element had failed, giving the light a milky appearance.
Headlight removed. In case you're wondering, all the marks are from dead bugs.
The power source for the lights was taken directly from the alternator.
A friend and fellow P6B owner is an electronics technician, so he very kindly gave me a hand in the installation.
Four relays were fitted, one pair for each outer headlight. As purchased, each relay came with a 25A fuse, but these were swapped for 15A units.
All finished.
Road testing at night revealed the lights to be significantly brighter than the originals, so needless to say, I am very pleased indeed.
I’ll take some nighttime photos and post them within the next few days.Ron.
rottenlungs
Member
That`s one handsome looking brake servo you`ve got there..
PS I have fitted the Hella mainbeams to mine, very happy so far.
Cheers
James
PS I have fitted the Hella mainbeams to mine, very happy so far.
Cheers
James
rottenlungs wrote,...
Hi James,
Thanks very much. I refurbished the booster (servo) myself during 2008 fitting a new kit throughout. For a custom appearance, I cleaned all the paint off back to bright bare metal, then painted the vacuum chamber in the same style as the alternator.
I have Hella highbeam lights also.. :wink: They have been working perfectly for 23 years to date, so a good reason to go with the same brand for the outer lights.
That`s one handsome looking brake servo you`ve got there..
PS I have fitted the Hella mainbeams to mine, very happy so far.
Hi James,
Thanks very much.
I refurbished the booster (servo) myself during 2008 fitting a new kit throughout. For a custom appearance, I cleaned all the paint off back to bright bare metal, then painted the vacuum chamber in the same style as the alternator.I have Hella highbeam lights also.. :wink: They have been working perfectly for 23 years to date, so a good reason to go with the same brand for the outer lights.
rottenlungs
Member
Ron
Top work on the booster - it looks sharp indeed with the drum painted.. With my car the booster is effective, but sometimes the pedal seems hard for a split second like a valve is slightly sluggish somewhere. If I tap the pedal it doesn`t really want to move, but if I apply a typical brake force, it works fine. As a result, I`ve been thinking about rebuilding it at some point soonish. Did you find the parts easy to get?
Cheers
James
JVY
Active Member
Good mod Ron. I still have original sealed beams all round on my car. The full beam is OK (possibly brighter than some modern cars). However, the dipped beam is pretty miserable. So, I'm sure having two 55W dipped beams with coupled with modern halogen lamps, must make quite a significant difference.
BTW, good bug collection .
BTW, good bug collection
.