Sparky's winter/spring/summer/autumn work

You're over the hump now Richard! It's looking really good, it must be a nice feeling knowing that base unit is solid all the way through and protected now. You should get another 35 years out of Sparky before you need to do that again.
 
Thanks everyone - I might start feeling under pressure to keep up the standard now :shock:

I’ll give anything a go :D
101_0236c.jpg

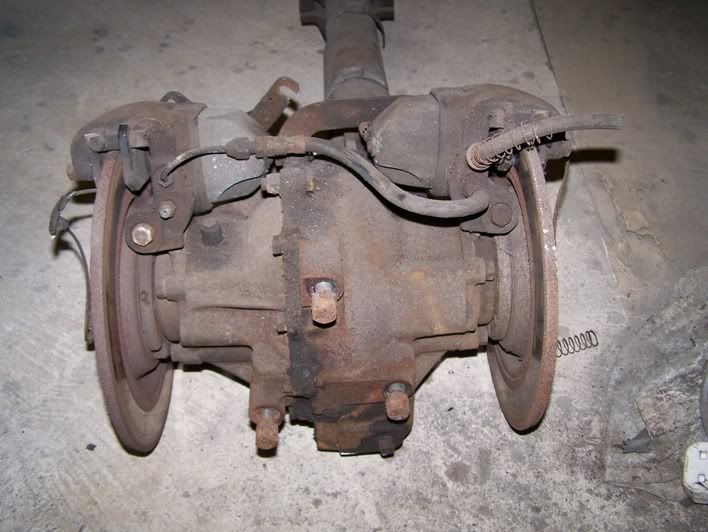
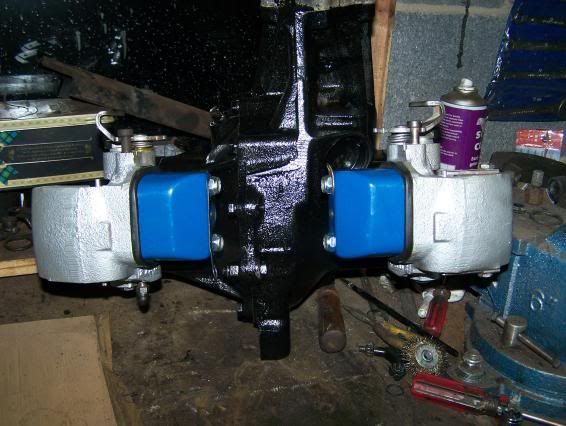
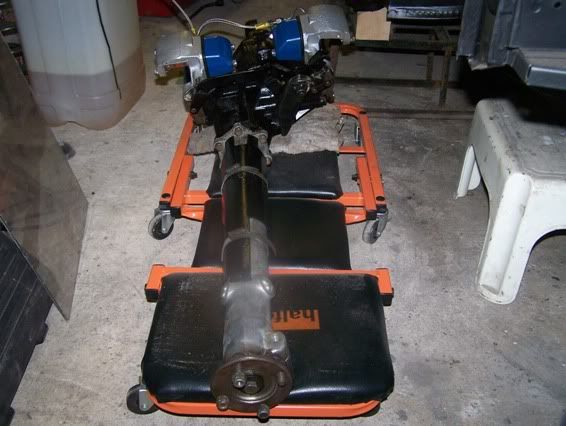
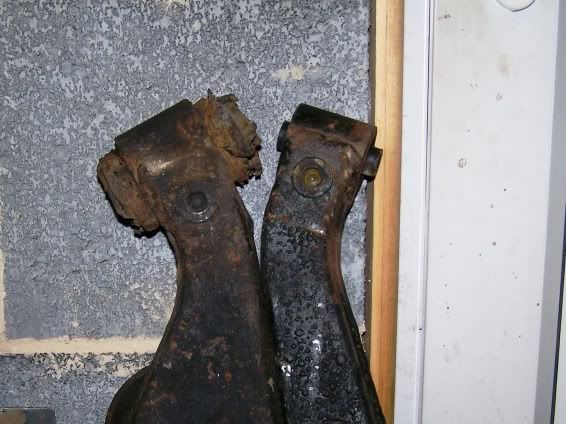
Here’s Sparky’s diff as it came out a few months ago. I have never had any problems with it, no noises, no clunks, so it’s going to get a clean up, paint, and an oil change then goes back in. Wouldn’t it be more sense for the bleed screw to be at the top?

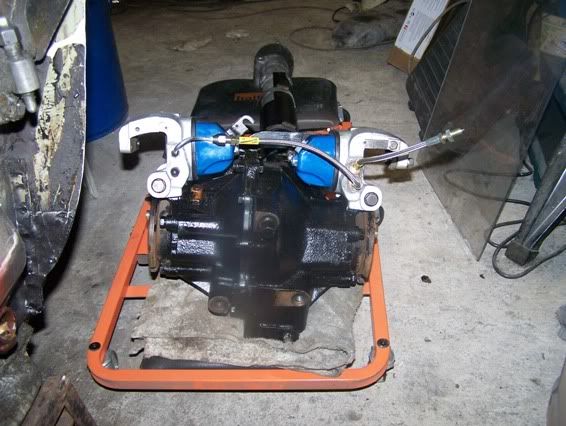
The calipers however, are now easy to get at and it seems too good an opportunity to miss, so having a new set of seals and braded hoses (if I can find them) I got some advice (from the brake section of this forum) and dived in.

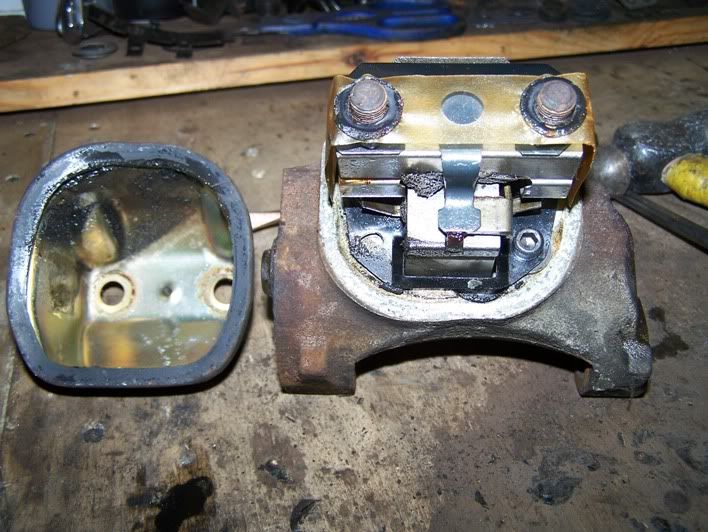
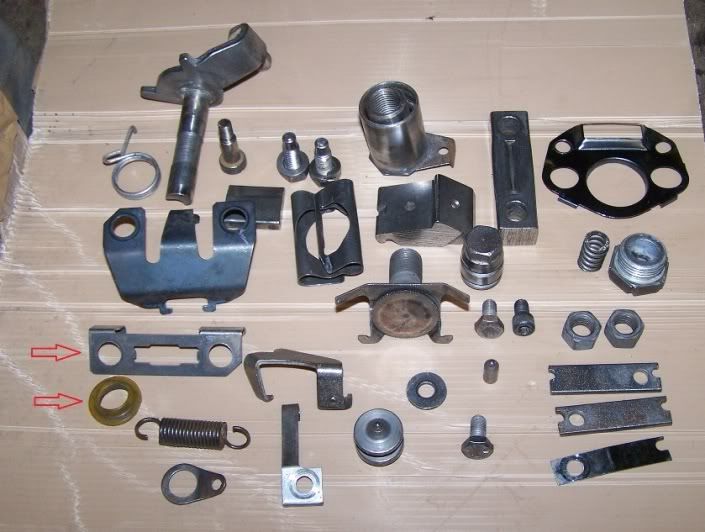
Now there’s a complicated looking thing, how did that get there and how do you tell the time with it?
101_0245c.jpg

101_0249c.jpg

101_0250c.jpg

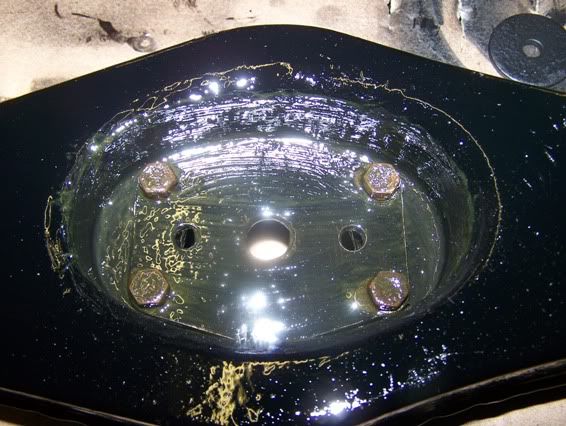
Took it to bits and cleaned it up. The cylinder was perfect, no scoring and no pitting, so a good clean and a wipe with brake fluid was all it got.
101_0274c.jpg

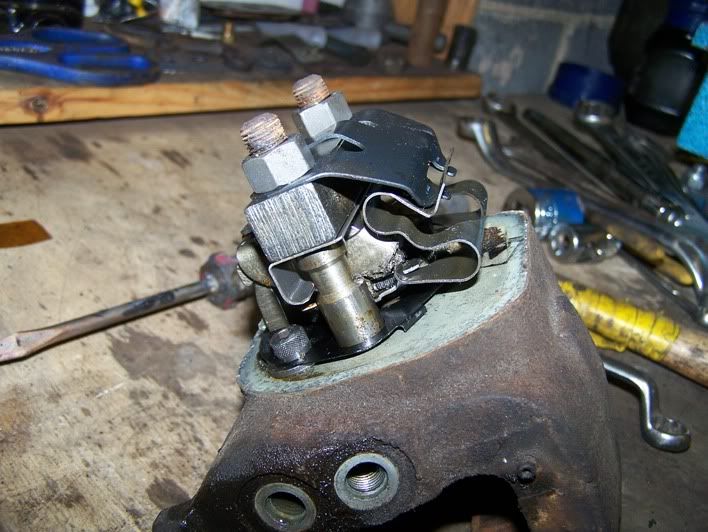
The two arrowed bits are NOT in my manual, so it went back together without them. Then it came apart again, and went back together correctly. Good job I took loads of pics.

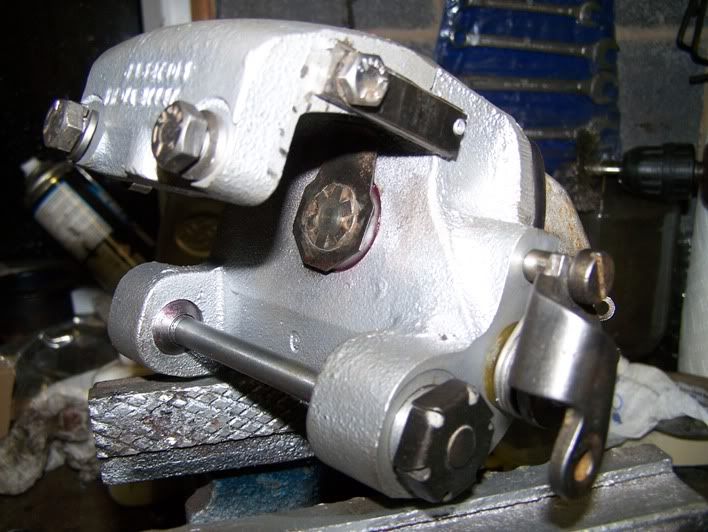
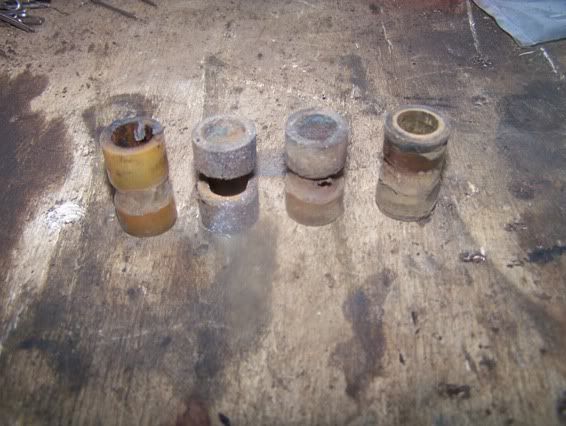
It was great fun, greasing up all of the bits the manual told me to, then trying to hold them tight enough to force them back together. A couple of bits tried to make a run for it, but were recaptured and eventually joined their compatriots and went back together.

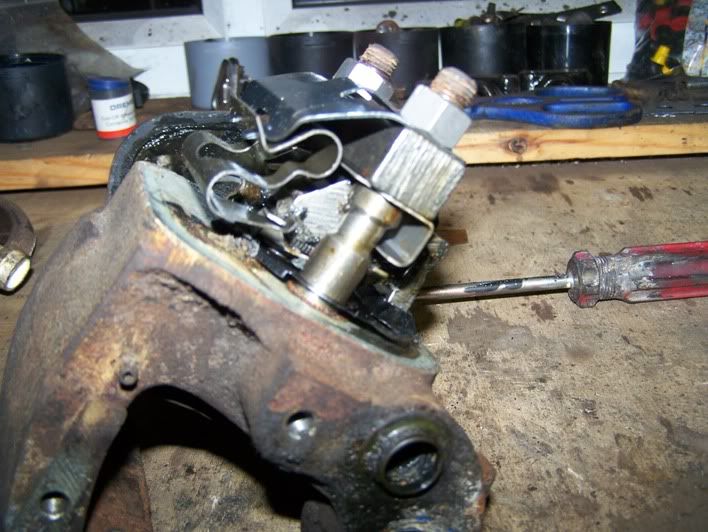
I moved the handbrake lever around a couple of times and noticed that the pawl clicked nicely and the serrated head moved round one tooth every time.

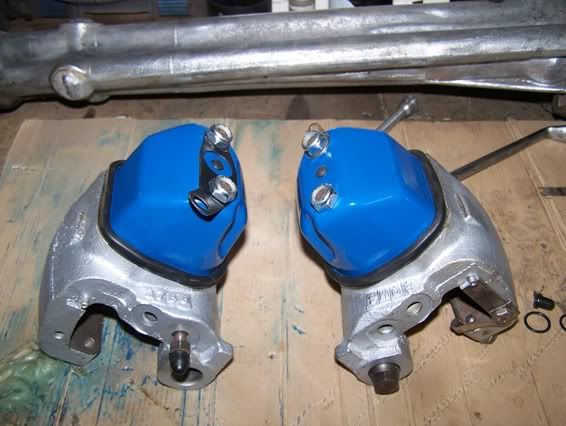
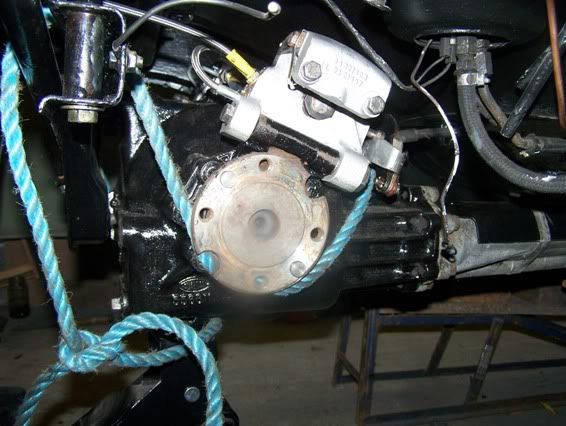
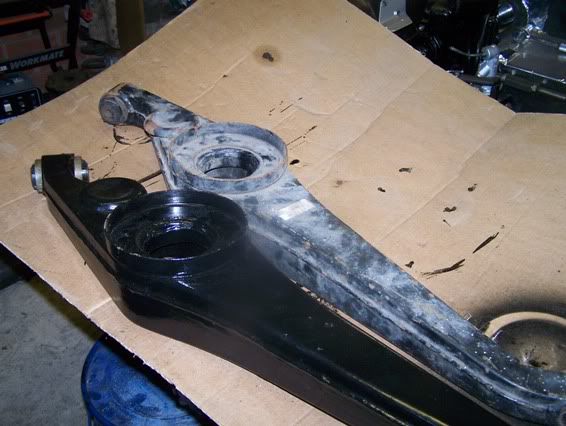
I haven’t gone over the top with polishing it, but have cleaned the rust off the main caliper and protected it with some high temperature enamel. The cover was left as it was because the yellow passivating coating was intact, but covered in baked on crud.

101_0280c.jpg


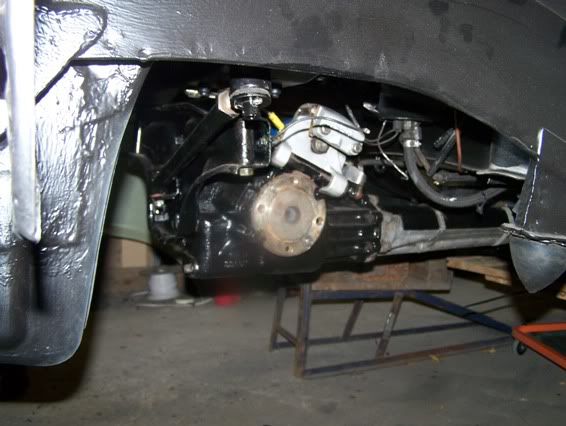
Just one problem! there's two of them!! :shock:

Richard
 
Wouldn’t it be more sense for the bleed screw to be at the top?

It would but you'll never be able to get at the bugger when it's all back in the car. Excellent work btw, I'm in awe of your patience and dedication. :)
 
I finished rebuilding the second caliper - rear caliper overhaul

The cover on the other caliper was rusty, so I rubbed both of them down and painted them.

b101_0359.jpg


Fitted back onto the diff, after a good wire brushing that is. oh and a coat of paint.

b101_0361.jpg


Just got to finish off with the brake pipes when I remember where they are and the hand brake linkage, then it can go back in :shock:

Richard
 
Last edited:
Cheers Bri

I have finally managed to finish the diff and have manage to wrestle it off the bench and onto the crawler - I knew that thing would come in handy one day.

101_0368a.jpg

101_0369a.jpg


I don't have enough stamina to fight it into position so I lifted the front onto the cross member and then screwed in the top bolt. It was then fairly easy to jack the diff off the crawler on the bolt, and tie it to the diff hanger. The let the jack down, move the crawler and lift it again with the jack underneath it. In with bolts and jobs a good'un.

101_0372a.jpg

101_0375a.jpg


Just need to connect it all up then refit the rest of the rear end.

Springs, shocks, trailing arms, top links, and tube have all been cleaned up, derusted and painted. Replaced the rear bushes on the top links and the trailing arms where they fit into the elbow (Thanks to Ian for his help and the loan of the press) piccies later.

Just need to treat the elbows, slap it all together, then it will be on its rear wheels :D :D

Richard
 
It's good that you have the patience to do things properly.
Usually i have the tendency to hurry up a little too much.
I also did the trick with the top bolt to raise the diff. I guess that there aren't that many options.
I can also see that the harmonic balancer is missing. Are you going to fit it later?

And yes, crawlers can be very handy, with the help of some proper wood make an excellent engine trolley. :D
2399724260050033024S600x600Q85.jpg
 
Demetris said:
It's good that you have the patience to do things properly.
Usually i have the tendency to hurry up a little too much.
I also did the trick with the top bolt to raise the diff. I guess that there aren't that many options.
I can also see that the harmonic balancer is missing. Are you going to fit it later?

And yes, crawlers can be very handy, with the help of some proper wood make an excellent engine trolley. :D

Hi Demetris

I haven't spent as much time on the diff as I will the engine as it's out of sight as it were, but I have made certain that it all works ok and given it a coat of paint.

The harmonic balancer was left off to save weight so it was easier to handle, as were the discs, pads, and oil. I can fit them later after torqueing it all up.

I am now wondering if my cheap crawler will take the weight of my engine/box, hmmm. that might just work lol :)

Richard
 
quattro said:
I am now wondering if my cheap crawler will take the weight of my engine/box, hmmm. that might just work lol :)

Richard

Richard, I don't know how badly you need an engine/box trolley, but it is doable.
In my case i wanted something that could roll into the elevator and then into my apartment at the 3rd floor. :shock:
So i just removed the cushions, fitted an additional pair of wheels, bolted a thick plank of wood and i had an instant engine trolley.
When i finished i undid all the modifications (apart from the extra wheels) and i had my crawler back. :D
 
adamhotrod said:
Demetris said:
In my case i wanted something that could roll into the elevator and then into my apartment at the 3rd floor. :shock:

:LOL: There is absolutely no way you have a wife or girlfriend! You are my new hero Demetris.

Well, it was a period that i was fresh splitted, not much happy, but i was in a mood "I am free to do whatever i want".
And so i did. Roverwise, i had the engine in the porch and i rebuilt the gearbox in the living room. Despite of what this implies, i tried and kept everything really clean. Forget oil spils etc.
But those things don't happen everyday you know.
OK, enough of highjacking Richard's thread.
 
Wow!

Just caught up with the thread - awesome work, Richard. Really awesome.

Amazed at thoroughness/patience/perseverance combo. And no lack of skill. <hats off smilie>

Keep it up.

Cheers,

Matt.
 
adamhotrod said:
Demetris said:
In my case i wanted something that could roll into the elevator and then into my apartment at the 3rd floor. :shock:

:LOL: There is absolutely no way you have a wife or girlfriend! You are my new hero Demetris.

I guess I must be one lucky chap then, my missus let me rebuild an engine in the conservatory last year...! :shock: I will say that it was only the build up after everything was acid stripped and spotlessly clean. I did the oily, messy strip down outside. Its also amazing what I can get away with putting in the dishwasher when the boss isn't looking... :wink:
 
V8P6B said:
Its also amazing what I can get away with putting in the dishwasher when the boss isn't looking... :wink:

LoL :LOL:
Both my P6 head and the head from my CBR 600 got the dishwasher treatment. Fantastic for getting every little bit of debre out, a must from the CBR head being a high performance bit of kit. :D
 
Richard
A superb record of your efforts and progress; well done. It's good to see another P6 being given a new lease of life and this topic really does show the benefits of digital photos; looking forward to seeing the final result.
 
Off again with the rear suspension.

The rear trailing arm bushes were shot, totally ronnied. The inner steel sleeve had rusted, and expanded as steel does, pushing the rubber out of both ends. The outer steel sleeve had also rusted away leaving me nothing to push it out with. I used a hole cutter to cut into the rubber from both ends then cutting what was left of the outer sleeve away with a hack saw, clamped the inner sleeve into the vice and wrestled it out.
c101_0193.jpg


Hacksawed the outer sleeve out and was ready to clean up and paint. I then removed all of the underseal, derusted small areas as the arms were quite good, then prised out the bungs and injected them with dinitrol. Took them down to Rover Classics to get some new bushes, and somehow managed to end up with a new trailing arm, which then had to be painted :shock:
c101_0371.jpg


Now, having had problems with trailing arms before, (i.e. one snapped under the spring and one had a shock let go when the mounting plate rusted away) I painted a load of dinitrol into the mounting hole, then put the freshly painted plate in and gave it a good coat of dinitrol top and bottom
c101_0380.jpg


Shock mounting rubbers and nylon bushes were pretty bad so I got a new set and in it went. Ok there was quite a bit of wire brushing, sanding and painting going on too.
c101_0384.jpg

c101_0381.jpg

Just need to get the elbows sorted then it won’t be long before the rear wheels are on.

Richard
 
quattro said:
Took them down to Rover Classics to get some new bushes, and somehow managed to end up with a new trailing arm, which then had to be painted :shock:

I didn't know Ian had turned into Auntie Wainwright making you buy things you didn't need!

Seriously though, it's coming on a treat now, you're doing a fantastic job on it - a proper restoration, not just making it a shiney show queen but making it last too.
 
testrider said:
quattro said:
Took them down to Rover Classics to get some new bushes, and somehow managed to end up with a new trailing arm, which then had to be painted :shock:

I didn't know Ian had turned into Auntie Wainwright making you buy things you didn't need!

Seriously though, it's coming on a treat now, you're doing a fantastic job on it - a proper restoration, not just making it a shiney show queen but making it last too.

Thanks all 8)

To be honest, its more about making it last than making it shiny.

I rebuilt Thunderdog and took a long time to do it too, but it rusted out again in a very short time. That was my lesson in not putting a plate over existing rust and nailing it on with the mig hammer. Now I have time (Thunderdog was a daily driver) and some spare cash, I am going to do it right. It will help of course that Sparky will not be used when there is salt, snow and slush on the road, and will be kept in a nice warm garage, but doing it right first time will extend his life considerably.

There will still be stuff to do when he is back on the road, but there are other winters on the way.

Richard

Have been using my home made sand blast cabinet - that was fun, noisy, dirty, useful, awkward, effective (please delete those which do not apply :shock: )
 
Well I'm keeping a very close eye on the developments and am enjoying it very much. You're an inspiration to people like me who are a bit afraid of taking their pride and joy completely apart. When I eventually get around to my rebuild, I'll be using this whole thread as a reference... Although it might just be easier to make you an offer you can't refuse for (The finished) Sparky, although after this amount of work I'm not sure there would be such a figure. :LOL:
 
Back
Top