

You are using an out of date browser. It may not display this or other websites correctly.
You should upgrade or use an alternative browser.
You should upgrade or use an alternative browser.
Sparky's winter/spring/summer/autumn work
- Thread starter quattro
- Start date
DesmoDuke said:What a fantastic looking P6 you have done an amazing amount of work to Sparky it is a real credit to you.Well done
Thanks Duke, however, he is a slightly different shape now :evil:
Monday Morning blues and British Gas
Richard
He'll be back 8)
Last edited:
Moon Rover!
Member
Hello Quattro, I have just spent nearly 2 hours reading your epic restoration of sparky.  What a credit to yourself. This really has been a labour of
love. I have immensely enjoyed reading up to page 22. ( Got be up early) I can't wait to read the final few pages. For myself this is what
the forum is all about!! Sharing all the blood sweat and tears to the finished car. Well done. If this doesn't give us folks on here the impetus
to keep our P6's in good order nothing will. Thankyou :wink: Sincerely Moon Rover! Kevin
What a credit to yourself. This really has been a labour oflove. I have immensely enjoyed reading up to page 22. ( Got be up early) I can't wait to read the final few pages. For myself this is what
the forum is all about!! Sharing all the blood sweat and tears to the finished car. Well done. If this doesn't give us folks on here the impetus
to keep our P6's in good order nothing will. Thankyou :wink: Sincerely Moon Rover! Kevin
Thank you Moon Rover - it was a lot of fun, and to be honest, is still going on 8)
Some of the links don't work on the thread including the link to the rear brake rebuild - rear caliper overhaul
And the heater work - Heater woes - any help?
I will be updating the latest bit when I get the chance - More Sparky's winter work
Cheers
Richard
Some of the links don't work on the thread including the link to the rear brake rebuild - rear caliper overhaul
And the heater work - Heater woes - any help?
I will be updating the latest bit when I get the chance - More Sparky's winter work
Cheers
Richard
grifterkid
Member
WOW... :shock:
This P6 I see before me is just stunning... Every box is ticked in my personal P6 'want' list so I am very envious indeed!
This P6 I see before me is just stunning... Every box is ticked in my personal P6 'want' list so I am very envious indeed!
Cheers Grifterkid
I have been doing some work on him of late, more of which when I can collate all of the photos. Got some at work, some at home, some on the laptop some on the phone and some still on the camera :?
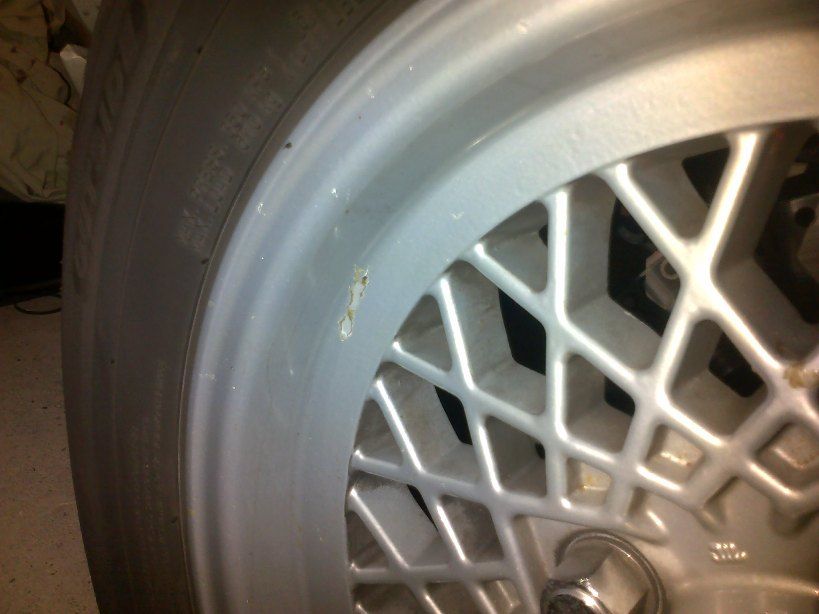
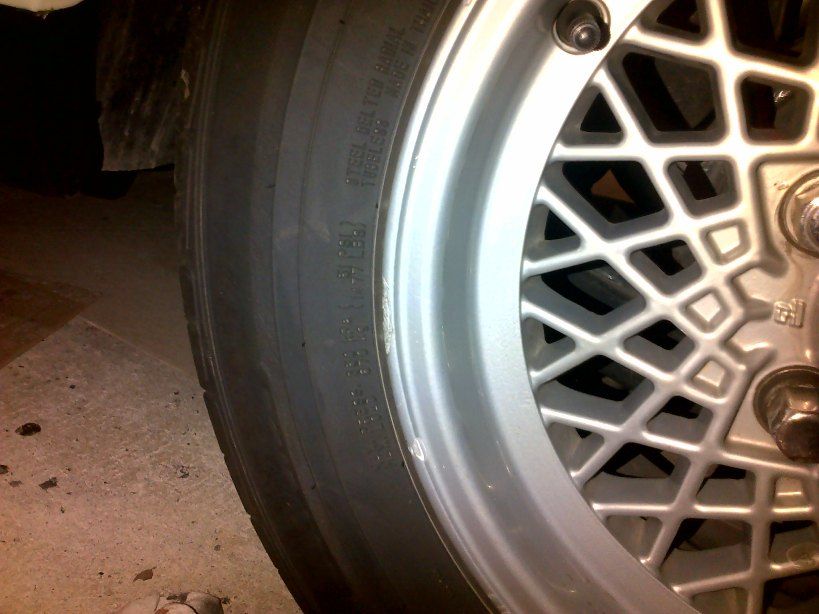
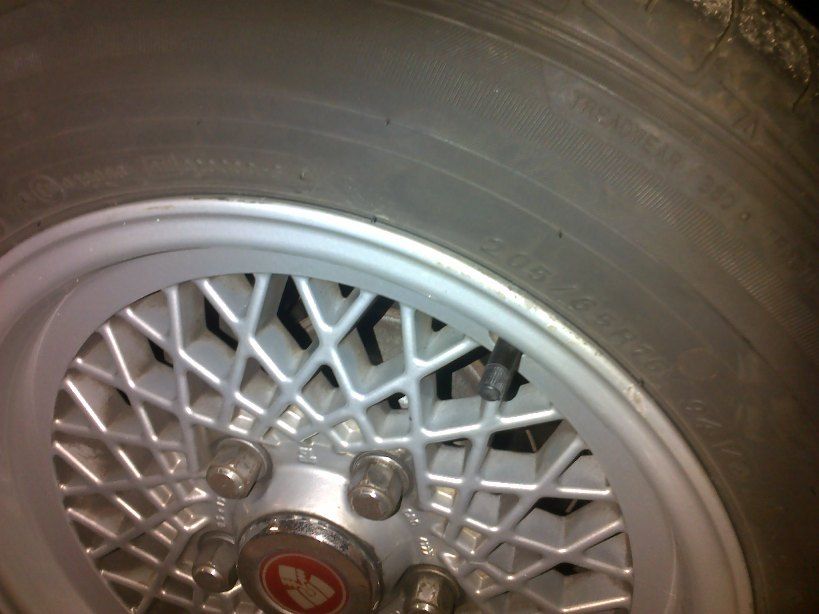
Main thing at present is the wheels - they're not bad to be honest, but they have a few small scuffs, some sort of resin on a couple of them which is impossible to remove and one has a small area which the coating is coming off and there is corrosion underneath. I was thinking about removing the wheels and taking them down to the local tyre shop to have the tyres removed, when after a call round to local alloy wheel refurb places I came across one who would :-
1/. Remove the wheels from the car, and take the tyres off
2/. Strip them, repair any dints etc
3/. Shot blast them
4/. Powder coat them to your choice of colours/finishes
5/. Replace the tyres and balance the wheels
6/. Fit them on the car ready to drive away.
All in one day, and all for £55.00 per wheel :shock:
This sounds very good to me, so I will be reporting on how it goes 8)
Richard
I have been doing some work on him of late, more of which when I can collate all of the photos. Got some at work, some at home, some on the laptop some on the phone and some still on the camera :?
Main thing at present is the wheels - they're not bad to be honest, but they have a few small scuffs, some sort of resin on a couple of them which is impossible to remove and one has a small area which the coating is coming off and there is corrosion underneath. I was thinking about removing the wheels and taking them down to the local tyre shop to have the tyres removed, when after a call round to local alloy wheel refurb places I came across one who would :-
1/. Remove the wheels from the car, and take the tyres off
2/. Strip them, repair any dints etc
3/. Shot blast them
4/. Powder coat them to your choice of colours/finishes
5/. Replace the tyres and balance the wheels
6/. Fit them on the car ready to drive away.
All in one day, and all for £55.00 per wheel :shock:
This sounds very good to me, so I will be reporting on how it goes 8)
Richard
Funny how you keep meaning to do stuff, then 2 1/2 years have passed
Anyhoo, the wheels. I took Sparky down to this place in Sheffield and left him there for the day.
They started out, in a reasonable state, but parts of them were beginning to deteriorate.
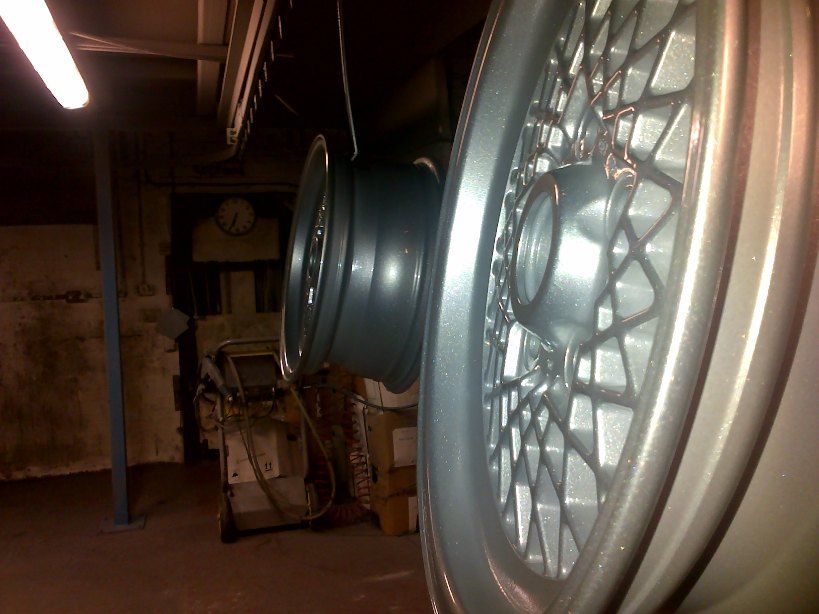
They did what they said and removed the wheel and then the tyres. Dipped them to strip off the old paint. I had the choice of around 10 different finishes including one silver one with a bit of fleck, which is the one I went with. These were hung up cooling off from the baking process.
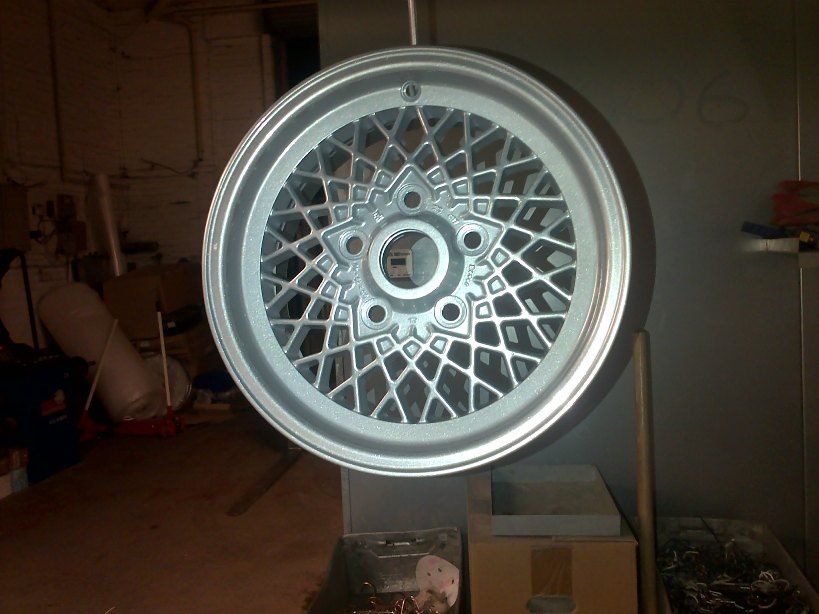
Back on the car, it doesn't look quite this 'Sparkly' in real life, as the camera flash has picked up the fleck.
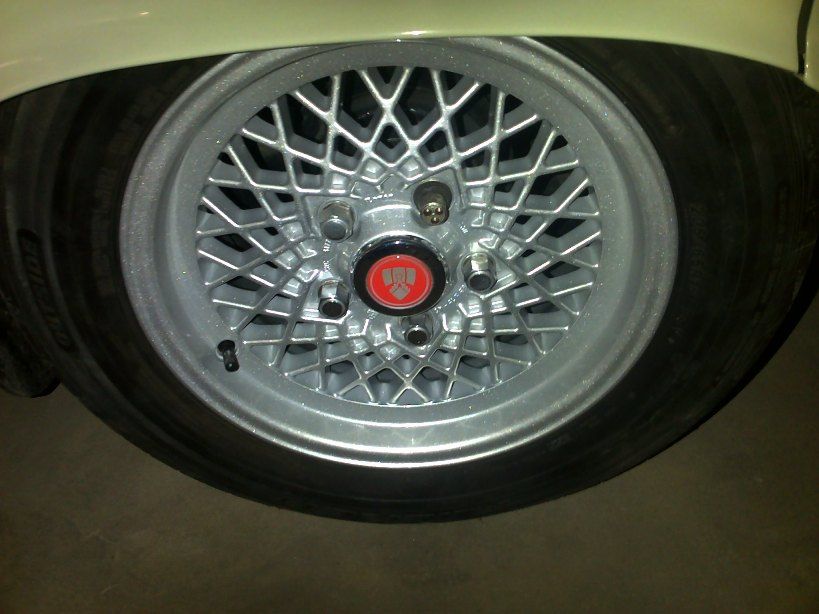
Very please with the result.
I am going to be doing some more work on Sparky shortly, as I have bought some stuff
Like this:-
and:-
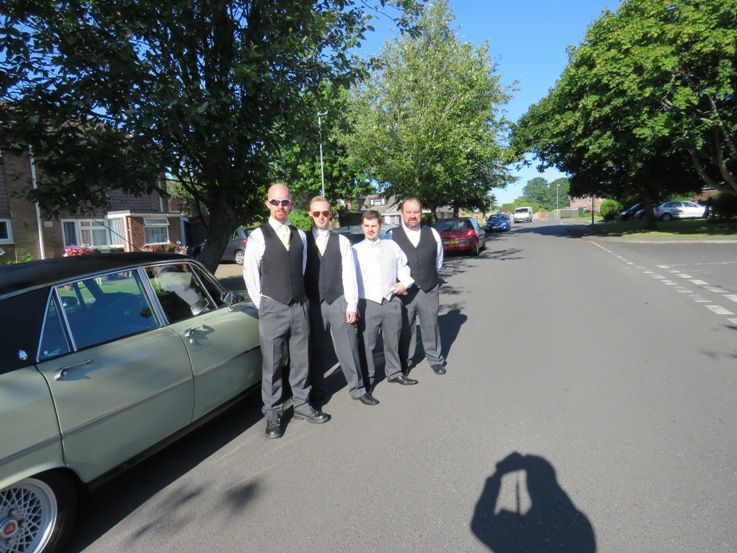
Also, Sparky was invited to my son's wedding last year and performed his duties admirably
Work will start fairly slowly, because I'm still driving him around, but hopefully towards the winter, Megasuirt will be handling the fuel and sparks.
Richard
Anyhoo, the wheels. I took Sparky down to this place in Sheffield and left him there for the day.
They started out, in a reasonable state, but parts of them were beginning to deteriorate.


They did what they said and removed the wheel and then the tyres. Dipped them to strip off the old paint. I had the choice of around 10 different finishes including one silver one with a bit of fleck, which is the one I went with. These were hung up cooling off from the baking process.


Back on the car, it doesn't look quite this 'Sparkly' in real life, as the camera flash has picked up the fleck.

Very please with the result.
I am going to be doing some more work on Sparky shortly, as I have bought some stuff
Like this:-

and:-

Also, Sparky was invited to my son's wedding last year and performed his duties admirably

Work will start fairly slowly, because I'm still driving him around, but hopefully towards the winter, Megasuirt will be handling the fuel and sparks.
Richard
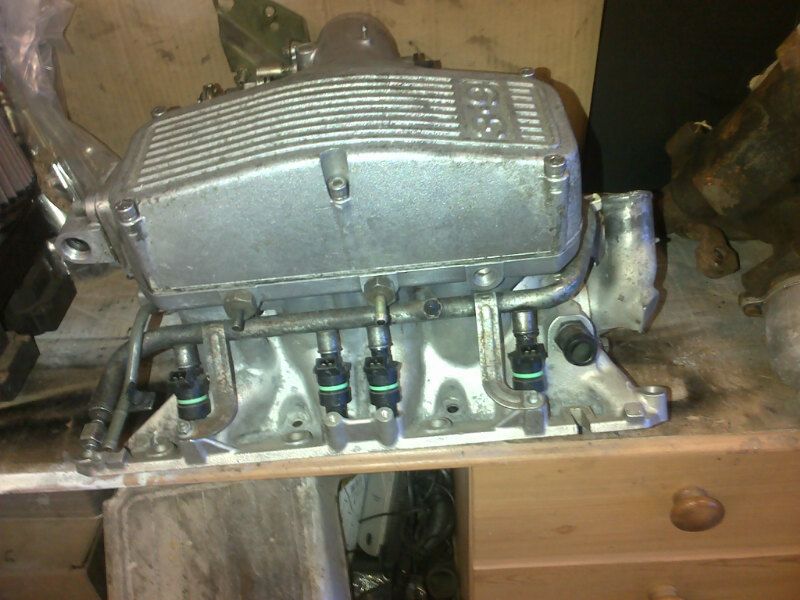
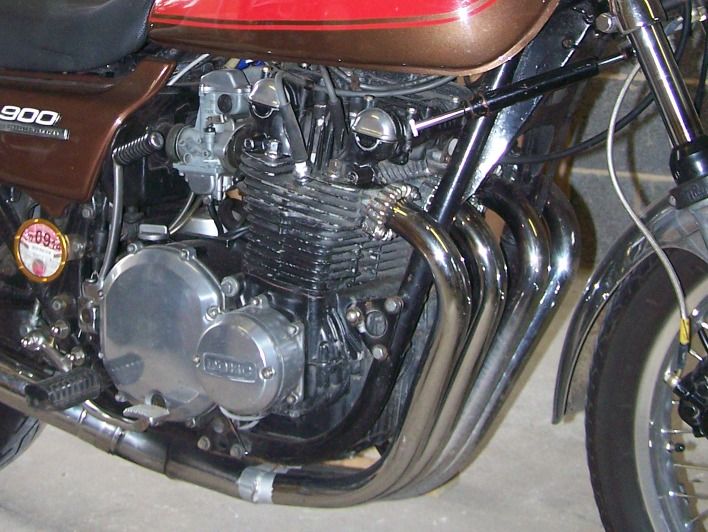
The Megasquirt bit was bought a while ago now but I have been very busy working so haven't done anything with it. I did manage to strip it down and send it to a chap I know who cleans and polishes engine bits, to a show standard.
I discovered him when rebuilding my Kwakker as someone had painted the engine black and I wanted it back to alloy finish. Apparently it turns it into a wipe clean surface which is very difficult to stain - we'll see
to this

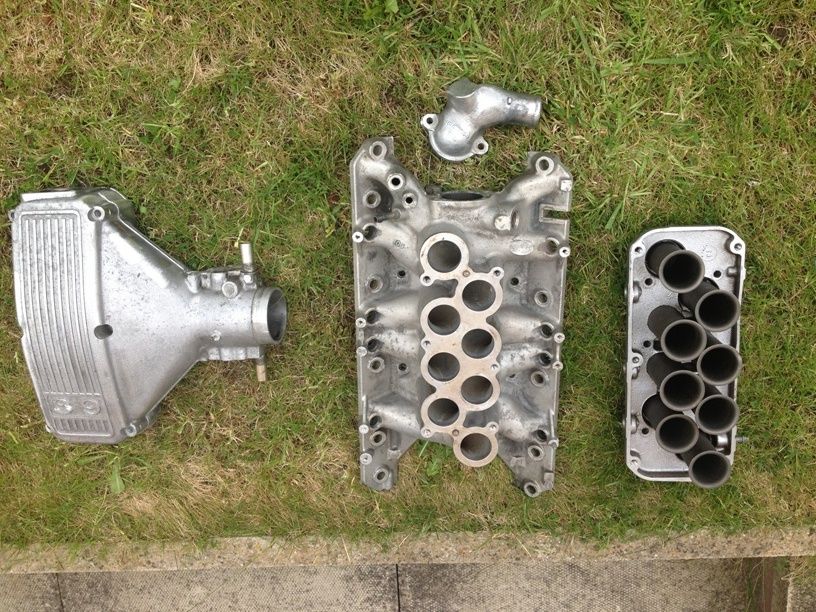
I also have a few other bits for the EFI
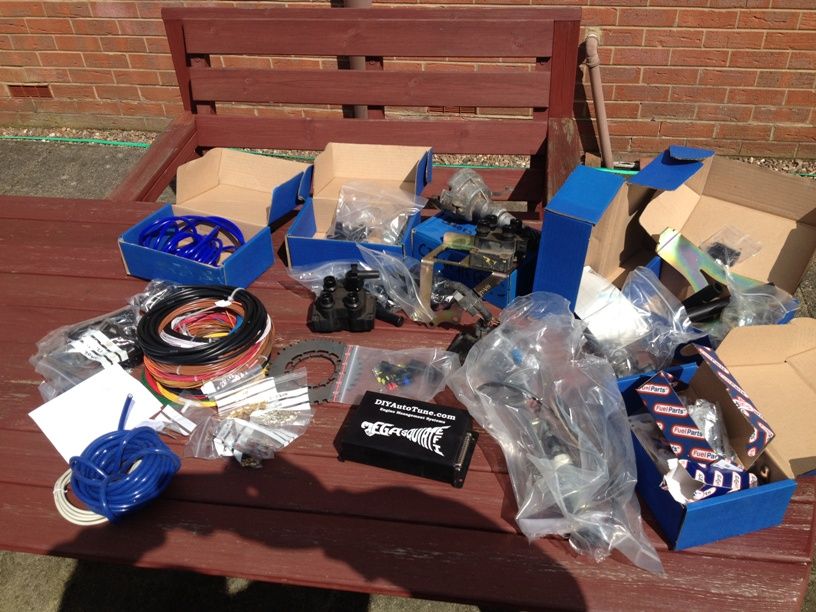
The wiring loom states, "Some assembly required."
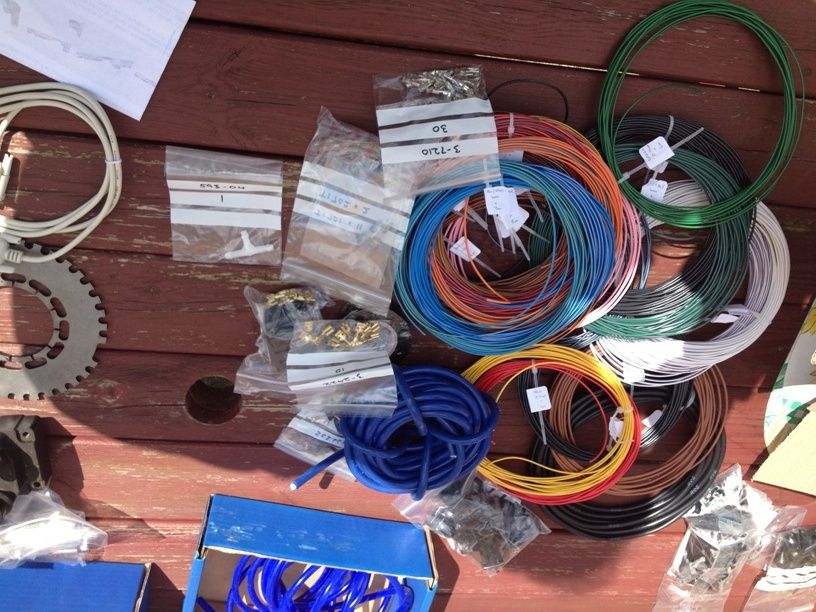
That looks a little daunting, Not a weekend job I suspect.
A few more small things completed in the last 30 months
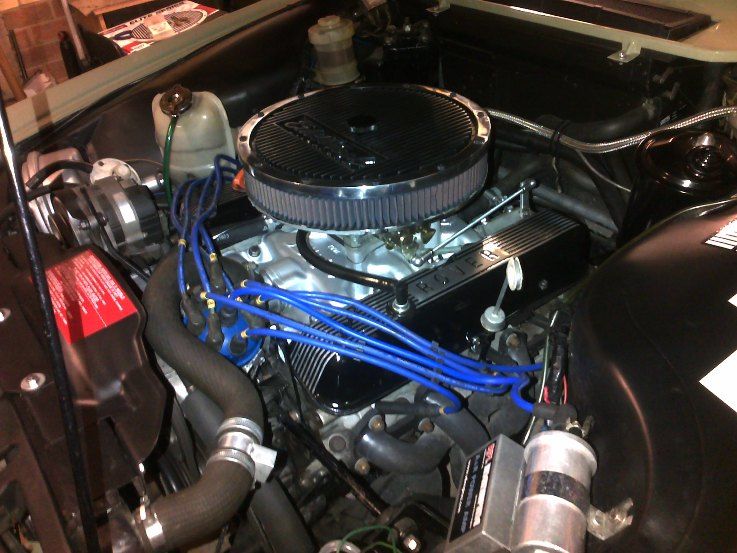
Managed to get an Edelbrock air filter housing, rather like them

Got rid of the awful mess which purported to be a throttle linkage
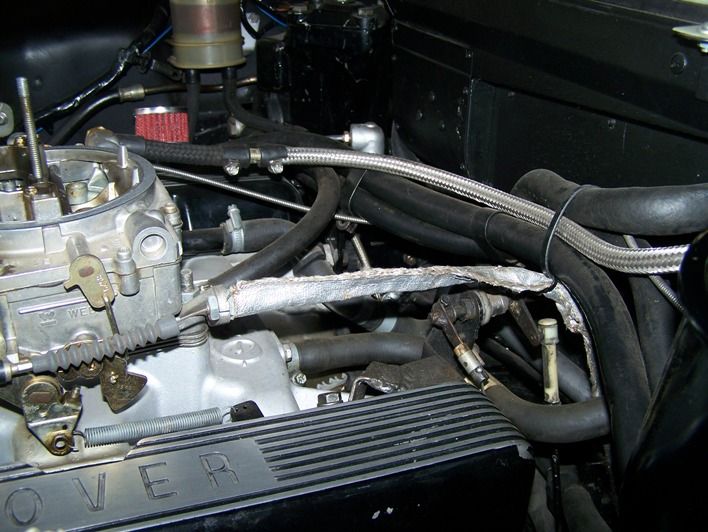
And made my own (throttle linkage, not awful mess)
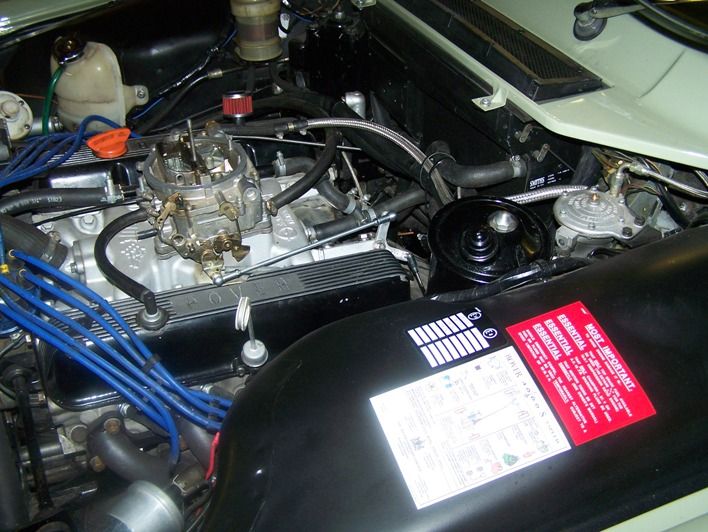
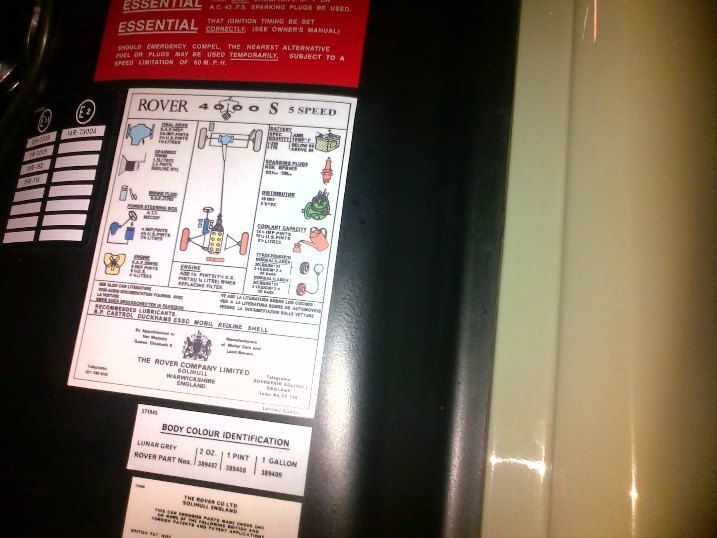
And spent a very long time finding the correct way to apply engine bay stickers, to find that most of the cars I looked at were different from everyone elses, so I just put them like this
Engine bay as it looks now

I discovered him when rebuilding my Kwakker as someone had painted the engine black and I wanted it back to alloy finish. Apparently it turns it into a wipe clean surface which is very difficult to stain - we'll see

to this
I also have a few other bits for the EFI

The wiring loom states, "Some assembly required."

That looks a little daunting, Not a weekend job I suspect.
A few more small things completed in the last 30 months
Managed to get an Edelbrock air filter housing, rather like them

Got rid of the awful mess which purported to be a throttle linkage

And made my own (throttle linkage, not awful mess
)
And spent a very long time finding the correct way to apply engine bay stickers, to find that most of the cars I looked at were different from everyone elses, so I just put them like this

Engine bay as it looks now

Richard yeah 2 years is too long lol. I will look forward to your Mega Squirt project as I am contemplating the same so lots of photos and plenty of words needed on the forum.
Which injector manifold and body is that in your picture?
Graeme
Hi Graeme, apparently it's a Hotwire system for the 3.9. This is a very steep learning curve for me as I know absolutely nothing about EFI, except that it stands for Extra Flippin' Intricate, (polite version
)Richard
Will your MS control the ignition as well?
Yep, if you look carefully at the table covered in MS bits, you can see two coil packs, awaiting instructions
The chap who built the engine (a muckanik or so he said) made a bit of a mess with the install. I have not yet delved into the interior of it, so will therefore be checking the cam timing prior to installing the EFI. I can fit the trigger wheel then as the front pulley will be off.Richard
Will be good to see another MS project on here I finally installed a throttle position sensor on mine last night and todays drive into work was the first journey in which I was able to utilise full fuel cut...
Last tank without it was 25.8mpg (I also filled up this morning). As Graeme says - the temptation to use the right pedal is too much to resist a lot of the time.
What I have found is that I definitely need another gear! The Lt77 is in the garage waiting...
What MS did you go for? MS1 or 2?
I finally installed a throttle position sensor on mine last night and todays drive into work was the first journey in which I was able to utilise full fuel cut...Last tank without it was 25.8mpg (I also filled up this morning). As Graeme says - the temptation to use the right pedal is too much to resist a lot of the time.
What I have found is that I definitely need another gear! The Lt77 is in the garage waiting...
What MS did you go for? MS1 or 2?
What MS did you go for? MS1 or 2?
I have an idea that it's the MS2 - I must admit that I bought it a while ago and got sidetracked into rebuilding a bike, and believe it or not, a huge building
I don't know enough about it yet to know which one it is by looking at it either, no doubt all will be revealed as I go along.
I have the LT77 fitted, and also have a 2.88 LSD jag diff, which will gear it up a little bit more
Should be fun
Richard
LT77 and 2.88, that'll be a real long distance cruiser!
Good luck with the Megasquirt, I had mine pre-loaded with a RV8 base map and the stepper motor already configured so it was really down to sorting out my own wiring faults and fine tuning the mismatched injectors that took the time
Good luck with the Megasquirt, I had mine pre-loaded with a RV8 base map and the stepper motor already configured so it was really down to sorting out my own wiring faults and fine tuning the mismatched injectors that took the time
LT77 and 2.88, that'll be a real long distance cruiser!
Good luck with the Megasquirt, I had mine pre-loaded with a RV8 base map and the stepper motor already configured so it was really down to sorting out my own wiring faults and fine tuning the mismatched injectors that took the time
In 5th gear 70 is around 2,500 with the LT77, where it used to be 3,000 with the 4 speed so it does make a big difference. 3,000 rpm on a long journey can be a little tiring.
The 2.88 should drop this to 2,350RPM which isn't a massive drop, and with all of that torque from the 4L I'm hoping it will be quite civilised.
When I get round to fitting the diff, you may very well get fed up with me asking questions Simon
I thought it was taller to start with! On my SD1 I've got a spare 2.88 Powerlock and combination of 4HA axle cases which one day would be nice to fit, and with a little ratio tweak to the R380 gearbox my calculations indicate 2000rpm at 70mph in 5th
Question away, I winged it along when I first built it all, I think I can remember most stuff I did!
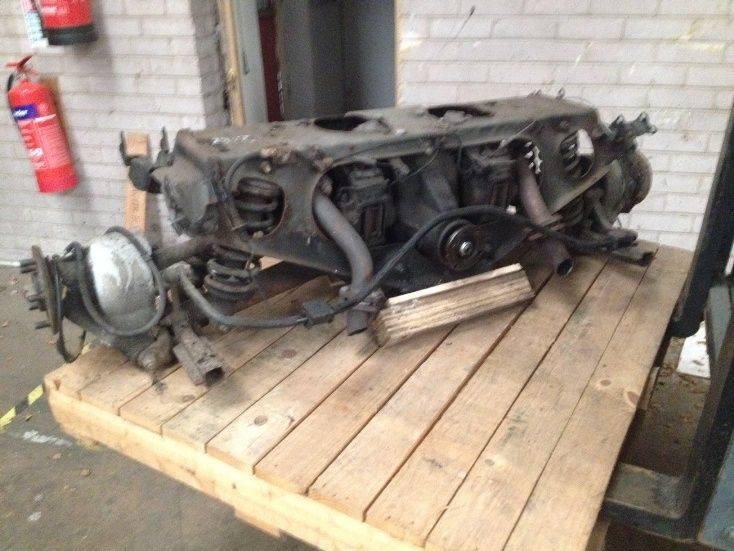
Right, I've made a start. I bolted this bit to this other bit.

Seriously though - inside the heart of the beast

Now, I decided that I would check out the cam when I was in here, just to check that it was timed correctly. Apparently the RP4 camshaft should have full lift at 112 degrees. I have heard that the RP4 is specifically for autos and heavier vehicles. I have looked at the Viper Cyclone which was developed for the 3.9 Hotwire engine, which is very close to what I have, but have also heard that the RP4 and the Cyclone are basically very similar cams from different manufacturers, so what do you believe? It would really be the best time now to change it if I wanted to
Anyhoo, I made one of these a while ago and found the timings marks were 8 degrees out, so I adjusted it as much as I could but it still reads 1 degree out.

Just ensure that number one cylinder is nowhere near TDC and insert this piston stop then turn the engine by hand until it stops - 17 degrees ATDC

Then turn it the other way until it stops - 15 degrees BTDC

So I took the pointer off, cleaned it and the area where it sat, filed a bit off and hit it with a hammer, now it sits exactly on TDC when at TDC, so we know it's accurate.
Made this and stuck it to the pulley

I'll sort out my dial gauge and check the timing shortly.
When I was in the engine, I had a look at the huge wadge of shims under the rocker pillars, which I have never been happy about. (I bought the car with engine fitted - badly)

But this was a bit of a shock, this one had turned round and the bolt was actually loose.

I tightened it up but the shim turned with the bolt? So, off it came and shock horror, the thread had stripped in the head
Do I take the head off and take it to a machine shop for a helicoil, or do I do it myself, then take it to the machine shop for a helicoil and sort out my bodged attempt?


Also, this lovely bracket doesn't fit the P6 front end (Not even close), and three of nuts supplied with the kit are the wrong size.


All part of the fun when owning a classic car I suppose.
Seriously though - inside the heart of the beast
Now, I decided that I would check out the cam when I was in here, just to check that it was timed correctly. Apparently the RP4 camshaft should have full lift at 112 degrees. I have heard that the RP4 is specifically for autos and heavier vehicles
. I have looked at the Viper Cyclone which was developed for the 3.9 Hotwire engine, which is very close to what I have, but have also heard that the RP4 and the Cyclone are basically very similar cams from different manufacturers, so what do you believe? It would really be the best time now to change it if I wanted to Anyhoo, I made one of these a while ago and found the timings marks were 8 degrees out, so I adjusted it as much as I could but it still reads 1 degree out.
Just ensure that number one cylinder is nowhere near TDC and insert this piston stop then turn the engine by hand until it stops - 17 degrees ATDC
Then turn it the other way until it stops - 15 degrees BTDC
So I took the pointer off, cleaned it and the area where it sat, filed a bit off and hit it with a hammer, now it sits exactly on TDC when at TDC, so we know it's accurate.
Made this and stuck it to the pulley
I'll sort out my dial gauge and check the timing shortly.
When I was in the engine, I had a look at the huge wadge of shims under the rocker pillars, which I have never been happy about. (I bought the car with engine fitted - badly)
But this was a bit of a shock, this one had turned round and the bolt was actually loose.
I tightened it up but the shim turned with the bolt? So, off it came and shock horror, the thread had stripped in the head
Do I take the head off and take it to a machine shop for a helicoil, or do I do it myself, then take it to the machine shop for a helicoil and sort out my bodged attempt?
Also, this lovely bracket doesn't fit the P6 front end (Not even close), and three of nuts supplied with the kit are the wrong size.
All part of the fun when owning a classic car I suppose.