Sparky's winter/spring/summer/autumn work

rockdemon said:
That engine and engine bay look fantastic... I'd say you're a lucky man but it's entirely earnt through hard work!

Rich

Cheers Rich

I keep getting it all dusty with the wire brushes I use in the garage, so I have got a dust sheet now. I will just have to clean it all once more :roll:

Richard
 
Yep, I needed some extra space to paint the bodywork (I am only painting the inside with an eopxy) so dropped the motor back in and put all of the front suspension inside the car.

Now it's just a case of treating the panels and taking them to be painted. I am crap at painting so will let an expert do it :oops:

Then I have to rebuild the heater (it has rotted away at the base), rebuild the front brakes (Servo was full of fluid and I might as well do the front calipers), clean, polish and paint everything under the bonnet, and trim the interior with the new carpets, treating the seats at the same time.

Oh, and then scraping all of the paint from inside the boot as it is in a state and repainting/retrimming it, renewing all of the rubber wing/body seals, rebuilding the doors, connecting all of the wiring, and then getting the panels to fit.

And then...... :shock: Oh dear, I wish I hadn't bothered working out what was still to do :shock:

Soon be there :D

Richard
 
Love those headers Rich, are they RPI versions, may I ask where you bought them & how much? :)

Sparky gonna's look real tuff when he's finished :twisted:
 
rockdemon said:
You've broke the back of it though - You've done more than you have left to go!!!!

Yep :) Still seems a long way to go sometimes though.

DamianZ28 said:
Love those headers Rich, are they RPI versions, may I ask where you bought them & how much? :)

Sparky gonna's look real tuff when he's finished :twisted:

They are indeed from JP Exhausts which are sold through RPI, and they came with the car so I don't know how much they cost.

They have caused me a few headaches though and I came close to putting them on ebay and getting some stock ones.

The heat they create under the bonnet destroyed many a rubber including one of the engine mounts. The metal engine mount on the body had been butchered to get them to fit and not strengthened afterwards so it collapsed (sorted now with some 2mm plate).

I fitted a heat shield to protect the engine mount rubber, wrapped them which worked ok but didn't last too well, and eventually sent them off to have them ceramic coated inside and out.

They do look nice though :)

Richard
 
Hi Richard, it's coming on well now. It's frustrating when you feel motivated to work on the project but your body won't let you, I've had the same problem this last week.

Have you painted the rocker covers as part of the rebuild or is the Engine as was? If so, what paint did you use?
 
testrider said:
Hi Richard, it's coming on well now. It's frustrating when you feel motivated to work on the project but your body won't let you, I've had the same problem this last week.

Have you painted the rocker covers as part of the rebuild or is the Engine as was? If so, what paint did you use?

I did one of them a little while ago, the other one is still to do.

I cleaned it off with solvent, rubbed it down with a fine grade of wet n dry, then solvent again. Then using a 180 grit wet n dry and a block, I rubbed the top of the cover to clean up and polish the lines across the top. Then a finer grade and then a finer again.

Then I painted it all with a gloss engine laquer, then cleaned it all off because it still had some oil in the aluminium, solvent wiped it again and again, then repainted.

Waited for the paint to almost dry and wiped the paint from the top of the peaks, with a solvented rag. Few more coats the same and it looked like it does now. Fair bit of work, but I wasn't going to pay nearly £100 like I see them on ebay.

I'll do some pics when I do the other one

Richard
 
Great work there Richard, it's amazing how quickly they come appart and how long it takes to put them back together, especially as you're being super careful on the reassembly. :D
 
webmaster said:
Great work there Richard, it's amazing how quickly they come appart and how long it takes to put them back together, especially as you're being super careful on the reassembly. :D

Super careful? I should have tried that - I got dinitrol al over one inner wing and scratched to the other one with the engine :shock:

Never mind, will just have to repaint the tops a little later on when it's warmer.

Do you want your engine hoist back Richard, I will try to get to the Feb meeting and can bring it back then if you like.

Richard
 
This is going slower than I would have liked, but I have managed to do some of the last few weeks.

Bush on link strut replaced, thanks to Ian and his press for his help on this one :)

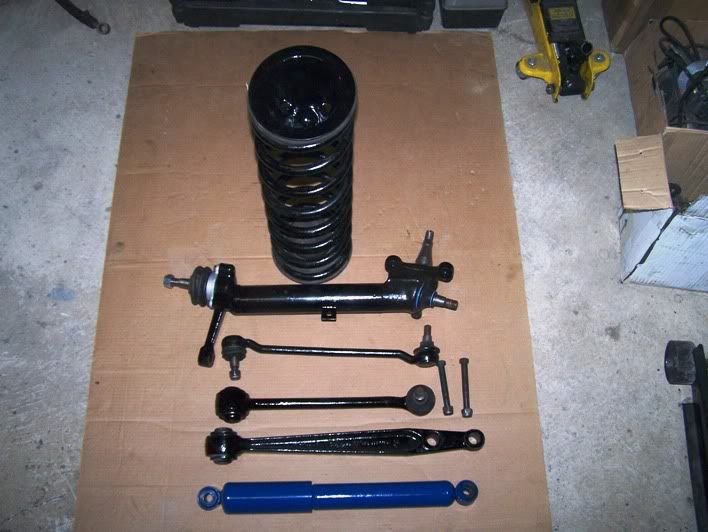
All bits painted up and ready to go back on. I have spent most of the day cleaning the garage, putting tools back into their boxes, sorting through box after box of bits looking for the *&%^($%$£ nuts and chunky washers that hold the top links in. Of all the things to go hidey (I like that word :) so nicked it off Stan and will use it 'til I get bored of it), it had to be them :evil:

I have now managed to find 7 nuts and 5 washers.

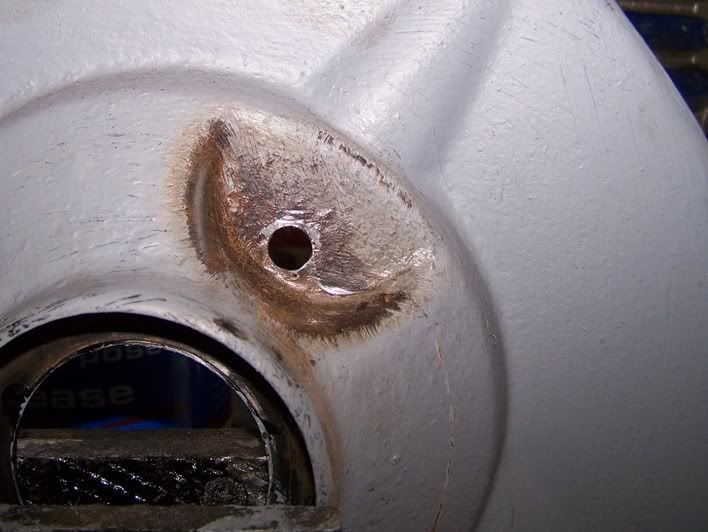
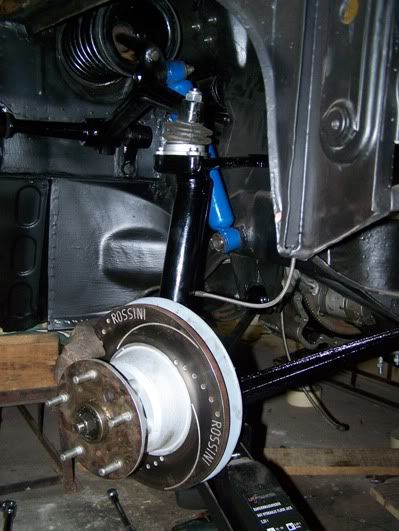
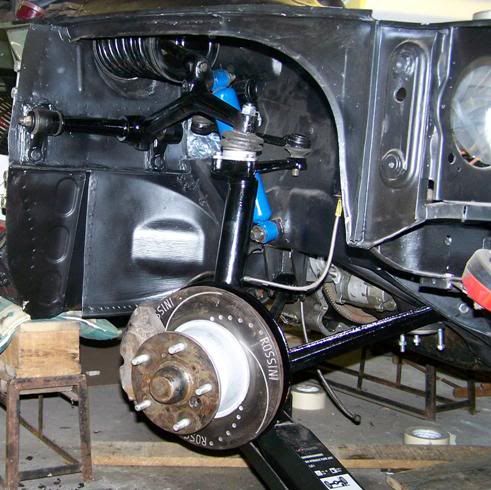
As I had to remove the top ball joint, I have fitted a new one; old one is in the spares cupboard just in case. I noticed that these top joints tend to rust and look awful, so I painted the exposed bits with some enamel before fitting it. The lower joint is perfect except for the boot, which I have replaced after packing it with grease.

I did the shock a while ago, just cleaned it up and painted it.

101_0490.jpg


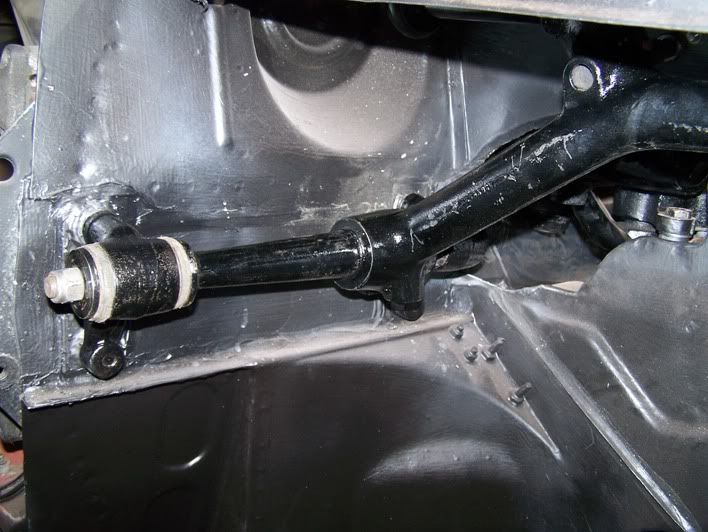
I have stripped the top link, gawd that bush is tight. And I managed to get it off and back on without breaking it 8) . Just popped it back into place to check the angles, then off again for a final paint before re-assembly.

101_0488.jpg


Richard
 
Lovely... I know it feels daunting knowing how much there is still left to do Richard, but you really are on the homeward straight now. Besides, there'll be a part of you that is just a little bit sad when you don't have anything to do on a weekend anymore. :wink:
 
quattro said:
Of all the things to go hidey (I like that word :) so nicked it off Stan and will use it 'til I get bored of it), it had to be them :evil:

Feel free Richard! And as is the way of things, they'll go unhidey once you've got some some replacements! :wink:

Great work...keep it going.
 
Well, at least that bit's back together - more of a wrestling match than a game of chess though :shock: Fitting that spring with normal spring compressors was a bit of a game - anyone know where I can find a set of proper P6 ones for loan/purchase for the other side as I do not wish to go through that again?

I found a pair of these on ebay

101_0494.jpg


They have the three captive nuts as per the late model but the legs are early model. So I have got the correct plates, but Sparky's legs are not the right ones (I think)

I cut the nut off the back of the forward fixing

101_0502.jpg


Then placed it on the leg followed by the hub. The brake disc rubbed on the plate. So I had to bolt the whole lot together, including the caliper to see what would happen.

101_0503.jpg


I am happy to say that when it's all bolted up and tight, the disc and plate do NOT make contact, so off it came again and following painting, is all together. The only things to do under there now is to rebuild the brakes (that will happen soon) and find the nut which holds the end of the steering arm in place :evil:

101_0509.jpg


Three wheels on my wagon 8)

101_0510.jpg
 
Oooo it's looking lovely... I can see a panel-free test drive up and down the street coming soon. That'll give you that final boost to keep going! Excellent work Richard, those discs look a bit flash too.
 
When I went to see Ian of rover classics to do mine he drilled 3 hopes and threaded long bolt threads through, compressed it withbhos press then undid thembcarefully once they were on the car...
 
Back
Top