

You are using an out of date browser. It may not display this or other websites correctly.
You should upgrade or use an alternative browser.
You should upgrade or use an alternative browser.
MGTF1500resto.Finished.Won best in show.FOR SALE.NOW SOLD
- Thread starter Pilkie
- Start date
Pilkie
Active Member
Re: Pilkies new project!! 1954 MG TF1500
Trying to remember to take pics of every job done,and of assembly progress is the difficulty,you can get carried away and have a section rebuilt without pics if you aint carefull!
Slideshows are a free ready made facility on all photobucket albums.
Trying to remember to take pics of every job done,and of assembly progress is the difficulty,you can get carried away and have a section rebuilt without pics if you aint carefull!
Slideshows are a free ready made facility on all photobucket albums.
Pilkie
Active Member
Re: Pilkies new project!! 1954 MG TF1500
The first milestone has arrived today!
Its now a rolling steering chassis with all susp fitted.
Still need to fit up the brakes,but with it like this,I can trial fit the engine/box,and roll it out to work on the bodytub woodwork suspended in the loft!


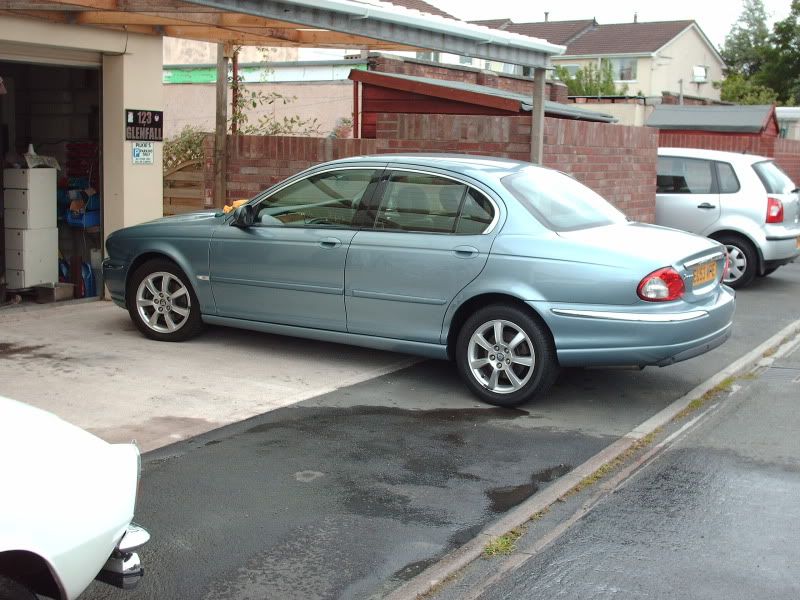
Another hard won battle between me and his family was to get my neighbour Pete to buy the car he has wanted for years!!
Selling the 1999,30k miles Honda Civic he inherited and the daily "54" VW Polo,he can now waft about in his retirement!
A really nice 1 owner VERY low miles, "53" Jag X-type 2.0d!
The first milestone has arrived today!
Its now a rolling steering chassis with all susp fitted.
Still need to fit up the brakes,but with it like this,I can trial fit the engine/box,and roll it out to work on the bodytub woodwork suspended in the loft!
Another hard won battle between me and his family was to get my neighbour Pete to buy the car he has wanted for years!!
Selling the 1999,30k miles Honda Civic he inherited and the daily "54" VW Polo,he can now waft about in his retirement!
A really nice 1 owner VERY low miles, "53" Jag X-type 2.0d!


Rover-tragic.
Member
Re: My 1954 MG TF1500 project.The chassis is now rolling!!
Wow Pilkie!!
I stand in awe of your progress Excellent work. I wish you continued success.
That is going to be the nicest MG about town.
Good to see your are wearing the Occ. 'Elf and Safety approved Japanese work boots too!!! :wink:
All the best.
RT.
Wow Pilkie!!
I stand in awe of your progress
Excellent work. I wish you continued success.That is going to be the nicest MG about town.
Good to see your are wearing the Occ. 'Elf and Safety approved Japanese work boots too!!! :wink:
All the best.
RT.
Pilkie
Active Member
Re: My 1954 MG TF1500 project.The chassis is now rolling!!
It is an ash skeleton under all the tub and door panels.
fortunately the 3 main sections that need replacing are, though fiddly,probably the easiest to get at,all the rest is perfectly sound,although the 3/8" plywood floors and back panel will need doing as well but thats basically flat and square slot in sections!
JVY
Active Member
Re: My 1954 MG TF1500 project.The chassis is now rolling!!
Thanks Dave. I find the idea of wood construction on cars quite interesting. One of my other hobbies is (very) amateur woodworking. Wood butchering would maybe be a more apt description . The thought of combining mechanical/metalworking with a bit cabinet making on a car just appeals to me. When I see some of the woodworking skill that coachbuilders put into car frames/chassis and interiors, I am always very impressed.
Thanks Dave. I find the idea of wood construction on cars quite interesting. One of my other hobbies is (very) amateur woodworking. Wood butchering would maybe be a more apt description
. The thought of combining mechanical/metalworking with a bit cabinet making on a car just appeals to me. When I see some of the woodworking skill that coachbuilders put into car frames/chassis and interiors, I am always very impressed.Pilkie
Active Member
Re: My 1954 MG TF1500 project.The chassis is now rolling!!
HOWDY GANG!!
Went to a show on Sat,but turned out to be crap,so came home had lunch and attacked a bit more of the woodwork!!
Both main knackered wood sill sections are out,and the new ones trimmed and trial fitted,but as expected I found 2 more sections that need doing as well!!
Only small bits,but thats another £120 for 2x2ft long 1"x1" sections of wood,but they are curved,almost carved, in every direction,so no way can I just knock them up out of a length of roofing batten!
They fit above the wood sill and under the door tread plate flush with the curve in and up of the bodypanels.
Placed the body back on the chassis with 4 brick spacers,as it makes it easier to work on than suspended in the loft!
Took all the ply out of the rear floor and that :x ,back panel!!!
That was fun as it was coach built,they were put in before the body panels were done,so took a bit of working out how to get them out,and how to fit the new sections???? But I think ive sussed it! :wink:
At least I know the main top rail is sound,as that came out fairly easy.
The ply sections are easy to do,so will need to buy 2 x 8x4 12mm marine ply boards from a guy I deliver to,who can cut the square sections for me! :wink:
The floor ply panels will have to be jigsawed once I measure and mark using the old boards!
Click pics for big pics.


Pilkie
Active Member
Re: My 1954 MG TF1500 project.The bodywork starts!!
Hi all.
Ive just saved myself a HUGE £400 on wood for the TF's floors and other ply panels!
There are 9 sections in total,costing a massive £429 + £deliv from the main supplier.
I know the original plywood used was mahogany ply,but the stuff they now supply is std birch ply,not even marine grade!
I had worked out that I could get all 9 sections out of 1 sheet of 8x4 ply,however,there were 2 sizes used,10mm and 12mm thick in metric.
God knows why,as I can see no reason why 12mm cannot be used for all of it! :?
All it will mean is the floors are 2mm thicker,so stronger!
Bought a sheet of medium grade structural ply for £20 with a nice finish,not that it will be seen though!!
After a bit of jiggling,screwed all the old panels to it and set to with the jigsaw,using the old as templates.


Once cut,and fine trimmed,and while the old panels are still attached, :wink: I can drill out all the holes required for fixings,cut the little notchy bits out,and use new s/s screws and fixings.
That compensates for the £120 ive had to fork out for the other 2 sections of wood that had to be bought!
A good dose of preservative top and bottom should make it last,as I dont intend using it in the rain! :wink:
Pilkie
Active Member
Re: My 1954 MG TF1500 project.The bodywork starts!!
ME!! ATTACHED!! NO!!
I dont even use the TR6 in the rain if I can help it,and I am attached to that!!
Its not going to be a daily driver,or like the TR6 drafted in as a 2nd car if the Rover is poorly!
I have not even driven one yet,and may not like it when I do!
If I do end up getting attached to it then the TR6 will have to go,but somehow I cant see that happening!!
When its done,got a few shows under its belt,and been seen in public,then we will see,and if a decent offer comes along!
But what will I do for a project for next year!
Hopefully another tasty project will turn up before then,and I can stick it in the lockup awaiting its turn!
RIGHT!!
TIme for brekkie then another day of playtime.
JVY
Active Member
Re: My 1954 MG TF1500 project.The bodywork starts!!
Chipboard would have been even better .
DaveHerns said:I thought you were going to say you were using MDF !
Chipboard would have been even better .Pilkie
Active Member
Re: My 1954 MG TF1500 project.The bodywork starts!!
Update.
Am still waiting on 3 sections of wood that need replacing.
The n/s door wood upright was cracked due to a very old accident impact and not viable to repair,so had to open it up a'la tin opener style,"the accepted way of fixing this problem" to get at it,as I didnt want to take the whole side panel off,as that is a LOT!!!! of work!
Only meant a 1" snip on the top of the rear wing panel that can be welded up when done,then bending the door hinge mount boxed section out just enough to get it out and new in and line it all up again..


Rear floor,back panel,top and bottom rails all now treated in and secure!!
Rear inner arches bare metalled and painted,these will be trimmed in padding and vinyl.


Did a couple of test patches with nitromorse,and it didnt take long to strip the whole front bulkhead and top scuttle to near bare metal!
I will be stripping every part to be painted body colour back to bare metal,so Dean my painter will then have good clean metal to work his magic on!


Doing a little stripping each eve after work,and with luck the wood will arrive in time for the weekend,as I would like to have the tub sorted and ready to be painted asap.
I had noticed that 2 of my steel wheels were badly buckled,so was on the hunt for some of these rarish wheels.
The last set I saw sold for over £100.
Spotted a set of 5 steel wheels in Devon on Ebay,these were not well listed,and said to be in need of a good derust and stove enamel to restore!!
I won the bid and got them for the silly price of just £1.20p for the 5!!
His daughter lives in Bristol and visits him in Devon every weekend so got them as good as to my door as well,so gave them a £10 for a bottle of plonk or 2.
A session in the sandblaster and a few coats of red oxide and steel wheel silver will see them looking great!!
Pilkie
Active Member
Re: My 1954 MG TF1500 project.The bodywork starts!!
The last bits of wood needed to finish the body frame arrived today!
This is what you get for £200!!,but there was no way I could shape these myself! :|

Total precut,drilled and shaped wood cost that I have had to buy is £450 but I did save £400 by cutting and shaping all 9 ply sections myself from an 8x4 sheet!
The last bits of wood needed to finish the body frame arrived today!
This is what you get for £200!!,but there was no way I could shape these myself! :|
Total precut,drilled and shaped wood cost that I have had to buy is £450 but I did save £400 by cutting and shaping all 9 ply sections myself from an 8x4 sheet!